
We’re going through our book Creating Motion Graphics with After Effects 5th Edition (CMG5) and pulling out a few “hidden gems” from each chapter. These will include essential advice for new users, plus timesaving tips that experienced users may not be aware of.
We covered nesting and precomposing in the last two chapters, which are useful for grouping layers as well as fixing render order issues. We wrap up our focus on After Effects’ rendering order by exploring the pros and cons of Collapse Transformations and its cousin, Continuous Rasterization. These powerful features open a door to higher quality and faster rendering, as well as enabling precomps with 3D layers to behave like complex 3D objects when nested.
The Render Order
After Effects renders in a series of discrete steps: Masks, Effects, Transformations, Track Matte, Layer Styles, and so on. The order of these steps is predetermined, so the order in which you apply effects and transformations is largely irrelevant. (By that we mean, whether you create a mask and then apply an effect, or apply the effect and then createthe mask, the rendered result will be identical.)
You’re probably also aware that when a layer is set to Best Quality, After Effects antialiases it when an effect is applied that distorts pixels as well as when the Transform properties (position, scale, rotation, anchor point, and motion blur) are calculated. Each time a layer is antialiased, pixels are altered and the image appears slightly softer. However, if you change your mind about how a layer is effected or transformed, at least these values are reapplied to the original source, so the image is not degraded with every edit.
The ability to re-edit a layer while maintaining its original resolution can be lost when you start building a hierarchy of comps. When Comp 1 is nested in Comp 2, the nested comp is “rendered”: Effects and transformations are applied to each layer, which are antialiased if necessary, and all layers in Comp 1 are composited together. Comp 2 receives only the composited frame (a “flattened” image) and has no history of the layers in the first comp.
At least, that’s how it works if you don’t know about the Collapse Transformations switch. This feature allows you to perform two sets of transformations without a loss in quality – the downside being a potential loss in sanity. Read on…
Collapsing 101
At its simplest, Collapse Transformations allows you to scale a layer in one comp, scale it again in a second comp, and retain the same sharpness and resolution as it would have if you had scaled it just once.
To see how this magic work, create this example:
1) Create a first composition (let’s call it Comp 1) and add a layer to it. Scale this layer to 10%:
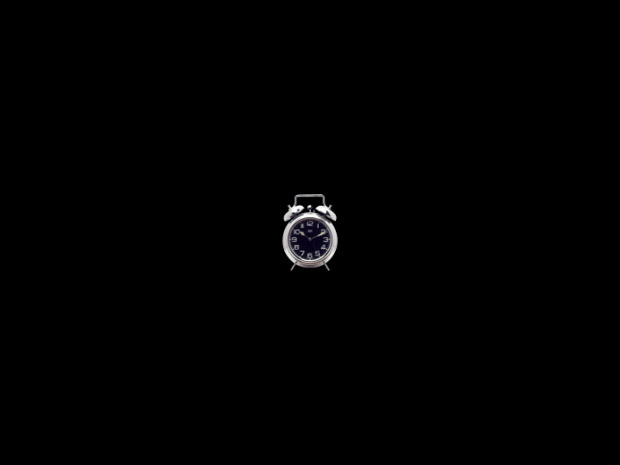
In Comp 1, the image is scaled down to 10% and reduced to just a few pixels. Alarm clock from Classic PIO/Sampler.
2) Create Comp 2, and nest Comp 1 into it. Select the nested comp layer and press S to twirl down Scale; the value is 100%.
3) Change the Scale value to 1000%: The small image is blown up ten times – and looks as ugly as you might expect:
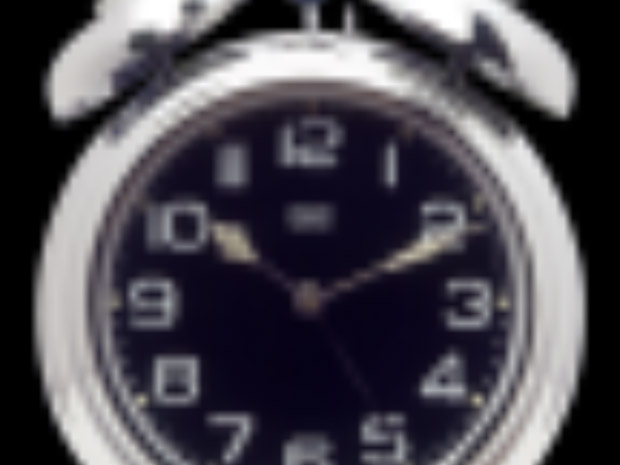
Comp 1 is nested in Comp 2 and scaled 1000% for a truly ugly result.
 4) The Collapse Transformations switch for the layer in the Timeline panel is set to Off (it appears empty), which is the default setting. Time for some magic: Turn on the Collapse switch in Comp 2 for the nested Comp 1 layer. The lost resolution returns, as the Transform values applied in the first comp are combined with the values applied to each layer in Comp 1. A calculator will tell you that 10% times 1000% equals the original value of 100%, which yields a final composite as sharp as the original:
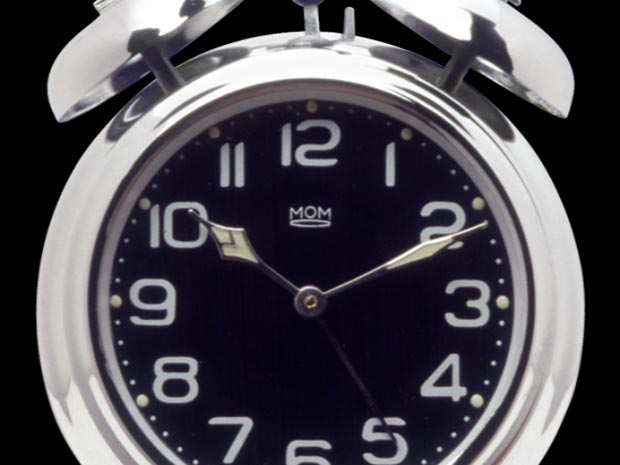
When the Collapse switch is turned on, the original resolution from Comp 1 is restored, as the two Scale values are calculated in one step (10% – 1000% = 100%).
Of course, applying scaling values that result in a value larger than 100% would introduce degradation – you can’t improve on the resolution of the original image. (That would be magic…)
Collapsing 102
There are pros and cons to Collapsing Transformations. We don’t have time in this brief excerpt to detail all the issues, but they relate to images that spill onto the pasteboard not being cropped, adjustment layers and stencils from Comp 1 reacting to layers in Comp 2, and a complicated render order when you apply masks and effects to the collapsed nested comp layer. All of these issues are detail in Creating Motion Graphis. The next example is one situation where the result is just good news:
Some artists prefer to work in D1 square pixels (720×534) so round images and titles do not look distorted.
To render the final movie, the Main Comp is nested into a Render Comp, which is a non-square pixel 720×486 comp. The nested comp layer is scaled down to fit the D1 comp size (shortcut: Layer > Transform > Fit to Comp).
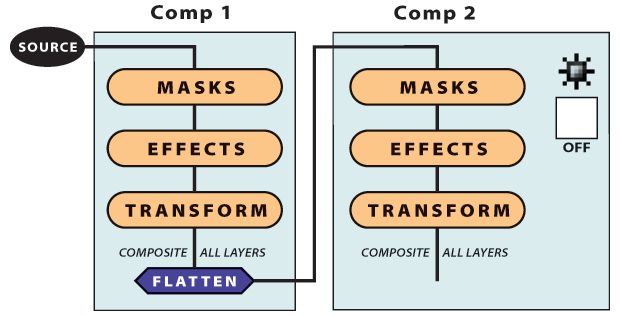
Figure A: With the Collapse switch off, layers in Comp 1 are composited together before flowing through to Comp 2’s rendering order of Masks/Effects/Transform.
Normally, scaling this layer would add another antialiasing step, which would degrade the image. By collapsing the nested layer, the scale value of 91% is added to all the scale values in the precomp. Because the images are scaled once, you get better quality and faster rendering.
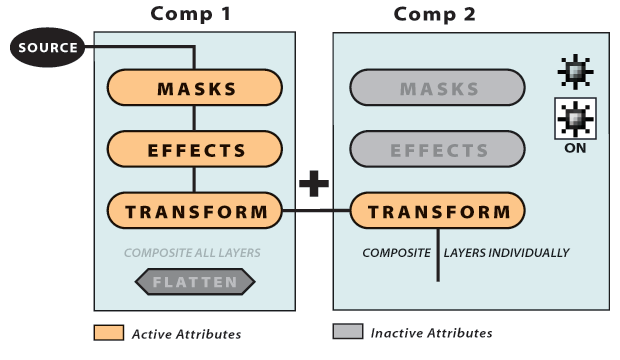
Figure B: When you turn on the Collapse switch in Comp 2 for the nested Comp 1 layer, the Transformations applied in Comp 2 are combined with the values applied to each layer in Comp 1.
Note: Some artists are doing the D1 “squish” in the Output Module, but Collapsing Transformations will give better results. If you instead render your square pixel comp (with fields off), and then Scale in the Output Module, the render order is to create a progressive frame at 720×534, and then apply antialiasing when scaling the image down to D1 720×486. Of course, you are limited to progressive rendering only; if you turn on field rendering, you would be creating fields for a 534 frame size and then scaling those fields in the Output Module. The result will be “field mush” – not recommended!
Collapsing and 3D Space
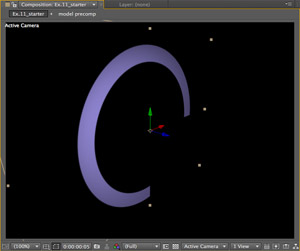
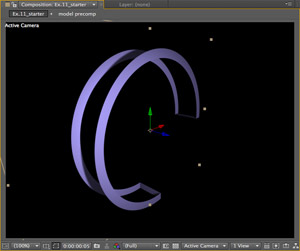
Collapsing also works with 3D layers. This can come in handy when you have a group of layers that need to be treated as a unit: Rather than have them clutter up your timeline, you can precompose them (resulting in one layer in your current comp), then use Collapse Transformations. The result is that they will continue to react to cameras and lights in the original comp. This sequence shows the basic idea:
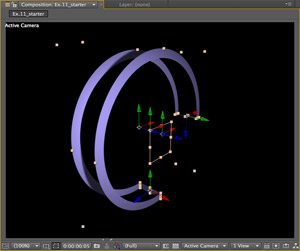
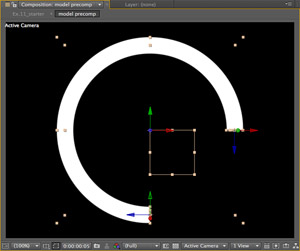
The initial model consists of four white solids and a null object, all in 3D space (above left). the purple light provides all the color. When they are precomposed, the precomp renders them with a default camera and no light (above right). Enabling the 3D Layer switch for the nested layer allows it to be affected by the main comp’s camera and light, but it is still just a 2D composite moving in 3D space (below left). Enabling the Collapse Transformations switch brings the 3D coordinates through, with the benefit of just one layer to manage (below right).
Continuous Rasterization
Continuous rasterization – rendering a vector-based layer at any size requested to maintain maximum sharpness – is closely intertwined with collapse transformations. For one, they share the same switch in the Timeline panel. Additionally, the render order is rewired as transformations are rendered before masks and effects are applied.
Many think of continuous rasterization as “the Illustrator switch” because in earlier versions, that was the only type of footage item it would work on. Now other types of layers (such as solids, PDFs, and SWFs) also have the option to be continuously rasterized, while text and shape layers are always continuously rasterized. These files are based on vectors rather than pixels: They have, in essence, infinite resolution.
If continuous rasterization is off, they are converted into pixels at their “native” sizes (the document size of an Illustrator file, or the pixel dimensions in the Solid Settings dialog), and they are treated as any other pixel-based layer. If you enable continuous rasterization, the layer’s transformations are calculated before it is converted into pixels, meaning its edges always stay sharp no matter what size you scale it to.

When applied to Illustrator layers, the Collapse Transformations switch in the Timeline panel becomes the Continuously Rasterize switch.
To see this in action, add an Illustrator file to your composition with continuous rasterization disabled (the default), and scrub the Scale value. As it goes over 100%, it starts to get fuzzy. Now enable the Collapse switch (also known as the Continuously Rasterize switch): The edges are rendered sharp again. Better yet, no matter what size you scale the layer, it remains crisp. This is because After Effects is applying the Scale value to the original Illustrator file, then converting the larger image to pixels.
Trish and Chris Meyer share seventeen-plus years of real-world film and video production experience inside their now-classic book Creating Motion Graphics with After Effects (CMG).
The 5th edition has been thoroughly revised to reflect the new features introduced in both After Effects CS4 and CS5. New chapters cover the new Roto Brush feature, as well as mocha and mocha shape. The 3D section has been expanded to include working with 3D effects such as Digieffects FreeForm plus workflows including Adobe Repouss©, Vanishing Point Exchange, and 3D model import using Adobe Photoshop Extended. The print version is also accompanied by a DVD that contains project files (CS5-only) and source materials for all the techniques demonstrated in the book, as well as over 160 pages of bonus chapters on subjects such as expressions, scripting, and effects.
We will be pulling a few “hidden gems” out of each chapter to share on ProVideoCoalition.com roughly every week. These will give you a taste for the multitude of time-saving tips, not-obvious features, little gotchas, and other insider knowledge you will find in CMG.
The content contained in Creating Motion Graphics with After Effects – as well as the CMG Blogs and CMG Keyframes posts on ProVideoCoalition – are copyright Crish Design, except where otherwise attributed.

Filmtools
Filmmakers go-to destination for pre-production, production & post production equipment!
Shop Now


