It was announced at IBC and shipped at Adobe MAX (I wonder if this will become the norm?) and it’s another big update to Adobe Premiere Pro. We dissected the features when this update was announced but now that we’ve had the chance to work with it we can dig in a bit deeper. I’d have posted this sooner but I’ve been editing!
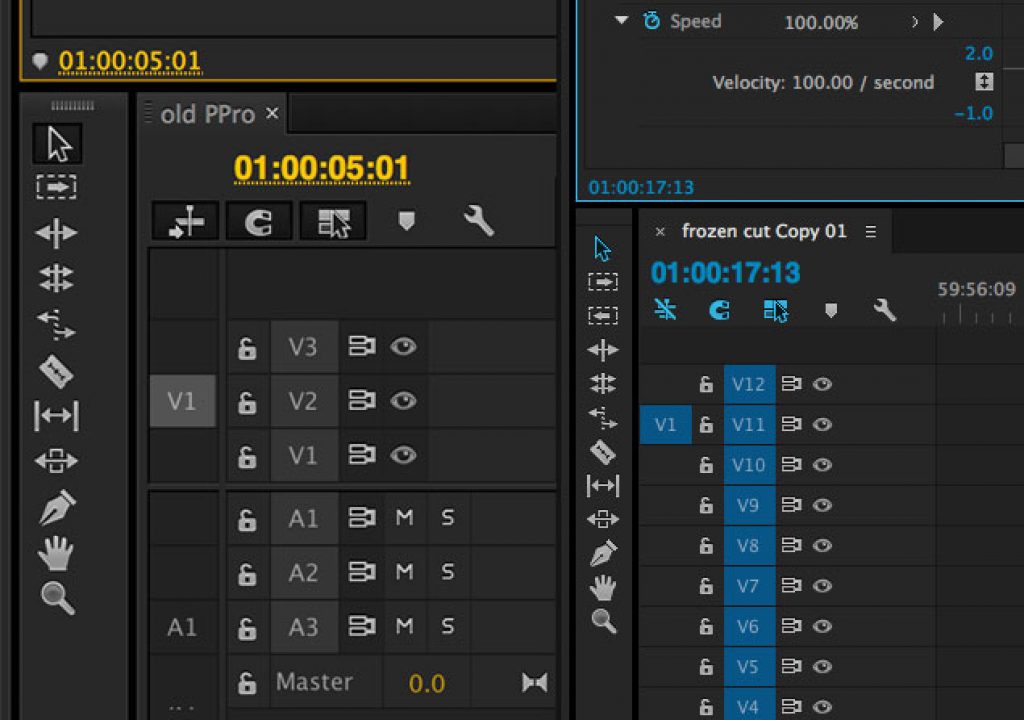
The first thing you’ll notice is the interface. It’s darker and the preference won’t lighten the interface to the near white that it was before. Gone are the yellow high-lights and outlines of windows and that is replaced with a brand-new blue. I like the blue over the yellow of before as I think it’s easier on the eyes when staring at it for hours on end. And I have started at it for hours on end.
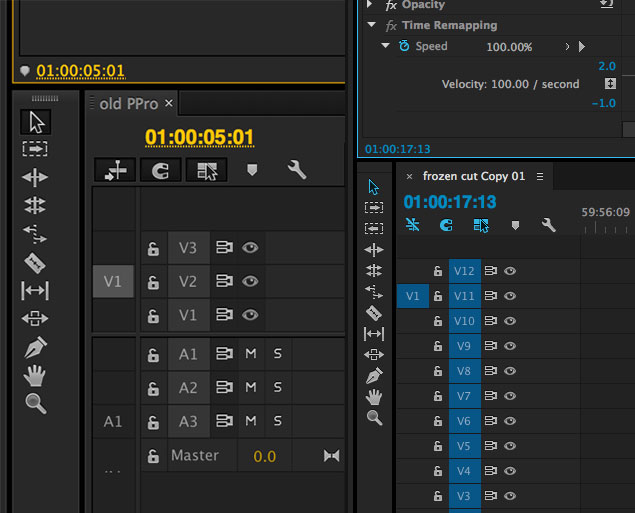
The old yellow highlights and outlines are on the left. The new PPro 8.1 blue is on the right. The track selectors now get colored as well.
More than that I’m a fan of interface refreshes in general as I think it keeps them more engaging as long as it don’t break things. The buttons and other interface elements now just look cleaner. If you remember the cluttered Adobe Premiere Pro of old this current interface is something you probably thought you’d never see. It’s welcome. Though not everyone is happy with the blue.
The biggest interface change that tripped me up was the removal of the little fly out menus from the upper right corner of all the windows. That would often include the Undock and Close Panel as well as some specific window functionality. Many of those options have been moved into a pulldown menu that’s to the right of each tab. Other less interface related options have been moved to the Settings wrench menu. I think this is a good thing as there’s less clutter and menus all around but it definitely takes getting used to since we’ve lived with those upper right-hand corner menu options for so long.
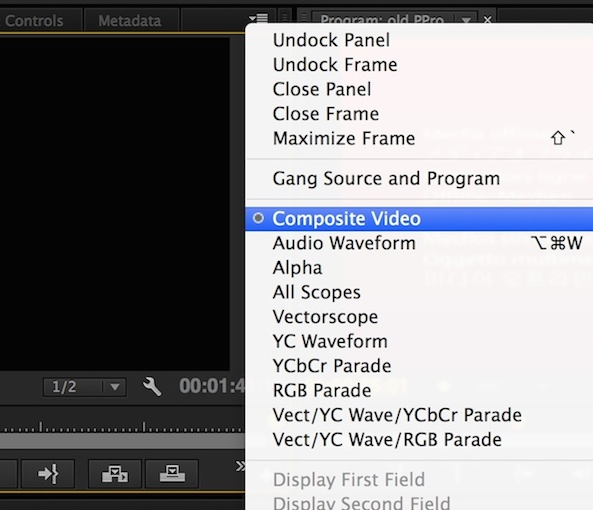
Above is the Source window flyout menu in the old PPro. Many things beyond video scopes were in that menu.
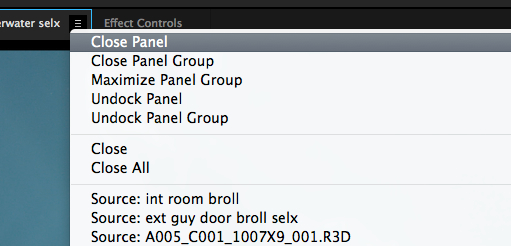
The close and window options are now under a little menu to the right of a tab. Above is that menu for the new Source window. Things like video scopes, overlays, etc. are located under the Settings wrench.
And there are no longer little close X’s to the right of each tab as apparently people were accidentally closing too many windows. Closing a tab or a panel now takes a trip under that new menu with the exception of tabs in the timeline. They still have the little close X. I’m all for decluttering the interface so I like this change.
And if you always took a trip to the interface preference and changed the interface look to a burning bright white you’ll be disappointed as the brightest the interface can go now isn’t near as bright as it used to be.
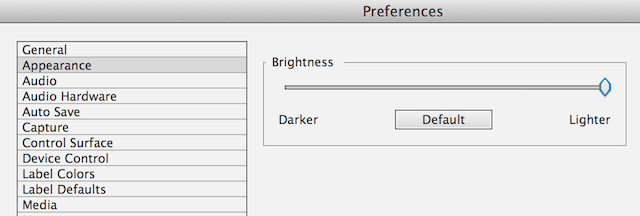
Pre–8.1 you could take the interface to nearly white. I never saw anyone in the wild with their interface that bright.
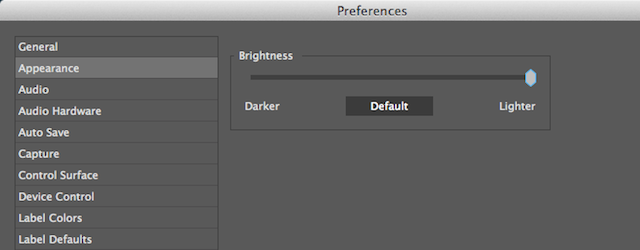
That’s as light as you can go with the slider now. I bet I’ll never see anyone in the wild with their interface that bright.
This is a simple but welcome addition: the ability to change the font size in the project window as well as bins. My eyes thank you Adobe though I wish they could go bigger. And this font size is universal and not on a per bin basis which is a bummer as there are times I like a big font in one bin and a small font in another.
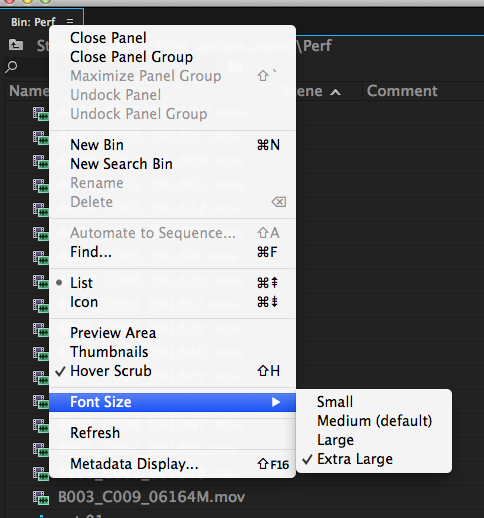
Right click on the tab name and the font size is an option down below. This changes the font size of the tab name itself as well as the columns headings when in list view.
There’s a few important workflow things that were added in this version but as usual the things that really matter most to me (and I think most working editors out there) are the small enhancements that we work with on a daily basis.
Consolidate and transcode.
A new option in the long suffering Project Manager tool is an option to consolidate and transcode a sequence into a new format with only the clips used in that sequence. A bonus is the option to truncate the clips with only what was in the edit and include handles.
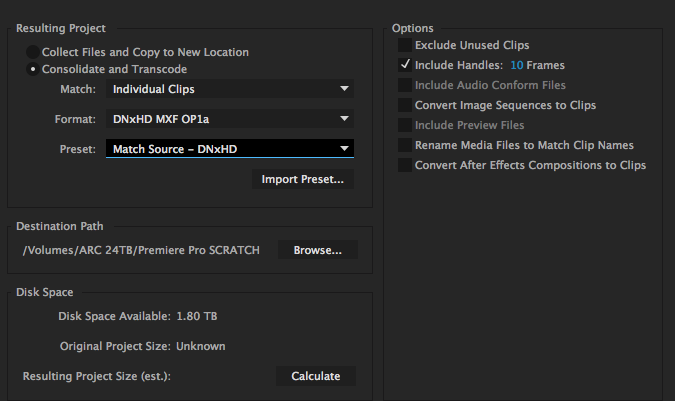
Above is the new options in the Project Manager. Note the Convert After Effects Compositions to Clips option. That’s a nice addition
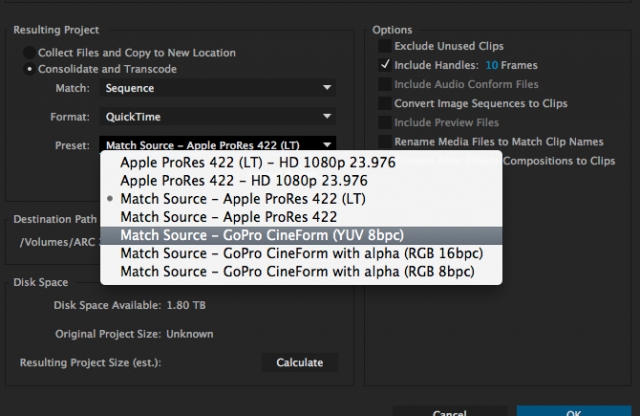
Another new option in 8.1 is the inclusion of Cineform internally as a mastering codec. Cineform is a great, cross platform option.
Premiere has always had a Project Manager but what it was never able to do is transcode and what it wasn’t very good at was truncating clips to collect only what was used in the edit. I have had only partial success with the Project Manager over the years and with some formats it would never work properly with Premiere copying the entire clip instead of just the media used with handles specified.
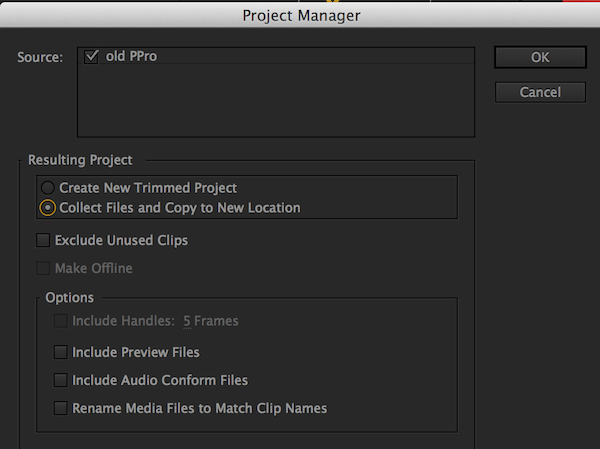
Just for comparison, here’s the old Project Manager.
I tried this new feature on sequences that hadn’t worked in the past including C300 and RED edits as well as some ProRes. The C300 worked like a charm transcoding very quickly with only the video media in the edit and 10 frame handles. I tried to transcode to both QuickTime ProRes and DNXHD 175X and the transcodes were very fast and accurate with the exception of one error where it didn’t work with a large ProRes file transcoding to XDCAM. In that case it just copied the entire 18 gig file and left that clip in the timeline. I said “video media” above because the imported audio in the sequence did not truncate and Premiere copied the entire audio file into the new folder. Not a dealbreaker but worth noting if you have a lot of audio files. And when I say this for the audio files that is non-camera audio like music, sound effects and secondary sound that was recorded on the shoot. The audio that was part of the video files was truncated properly with 10 frame handles.
When attempting consolidate and transcode on a couple of sequences with lots of different types of media I was often presented with this message:

That usually meant there are files it would not be able to transcode with handles so those sequences had originals copied over. Not ideal because most of the sequences had all matching resolutions and frame rates so I’m not sure why it was unable to properly make the transcode.
When I tried consolidate and transcode of a sequence with RED media it was a different story. I made several attempts and Premiere would hang on the transcode media step in the project manager. Yes RED files can take a long time to debayer but I ended up just trying to consolidate couple of seconds and it still got hung up. I want to try that on a different machine just to confirm.
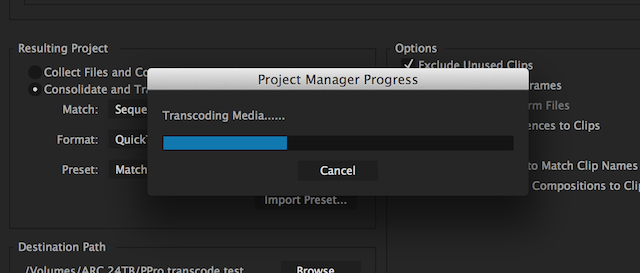
The Transcoding Media option is new in this update. When trying to Consolidate and Transcode RED this is where it stopped.
Unlike Avid Media Composer where transcoding a sequence will get you a brand-new sequence in the project and lots of new media to the Avid Media Files media folder, Premiere places all of the new media into your designated folder as well as a new project file. That actually makes it quite easy to move just a single sequence to a different place or import the transcoded edit back into your project via the Media Browser. I think most of the time I would prefer this method to what Media Composer does. This new folder gets designated with a transcoded prefix in the folder name. It would be nice if the project file as well as the sequence within the project could get a transcoded designation as well just to keep it easy to identify.
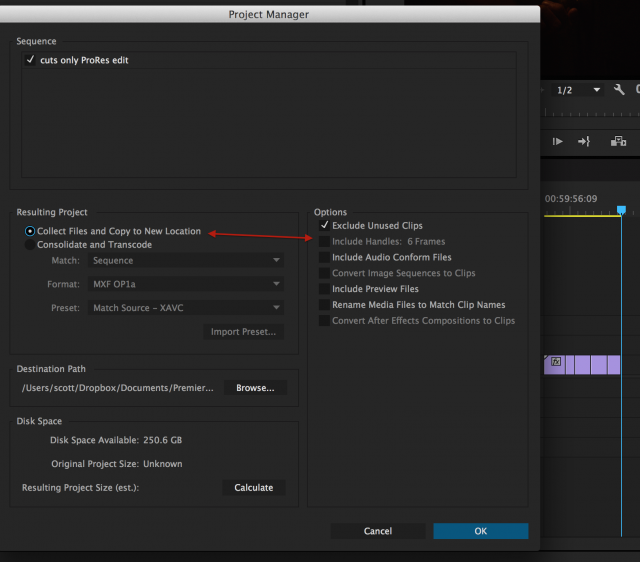
Another thing the Project Manager can’t do is use the collect files and copy to new location option to truncate clips with handles. You can check the Exclude Unused Clips but it would be nice to be able to copy just media used in an edit with handles. This would be great for moving the single sequence that is already in a desired codec or format to a new location by only copying the media in the edit. I don’t quite understand why that isn’t an option. Let’s hope for that in the future update.
Overall the new consolidate and transcode feature seems to have mixed results. This is the first implementation of this new feature so I’m sure it’ll continue to get better. When using this option in Avid Media Composer it is rock solid and rarely ever fails to do what you want it to do. I'm not the only one who has seen mixed results.
Search Bins
What is a relatively simple concept but a great addition are search bins. Think of these like the smart folder in your email application and you can have a bin automatically populate with clips based on metadata of your choosing. At it’s most simple organizational level I love the idea of being able to tag thousands of clips with Description or Scene data upon transcode, with an application like Bulletproof, and then just create a Search Bin in Premiere to gather all those clips in one bin. Premiere’s ease of adding metadata to multiple clips at once within the application also means you can quickly tag a lot of clips and have them gather into Search Bins without any manually dragging or moving any clips.
What the search Bins won’t do is gather anything and everything within a project based on every parameter you can possibly imagine. In other words these new search Bins don’t seem to go quite as far as Final Cut Pro X’s Smart Collections as that’s the comparison everyone is making and the question everyone is asking.
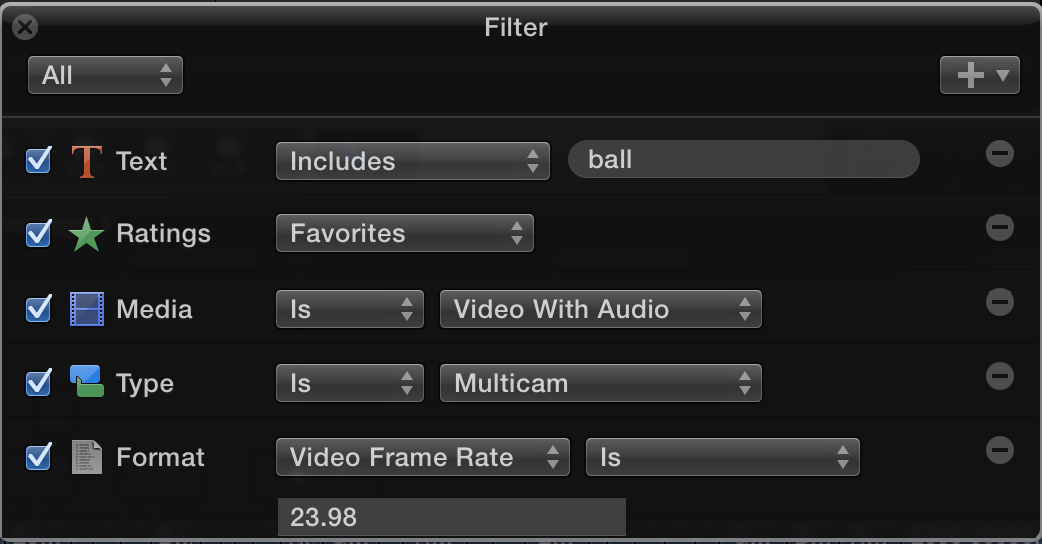
Since everyone seems to be comparing Search Bins to FCPS Smart Collections, let’s take a look at an FCPX Smart Collection setup. There’s a lot of strings you can search as you build a Smart Collection.
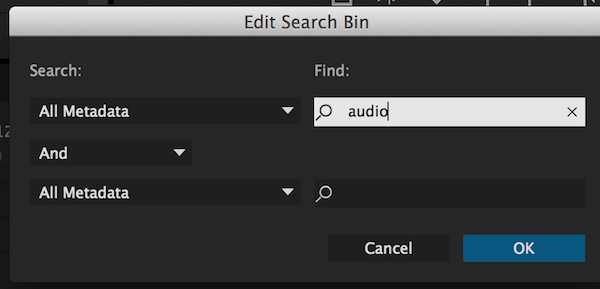
By comparison Adobe Premiere Pro CC 8.1 Search Bins are more simple to setup and don’t include as many search string options.
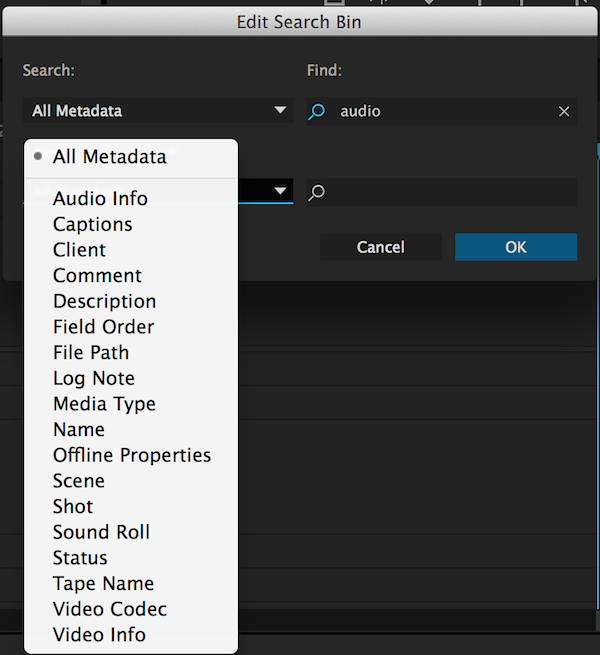
Pop up the search field and you can see what all can be populated in a Search Bin.
At first glance the Edit Search Bin dialog box seems much more limited than an FCPX Smart Collection. There’s a decent amount of columns under the search pop up but more things overall that one could search by when looking at an FCPX Smart Collection.
If choosing something specific to search, like video codec, you’ll still have to type the codec type into the find box as it doesn’t give you a pop up of listed or known codecs. And there’s only two search strings available so ultra complex and/or searches might not be able to be performed when you only only have two and/or options.

I’ll make good use of Search Bins by using the comment columns.
Of course something simple and specific like searching for a word in a clip name or something in a comment column is going to quickly populate the Search Bin, but what I found was that searching for a more generic term like “graphic” would add all my .jpgs, .pngs, .eps and .psds.
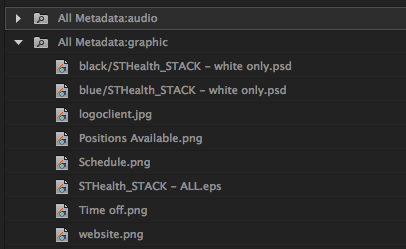
Searching the word “graphic” populated all my graphic files in this particular project.
Creating a Search Bin for the term “audio” added all of my aifs, wavs and mp3s. So there is some smarts in these Search Bins just have to type out what you want. And like all good search bins/smart collections they update as new clips that match the search parameters are added to a project. I tested Search Bins out on a large 5000+ clip project and they were very fast populate with new or changed search parameters. This is a great new feature.
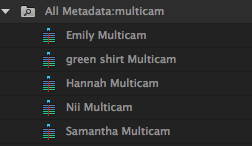
And you can also search Sequences as we see with the Multicam sequences above.
Source Monitor Timeline
One feature that Adobe has talked about quite a bit in this update is the ability to open a sequence from another project via the media browser in a source monitor timeline/sequence. In the past when loading a sequence into the source monitor from another project or from the open project itself there was no way to view the actual timeline. You could still mark in and out points and edit from that source timeline into another timeline but editing from sequence to sequence is not always easy if you can’t see exactly what’s in that source timeline. Plus there’s no easy way to copy and paste from a timeline in the source monitor. Now when you load a timeline from the Media Browser it automatically opens a sequences tab called Name (Source Monitor) that is read only. It it can’t be edited or adjusted but you can copy and paste from it as well as edit via IN and OUT points.
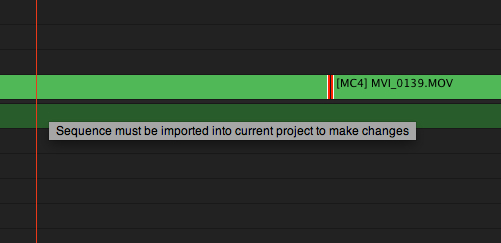
Try to make an edit in a Source Monitor timeline opened from the Media Browser and you get this message. That’s probably a good thing as you most likely don’t want to make changes to an edit not actually in your project.
You can also have multiple Source Monitor timelines open at once from different projects. This is great for bringing in elements from another project since we still can’t actually open more than one PPro project at a time.
But it gets even better (and more useful) because you can also load a sequence from an existing project in the source monitor and open that sequence from the same project in a Source Monitor timeline. That timeline is editable in that you can trim delete and add clips to a timeline that’s open in the source monitor. Not that you want to do that a lot but it’s good to know that it is possible. It took me awhile to figure out how to open the Source Monitor timeline for a sequence within the same project but if you just go to the settings wrench in the srouce monitor there’s a new option up top to Open Sequence in Timeline. This is quite a big feature addition for those editors coming over from avid media composer.
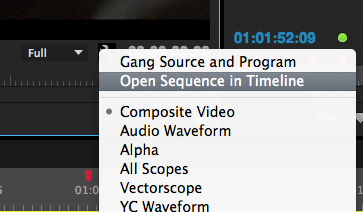
This new feature gets a keyboard shortcut that has to be mapped as well. I put mine on shift+o and use it all the time.
It’s also important to mention that you can have multiple Source Monitor timelines open at once. When you drag a new sequence into the Source window the Source Timeline tab that you may have open in your timeline doesn’t change to reflect that. You have to go under the Settings wrench menu and open a new Sequence in Timeline. That’s different from how Avid Media Composer operates with its Toggle Souce/Record option but opens up some nice workflow possibilities.
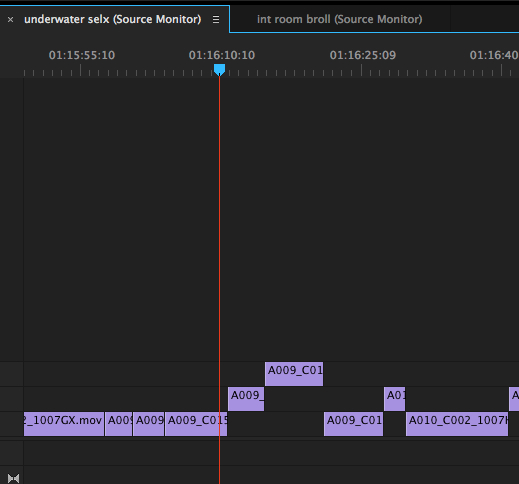
The source monitor timeline is designated by the (Source Monitor) name suffix in the timeline tab as well as a red playhead line.
When you close a Source Monitor timeline that sequence leaves your Source monitor dropdown menu. And if you close the Source monitor all Source Monitor timelines that are open close as well.
Display clip names and colors
Another seemingly small feature update that actually has a pretty big implications for editors is the somewhat confusingly named new project setting preference called: display the project items name and label color for all instances. The Premiere Pro Work Area blog calls it this: Preference for label colors and clip names to update all instances and stay in sync.
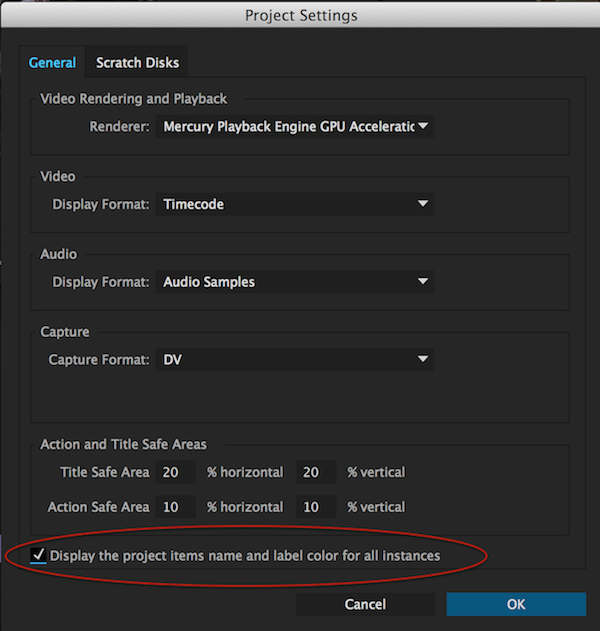
Hit File > Project Settings > General to find this new option.
With this preference check mark turned on whenever you change the name of a clip or change the label color of a clip that change is reflected and rippled in the timeline. It’s a seemingly small but oh so important thing that helps keep projects organized, labeled and in good working order. This new setting appears to be turned on by default which is a good thing. Personally I don’t think I will ever turn it off.
And a few other things worth noting
Marker colors
Previously the only way to change the color for Markers was to click them into a different marker type which brought up its own issues. Now we have a list of colors to choose from.
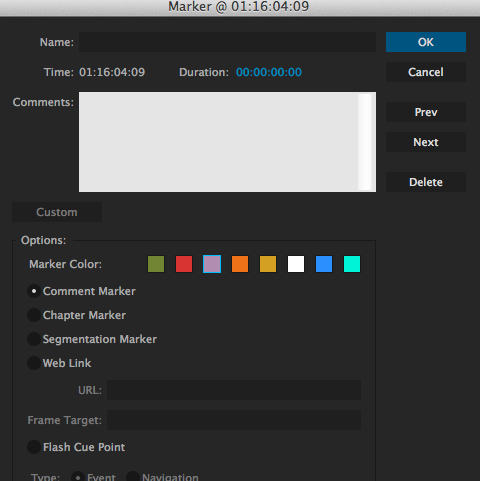
Marker colors are also viewable in the Markers window with a color mark on the left side.

The new colored Markers really work well when set up in the timeline.
The timeline IN/OUT range now uses shading to indicate track targeting
Editors always want to be able to glean more information about that they are doing just by a quick glance at the timeline and this new preference helps with that.
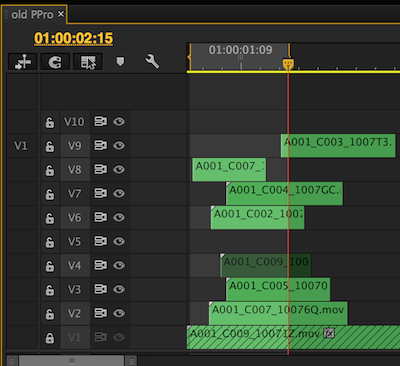
That's the old PPro with an IN to OUT marked.
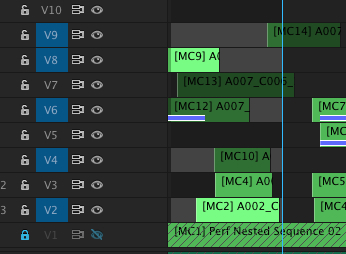
It's a little bit easier to see the marked IN to OUT ranges now.
Free Draw Bézier pen tool for drawing irregular mask shapes
When Adobe introduced the built-in masking and tracking for effects there was no way to draw out very detailed masks. Now we have a Bézier pen tool which makes the masking much more useful and one less reason to send a clip to After Effects.
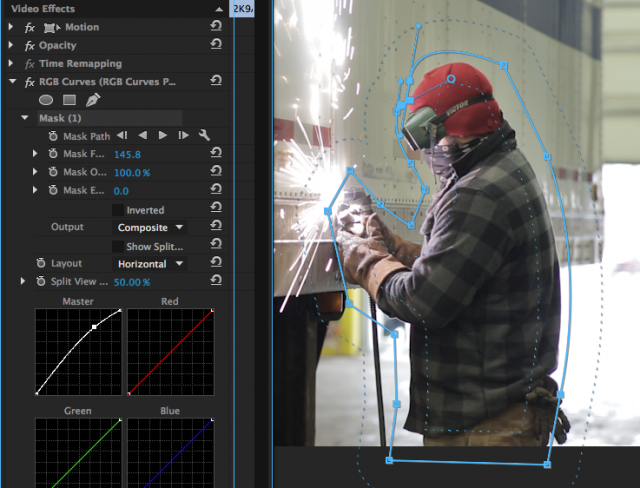
Need help learning how to use a Bézier pen tool? Then play this little addictive game.
Lots of bugs fixed
Adobe wrote a dedicated blog post that lists a ton of bugs that were fixed in Premiere Pro 2014.1.
This one seems important: ProRes media encoded by Premiere causes are not compatible with certain video QC programs.
And these are good to see if you’re conforming your PPro project: EDL does not give correct Source In and Out for clips with speed reversed. EDL does not give correct source in and out on reversed clips.
This has bitten quite a few folks: Smart rendering can introduce black and red frames.
Looking outside of Adobe Premiere Pro CC
The Adobe MAX event where this new version of PPro launched also saw the launch of a free iPad video editing app from Adobe called Premiere Clip.
I’ve only played with it for a short while and it is a neat little tool but it doesn’t feel like any great advancement above an beyond iMovie or Pinnacle Studio. What you can do is send an edit from Premiere Clip back to Adobe Premiere Pro CC on the desktop and continue to edit and refine. It doesn’t feel like it’s really that NLE companion app so I’ll just point Adobe to this article for something that could be really useful and cool for professional editors.
I did notice one thing in the Premiere Clip all that would be quite nice in Adobe Premiere Pro CC: Smart Volume
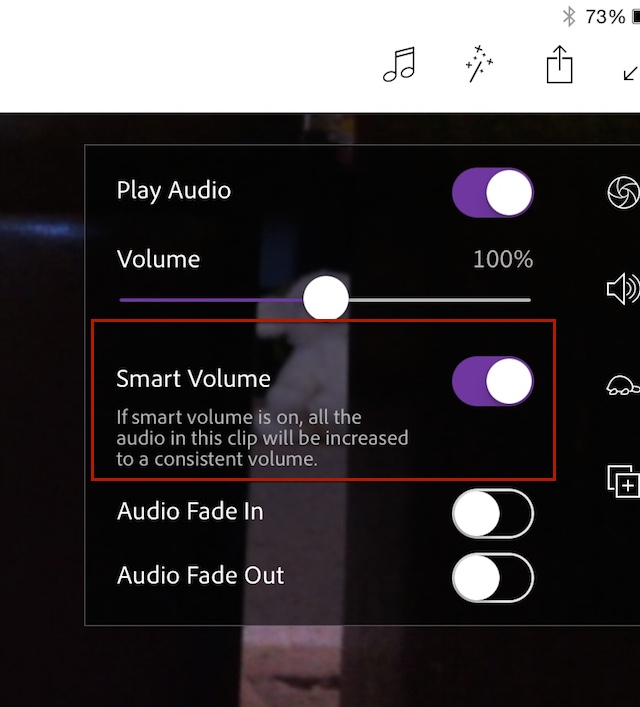
Smart Volume would be great to have in Premiere. There's something similar in FCPX with it loudness control.
And speaking of future technology that we’d like to see come to Premiere Pro, Adobe had some very cool technology demos at the MAX conference.
GapStop is a way to automagically remove jump cuts from a talking head and possibly more. The demo below uses a subject who wasn’t the best speaker and something like GapStop could make an interview like that much more usable.
Potentially better than GapStop is the #VisualSpeechEditor (I’m guessing Adobe wants these sneaks written this way with the hashtag so there ya go Adobe).
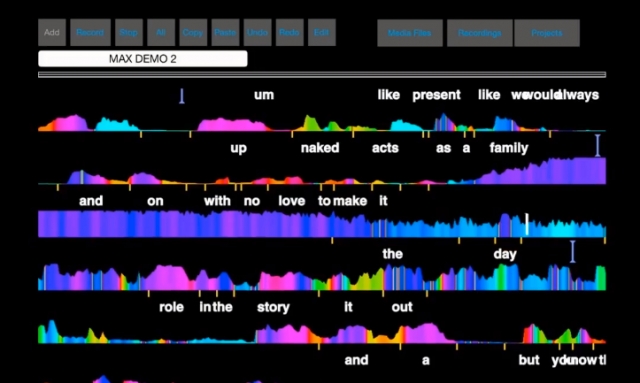
Moving beyond a waveform looks quite cool and innovative. Let’s get this into Premiere Pro!
This could be a new way to replace the old waveform when editing audio with colors that help you “see” the speech. But better than just editing audio the demo points out how it could be good for video editing when dealing with dialog.
There were quite a few Adobe Max 2014 Sneaks and there’s a nice roundup of them right here.

Filmtools
Filmmakers go-to destination for pre-production, production & post production equipment!
Shop Now