If you follow what has been going on in the world of non-linear editing tools for the past few years you know that Adobe has been working very hard to make Premiere Pro a viable option for every aspect of editorial and post-production. The Adobe Premiere Pro team has been asking questions, listening to editors and improving their product with release after release pretty much ever since CS4 came along. I’m happy to report that with Adobe Premiere Pro CC the tool really has arrived.
It’s hard to talk about PPro CC without talking about Adobe Creative Cloud subscription service and the fact you can no longer pay one lump sum for a specific Adobe suite of tools. You now have to pay monthly. That’s not what this article is about so you’ll have to look elsewhere for that debate. Though I will say I do wish there was a video tools only option that was a bit cheaper. So much of the Creative Cloud toolset I will never ever ever never use. It sucks I still have to pay for it.
What follows is not a CC new features review. While it’s hard to review a big update like the CC update without discussing new features (and features that are still missing) I tried to approached this review so that someone who is new to Adobe Premiere Pro could appreciate it as well. There’s some long-standing issues still present in PPro CC and those are discussed. There’s also some things that were fixed and/or modified before the CC release and those are discussed as well. And while this is a long review a tool that’s as feature rich and in-depth as an NLE like PPro can never be completely covered feature-for-feature in a several thousand word review.
Interface
One of the most important things about any NLE is the interface and PPro CC seems to complete an interface makeover that began a few versions ago. Most all of the knobs, dials, buttons and dead spaces have finally been eliminated to streamline the tool into something that feels good to spend many hours working in. Customizability is important to CC and you can see that all around the Source / Record monitors down to the much cleaner timeline.
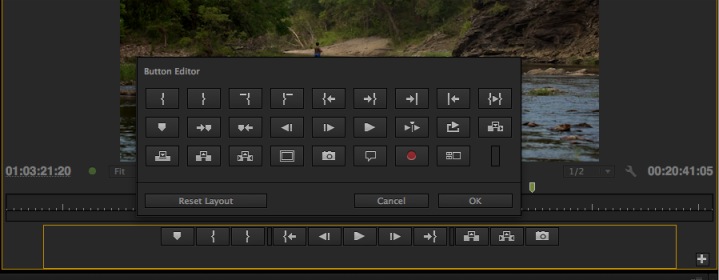
Button customization in the interface is important but it would be nice to have more options for what can be put under a monitor. How about any menu item?
The PPro timeline track patching panel has always been a real mess but with CC the headings can be minimized to show virtually nothing up to way too much.
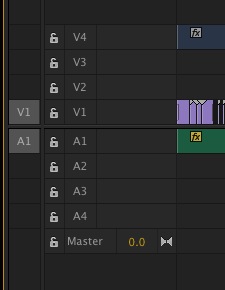
With all the track patch panel options off it makes for a very clean, minimal patch panel.
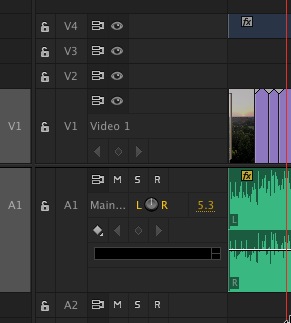
With everything turned on the audio tracks come a bit convoluted but you can put in only as much or as little as you would like.
Solo and mute buttons have moved from the track mixer into the timeline where they should be. Patching Source media into a track is finally easy with the drag of the mouse or the tap of a few keyboard keys. The Source media destination only obeys the Source patch just as it should. Changing track size is as easy as scrolling a mouse wheel and custom timeline track sizes can be saved.
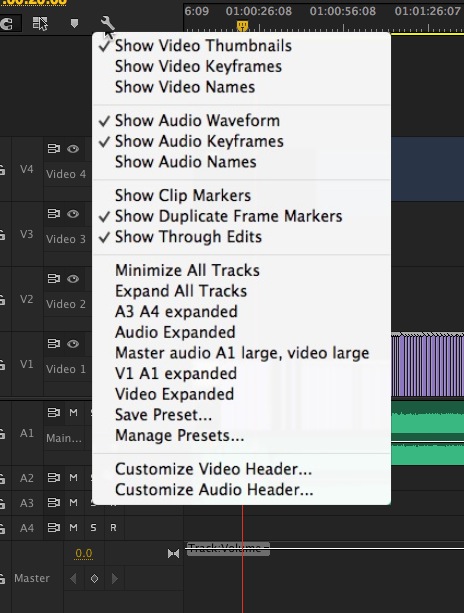
Not everything is roses … with all these new timeline options comes a rather convoluted track heading menu. With great power often comes lots of settings.
Audio waveforms in the timeline have changed to a new “rectified” style (as in audio waveforms on the bottom) but the old un-rectified waveforms (as in waveforms in the middle) are still available via the timeline flyout menu. I love that the push of a button will minimize all the timeline track heights and remove the waveform display. Then it’s a simple matter of making an audio track bigger to get the waveform back. I hate that you can’t see clip markers without a track height being expanded just a little. One negative I’ve found overall is that waveforms all over PPro CC sometimes don’t draw exactly when I want them to and sometimes they seem to flicker during playback. I might have to play through a section or zoom the display to get them to draw properly be it in the timeline or, especially, viewing waveforms in the Source monitor.
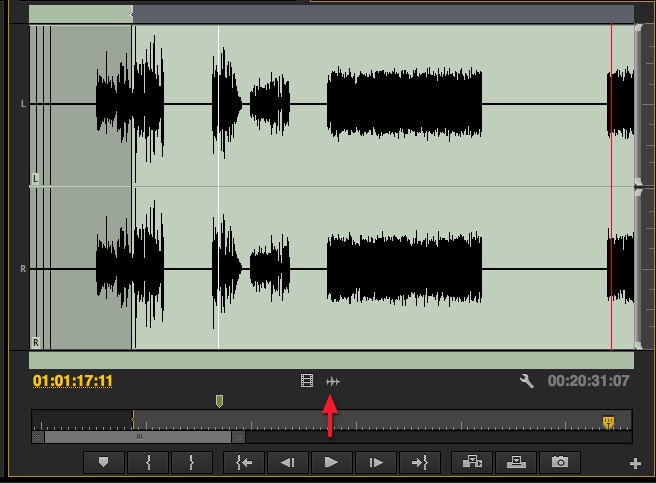
While waveform redrawing in the source monitor isn’t as good as it could be (that’s full audio in the image above and PPro only draws a piece at a time as I move the playhead there) it’s nice that a click of that little waveform icon at the bottom will show them instead of having to go to a flyout menu setting. And that waveform toggle is keyboard mappable.
The new timeline options don’t change everything as video tracks can display thumbnails in a variety of ways. I still find I leave video thumbnails off way more than I leave them on. Another thing that hasn’t changed is the option to display different video motion and effects keyframes right in the timeline.
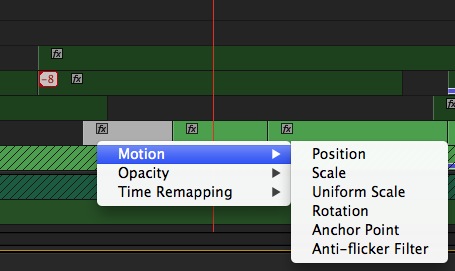
I can turn everything in the timeline off except for these annoying little fx buttons?
While this is great for doing animation and motion graphics I find times I want to turn those little keyframe buttons off that appear on every clip. Those things can sometimes just get in the way. If I can turn everything else in the timeline off why can’t I turn those off when I just want to work on my story?
Trimming is great, but not Media Composer great
The great PPro trimming overhaul of version 6 gets some subtle improvements in CC to make it even better. It’s going to take some divine intervention for an NLE to achieve Avid’s level of trimming bliss but PPro is getting closer. I love that you can select multiple edit points and choose ripple or roll trims very quickly. The speed with which you can dig in and achieve a trim via the mouse is quite nice but you can dynamic trim via the keyboard as well.
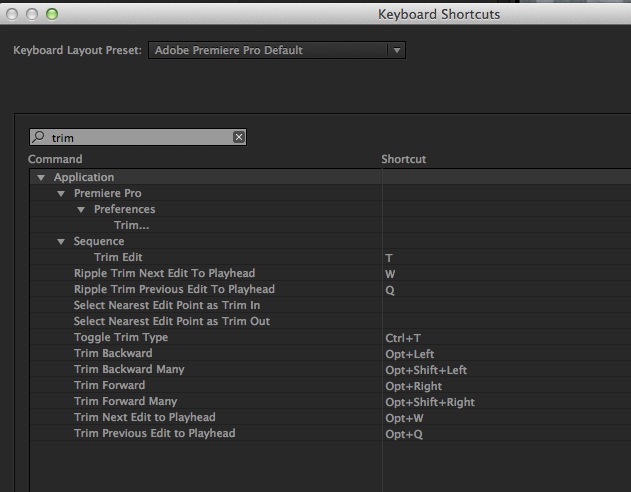
Like many menu commands in PPro CC you’ll need to search through the Keyboard Shortcuts to learn them all as well as map some of them to the keyboard as they don’t have any defaults.
While dynamic trimming of edit points works very fast and very well the fact you can’t really do dynamic SLIP and SLIDE trims in any sort of easy and proper way seems like a big oversight at this point in PPro’s life.
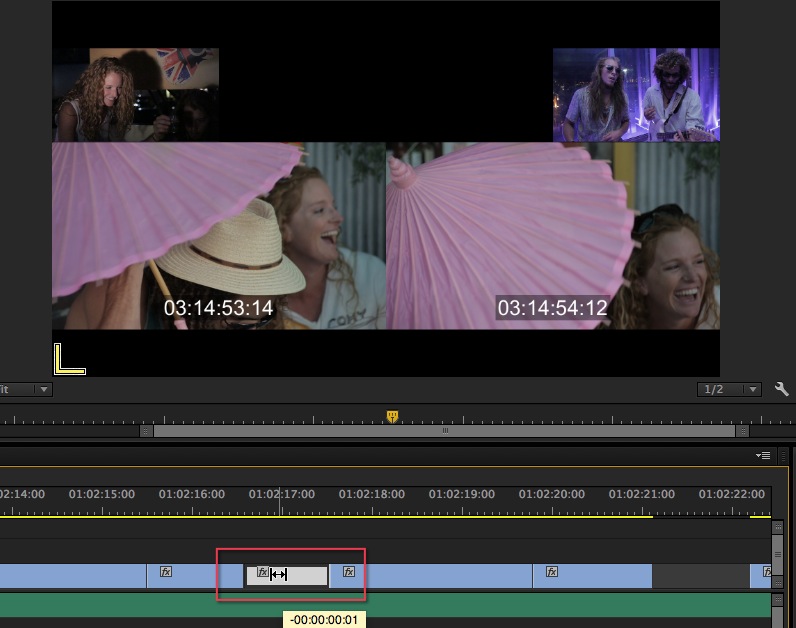
Performing a SLIP trim via the Slip Tool provides a nice 4-image display in the Program monitor that shows both the IN and OUT frame of the clip as well as the adjacent outgoing and incoming frames. That’s the kind of feedback you need when doing a slip edit. The Slide tool provides similar display feedback.
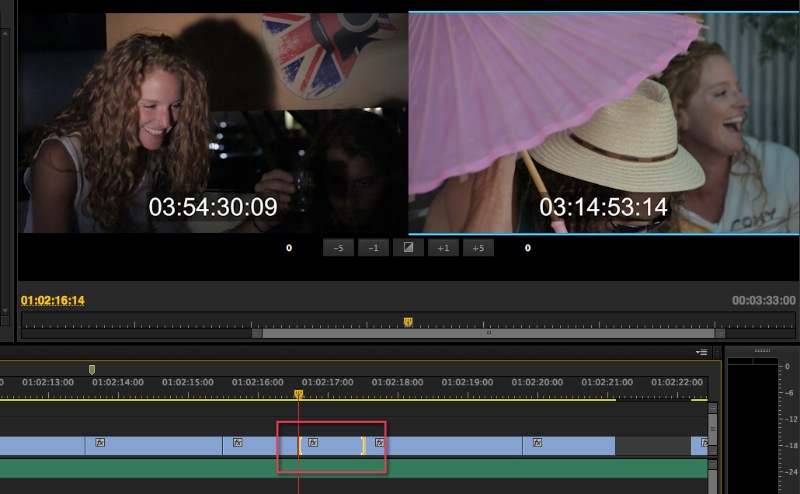
While you can set up a dynamic SLIP or SLIDE trim by choosing the appropriate yellow trim rollers (the image above is a SLIP) and actually use JKL playback to make the edit there isn’t anywhere near the proper feedback in the Program monitor.
Basically, performing a slip or slide trim with the mouse works very well. But performing a dynamic slip or slide trim where you can actually playback the media is clumsy and only seems to work accidently.
Did Adobe just forget to add this feature?
Shortcuts and the keyboard
Adobe has been adding in lots of new keyboard shortcuts with each update and CC is no different. I never really know exactly which new keyboard shortcuts were added with which update as I’ll often find a new one I didn’t know existed while searching the keyboard shortcuts editor for something else. This is a good thing as pretty much anything you do on an NLE should be able to be done by the keyboard. Yes that might be thousands of actions but it gives the editor choice of how they want to work. Yes all those actions make it more complex to search out and set up a keyboard but we’re big kid editors, we can handle it.
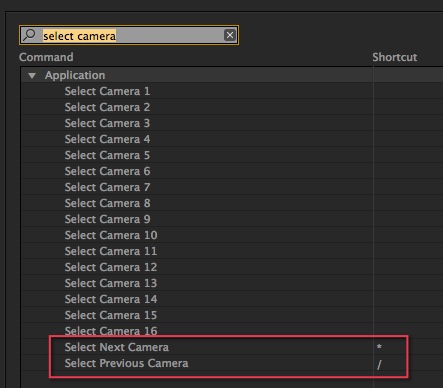
This little option to “step through” a multicam source clip seems to have come along in CC. With that it’s almost ready for large scale music video editing.
The problem with all these shortcuts comes in the form of a horrendous keyboard editor. There is no visual keyboard reference so it’s really a multistep process to search out, scroll through, identify the shortcut and then assign it to a new key. I extensively map my keyboard and with more PPro use than ever before it constantly changes. And changing it is a painful process. Saving the layout even more so as you can’t quickly overwrite your existing keyboard mapping: You have to type in exactly the same name.
I’ve heard Adobe Premiere Pro product manager Al Mooney quoted as saying it would take a lot of resources to create a visual keyboard mapping tool. My guess is that means we won’t see it anytime soon. That’s sad. If Adobe needs a reference look no further than Final Cut Pro 7 as it has/had the best keyboard mapping tool on the market.
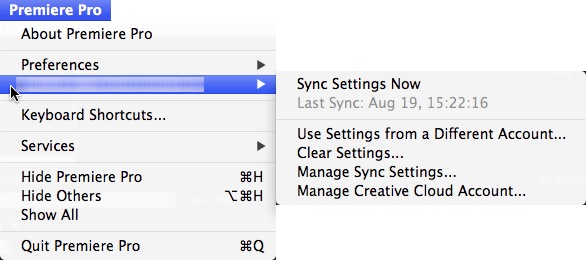
A great thing about the Creative Cloud? The ability to sync your keyboard settings into the cloud.
On the plus side you can now sync keyboard mappings (and many other settings) via the Creative Cloud. That means they are safe and sound as well as accessible from other machines regardless of the account paying for the CC subscription. On the minus side you can only map a command to one key at a time.
Media Management
A real weak point of PPro has long been media management. While still not perfect we have taken a big leap forward with the new “Link and Locate” option. Alliteration aside it means that the new dialog box you get to search out and relink media is very useful.
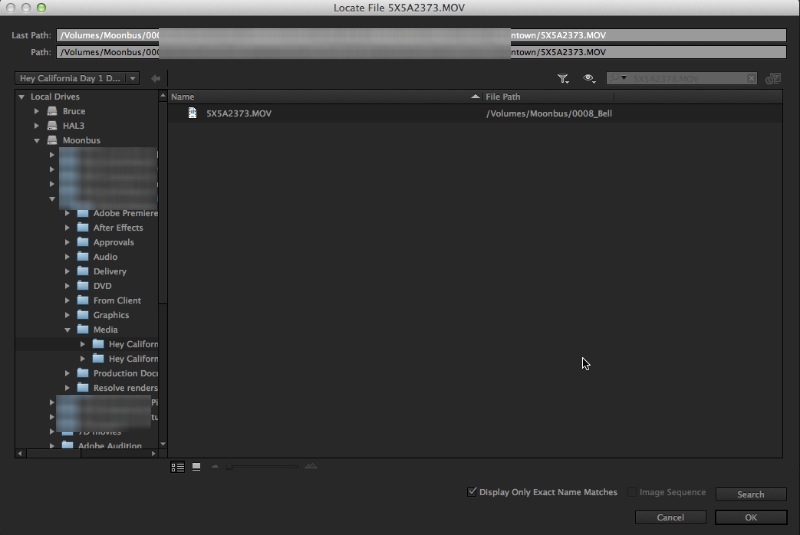
Adding a dedicated interface to search out and relink media has helped PPro CC take big strides in avoiding the reconnection dance. This used to be a much more painful process with earlier versions of Adobe Premiere Pro.
Things like the last file path used and the ability to use the Adobe media browser make relinking media nowhere near the chore that it used to be. While the reconnection dance isn’t entirely a thing of the past it’s at least more bearable. The fact that PPro CC can show only the file you’re looking for as well as relink media automatically is a good thing. The fact that it sometimes seems to miss media in the same folder is a bad thing, though that is the exception in my experience and not the norm. Often PPro is able to automatically find media that has moved to a new drive name and that is a good thing.
Adobe needs to continue to refine Link and Locate for a very important reason: their instance on camera native workflows. Camera native means you might have obscurely named media buried deep within weird camera file structures that needs to be located. This can be a pain. With this type of workflow being very common (and encourage by Adobe) the PPro media management needs to be the best in the business. It’s good but not there yet.
All hail the audio
Working with audio in PPro CC is as good as if not better than any NLE out there. It has been good for a while but the addition of the much asked for Clip Mixer means we really have the best of both worlds when it comes to audio mixing.
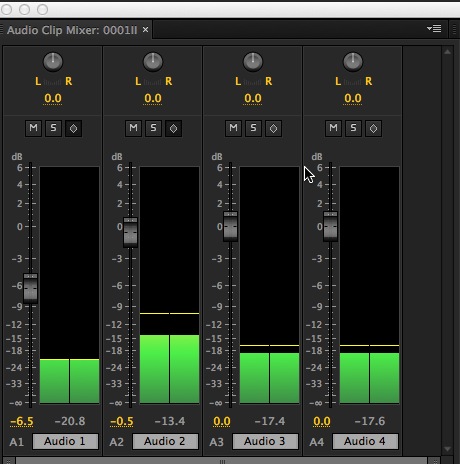
The Audio Clip Mixer is a welcome addition to PPro’s old Track Mixing way of working. There’s even the option to keyframe audio automation right from the Clip Mixer.
Think about it … you can adjust clip levels on an individual basis by dragging audio rubber bands and then fine tune with the precision of the Clip Mixer if needed. You can also adjust levels and pan, apply effects and keyframe with Latch/Touch options for an entire track with the Track Mixer. The fact we still have a track based timeline makes this incredibly useful for the organized editor. You can then send the entire mix over to the Creative Cloud’s great Adobe Audition if you really need the heavy duty audio mix. It would be nice it there was a way to slip track audio keyframes though.
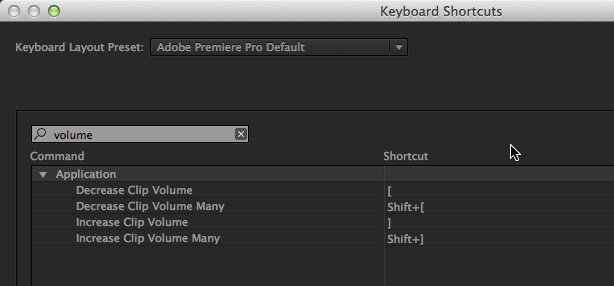
A search through that keyboard editor will find commands to raise and lower clip volumes with a keystroke.
Yep, all these audio options make for more complexity when it comes to doing audio work in PPro CC. Fear not the complex fellow editors as these are conventional audio tools that editors need to know how to use. Learn it once and you can apply it in other places. Now if only Adobe would add those cool fade handles to the head and tail of each audio clips … like FCPX has. They’re there in Audition!
I hate the audio conform, media cache and scratch disks
Let’s first talk these audio conform files that PPro has to make before it can playback certain audio formats. I can understand the need to have to make some new audio files to play back and draw waveforms for non-standard audio formats. But what an NLE should never, never, never do is present video media and make it appear to not have audio. That is exactly what can happen if you try to load up a piece of video that PPro needs to create audio conform files for that it hasn’t yet generated.

While you can monitor the audio conforming process at the bottom of the interface there is no indicator of how long PPro might take to complete the entire process. It can be a real pain.
I don’t care if you have to take every system resource available and take double the time to generate the conform files but to have video appear to have no audio is the worst possible choice. If you want to see a producer freak then try to load up their shoot before the audio conform is done.
You’d think with the awesome Mercury Playback Engine PPro wouldn’t have to generate as many of these conform files as it does. All of these conform files can make for messy media cache folders but that’s what we have. There is an option to place those cache files along side the media files. That can help solve the issue of PPro losing those files but it sure does make for one messy camera media folder.
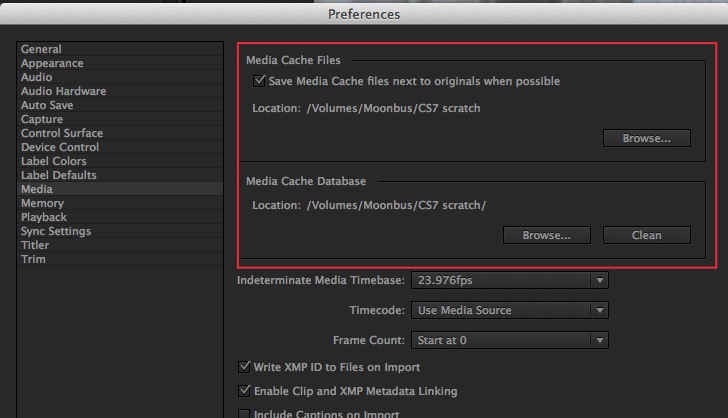
I’m not yet convinced that saving these cache files alongside the original media files in an original camera folder structure won’t cause issues if using that native media in other apps. But the option is there and some editors never turn it off.
That brings me to the other frustrating issue which is the location of those media cache folders and PPro’s Scratch Disks. You want your Scratch Disks on your fast media drive but what you don’t want is Scratch Disks to end up on your system drive. This is exactly what happens when you open a project that is missing its scratch disk locations. You get an alert that you have to default the Scratch Disk to your Documents folder. You can’t open the project if you don’t agree.
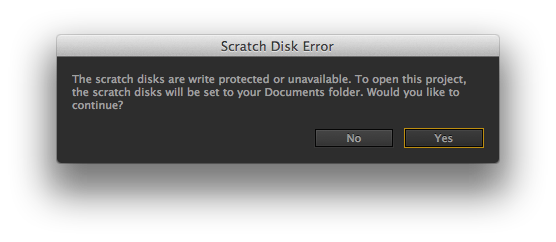
If we can have a dialog that is warning us the Scratch Disk isn’t there then how come we can’t choose a new location right from that dialog box before the project opens?
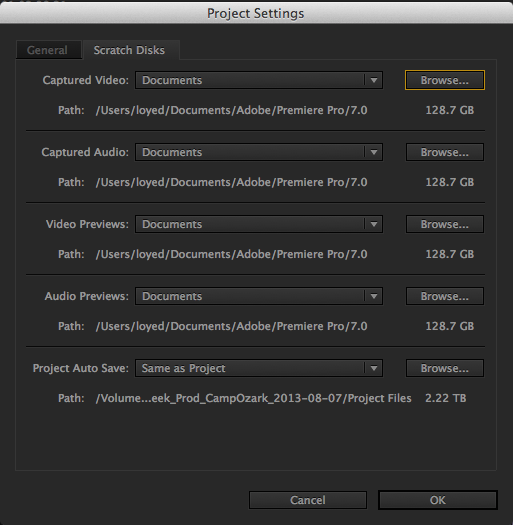
Why can’t we open this Project Settings dialog box right from the Scratch Disk Error?
These media cache and Scratch Disk issues go back to the importance of good media management. PPro could still use some work in this department and the media cache / Scratch Disk issues are by far my biggest issues with PPro CC.
But how does CC perform in the real world?
I’ve talked about some of the specific features of PPro CC but for the second part of the Adobe Premiere Pro CC review I wanted to look at how PPro performed on a couple of recent edits. I’ve used it a lot since release but it was these two jobs in particular that I think really shows where PPro CC shines as well as where it fell short.
Next Page: How Adobe Premiere Pro CC performed on two specific editorial jobs
Premiere Pro saves the day
The first job involved an edit that was originally intended for Avid Media Composer 7. It was a 30 minute television show that was an update of a show from a year ago. That original show was cut in Avid Media Composer 6 and all DNxHD .mxf media was archived. For the new show all footage was shot on a Canon C300 and the intention was to cut with native C300 media via an AMA link in Media Composer on a new version 7 install. Before we get into the Avid AMA vs. Avid native media debate, all versions of this show had been cut in Media Composer with AMA C300 media with no problem at all. The problem arose with MC version 7 and an issue with the Canon AMA plug-in. The issue was that it just didn’t work and any action took several seconds for the software to catch up (this whole thing could be the subject of its own article). Long story short after 2.5 days of troubleshooting and trying to get it to work the decision was make to start over from scratch in Adobe Premiere Pro CC.
What went right
• Premiere Pro CC handled the different types of native media without blinking or breaking a sweat.
All of the acquired footage for this show came from a Canon C300. We were working at 1920×1080 23.98 so I wasn’t asking PPro to do anything too extreme like pushing native 4K. But we also needed to access a lot of Avid native DNxHD 175 mxf media. This was finished video from the last show that came directly out of a Baselight color grading session.
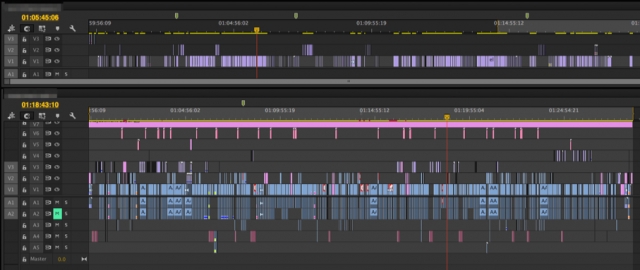
While that timeline on top looks rather simple, it’s Avid Media Composer DNxHD media (generated by a Baselight color grading system) that was conformed from a show archive via an AAF file.
Obviously that DNxHD media was an integral part of the show and Media Composer would have handled it perfectly but I was pleasantly surprised when I was able to import an AAF file from the old graded show and get a nice, conformed timeline of that old show right inside PPro CC.
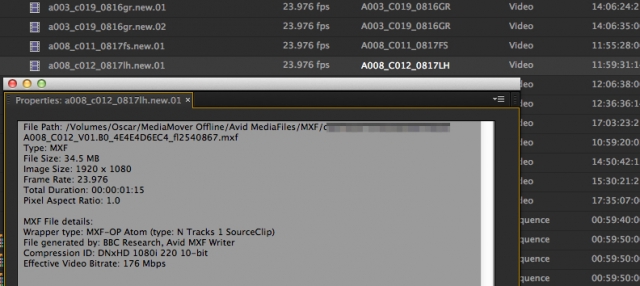
There’s the properties of the DNxHD MXF files. I’m not sure why PPro is seeing them as 1080i 220 via the properties as they were 23.98 DNxHD 175X.
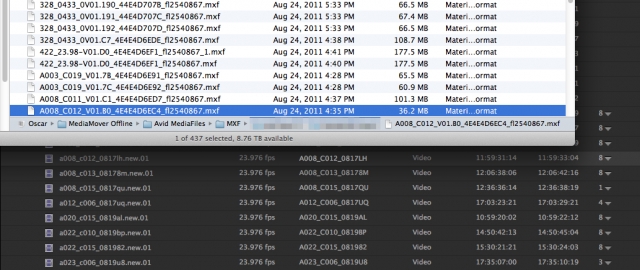
And there are those crazy Avid names right in the Finder. These came right out of an archive made by the great Media Composer 3rd party software Media Mover.
I didn’t conform those mxf files right out of an Avid MediaFiles folder (though in theory that should be possible but I wouldn’t have wanted all of those audio peak and conform files living in there) but rather an archive I moved over to our media drive. The new CC version added better support for both Avid DNxHD and Apple ProRes media so this was a huge help.
• It didn’t crash.
Nope, not once during that week long edit.
What went wrong
• There is still no option to consolidate or media manage an edit.
With PPro’s native file handling abilities and lack of an internal, intermediate codec there is no option to transcode an edit to a single common intermediate codec. For the most part this isn’t a big deal while editing but when it comes to finishing there are times when you need to create a project with only a single edit sequence that includes just the media in the edit, with handles. This is common when sending an edit to color grading (where you don’t conform from the original media) which was what I needed to do here. For a primer on how to send an edit to a color grading session check out these two articles from both an editor and a colorist’s perspective.
The solution is/was to export a flat, self-contained Quicktime file (in this case ProRes) to send to the grade but since we were using footage from an old show that meant some of the footage used had been through multiple recompression stages when the show was done. I looked very carefully at some of those shots and didn’t see any artifacts but it is something to be aware of. That really points to the quality of both the ProRes and DNxHD codecs rather than something PPro is doing internally. As Premiere becomes a more popular edit choice in the high end of the market this is a feature that will become more important.
One thing PPro does have is the Project Manager which is a way to, in theory, create a consolidated version of a project which could be a single sequence with handles. There are a lot of options in the Project Manager as it scans a project and allows the editor to choose which sequences are included in the managing.
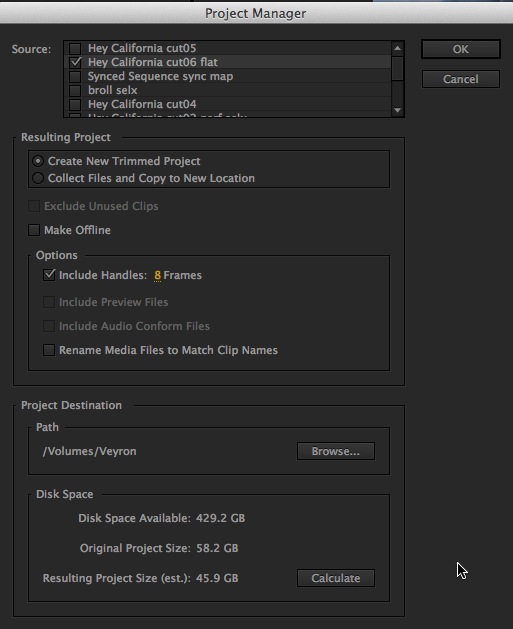
While options are nice you can see the Project Manager isn’t going to do much good here as it can’t properly truncate the files used in the edit to only include 8 frame handles. The resulting project size of only a single 3.5 minute edit sequence should be much smaller than 45.9 gigs.
The issue comes when you ask it to manage edits with different types of camera native media. While it has worked fine for me using edits with all ProRes media if there is media from cameras like the Canon C300 or Sony F3 it will usually fail as it can’t truncate those native files. Sometimes if the Project Manager operation succeeds you’ll get entire media files copied over instead of the shot with handles.
• Okay every once and awhile it seems to crash upon exit of the program.
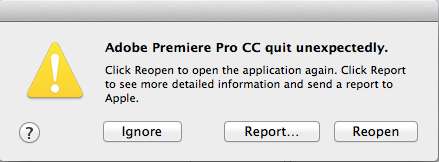
Why in the world PPro would STILL unexpectedly quit upon a quitting the app is beyond me. It’s not an unexpected quit when the editor tells the app to quit.
Premiere Pro CC tackles a biggie
The other job where CC really stepped up was on a big job. A really big one. This job was a series of videos for a summer camp and the big task on this job was dealing with the sheer volume of media. The challenge was covering and organizing several weeks worth of shooting that covered many different events at the camp. When shooting was done we estimated nearly 70 hours of media that needed some good organization.
The main promo video was just a piece of the overall project that PPro CC handled very well. I really wanna spend a week here!
That organizational hurdle was the reason I considered Final Cut Pro X as the prime contender for this type of edit. The job required extensive logging of the footage so it seemed like a natural for FCPX’s amazingly cool keywording and Smart Collections. But once I got to mapping out all the different versions we would need as well as the complex main edit a decision was made that we just couldn’t trust FCPX yet with that much media or that many different edit sequences. The complexity of the main edit wasn’t something I would trust to the magnetic timeline way of working either. A few tests loading a few thousand clips into FCPX on the edit system to be used wasn’t terribly pretty.
Organization was of vital importance but since PPro doesn’t do anything innovative in the organization department we used old school methods like Bins within Bins and Selects Sequences.
What went right.
• Stability.
What struck me most about using PPro CC on this massive job was how stable the NLE was. In the 5 + weeks I was pounding it I had zero crashes and three Force Quits. Two of those Force Quits happened when I had started an export but then had to cancel. The beachball just kept spinning so eventually I did a Force Quit. Why it would hang on a cancel seems odd but between my regular saving and the autosave I didn’t lose any work. And it may have crashed on exit a time or two as well but overall I considered it to be very stable on this job.
• Easy options for editing from selects sequences.
As mentioned above the PPro CC interface has had even further refinement since Adobe began removing the clutter back a few versions ago and it finally feels clean. There’s not a ton us useless controls under the edit windows and what clutter there is can be turned off. While you can still only open one project at a time the interface allows you to really tailor window arrangements for each task at hand. I made extensive use of the “pancake” timeline as it was very easy to drag clips out of my selects sequences into my edit.
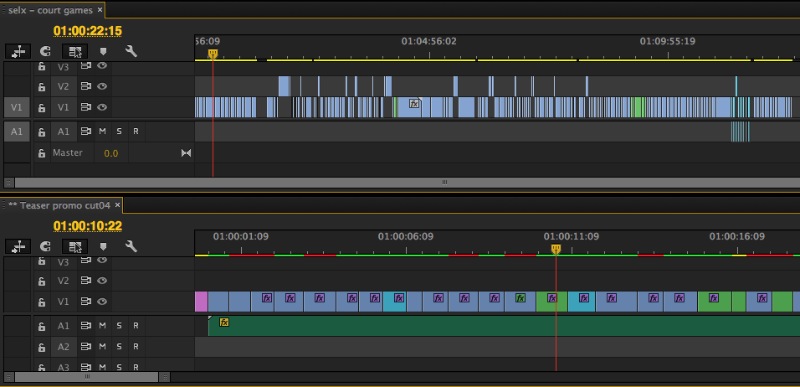
The pancake timeline is an effective way to get media from selects sequences into the edit. The highly customizable PPro interface makes this easy.
A new feature added to PPro CC allows you to load an edited sequence into the Source monitor and then edit from that sequence without creating a nest. While this is common in both Media Composer and Final Cut Pro 7 this little toggle in the PPro timeline brings that very important capability to PPro.
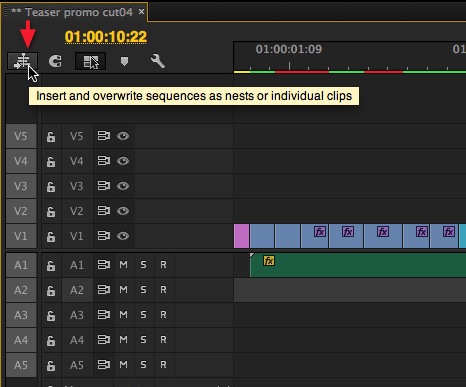
While I love this new little toggle button a bug that I’ve encountered in several PPro CC installs is frustrating in that using this option seems to ignore some of the the IN and OUT points when editing a sequence into a sequence. It’ll often edit the whole damn sequence in. That is very frustrating.
• Hover Scrub and editing right from a bin thumbnail.
While I made extensive use of these selects sequences I don’t want to underestimate how important the Hover Scrub feature was during this edit. If I couldn’t find something in a selects sequence then popping a bin open for a quick scrub through often found something different.
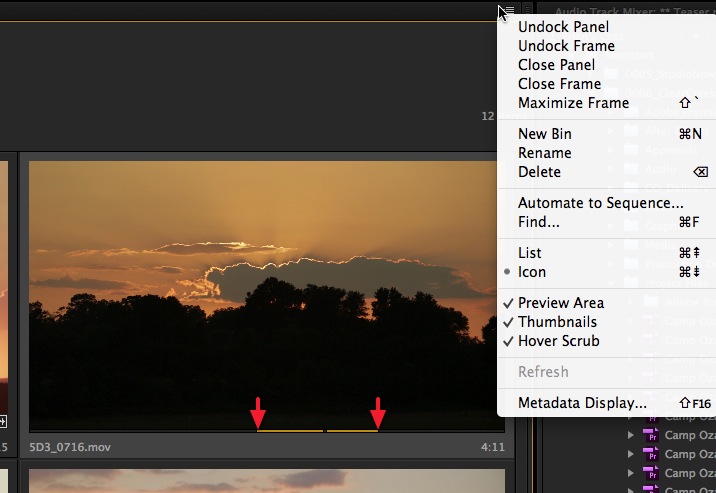
PPro CC offers a real ease of editing right from a bin thumbnail view. The two red arrows above indicate IN to OUT points that have been marked on a clip.
Hover Scrub and the ability to edit from the bin was also helpful when creating the selects sequences. I made the bin icons as big as possible and then watched my footage right from the bin while editing selects into a timeline. With over 5000 clips in the edit that’s 10,000 clicks I saved right there! Hover Scrub was added in CS6 as an answer (we can only assume) to FCPX’s skimming it’s one of those killer features that you really can’t live without once you use it. I can say, without a doubt, that Hover Scrub and editing directly from the PPro CC bin helped me get through this job faster.
What went wrong
• Load time for the project wasn’t great.
At over 5000 clips, that was a lot for the app to churn through when the project was opened. The actual time to open the project file was very fast but then it was like watching paint dry as I’d look to the bottom left corner of the bin as the clips would load.
All of our media was time-coded ProRes LT and PPro never hiccuped when loading the media. It just took awhile.
I clocked the total load several times and it took around 30 minutes from launching PPro to being fully loaded. Part of this could be the blame of my storage which was an EditShare Field 2 unit hooked via Ethernet to a MacPro LINK FIELD2 REVIEW. While it wasn’t the speediest of solutions it was plenty fast for a multiple streams of the ProRes level at which we were working. My standard protocol was to boot the project first thing in the morning and let it load while I got the coffee.
• Using the Find and Filter features are kinda … well, useless.
With over 5000 clips I had this dream that I would be able to label a clip with a word like water in the comment or description column and then just search for that word and have all of those clips filter out or appear in a bin. That is very far from reality. A command + F opens the Find dialog box which looks promising at first.

The problem with the Find box is that it only finds one clip at a time. That’s rather useless when you want to see hundreds of clips tagged with a specific word in the Comment column.
There’s also that little search bar at the top of a bin (where you see the magnifying glass) that looks promising too.

I like the idea of a filter that could only show me the clips that match a keyword.
That type of search seems to filter media to find a search term but it was quite literally an unusable, slow search that didn’t prove useful once during the edit. God knows I tried. The problem happens when you go to type and PPro basically grinds to a halt as it tries to filter every clip with every letter as you type. Just trying to filter the word blob took over a minute.
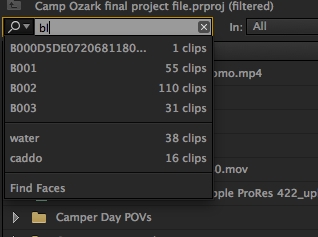
As you type PPro seems to try to filter in real time which in turn really just slows it down.
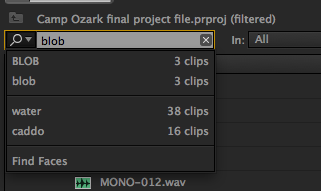
When the filter is finally done you’re able to see results in both the Name and other columns like the Description column.
To use the bin filter just takes way too long on a project of any real size. Adobe knows this needs to get better and with FCPX as primary competition they need to get it done sooner rather than later. PPro is in a good place when it comes to easily applying metadata to things like the Comment and Description column but if you can’t easily search and filter that data its true potential hasn’t been reached.
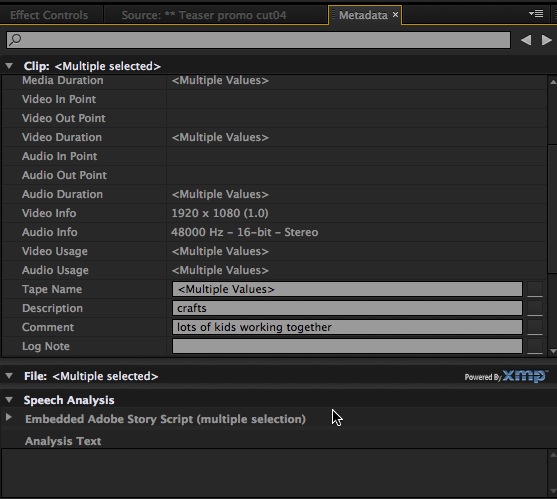
You can easily add things like Comment and Description data to more than one clip at a time in the Metadata tab. A good next step would be some type of clip batch renaming via this tab.
• Importing another sequence means duplicate media in the project.
I worked with another editor for part of this project. He would send me a project file when he was done with a cut. I would navigate to it via the Media Browser and import the sequence.
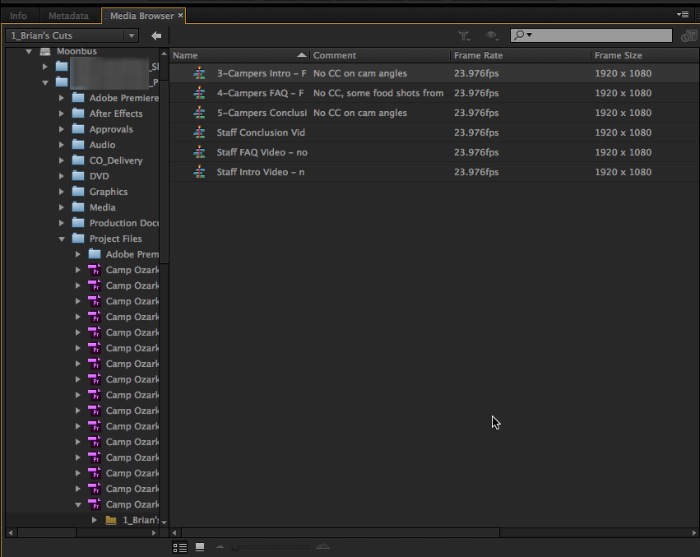
The Media Browser is a handy way to import camera native media as well as sequences from other edits since you can’t have two PPro projects open at the same time.
Once a sequence was imported I would then have a folder with new master clips that linked to existing media on the hard drive. We were working with duplicate media in different locations on similarly named drives. In theory, I think, PPro shouldn’t have to make these new master clips for a sequence import. But it does. And this is silly since the exact clips that it needed for each sequence import were already in the project.

When all was said and done my 5000 clip PPro CC project had ballooned into an over 6000 clip project. That extra 1000 clips came from all the duplicate master clips when importing sequences from another editor.
This limitation became even more frustrating when importing comments from the Kollaborate review and approval service we were using. I had to merge the comment notes with an XML export and import that back into PPro. This was an 800 clip edit so to get 800 new master clips wasn’t ideal. I dealt with this by copy/pasting the old edit clips out of the previous timeline and deleting all of the newly created ones. Not ideal but a workaround that worked.
If we can’t open multiple projects at once then we really need PPro to be smart enough to recognize existing media in an edit that when you import an XML or sequence. To make matters worse, in the October video update an XML import no longer dumps all the new clips into their own folder with the imported sequence. It makes a project really messy.
Wrapup.
It’s the little things to like.
PPro CC added quite a few little things that were welcome additions (dupe detection, match frame/through edit indicators, offline file linking) though a lot of those are features that we’ve seen in other NLEs for quite awhile. We saw a benefit of Adobe’s Creative Cloud subscription model come to life when a July update came online which brought a wave of new and useful tweaks to the app. Then we got another big update this fall. That would be one advantage to the cloud model. Yes a lot of those features were things we’d seen in FCP7 forever but having them in PPro means it’s an even easier replacement for FCP7.
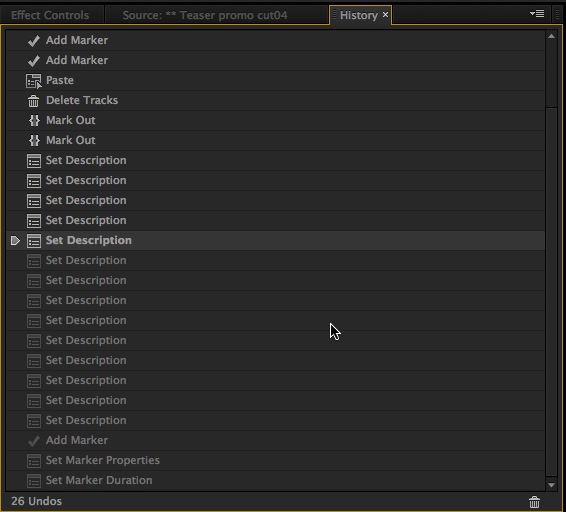
The History tab still a great way to see what Undos and Redos will do.
The integration with the rest of the Adobe suite means integration with Adobe Speedgrade is now a fast “Direct Link” if you need to open an edit for grading. It’s still a rock solid workflow to send an edit to Audition for mix. And there’s always After Effects there for effects and composition needs that Premiere can’t handle.
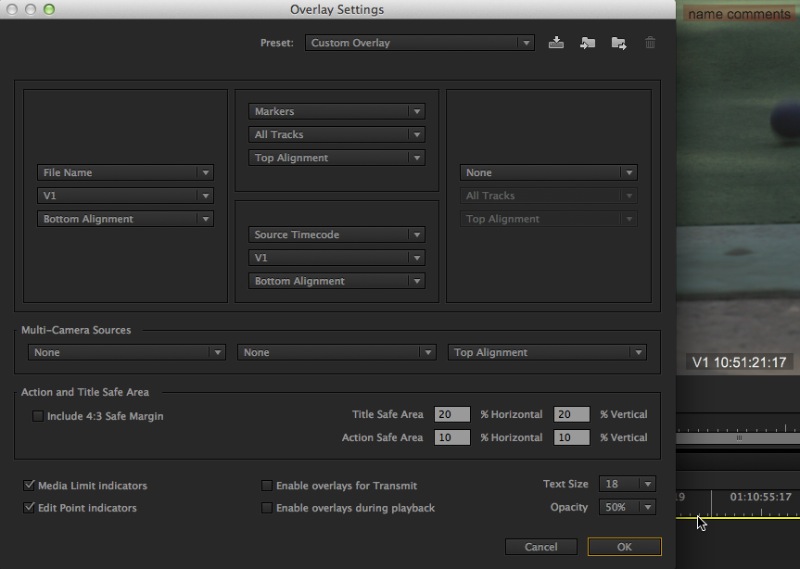
The new Overlays Settings are a great way to see a lot of data about your clips while working.
But there are little things we don’t like as well.
No NLE is perfect. PPro still has a weird way of working with 3rd party transitions. There’s no way to get all of that great data from the new Overlay Settings burned into the image upon export. That would be very handy for an online conform and color session.
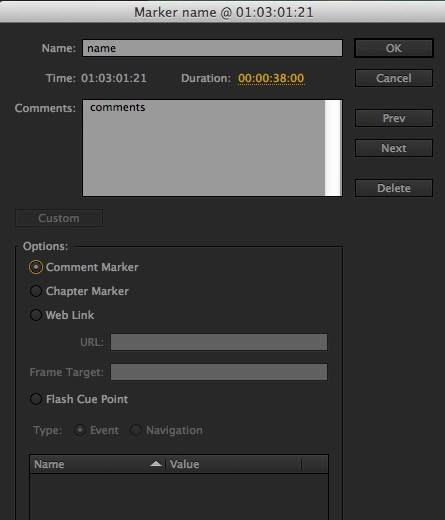
Overall Markers need some work. How many people really use the Chapter Marker, Web Link and Flash Cue Point markers these days?
And there’s lot of other little things that any FCP7 editor can nit-pick about, myself included.
Pros
- Very stable
- Many different editorial tools available within the app
- Great under-the-hood power to handle many different formats and quickly edit them
- Customizable interface
- A steady stream of updates since the introduction of the Creative Cloud
Cons
- Searching, finding and filtering of media isn’t good … at all
- Audio conforming and scratch disk preferences can be a real pain
- Imported sequences will create duplicate master clips even when the clips are already in the project
- No way to transcode a sequence to an intermediate codec with handles
- Third party plug-in support is there but still has a long way to go to match that of Final Cut Pro 7
Cautions
- If you cancel a render PPro will save all completed clips rendered up to the cancel but not partial clip renders
- PPro doesn’t always seem to choose the best/right sequence settings when you auto-create a timeline from a clip but those settings are editable after a sequence has been created
- The Effects Controls can be a bit finicky and I find myself twirling down the same arrows over and over again to access those controls
- I’ve never worked with PPro in a multi-user SAN environment so I don’t know how sharing of projects and edits will behave beyond what I experienced working with another editor with duplicate media
- If you stop paying for your Creative Cloud subscription it’s so long Adobe Premiere Pro CC
Overall?
It’s really a no-brainer to say that Adobe Premiere Pro can now easily stand side-by-side with all the other NLEs. Several years of dedication by the Adobe team have shaped PPro into a stable and feature-rich NLE. If the CC version can’t help PPro shake the stigma of its past then nothing will. Can it move into the rarefied air of Hollywood feature film and television that Avid Media Composer and Final Cut Pro 7 has dominated for so many years? Maybe. Will it be eclipsed as being too “traditional” in a new media world as Final Cut Pro X continues to improve into a very unique and very good NLE? Possibly.
But if Final Cut Pro 7 was or still is your weapon of choice, or you’re an editor who is just more comfortable with a traditional clips-in-bin / track-based-timeline model then you’ll be hard pressed to do better than Premiere Pro CC. You’ll just have to commit to that monthly subscription model to do it.
UPDATE: December 2013 PPro update adds more new features.
Just a day after this review went live Adobe released another update to Premiere Pro. Here’s the feature list:
- Voice-over recording directly in the Timeline has been enhanced.
- A pre-roll overlay in the Program Monitor counting down to the time when recording will start
- The ability to pre-roll before the sequence start time
- A new dedicated voice-over record button which can be added to the Audio Track header, and includes pre-roll functionality
- A red record status indicator in the Program Monitor when recording is taking place, including a count-out to the end of a recording when an Out Point has been set
- Multiple Media Browser panels can be open at once for browsing multiple projects or locations simultaneously
- Clip selection overrides track targeting for multiple editing commands (such as Match Frame, Mark Clip, Lift/Extract, Add Edit, etc.)
- Single camera multi-cam only shows single camera in the Source and Program Monitors
- A sequence can be created by dragging media to an empty Timeline panel
- The Ripple Delete command can be used with an In/Out range set in a sequence
- Mercury Transmit can output a Dolby E stream for external hardware decoding
- AVCi100 .mov files can be smart-rendered to MXF-wrapped AVCi100
- OpenCL performance has been improved
- The active source clip name is shown on multi-cam clips used in a sequence
- With a sequence or sequences selected in the Project Panel, a new project can be created from just those sequences by using File > Export > Selection as Premiere Pro project
- Markers can be exported from any asset or sequence to a document, as a .csv or .html file with thumbnails
- Clip markers can be added to selected clips in the timeline without needing to load them into the Source Monitor
- Multicam sequences can be created with a custom preset for switched audio
- Playback performance with XAVC 60p 4K media using Matrox hardware has been improved
- OP1a formats can be used for preview renders
- Improved AVC-Ultra support
- OMF export improvements, especially when working with adaptive audio tracks

Filmtools
Filmmakers go-to destination for pre-production, production & post production equipment!
Shop Now