Today a friend asked me what’s the best option for creating the Ken Burns style effect for panning and zooming around a still image in Final Cut Pro. Of course iMovie actually has the Ken Burns effect that can be applied but in FCP you need a third party plug-in to do this properly. Sure you can import a still image and use the built-in Scaling via the Motion tab but if you’ve ever tried to have nice smooth ramps into and out of moves then you know it’s a pain. There are alternatives. Here’s 3 of varying price and complexity.
The most expensive of the bunch is MovingPicture from Stage Tools. It’s $199 for the basic version and $268 when you add rotation. That might seem outrageously expensive compared to the other plug-ins here but it has one big advantage: it is very, very easy and very fast to use.
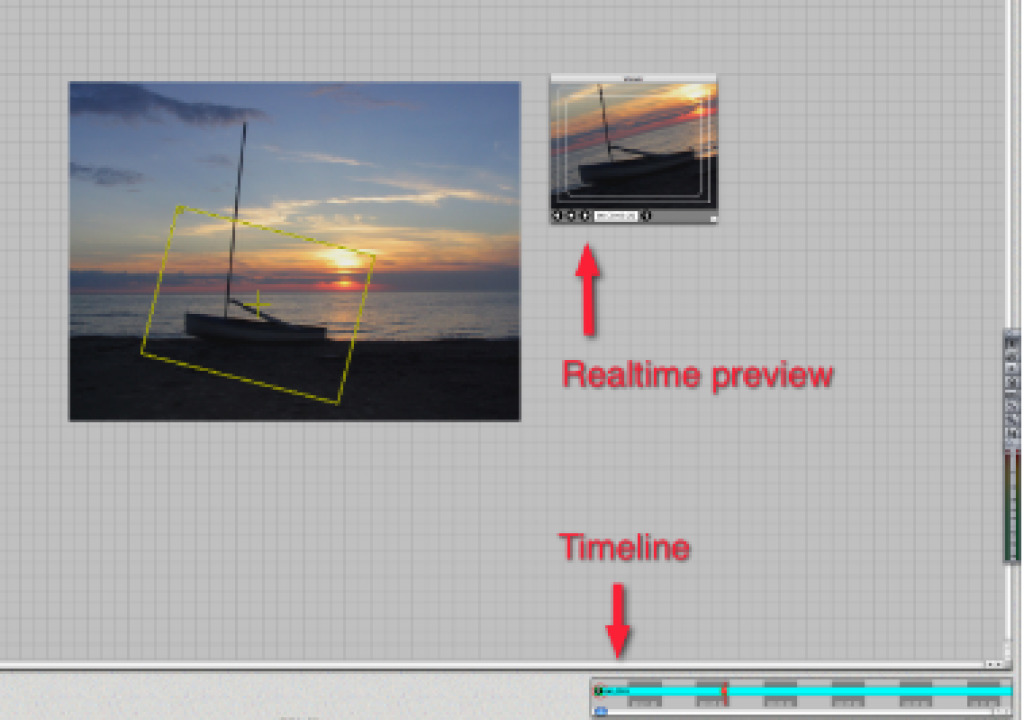
With MovingPicture you add a video clip to the timeline and then apply the MovingPicture filter to a video clip. Click the Options under the filter tab and a different interface opens. There you load a still image and then make your moves via a keyframes added to a small timeline in the corner and then a yellow bounding box on the still image. You drag the bounding box around for panning, resizing for zooming as well as rotation and you have make your moves. Keyframe are added in the timeline as you do this.
This direct manipulation of the bounding box on the image is what makes MovingPicture so fast and interactive when creating Ken Burns style moves. And it has that price to match. A demo is available so you can see if it is right before you buy.
The second plug-in is Pan Zoom Pro from Lyric Media. It’s more affordable at $49 but takes more work to set up a move. This effect is actually a generator that you add access via the pop-up in the bottom corner of the Viewer and edit into the timeline. You then double click and access the controls tab:
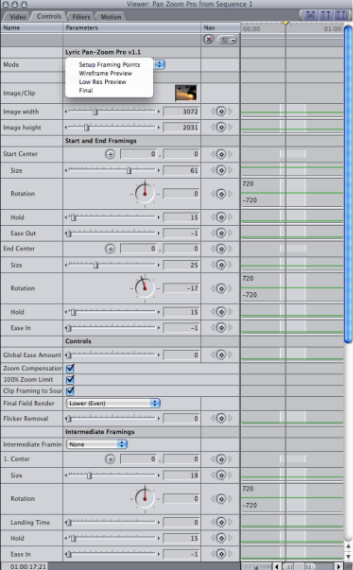
There you drop a still image into the well and set your parameters. As I said it takes more work than MovingPicture as you have to set your start, end, rotations, holds and eases all via sliders and Control tab controls. Not as intuitive as click and dragging directly on the image itself but it does work and can produce nice results. You can see your starts and ends via bounding boxes in the Canvas:
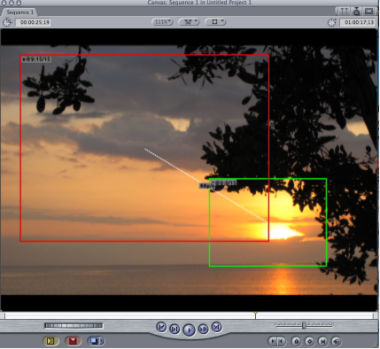
You also have to be sure to set the mode in the Controls tab: either set-up, wireframe, low rez or full resolution. And you have to set it to full before final render. It’s also nice in that you can have up to three intermediate framings so there is more to your move than just a start and stop. A demo is available as well.
Finally there’s the freebie. Noise Industries has a Pan and Zoom as part of their FxFactory Freebies. It is also located under the Generators menu. Once edited into the timeline you can add an image from project media or from off of your hard drive. It’s similar to Pan Zoom Pro in that you use typical Final Cut Pro sliders and dials to do the set-up but it also has several built-in presets. You can also save presets as well:
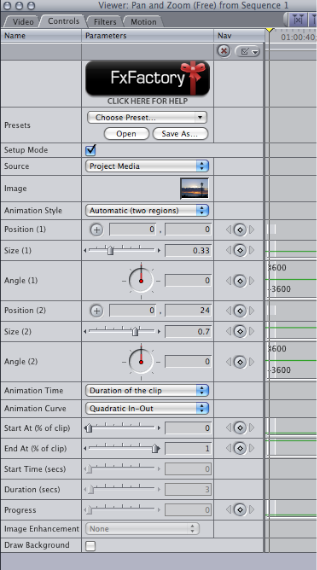
As with the others you can have different ease-ins and ease-outs, essential making smooth pans and zooms. There are similar bounding boxes in the Canvas for visual reference as well:
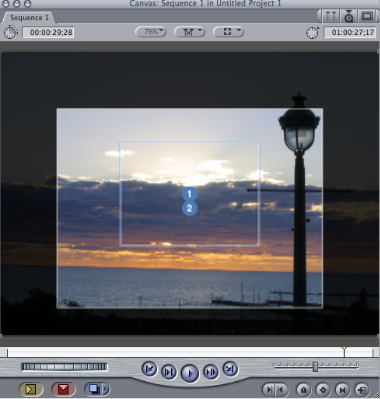
In the FxFactory version you have a Setup Mode check box to toggle between setting up your move and the final image for render. You can’t set a large number of intermediate framings but the ability to save presets makes this a nice plug-in. Plus you can pan and zoom video clips. And since it’s free there’s no demo, just download and go!
All three of these Ken Burns style effects do a great job. Each has it’s own strengths and prices. There should be something there for any Final Cut Pro editor who needs to pan and zoom a photo!

Filmtools
Filmmakers go-to destination for pre-production, production & post production equipment!
Shop Now