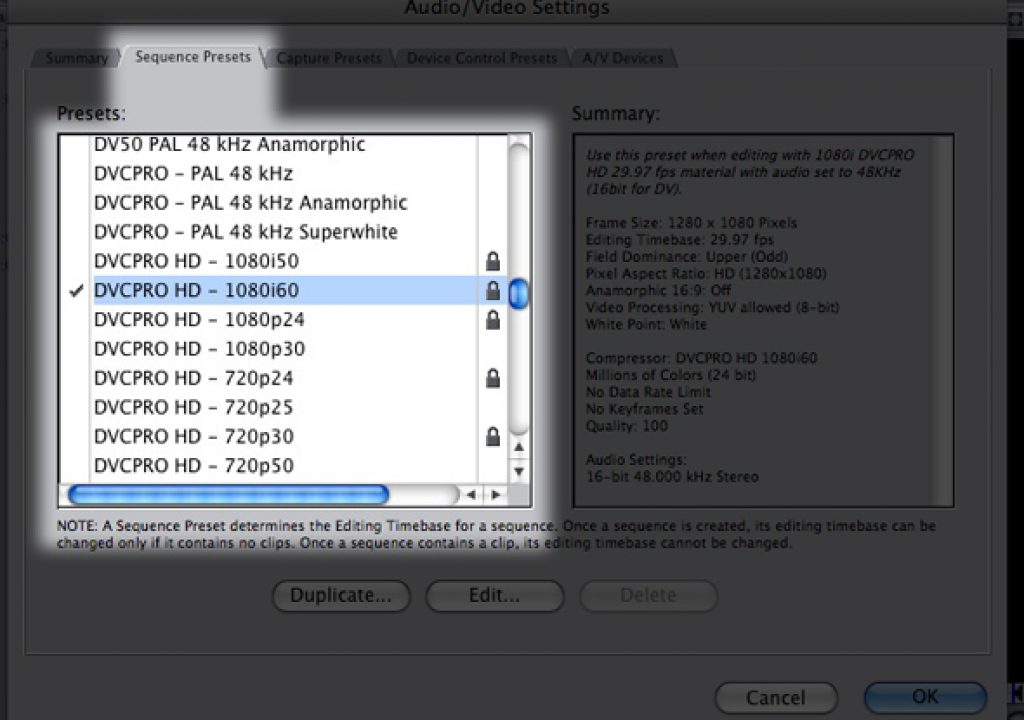
In the first of our three part look at the Easy Setup (ES) in Final Cut Pro, we took an in-depth look at the Capture Presets (CP), and really got in there and examined what each one of the settings did. For part two, we are going to look at what I think is the next logical step in the process, and that is the Sequence Settings, and then we are going to wrap everything up in part three by looking at the Device Settings, and how you can tie everything together to your advantage.
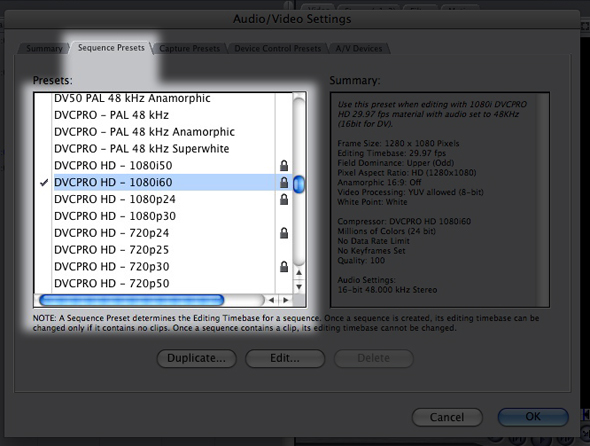
I’m going to assume that if you are reading this article, you have read part one (which if you haven’t, you can read by clickinghere ), and I’m also going to assume that you know how to navigate to the Sequence Presets (SP) tab. Once there, what I always recommend to people is that if you are creating an ES, pick one that is similar to the one you want to create, that way it’s less work for you to create your own. For this article, we are going to use DVCPro HD – 1080 60i as our “dummy” setting. Once I click “Edit”, I am prompted that the setting is locked, and I will need to duplicate it before I can work with it.
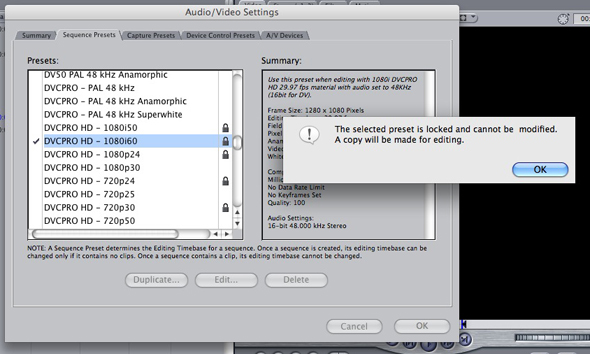
Like I stated in part one, this is a precautionary move on Apple’s part to help (stop) you from changing the “core” templates that you will use on a regular basis. Now that I have the Preset duplicated, I’m going to click “Edit”, and now I have a similar screen to the Capture Presets (CP).
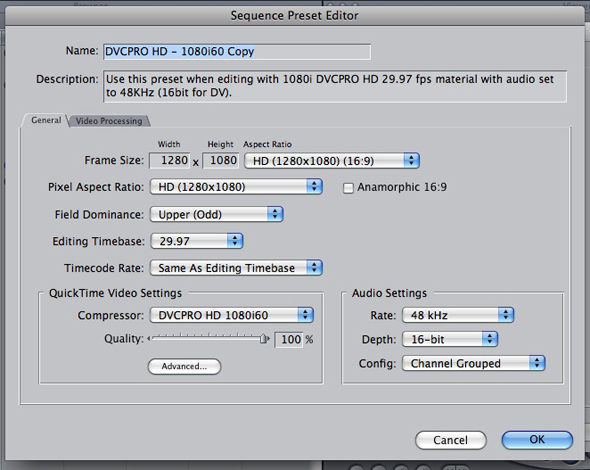
Let’s now break down the Sequence Presets by looking at each setting individually, and we are going to start with the “General” Tab.
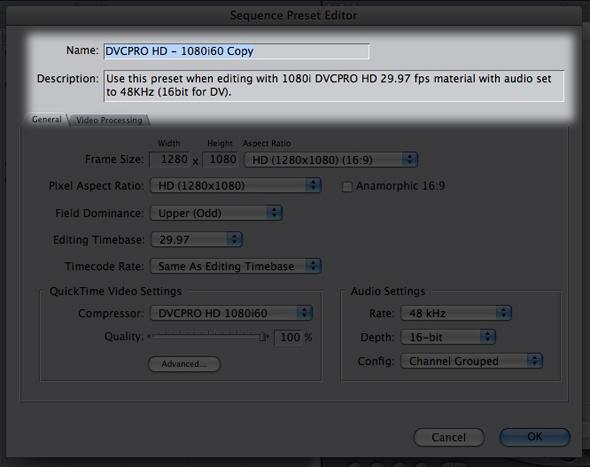
NAME/DESCRIPTION
Much like in the CP, these two dialogue boxes are where you can enter both a “Name” (i.e. – Kevin’s DVCProHD 1080i), and a “Description” (i.e. – Use this setting when capturing Kevin’s footage that was shot in DVCProHD 1080i) for the SP.
FRAME SIZE
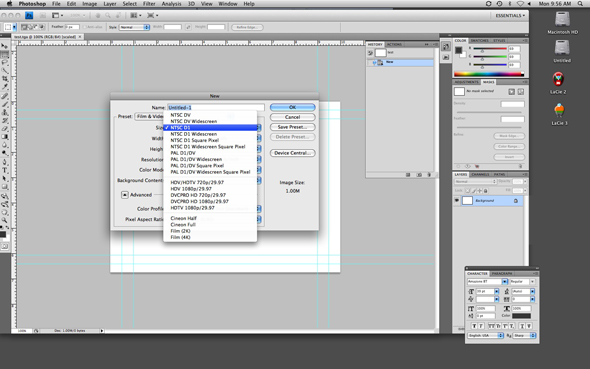
Almost right off the bat, we’re in for a little challenge that requires you to know a little about the footage you are working with. “Frame Size” sounds simple. It obviously refers to the frame size of your footage, but here’s the catch. Using NTSC SD footage as an example, did you know that it can have four different frame sizes? First, we have NTSC 4×3, which most people might think “That’s the one I need!”. Remember, 4×3 NTSC standard definition frame size is 640×480. Why is that you ask? The simple answer is that that setting is assuming you are working with square pixel footage, and for a 4×3 aspect ratio, 640 square pixels across equals 480 square pixels down. If you are working with what the industry considers “601” footage, and are looking for a frame size of 720×486, you are looking for a rectangular pixel frame size that has an aspect of 40:27 (CCIR 601 NTSC 40:27). Standard DV footage is 3:2 with a frame size of 720×480 and finally “601” square pixel footage (graphics from Photoshop, or After Effects) is considered to have a 4×3 aspect ratio, and a 720×540 frame size.

Here is where you would use these different settings in the real world.
NTSC 4×3
You will probably never use this setting. When I first started working in television, and we were editing with 3/4″ tape (yes, I’m dating myself), we would use this setting.
NTSC DV
Pretty self explanatory. If you have shot your footage and are capturing with a DV camera or VTR, this is the setting of choice.
CCIR 601 40:27
If you are capturing from a VTR such as a Digital Betacam, this is the setting of choice, as the footage that was recorded on the tape was in a 40:27 rectangular pixel format.
CCIR 601 Square Pixels
This setting would be used if someone has given you graphics from an older version of an application like Photoshop where you don’t have all the fancy new “Television” settings, and Photoshop only worked in square pixels. These days, Adobe has moved ahead and now lets people work in whatever pixel aspect ratio they want.
ANAMORPHIC
The anamorphic setting is used for footage that was shot with a camera that shoots in “faux” widescreen, and what I mean by that is that the camera stretches the image out, so that when you select your “Anamorphic” setting, it will “crunch” the image back into a 16×9 aspect ratio. Most consumer cameras have this “Wide” feature, but there are a few professional model cameras that have this feature as well, such as the Sony DVW-700WS Digital Betacam camera. This setting would also be used if you are offlining in SD from HD as a way to maintain your 16×9 aspect ratio. For more information about offlining in SD for HD, you can read one of my previous articles here.
FIELD DOMINANCE
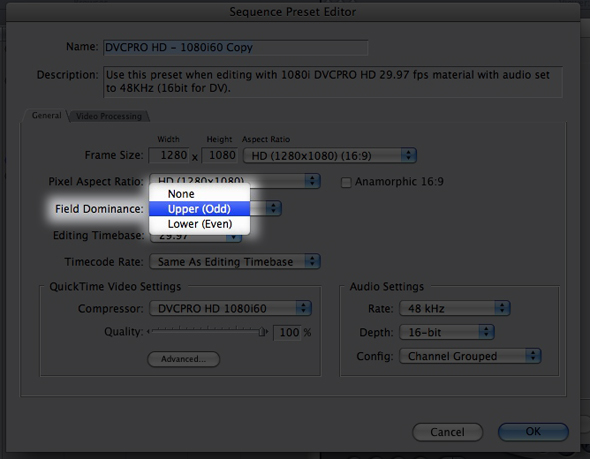
As most editors are aware, there are three types of field dominance. Upper, Lower and None. This will change depending on what type of footage you are working on. For example, if you are working in 1080i with footage from an HDCam, you will be using “Upper (Odd)”. If you are working with SD DV footage, you will be using “Lower (Even)”. For 720p or 1080 23.976psF, you will be using “None” (i.e. – Progressive). Make sure you know which field dominance your footage has, because if you choose the wrong FD, and don’t have an external monitor hooked up to see your footage, your Cinema Display won’t show you that there is a problem, as they work in progressive mode.
EDITING TIMEBASE
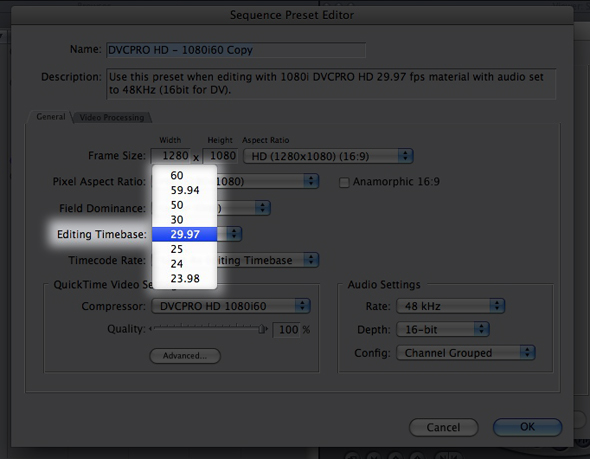
Basically, this is your sequences’ frame rate, and something important to keep in mind is that once you insert a clip (or multiple clips at the same time) your ET cannot be altered.
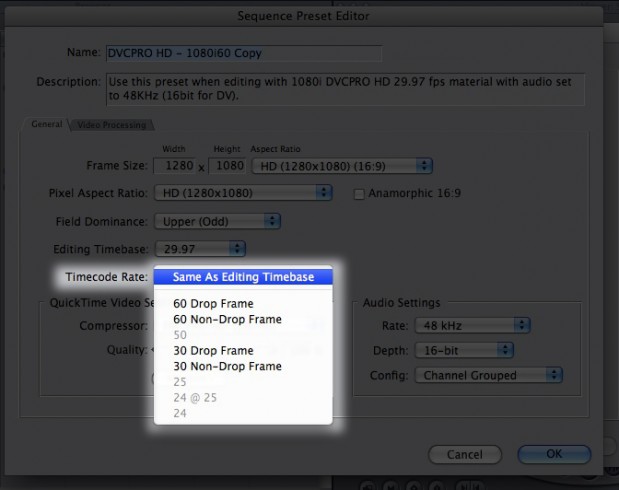
TIMECODE RATE
The first thing I want to say about TR is that you should always leave it as “SAME AS EDITING TIMEBASE”. I have been editing on Final Cut Pro for about four years now, and I have created thousands of sequences, and I have never had to adjust this….EVER. What you would use this for is if you were editing, for example, a 24p project for a 25p PAL output. Like I said, it is extremely rare that you would ever need to adjust this setting.
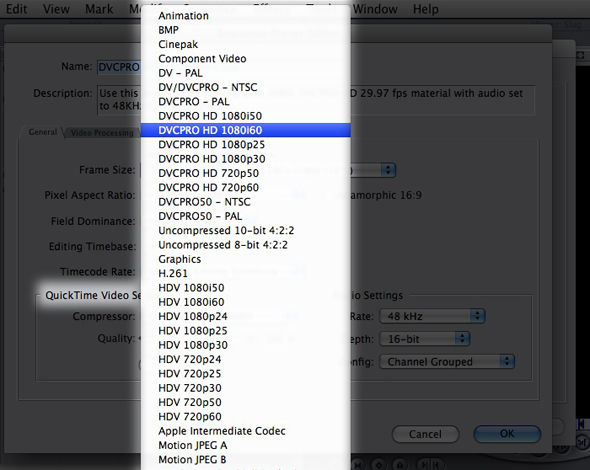
QUICKTIME VIDEO SETTINGS
This drop down menu is where you will tell Final Cut Pro which codec you have digitized your footage with. If you have footage that has come from multiple sources (renders from After Effects, DV clips for HD projects, etc), what I will do is set this for the codec that will dominate my timeline. For example, if I have captured ninety percent of my footage with DVCProHD 1080i, and ten percent of my footage has been captured with a different codec, then DVCProHD 1080i is the codec I will select. Normally, the codec defines most of your other parameters. What I mean by this is that I know that when capturing in DVCProHD 1080i, my clips will have an aspect ratio of 1280×1020, 16×9, Upper Field Dominant and 29.97 frames per second. Since I know all that from my codec settings, it makes my life alot easier when altering all the parameters before this one. I normally tell people to set this parameter first, and everything else will fall into place very easily, assuming you understand the codec you are working with. This can get a bit tricky, as there are certain codecs like ProRes (and HQ) and Uncompressed 8 & 10 bit that can be used in both SD and HD, and then it is a matter of knowing what type of VTR you are coming from, and the type of signal coming through your capture card.
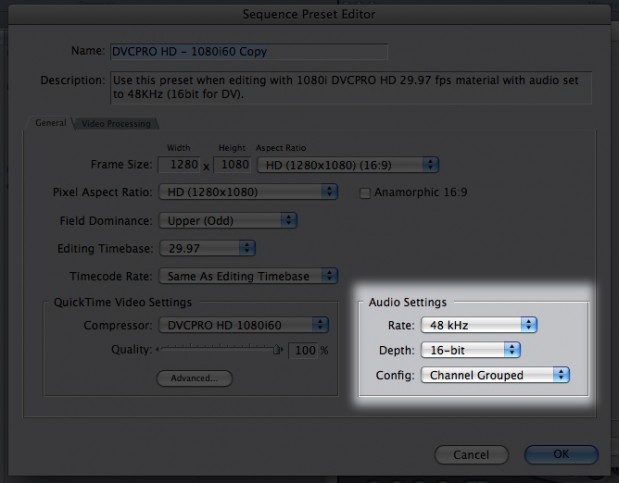
AUDIO SETTINGS
The audio settings will probably be the easiest for you to set up. Most television work is done using 48kHz, but occasionally you will find people working in 44.1kHz. Your depth will normally be 16-bit, but with more and more productions having post audio work done, you will find alot of mixes are coming back as 24-bit, and finally, depending on your output requirements you can choose between Stereo, Channel Grouped or Discreet under the “CONFIG” Menu.
Finally, we have the other tab located at the top of the SP window, and that is “Video Processing”. By clicking on the tab, you are greeted by this window:
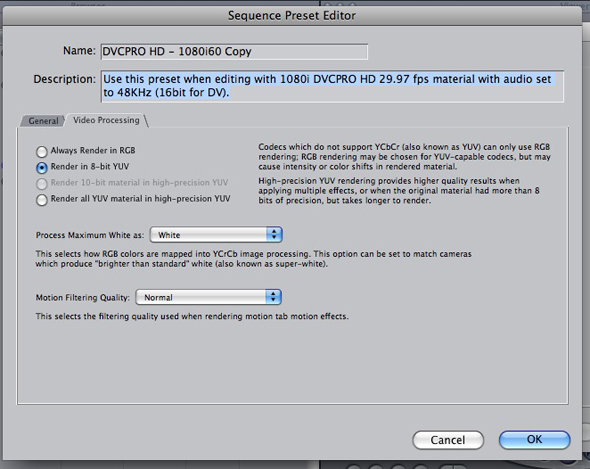
Basically what the “VP” tab does is let you tell Final Cut Pro how clips are rendered and processed in your sequence. The first set of radio buttons lets you tell Final Cut Pro what color space and bit depth you want to work with.
ALWAYS RENDER IN RGB
Select this setting if you are using a codec such as the “Animation” codec.
RENDER IN 8-BIT YUV
In most cases, this is the setting you will be using as most FCP codecs support 8-bit rendering. If you happen to have alot of compositing or effects work, you might want to select “Render all YUV material in high-precision YUV” (which is 32-bit float) for a better image quality.
RENDER IN 10-BIT HIGH PRECISION YUV
Similar to the above setting, you would use this setting if you are working with material captured with a 10-bit codec like “Uncompressed 10-bit” or Apple’s ProRes (and HQ). This codec only becomes active when you have selected a supported 10-bit codec in your “Quicktime Video Settings”, and rendering with this codec will take longer, but you will have much better looking end results.
RENDER ALL YUV MATERIAL IN HIGH-PRECISION YUV
This is pretty self explanatory, as it makes sure you cover all your bases. Any YUV material will be rendered with 32-bit float. Again, longer renders with better results.
One thing that is important to keep in mind is that 32-bit float (or high-precision YUV) will not make your actual footage look any better. You need to talk to your DOP or graphic artist about that. All it does is give you better quality on your effects work.
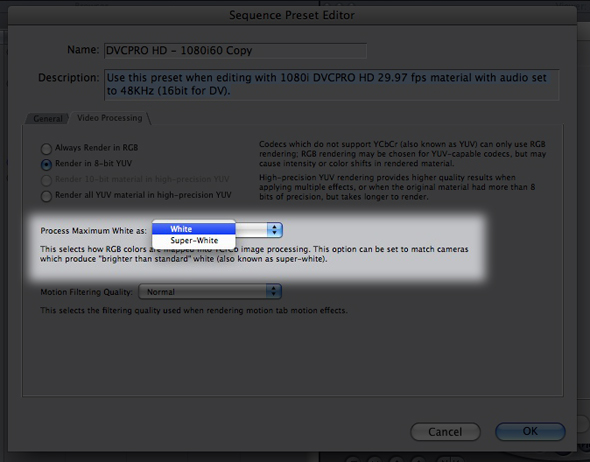
PROCESS MAXIMUM WHITE AS:
This is a setting that you should not change, in my opinion. White (100 IRE) is the broadcast standard for the brightest portions of your images. What this setting does when “White” is selected, is that it takes the RGB “white” value of 255, and converts it to 100 IRE. If you are working on something for broadcast, this is a must. If you aren’t, and don’t care, you can set the maximum white to “Super White”, and all your 255 RGB levels will be mapped to 109 IRE.
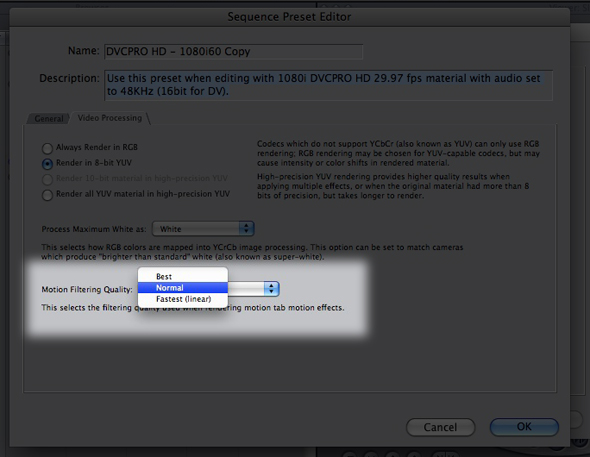
MOTION FILTERING QUALITY
You have three choices here. Normal, Best and Fastest. Normal will produce medium level results for parameters set in the Motion Tab. Best is what you would select when you are ready to output, and Fastest gives you quick results, but the lowest possible quality, which is great for offline work.
The Sequence Presets might seem a little daunting, but knowing your format, VTR and codec will help you easily navigate your way through the SP in no time. For the last of my three part article series, we’re going to take a look at the Device Presets, A/V Presets, and putting everything together so you can work how YOU want.

Filmtools
Filmmakers go-to destination for pre-production, production & post production equipment!
Shop Now