Not all pixels are created equal. Different devices often use different internal representations for the same color we see. HDTV video is one color space, which is fortunately related to sRGB (the default for many computer-connected devices). But still images from a professional photographer are probably in Adobe RGB or ProPhoto RGB color spaces, which is rather different. And anybody creating graphics without color management – from Illustrator logos to 3D renders – may be unwittingly creating imagery in the color space of their specific monitor, which might not be related to any of your other sources.
Not all pixels are created equal. Different devices often use different internal representations for the same color we see. HDTV video is one color space, which is fortunately related to sRGB (the default for many computer-connected devices). But still images from a professional photographer are probably in Adobe RGB or ProPhoto RGB color spaces, which is rather different. And anybody creating graphics without color management – from Illustrator logos to 3D renders (thankfully, MAXON CINEMA 4D is color managed) – may be unwittingly creating imagery in the color space of their specific monitor, which might not be related to any of your other sources.
At its default settings, Adobe After Effects ignores color management. Which means if you bring in HDTV video footage and Adobe RGB still images, one or both are not going to be interpreted correctly, meaning you’re going to be compositing together colors different than what the original shooter or editor intended. Really.
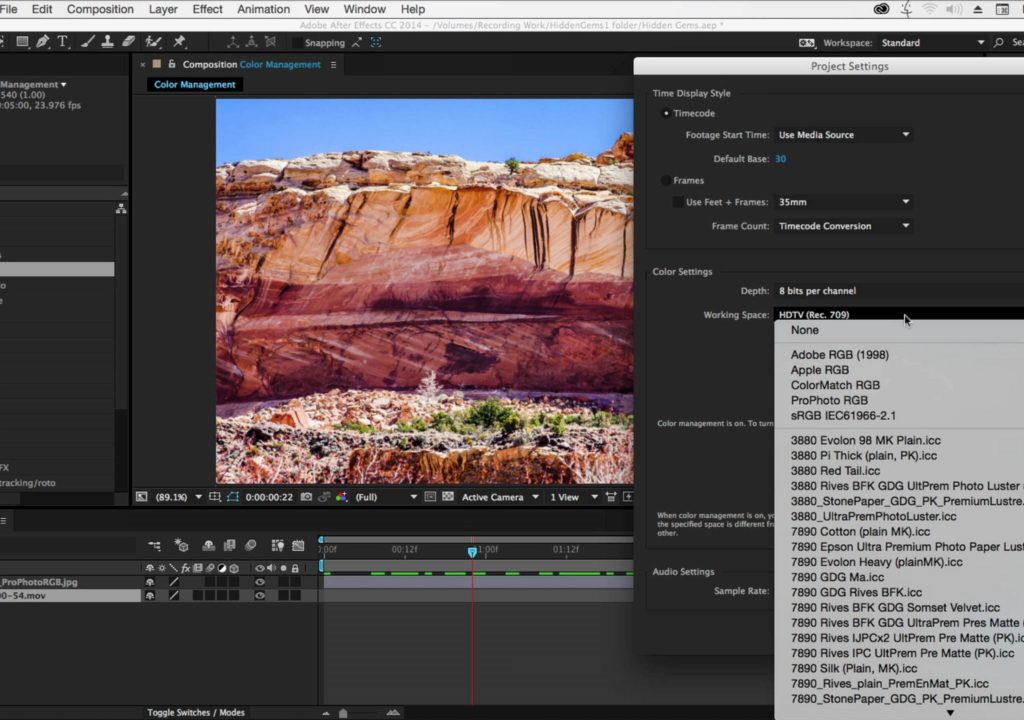
Fortunately, there’s an easy fix: Enable the Color Settings > Working Space in the After Effects Project Settings. Which profile should you choose? The easiest answer is the one you plan to eventually output to. For example, if your target is HDTV video, choose HDTV (Rec. 709). If your target will be the computer screen, a good compromise is sRGB IEC61966-2.1, as that’s the default for most Windows monitors, and Apple’s Safari web browser manages colors and will convert from that space to the monitor that’s connected. What if you are rendering for both? You get one more chance to choose a color profile: In the Output Module of the Render Queue, under the Color Management tab. (It’s okay; most other users have never clicked on that either – you’re not alone.)
The movie above gives a quick overview of where the relevant popups are in these dialogs; for the full story with examples, visit our After Effects Hidden Gems Weekly course on lynda.com – it will be available free to all for the week starting June 8 2015; after that it is only visible to their subscribers. If you’re not already a subscriber, you can get a 10-day free trial before your credit card is billed by using the link http://www.lynda.com/go/ChrisAndTrish. We’ll be adding a new gem each week; all of the previous gems will remain online for subscribers.

Filmtools
Filmmakers go-to destination for pre-production, production & post production equipment!
Shop Now


