Using masks in images with hair, feathers or fur is always a cumbersome process. Topaz ReMask 5 does help to make the workflow easier, and there are even tricks not documented in the manual that help to get results faster.
When I recently wrote about the program I showed the official way to work with masks, but there are more ways to remove the background of one image and that’s what this article aims to explain. I used the same image from the previous article, so you can compare them, but the effect applies to any other image you might need to work. It should be noted, though, that the technique shown here works best with images presenting a solid background that makes for an easy separation.

The final image, created through a change in the background of the portrait
Let’s resume how ReMask 5 works. The program uses simple 3-colour tri-map technology — green, red and blue — to enable users to quickly and easily extract even the toughest elements — hair, foliage, and transparent materials — in their photos. The interface is simple and the logic too. You use the blue brush to outline the area you want to protect, then fill with red the area to cut and with green the area to keep (in normal mode the green is already active, so you just use blue and red). Then you ask the computer to… compute. Topaz Remask 5 will make its calculations and will give you a final cutout and a mask for it, depending on how you set your preferences. You can just use the cutout as a layer in your photo editor – if you’re using one, that is, as ReMask 5 works independently. After the computing is done, you have five different previews available — Original, Trimap, Mask, Keep, Cut —, which can be seen individually, two side-by-side or four at once. This allows to view the results and where touch-ups are needed.
The official process – let’s call it that – is documented above and relates to what was shown in the previous article. The other process, shown here and already documented multiple times since someone discovered it, is slightly different, but offers similar results and, with some images may well give you an extra level of control from the moment you start, besides a faster workflow.
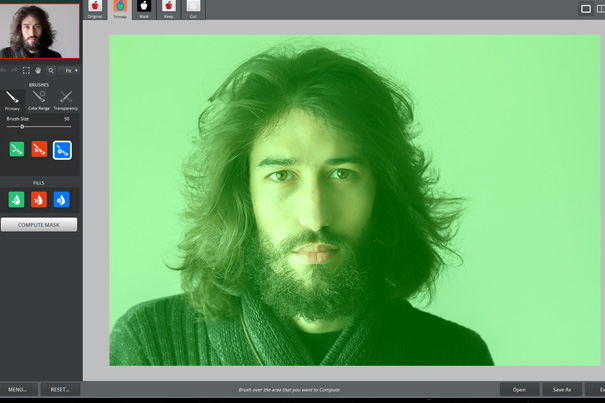
Start by opening the image you want to use in Topaz Mask 5. You can do it directly, as the program works standalone, or through your photo editor, as an app. In my case, the image has a grey background which I want to remove so I can place the person photographed (my older son, Miguel) in any other background I chose.
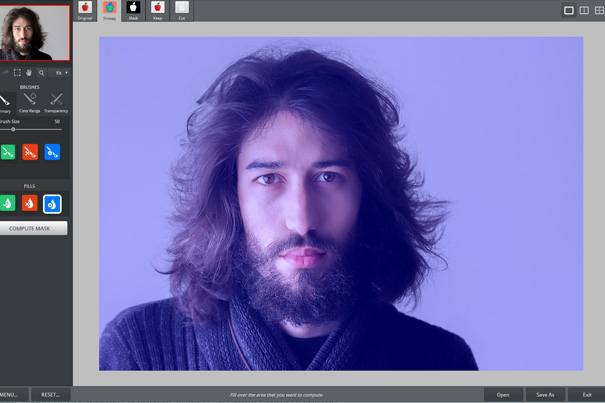
When the photo opens in Topaz ReMask 5 it has a Green mask over the whole image. The first step is to change the mask to Blue, using the fill bucket on the left side panel.
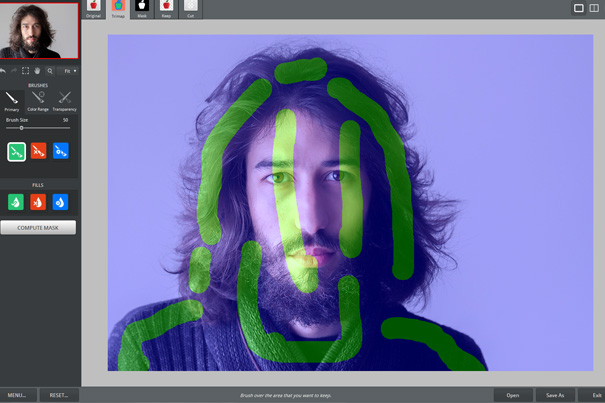
Once Blue is applied, select the Green brush and paint some strokes over the area you want to keep, so the program knows the colours and tones it should protect. Remember that on the regular mode, you would define the edges with Blue and fill the area to keep with Green. Look at the image published to get an idea of what you need to do when following this method.
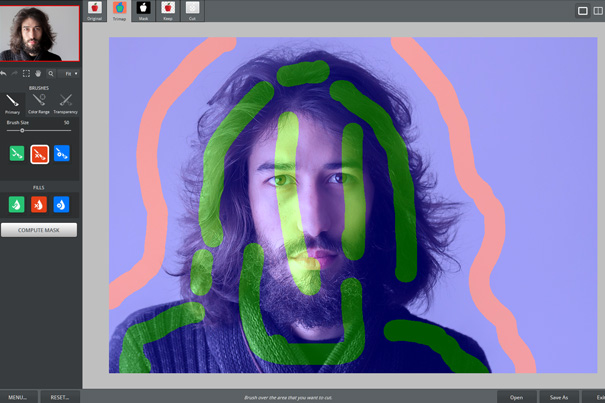
The next step is simple: draw some lines over the Blue area using the Red brush, creating a rough outline close to your subject and strokes over the area to remove. Once done, you can select Compute and the program will do its magic. At this stage you’ll have a mask, which will probably still need some retouching, but which is a good starting point for further work.
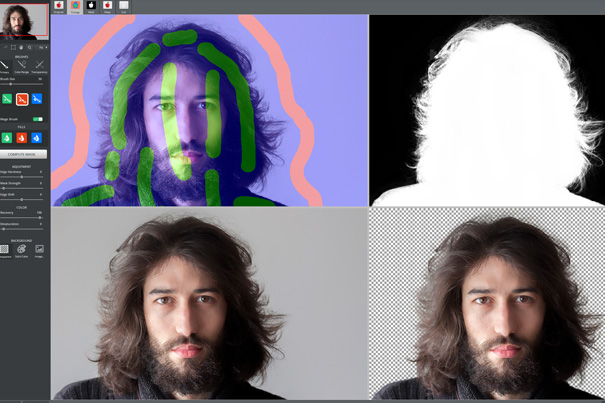
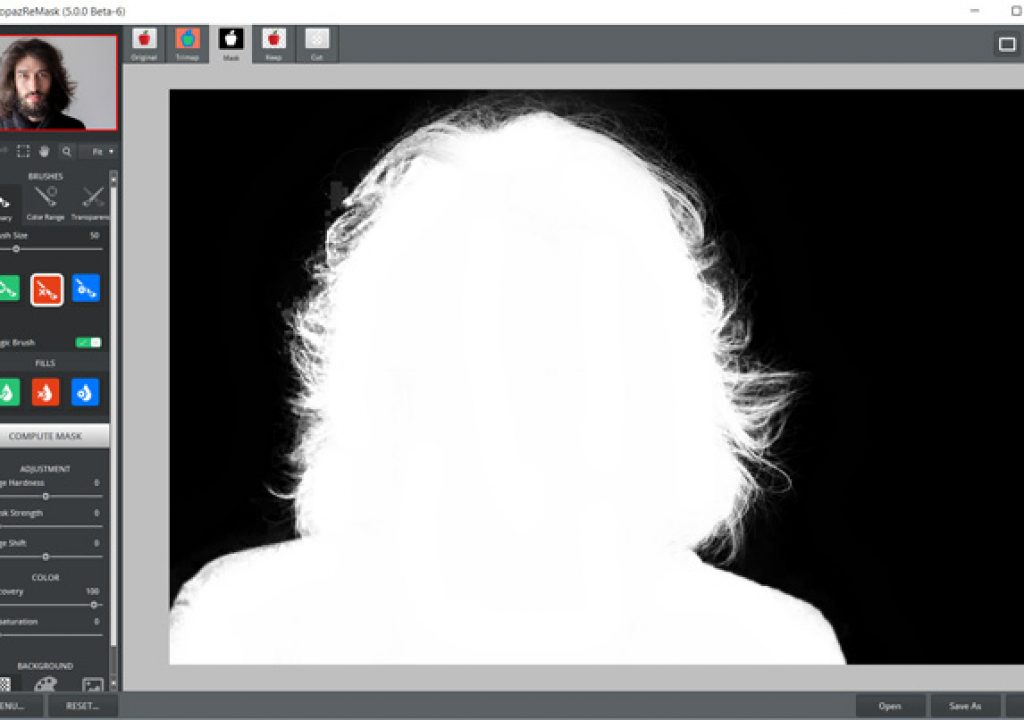
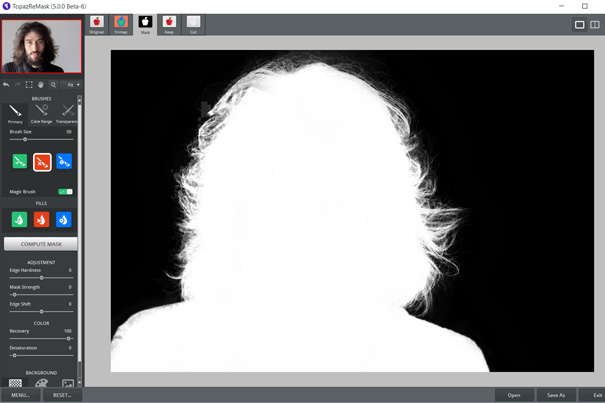
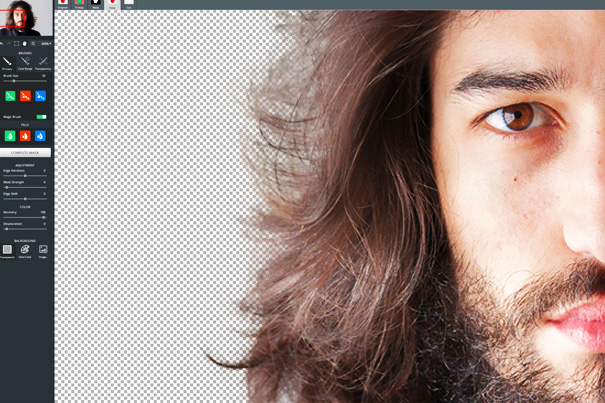
After the computing is done, Topaz ReMask 5 gives five different previews — Original, Trimap, Mask, Keep, Cut —, which can be seen individually, two side-by-side or four at once. This allows to view the results and where touch-ups are needed. It is also possible to change the background colour behind the image, to better inspect areas.
 |
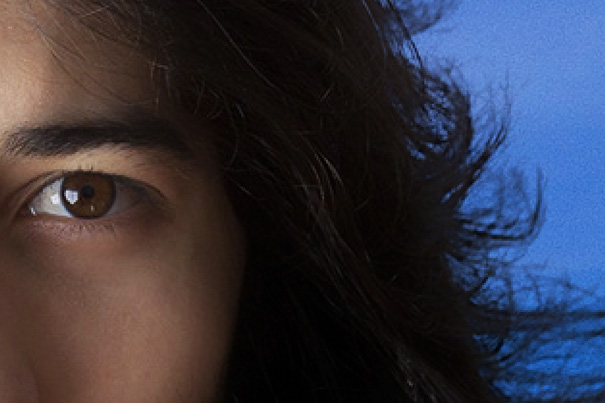 |
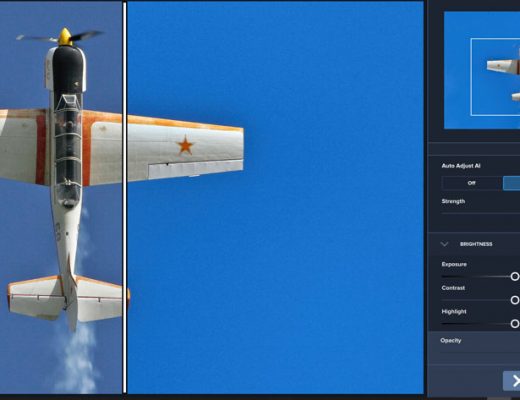
The image after the magic in Topaz ReMask 5 (left) and a detail of the hair over the sky background on the final photograph (right)
The final touches are achieved using the tools on the left side pane, using adjustments Edge Hardness, Mask Strenght and Edge Shift and colour Recovery and Desaturation. At this stage, using the Green, Red and Blue brushes allows to adjust small areas. Green adds to an area of the mask, Red removes, and Blue works as a “rubber” that cancels what you just did. Or you can use the keys to undo the action. It is still a work of patience, but it is easier than using many other conventional methods. Give it a try downloading a 30-day trial version of Topaz Labs ReMask 5.

Filmtools
Filmmakers go-to destination for pre-production, production & post production equipment!
Shop Now