In the past week I’ve received my Starlink beta kit, ground-tested it, and finally installed it on the roof and am running speed tests on all the devices. Check out this update and see how this technology might make remote production a reality for those living more off the grid!
Since I posted my first article on this last month, I’ve finally received my Starlink beta kit and have connected with more beta testers and researched what I’d be up for during my installation and setup.
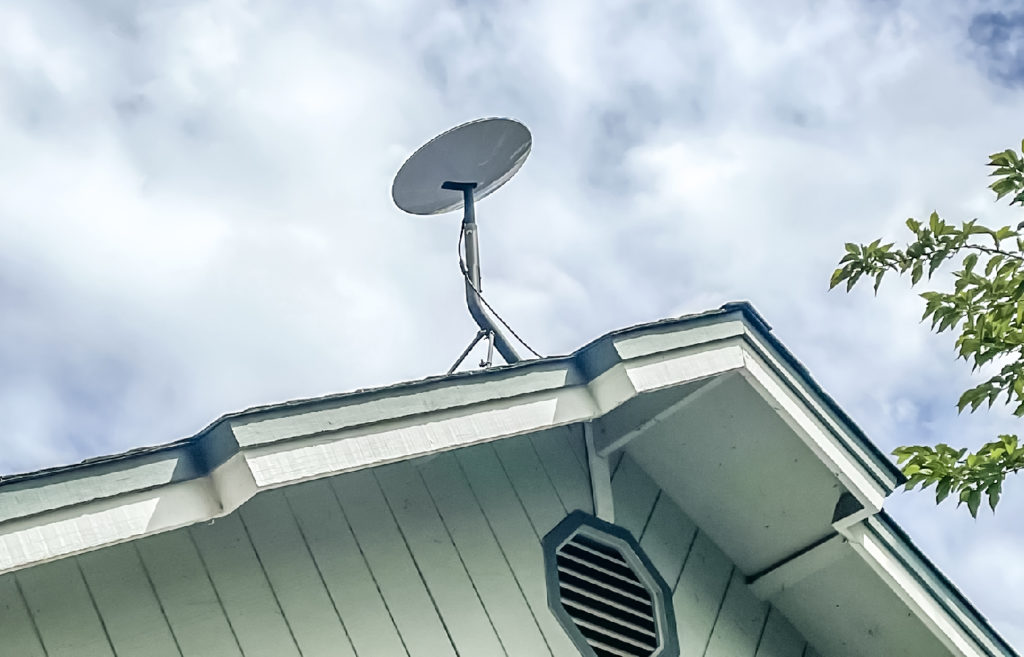
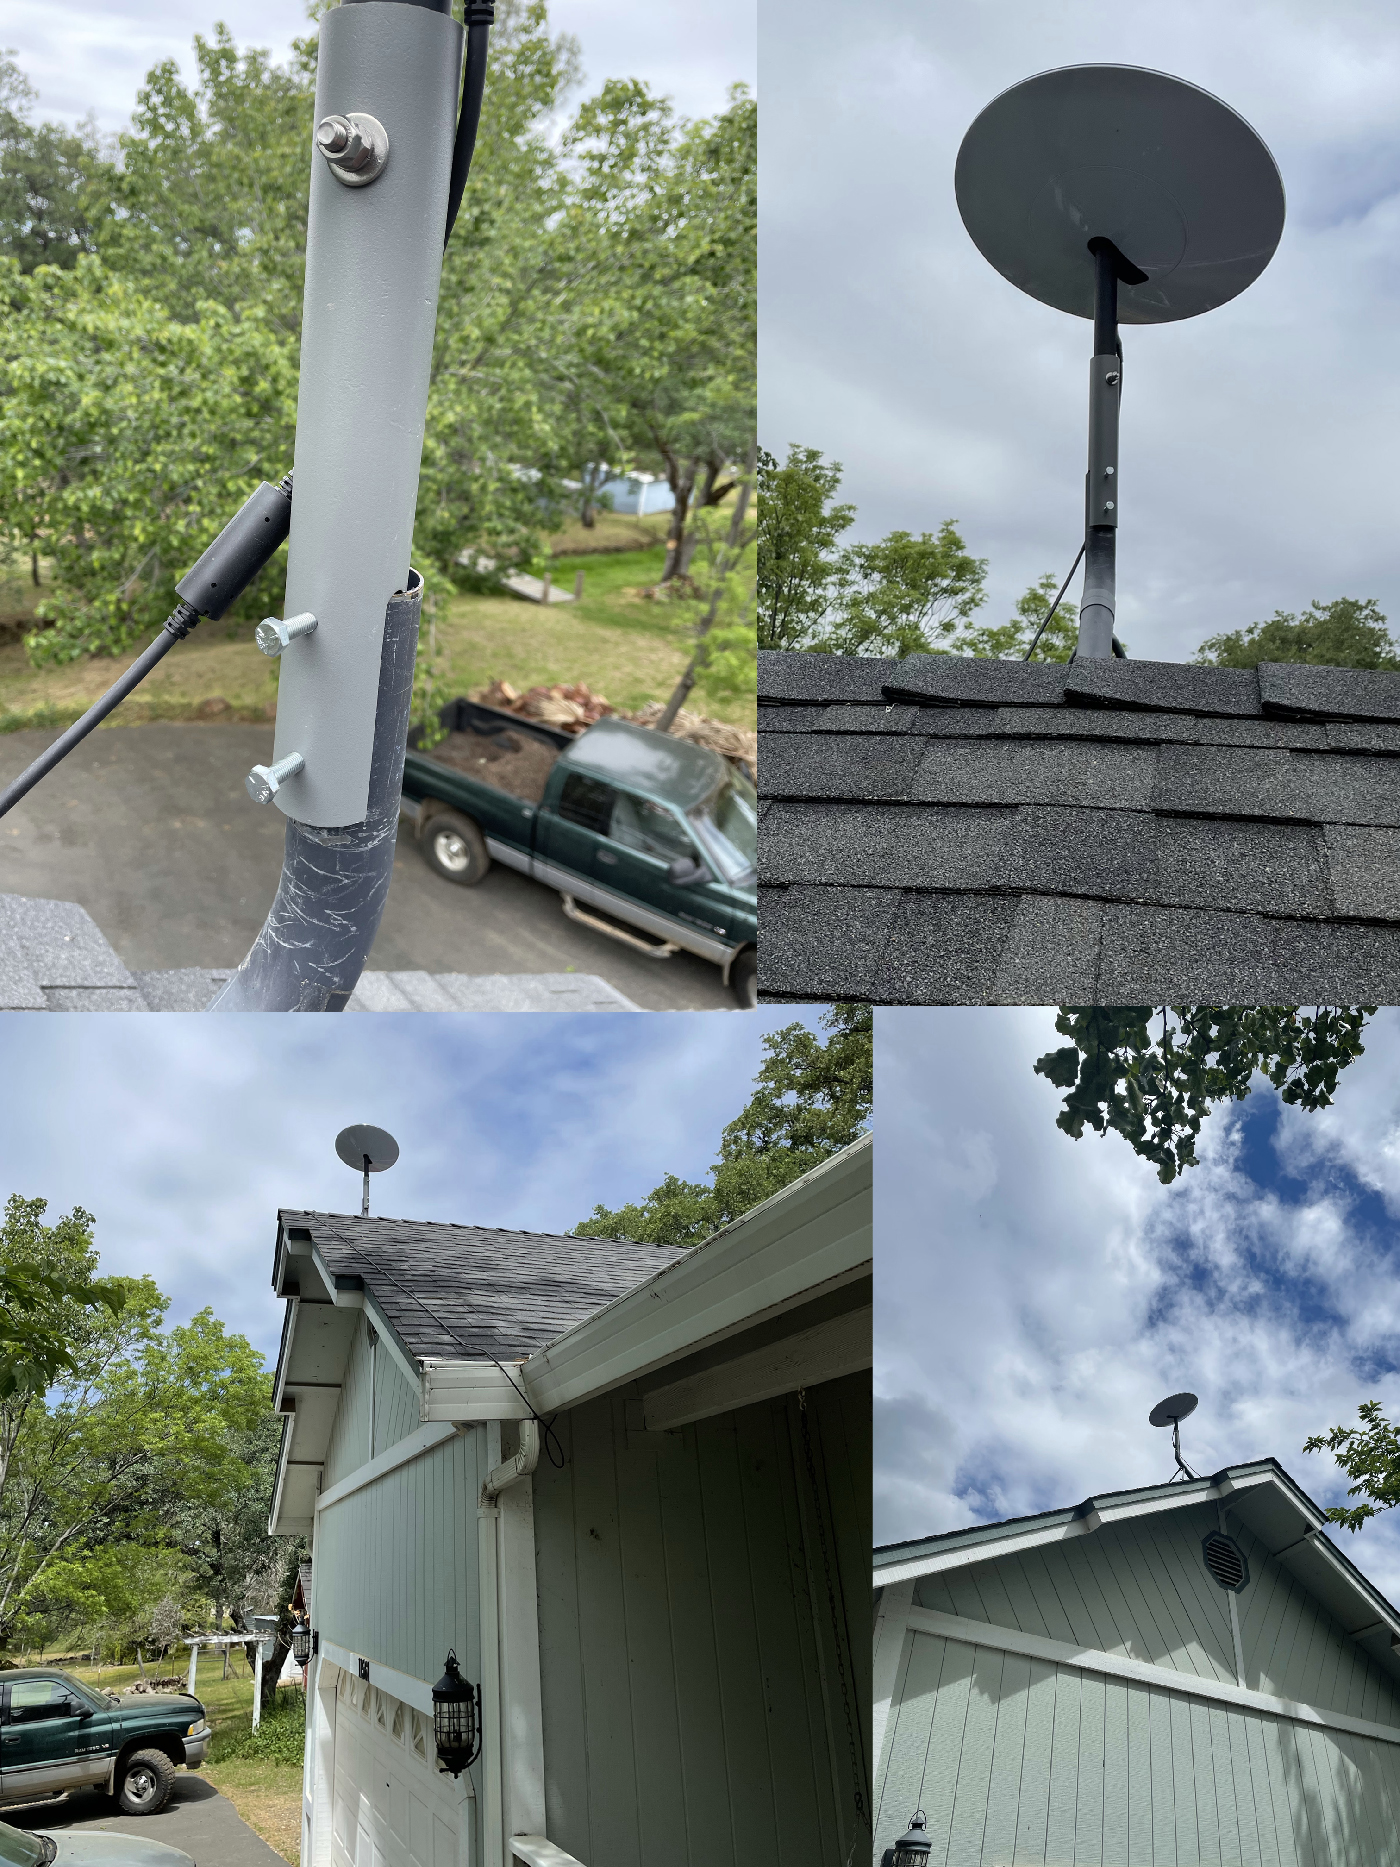
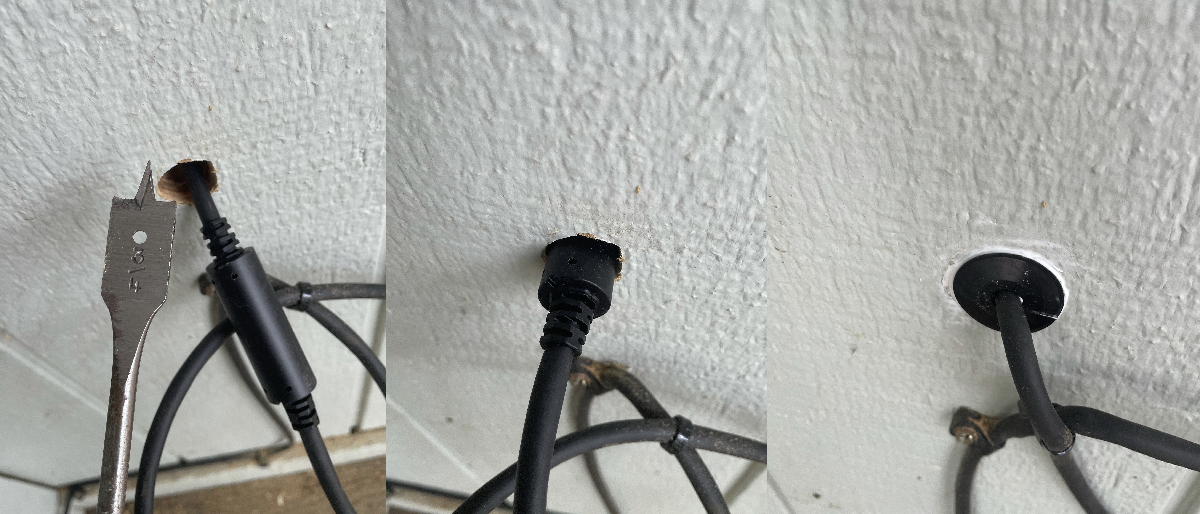
Fortunately, we’ve had a previous satellite dish (ViaSat) installed and mounted right in the “sweet spot” on our roof and a fairly close cable run into the house where my office is located. I can utilize the existing roof tripod from the old system as well as the cable retaining hardware so I don’t have to put any more holes in the roof. The only real (kinda) challenging part was drilling a larger hole in the wall and sealing it up as the cable is not detachable and CAT6 isn’t easy to splice unless you have the proper tools and know-how. I don’t have either. And it would undoubtedly void any warranty.
What’s in the Starlink Beta kit?
The Starlink Kit includes everything you need to connect to the internet including your Starlink Dish (aka “Dishy McFlatface”), WiFi router, power supply, cables and mounting tripod. The mounting tripod is designed for ground level installation, or to support a quick start setup to test your internet connection. For users that require a roof install, roof mounts are available by signing into your account – in most cases. Once I paid for my kit I was also able to choose from a couple mounts, or a “Pipe Adapter” to mount Dishy to an existing satellite dish tripod mount (as was our intended location).
Sadly, the kit came but no Pipe Adapter and it was marked as “Pending” on our order. A couple email contact to support and you’ll learn what I did instead below.
Installing “Dishy” – It’s easy, right?
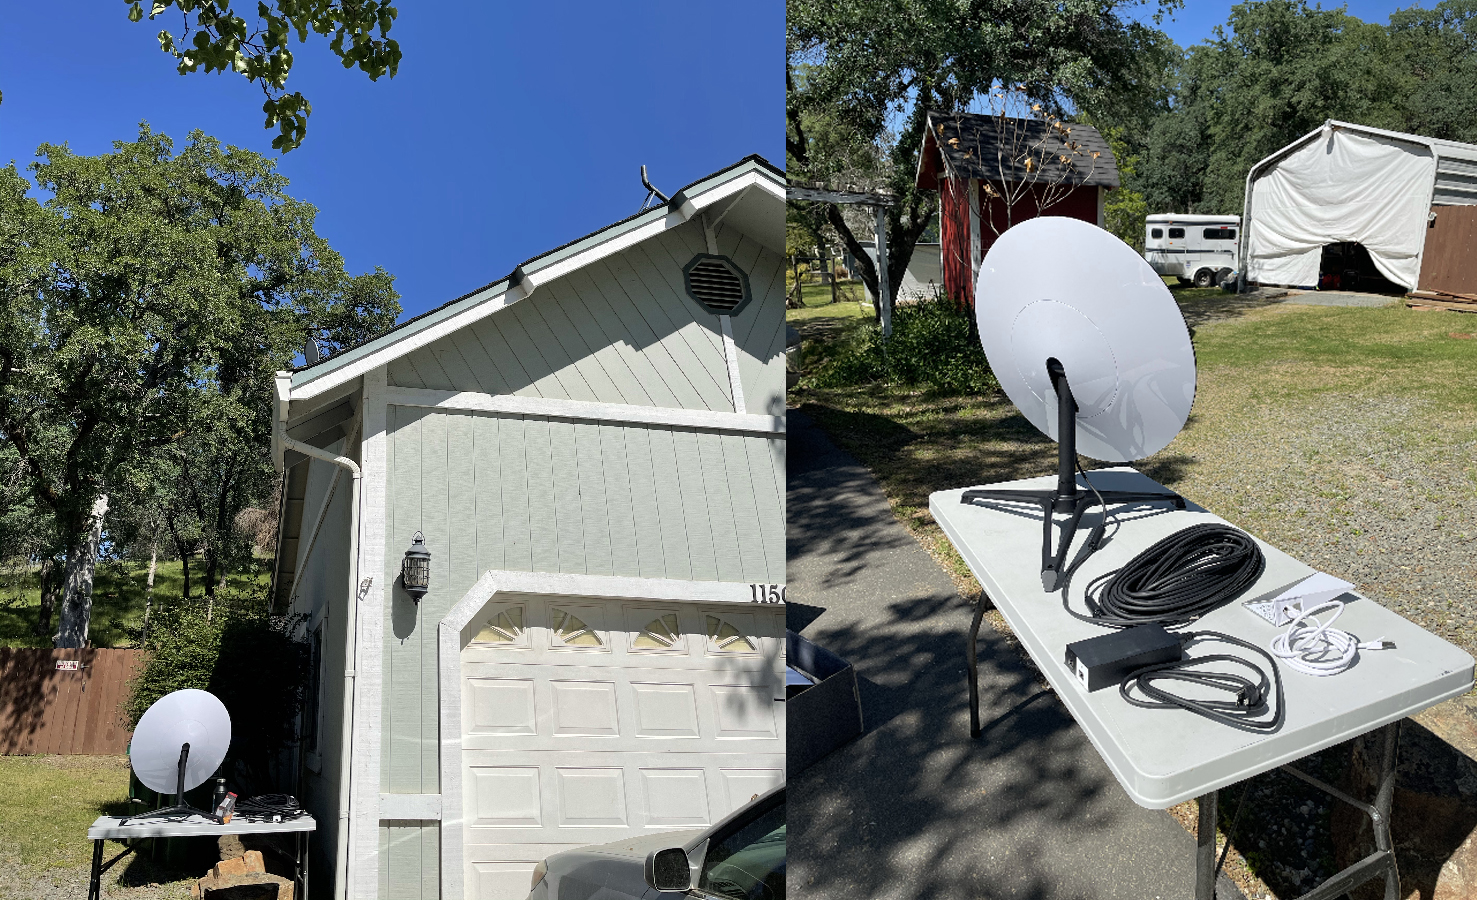
Actually – the whole kit is literally plug and play. I set my Dishy on it’s included stand on a folding table and ran the cable up through my office window to plug everything in and test it out.
After taking it out of the box and plugging everything in, I was online and getting a signal in minutes. As suggested, you should try to do a “ground test” first and make sure that everything is working and your devices are communicating well. I actually let my setup like this for about a day or so before I did my final installation. Not because I was lazy or afraid to get up on the roof (well, I’m old and it’s been awhile), but mostly because I was wondering when I might be getting my missing pipe adapter and had to order a different one off Amazon.
During this time of getting initial numbers and readings on my iPhone app, I could tell I had way too many obstructions from the trees around our house to get a constant signal. I couldn’t wait to get everything I needed so I could install it on the roof!
Before taking the time to climb up on your roof and start drilling holes willy-nilly, it’s important to know several things first about your location and where you plan to install it.
Where you plan to install your Dishy, know that it needs to have as much open sky in the North as possible to have as much contact with the Starlink satellite mesh. I’ve been using this cool Starlink.sx online tool to track satellites for awhile as I awaited my kit and it seems to just get better with time as the satellites continue to fill-in gaps in the mesh as they reach their final orbit altitude.
While in theory, this data could be especially useful in seeing how connected your location might be to both satellites and their associated ground points, given you live in a perfectly clear open sky horizon with no obstructions (trees, buildings, etc.) but being that we’re on a southwest facing hillside with lots of old growth oak trees, we’re getting only about 80% of what’s shown in this data simulator. Here’s a time-lapse version I recorded just under an hour. *NOTE: The green dots/lines are Starlink satellites and the orange dots/lines are the connecting ground points:
For the average rural installer, you’re most likely going to put your Dishy on the roof of your home or a very close barn or building roof. You can’t install it on the side walls or a tree, as Dishy needs to be able to have full 360º rotation and unobstructed view.
As you can see by this iOS App screenshot that most the satellites look low in the horizon, which is because the mesh hasn’t been expanded further south in our hemisphere yet but more satellites will be added periodically and that area of sky will be more populated eventually.
Here’s a great video that a beta user and popular tech YouTuber Jeff Geerling made during his rooftop installation. It was really helpful in noting the obstacles one might find during installation (also quite humorous), but also helped to be prepared to drill a big hole in your wall! (At least mine wasn’t brick or concrete).
Mounting Dishy on the roof:
As mentioned above, we were supposed to also receive a universal “Pipe Adapter” kit that I ordered in addition to the Starlink Dishy kit, but got a notice that it would be at least a month or more before they could get it due to a backlog of orders from their source supplier/manufacturer.
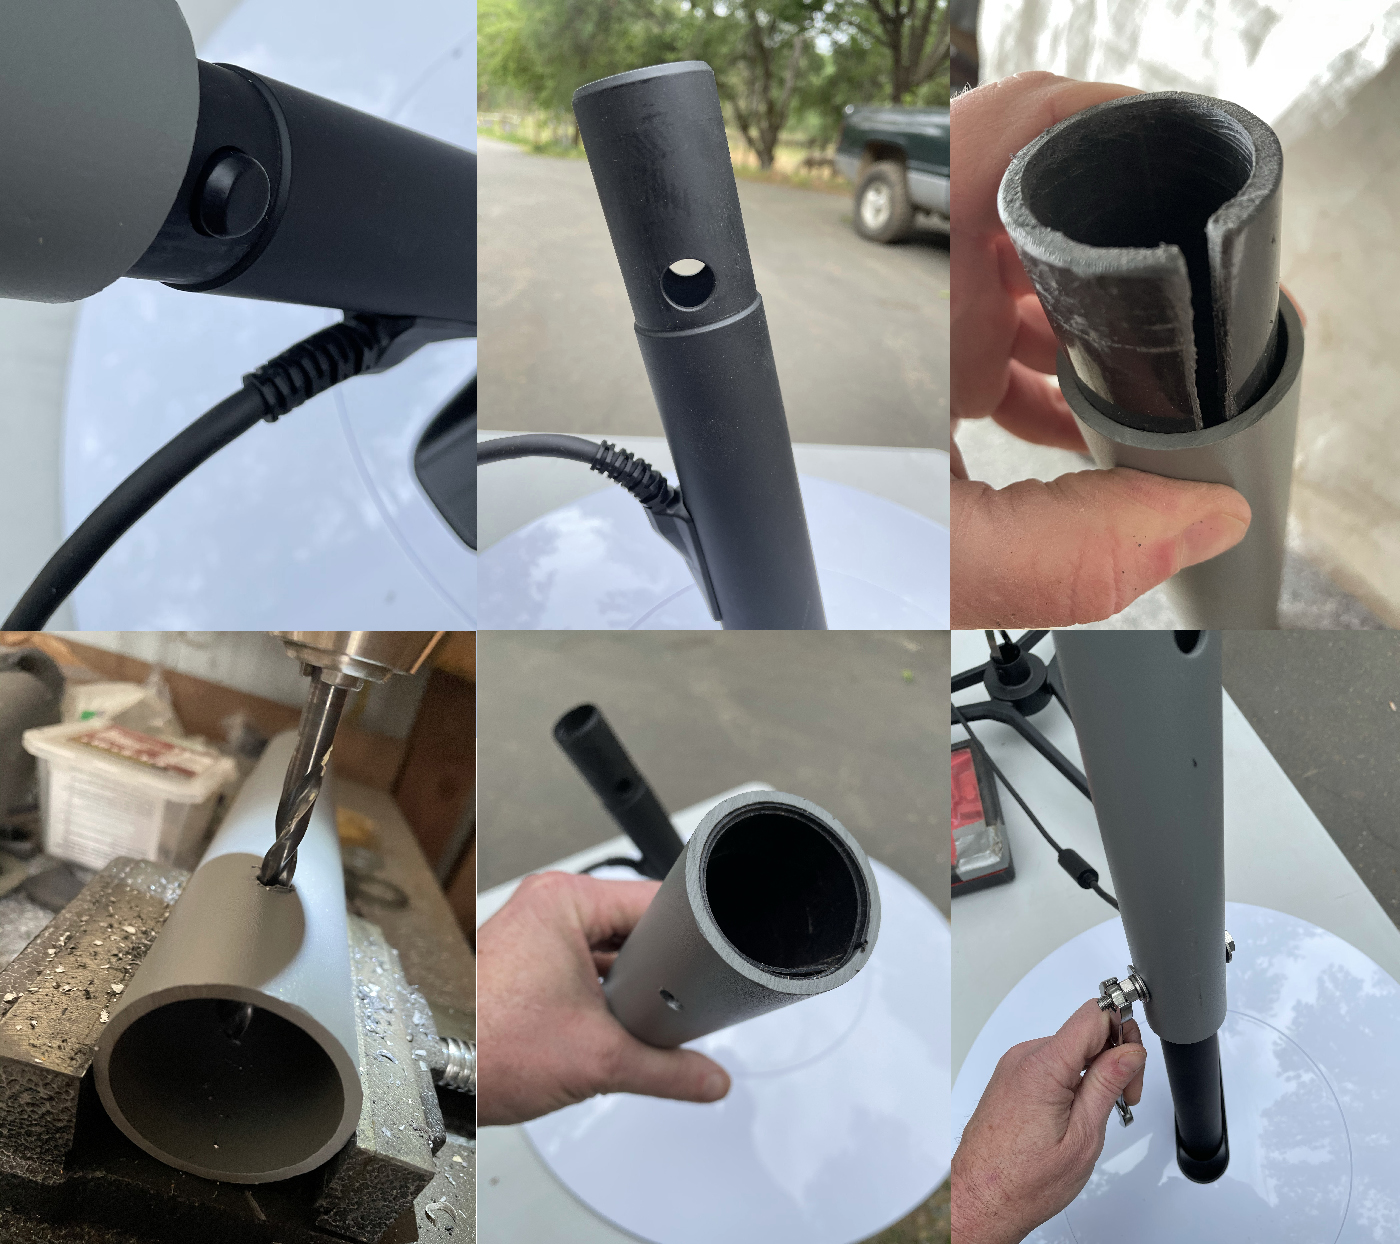
So doing some more snooping online, I ordered an alternative pipe mount adapter and modified it to work with our existing roof mount and the Dishy base. I really think this is way more solid than their custom “clip-in” support for the dish anyway.
It did require a little drilling on the pipe adapter, and you can see that I removed the spring clip from inside the dish base and bolted the two parts together with some plastic shims to hold everything square and in-place. I started with a press-fit piece of ABS pipe that I slit and squeezed to fit in as a “stop” for the Dishy mount base. Then I rolled up some fairly rigid ABS plastic sheeting and drilled out the clearance holes for the Dishy base mount to be attached and secured.
Once I had my modified mount attached to Dishy, I was off to challenge myself to get up on the roof and try not to think about the 24′ drop off the edge to the driveway below.
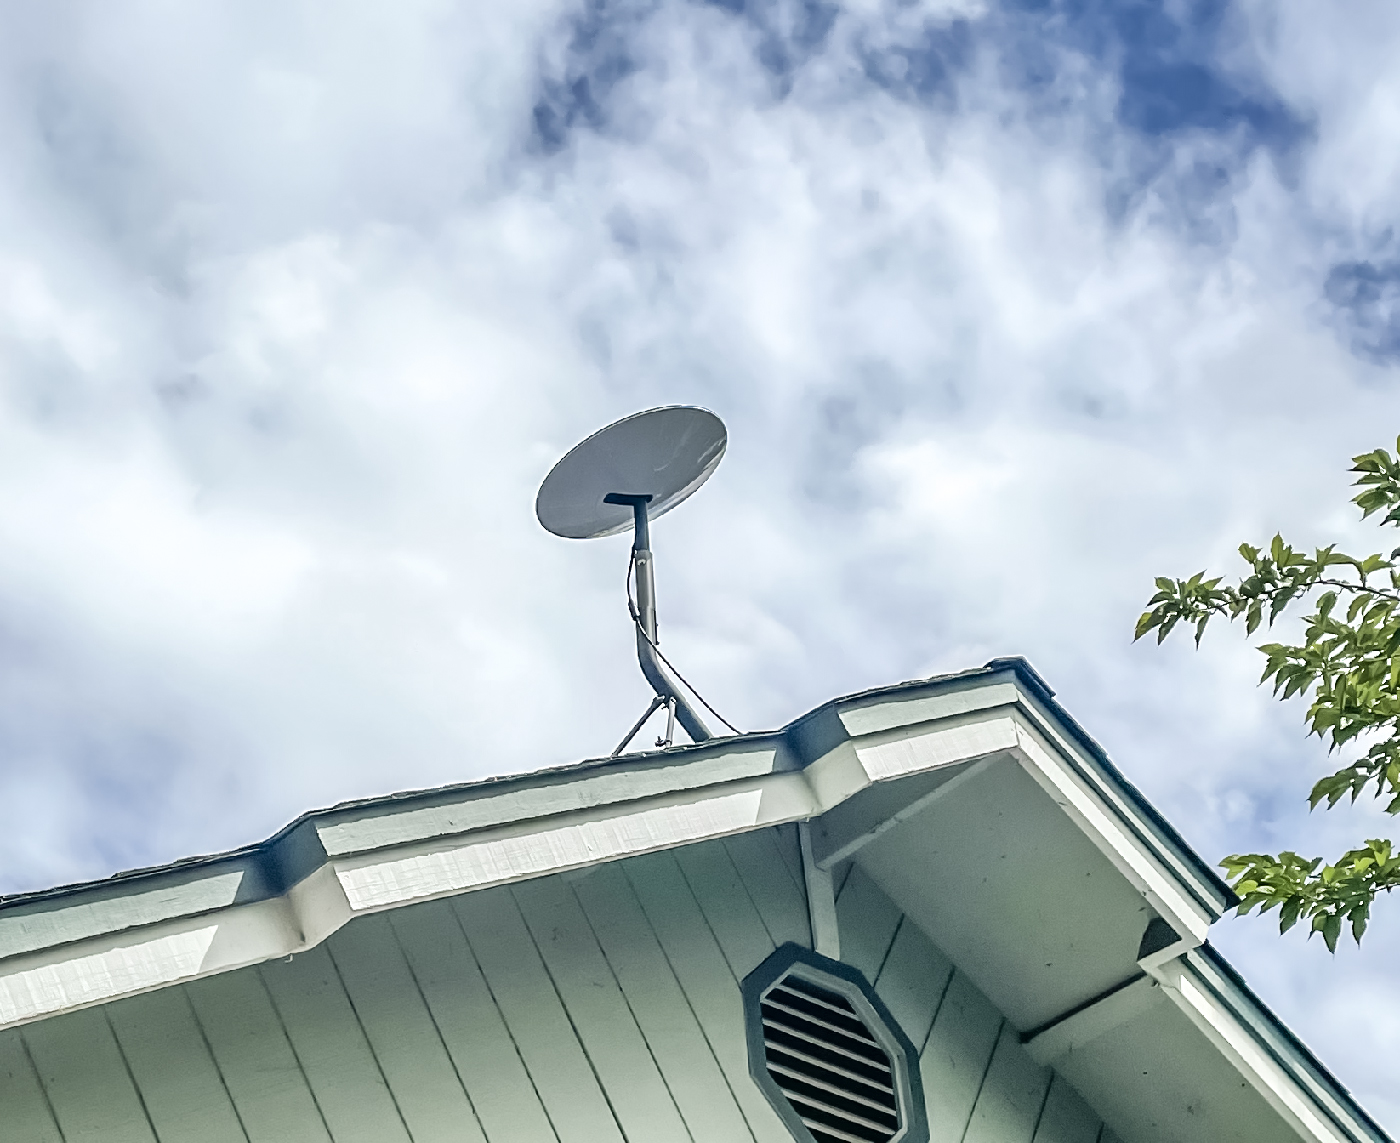
While it’s not the neatest installation, I literally used the exact same mounts along the roof that the previous Satellite installer put in to avoid making more holes in the roof. Yes, I thought about running the cable over and down under the eaves but I don’t have a 24′ extension ladder that would reach from the front (not that I’d actually climb up it anyway!)
I did have to expand the hole in the wall going into my office due to the CAT6 connector and dongle which took a 3/4″ drill. I slit the existing cable grommet so I could twist it onto the new cable and sealed everything up with caulk.
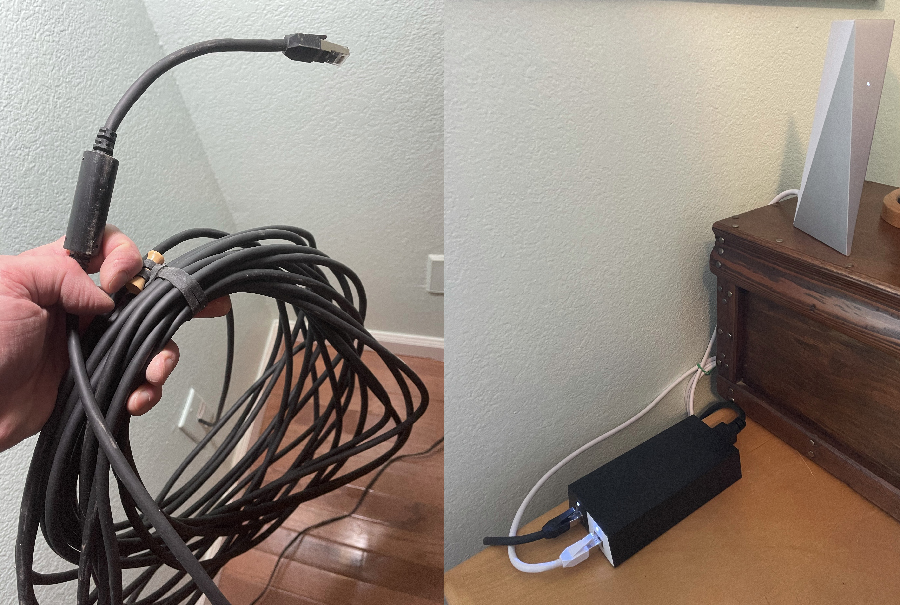
Also, because the cable is fixed to the Dishy and 100′ in length, all that extra cable has to be gathered up and stuffed inside somewhere behind/under where you’re setting up your router.
I’m currently using the router that came with the system but will be replacing it with one of my other stronger multichannel routers and eventually switch over to our mesh WiFi that our existing network is connected to so it will cover the entire house and shop areas better.
Initial Results & Testing
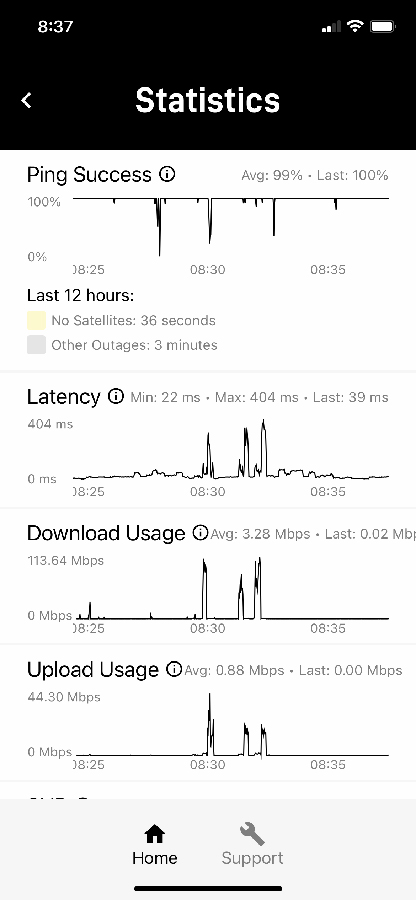 I’m still running our old network/service here through the next few months until we see 100% connectivity and solid results in our Starlink service. I do have my work computer and my mobile devices and our TV all on the Starlink network currently and I do experience a few slow-downs or time-out glitches occasionally, but quite frankly I hardly even notice anything at all. Other than downloads seem faster and I can actually log on to our VPN servers at work and transfer files that I’ve never been able to do prior.
You can see by this screenshot that there are a few seconds each day (accumulated) there are no satellites in range, which I mentioned will change as more get added to the Starlink satellite grid/mesh.
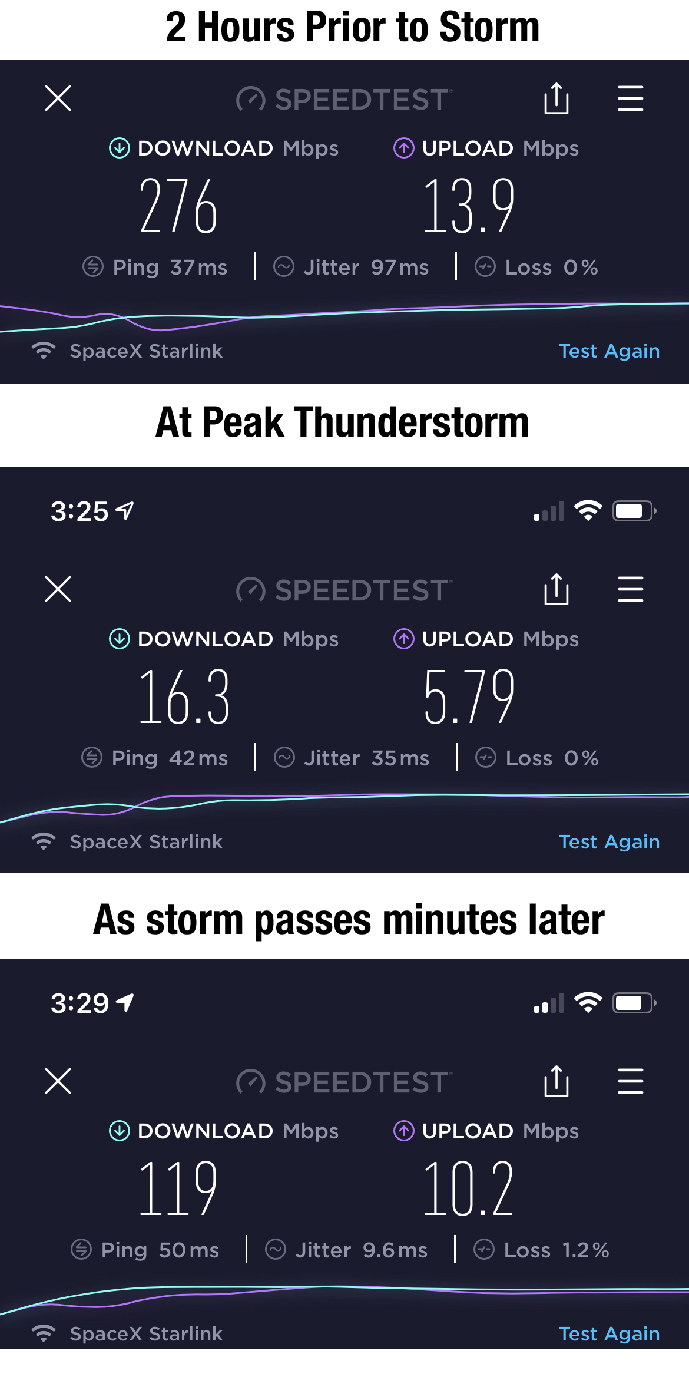
One question that is often brought up – and for good reason – is what happens if you have a thunderstorm or snow? As luck would have it, we had a big rolling thunderstorm come through the day after I installed everything and I checked out the speeds during the event. You can see there is a significant drop in speed both up and down, but it is still faster than anything else we’ve had. In fact, with our old ViaSat network, it could be a clear sky here but the downlink being near Chicago, IL, if it was stormy or snowing there, we would have NO SERVICE AT ALL!
Moving forward…
My next installment will be all about performance and benchmarking in real-world situations, such as file sharing, VPN download/upload, Frame.io access, etc. I’m committed to this program as a rural resident and content producer, because so many folks like me either can’t afford to live near a metropolitan area or just sick of the rat race (or both, as in my case). I’ll also expound on the truths vs fiction about “space junk” that is associated with this program.
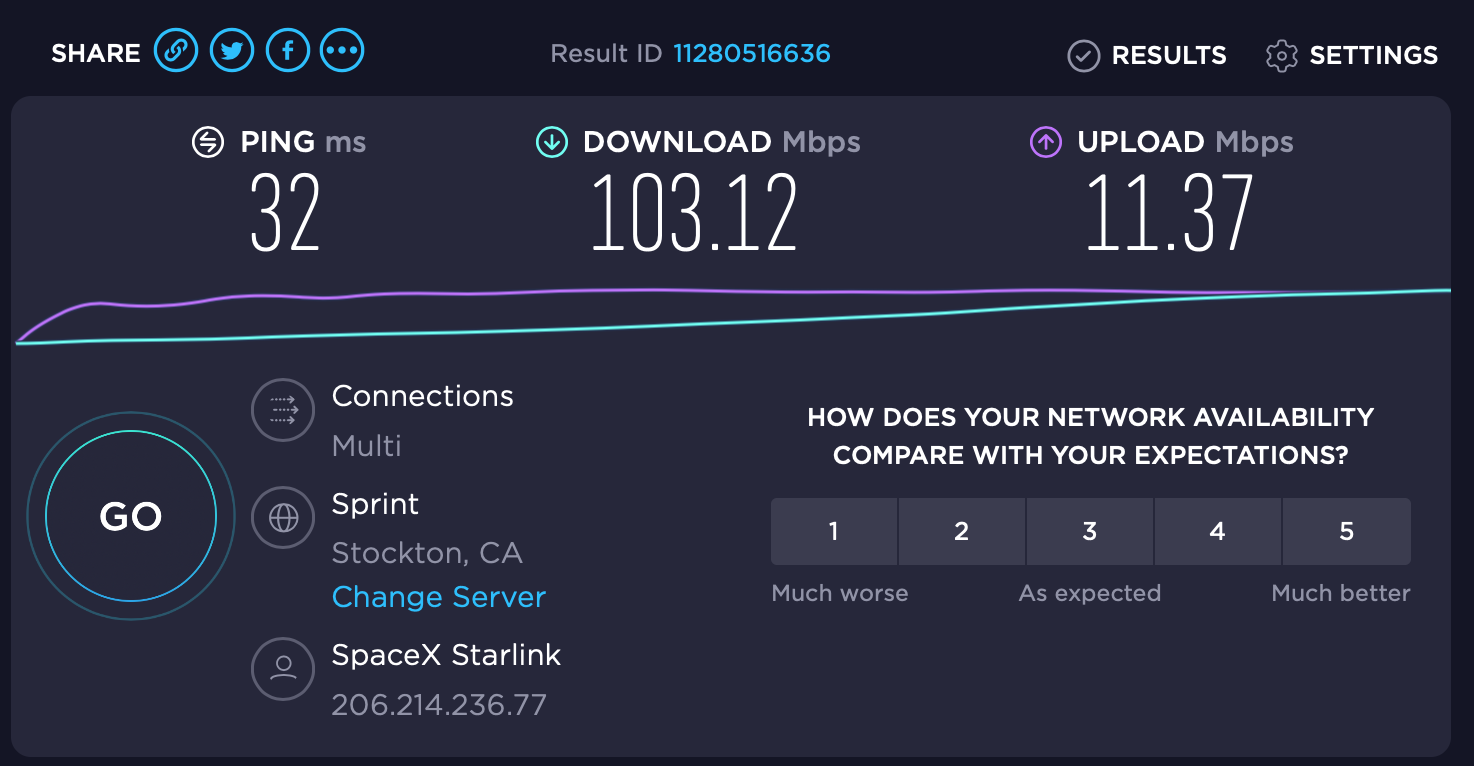
Also – new features enabled as we move forward such as the ability to be fully mobile with Dishy as so many of my colleagues and friends have inquired, but hopefully enable soon!
Stay tuned…

Filmtools
Filmmakers go-to destination for pre-production, production & post production equipment!
Shop Now