It has been estimated that virtual production and remote post production has advanced 5-10 years more than expected due to the pandemic. Many of us around the world continue to work remotely and for some it has become a new way of life. Some people have left the major editing cities like LA or NY or London for a quieter life and taken their clients with them. So there’s been a lot of discussion online about presenting your edits to collaborators.
While many swear by asynchronous notes on frame.io (purchased by Adobe this year) or Vimeo/Wipster/Dropbox/Kollaborate/Screenlight, there are times when you want to jump on a video call and look at the cut together. At that point you can find that simple screen sharing can let you down pretty quickly in terms of quality or keeping audio/video sync.
Hardware
A lot of editors have already set up their system with an HDMI output that feeds a viewing monitor or TV. Personally I have a little Blackmagic Decklink card to do just that. There are various bits of hardware that can take that HDMI feed and turn it into a virtual webcam (i.e. something that can be selected as the video source in Zoom). The Blackmagic Web Presenter & the Elgato Cam Link 4K are both pretty popular. I use the Cam Link and have it looped back – i.e. Deck Link > Cam Link > USB port and it works well.
However, the same end result can be achieved with the free NDI Tools for Premiere and Final Cut (as well as After Effects). Avid has NDI built in (see this guide) and Resolve users will have to stick with the hardware for now. NDI is a video over IP protocol – i.e. sending video over your local LAN or over the internet, focusing on high quality and low latency. Very clever things can be done with this in the broadcast industry and there are 3rd party hardware companies like Bird Dog working with the NDI protocol, but for now we’ll just focus on getting Premiere playing in your Zoom or Skype call.
NDI Tools Setup
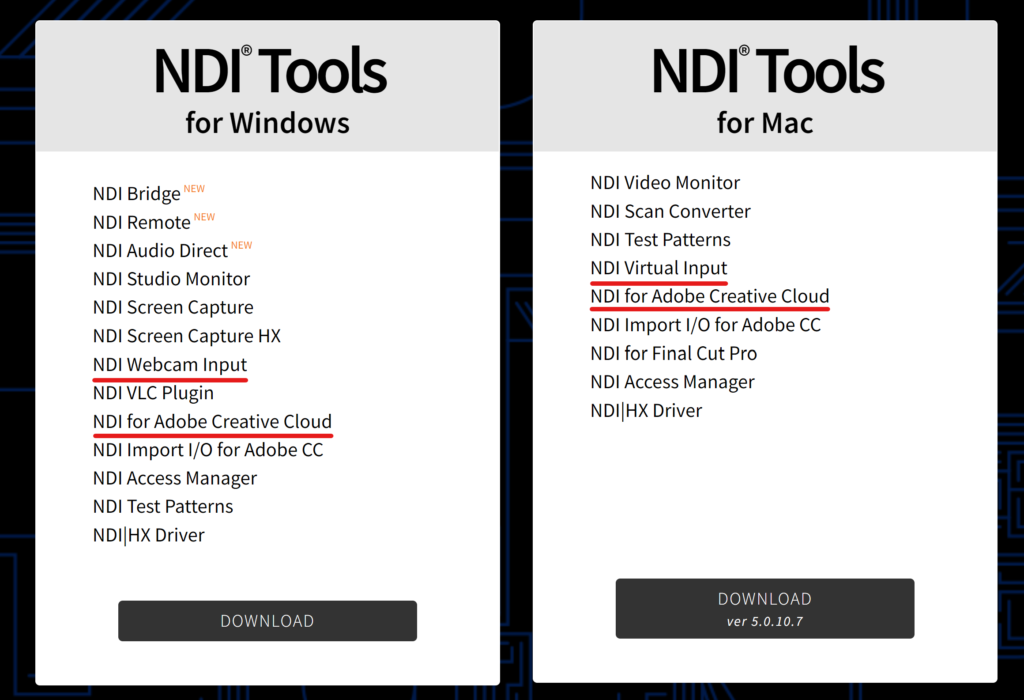
If you want to give it a go, head to https://www.ndi.tv/tools/ to download the installer for Mac or PC – once registered, you’ll get a download link via email. Once you run the installer, you’ll have the full range of tools, though it’s really just the Premiere plug-in I’m looking at here, with it’s accompanying webcam tool (called Webcam Input on Windows and Virtual Input on Mac).
Checking the install
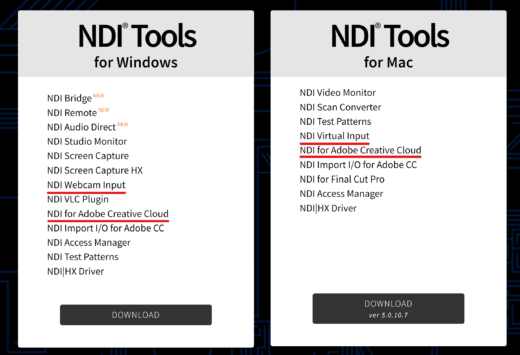
If you want, you can verify that it’s installed the Premiere plug-in by checking in:
Windows: C:\Program Files\Adobe\Common\Plug-ins\7.0\MediaCore\
Mac: /Library/Application Support/Adobe/Common/Plug-ins/7.0/MediaCore/
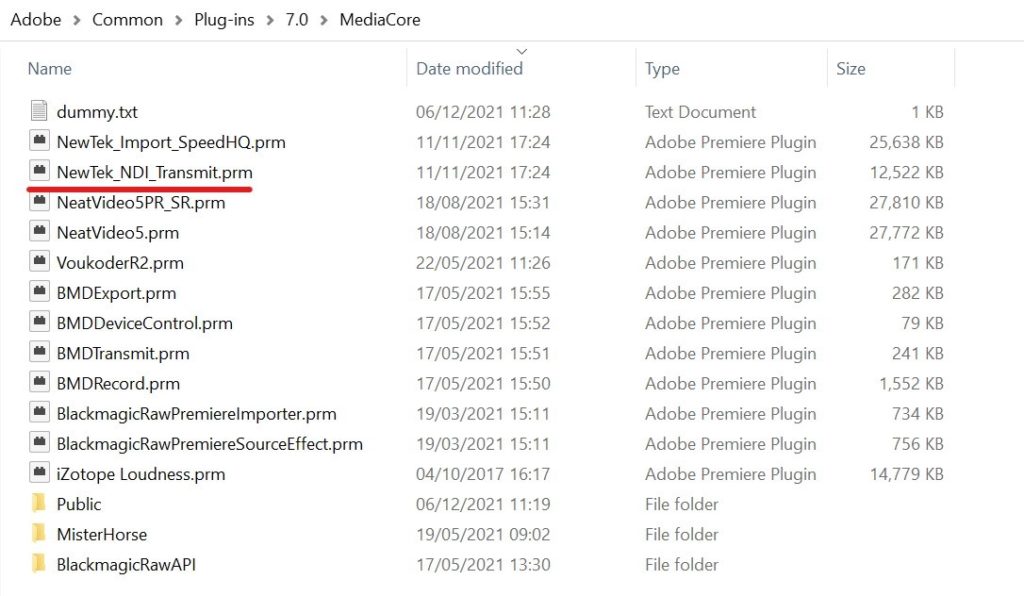
The installer should automatically run the NDI Launcher, but if it doesn’t, you’ll find it in the relevant Program Files (Win) or Applications (Mac) folder. If you click on the Premiere plug-in here, it simply gives you some instructions to set up Premiere correctly, which I’ll cover below.
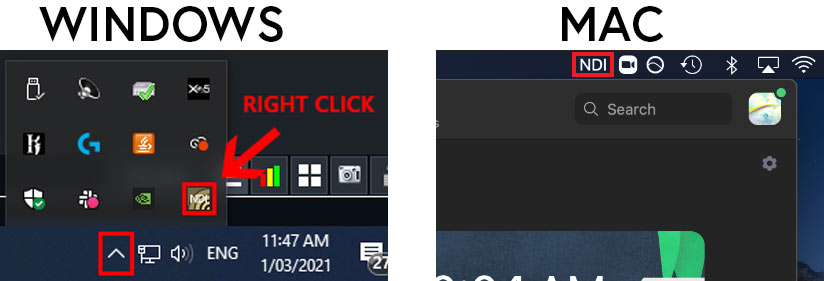
What you should do though, is check that the webcam application is running (again “Webcam Input” on Windows and “Virtual Input” on Mac – in Windows it will sit in your taskbar and on a Mac it sits in your menu bar at the top.
Premiere setup
The setup in Premiere is fairly simple. Go to Preferences>Playback and choose NDI as the audio and video output and make sure Mercury Transmit is enabled.
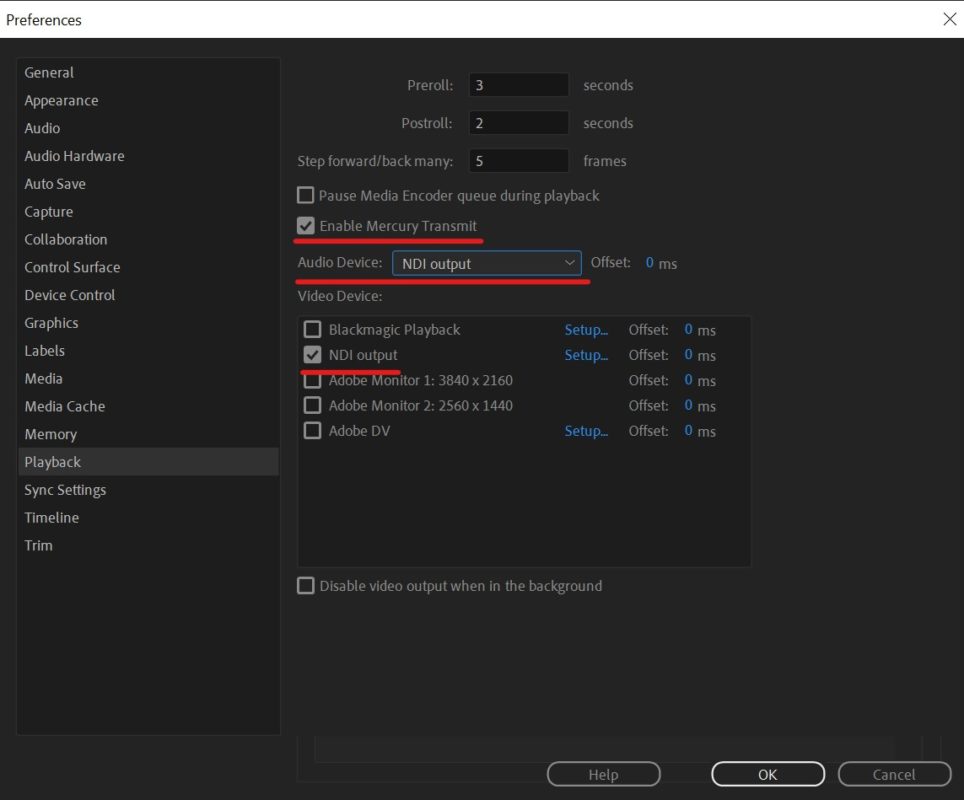
A big change with version 5 of NDI Tools is that you now hear the Premiere playback audio on your computer as well as transmitting it over Zoom, which wasn’t the case with version 4.
Webcam setup
Now you need to right click in the Webcam Input (Win) / Virtual Input (Mac) and choose the source as Adobe Premiere Pro. The default settings for Audio and Video should be fine.

Zoom setup
Open up Zoom and select NDI as your video and audio source. This can be done in Settings before starting a meeting or changed at the bottom of the meeting window (though using this method I found could freeze up the video feed).
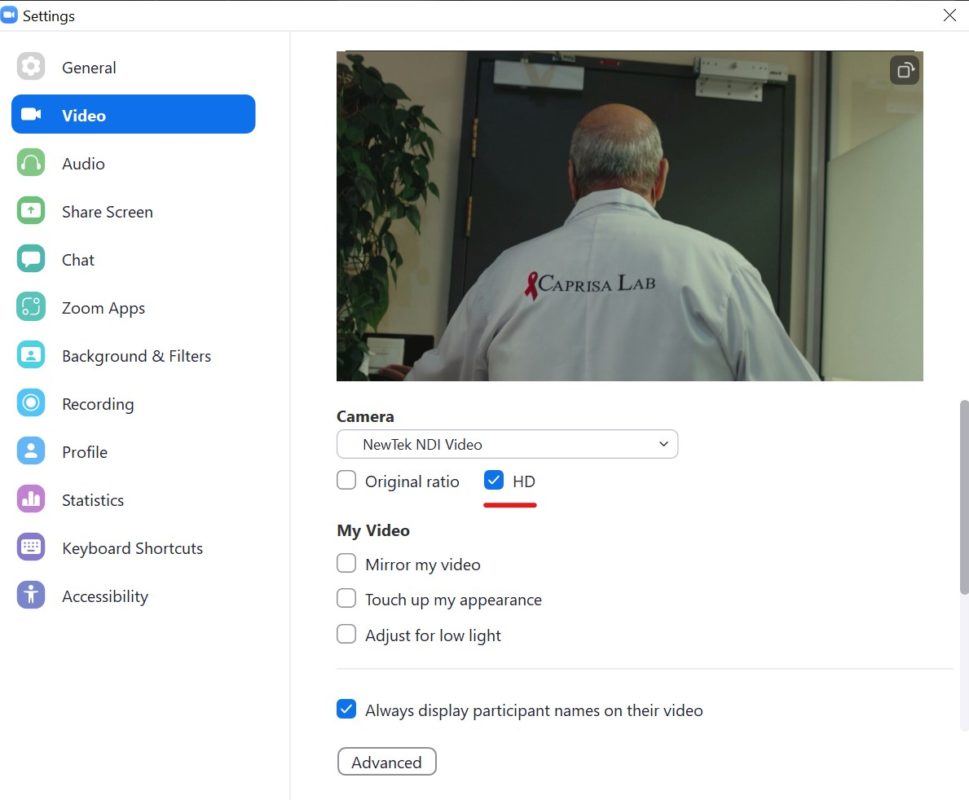
You can also enable HD in Zoom, so that it will transmit 720p (with lots of caveats) or even 1080p on a business and enterprise plan. This is why I’ve left the NDI webcam set as the default 720p. Make sure the other checkboxes are un-ticked.
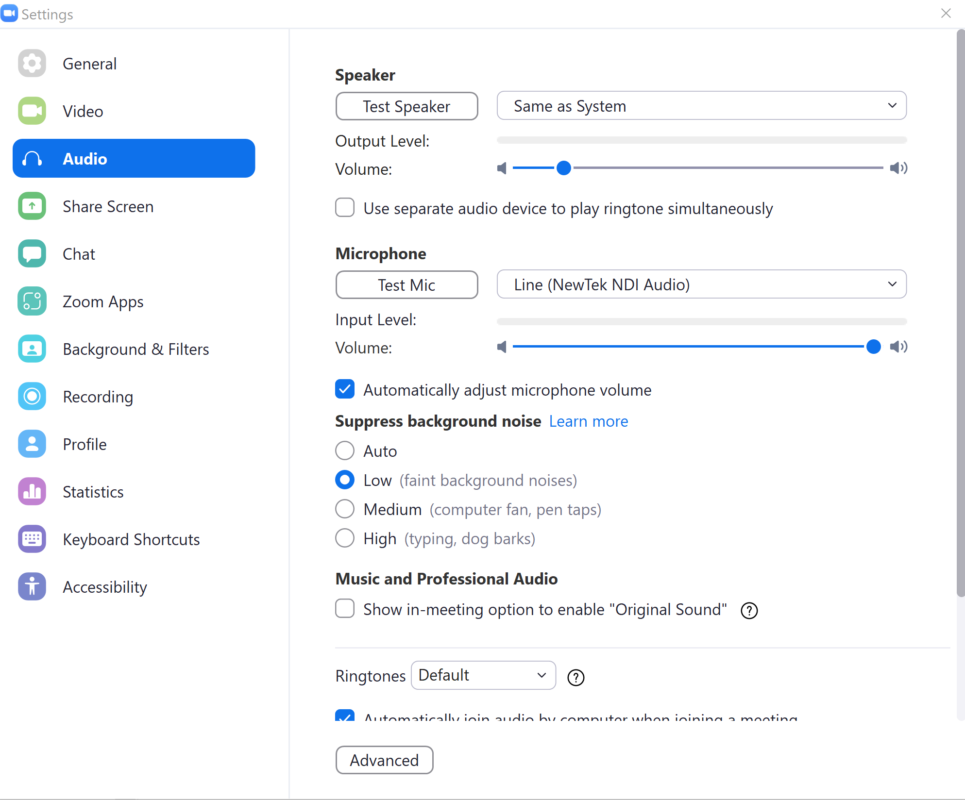
I would test all of this before using it in anger – just set up a Zoom meeting and then join it on another device and check you are getting the video and audio coming through. And by the way, this all works in Skype too.
Video review meeting
At this stage you’re ready to present your timeline, but as Premiere has taken over your video feed, you need to find a way to make yourself heard. This can be done on the same computer if you’re feeling clever as shown by Sofi Marshall’s brilliant if very complicated blog for Mac. On Windows you need to route through OBS and use Virtualcam and VB-Audio (guide).
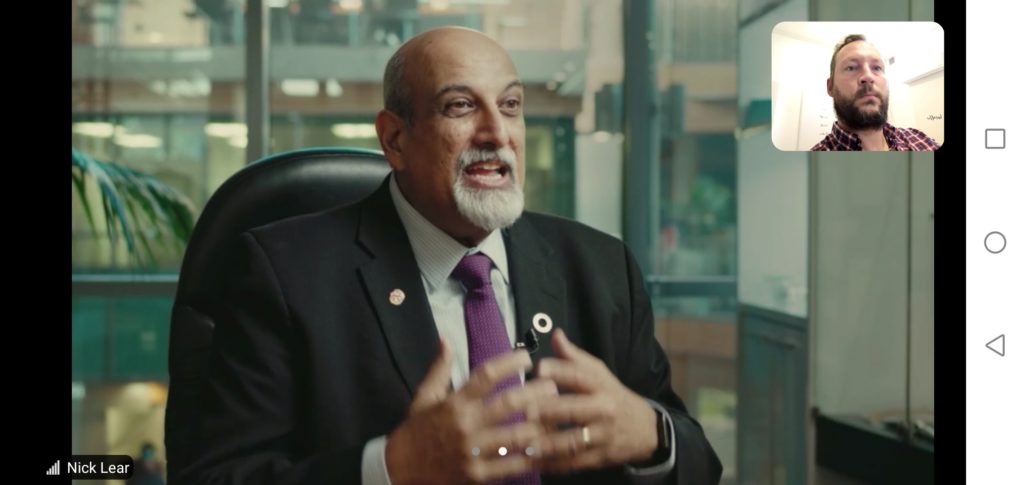
I have a simpler setup to avoid the complication of getting the chat working on the same computer – I just join the Zoom meeting a second time with a phone or iPad for me to talk and see the others.
Caveats
In the last couple of years, I have twice had a very crash-y day in Premiere that turned out to be due to the NDI plugin. If your computer doesn’t like it, it can cause problems. Currently v5 of NDI works pretty well on my main PC, though I’ve found sometimes the Premiere playback would hang and I’d have to restart the program. Basically you’re mileage may vary.
That said, if you are presenting your edit in meetings, this is a great option and free, so why not give it a try.

Filmtools
Filmmakers go-to destination for pre-production, production & post production equipment!
Shop Now