We’ve been working on a series for lynda.com on how to get the most out of effects in After Effects. As much as you may think you already know, nothing sharpens one’s understanding of a subject than preparing to teach it. One of the subjects we’ve had a chance to study is the usefulness in applying some effects to just the luma (grayscale) or just the color information in an image. Unfortunately, many effects (not to mention After Effects itself) operate on red, green, and blue color channels, rather than luma and color separately. But with a little channel manipulation, you can focus your processing to just the luma or just the color, sometimes with visible benefits.
More Sensitive to Luma than Color
Our eyes are more sensitive to gradations (small changes) in luma than in color. For example, take blurring just the color information versus blurring just the luma information in an image:

The original, unblurred image is shown at left. Below left shows a generous amount of blur applied to just the luma; the resulting image is unreadable. Below right shows the same amount applied to just the color information: Although there are some coloration around the fingers and stylus, the text remains readable.


Shocking, isn’t it? But once you know this little fact, you can use it and be more selective about your image processing. For example, lower end video formats such as DV have only 1/4 as much color information per line as luma information (for the very reasons explained above). This can result in visual staircasing or blocky edges on color keys, colored text against black or white backgrounds, etc. However, if you could blur just the color information (in a horizontal direction, as this color undersampling occurs per line) and leave the luma information alone, you can help hide some of these artifacts while maintaining apparent sharpness in an image. This is indeed how some DV-focused keyers work their magic.
Enough theory; let’s put this to work to improve the results of some common image manipulations, while also showing a couple of different effects stacks in After Effects that can help pull this off:
Example 1: Gamma Adjustments
We use the Levels effect all of the time to improve the contrast in an image plus alter its gray balance. By default, Levels works equally on the red, green, and blue channel. If you push it too hard, you can start to see some posterization in an image, even at higher bit depths:

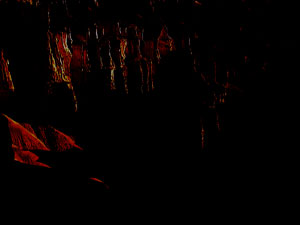
The original image is shown above left. Above right, we’ve applied a Levels effect and cranked its overall Gamma to a value of 0.15. Notice the posterized colors in the bright areas that remain.
Levels also has the ability to work on just the red, green, and blue channels individually. Plus, After Effects has a plug-in called Channel Combiner that has the ability to convert RGB color channels into either HLS or YUV color space. Convert RGB to YUV, and the Y (the luma) information now exists in the “red” channel. Effect just the “red” channel, and you’ll now be effecting just the luma information. You can then add a second Channel Combiner effect to the chain to convert from YUV back to RGB, allowing After Effects to properly interpret the final image:
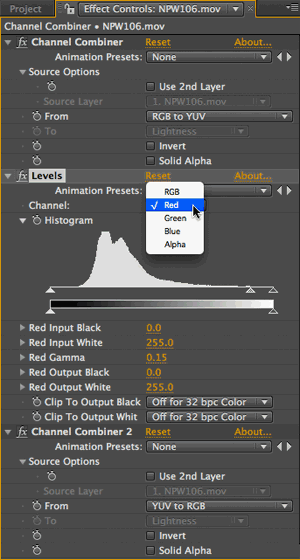
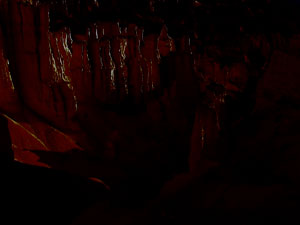
The Channel Combiner effect (left) is used to convert RGB to YUV. This maps luma – “Y” – to the red channel of effects such as Levels. Extreme gamma adjustments to just the luma information yields more pleasing results. (Part of this is a side effect of the RGB to YUV conversion placing Y’s low value at 16 and its high value at 235 to simulate internal digital video streams; to be fair, we compensated for this in the RGB example above – it looks even worse when you apply extreme gamma adjustments to a full 0-255 range image).
(Channel Combiner also allows you to convert RGB to and from HLS, but we’ve found this yields less satisfactory results than YUV processing.)
You can use this same idea to perform the color-only blurring mentioned above: Use the same pair of Channel Combiner effects, and in the middle replace Levels with Channel Blur. Blur the red channel to blur the luma; blur the green and blue channels together (maybe lock them together using the expressions pick whip) to blur just the color information. Set the direction popup to Horizontal to restrict your blur along lines.
Example 2: Sharpening
Speaking of blurring, the well-known Unsharp Mask effect actually works by blurring a copy of the image. This blurred copy is then inverted and mixed back in with the original, accentuating the contrast at dark-to-light transitions such as edges of objects. Our brains perceive increased contrast as increased sharpness. However, if you push this effect too far, the blurred color information can result in color shifts and halos:


The original image is shown above left. Unsharp Mask with a high Radius setting (amount of blur or “unsharping”) is applied to the image at right. Notice the cyan halos around the yellowish staff and turban.
To avoid these halos, Photoshop power users convert the image into LAB color space (akin to YUV), and sharpen just the “L” – luma – channel. These trick is easy to simulate in After Effects: Follow Unsharp Mask with the Channel > CC Composite effect, and set its Composite Original popup to Color. This says to use the color information of the original image, and the luma information of the effected image. Note below how the color halos have disappeared:
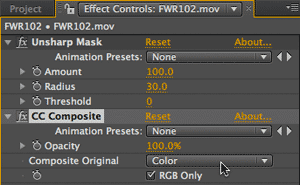

Given this improved result, you might want to save yourself time in the future by creating an Animation Preset of this effect stack, and apply this preset instead of the Unsharp Mask effect in the future.
Coda
We’ve only just scratched the surface of the benefits that may be had in focusing effects to alter just the luma or color information. We encourage you to experiment yourself – and to share your results!
In the meantime, you might want to watch the videos we created on lynda.com for Channel Combiner, CC Composite, Unsharp Mask, Channel Blur, and other similar effects. (If you’re not already a lynda.com subscriber, click here for a free 7-day all-access pass.) We intend to keep adding to this Insight Into Effects series as we have time, uncovering more ways to use effects more…effectively.
(For more on color representations, including RGB vs. YUV (YCbCr), HSL/HSV, and CMYK, try this excellent article from Colgate University.)
The content contained in the CMG Blogs and CMG Keyframes posts on ProVideoCoalition are copyright Crish Design, except where otherwise attributed.

Filmtools
Filmmakers go-to destination for pre-production, production & post production equipment!
Shop Now


