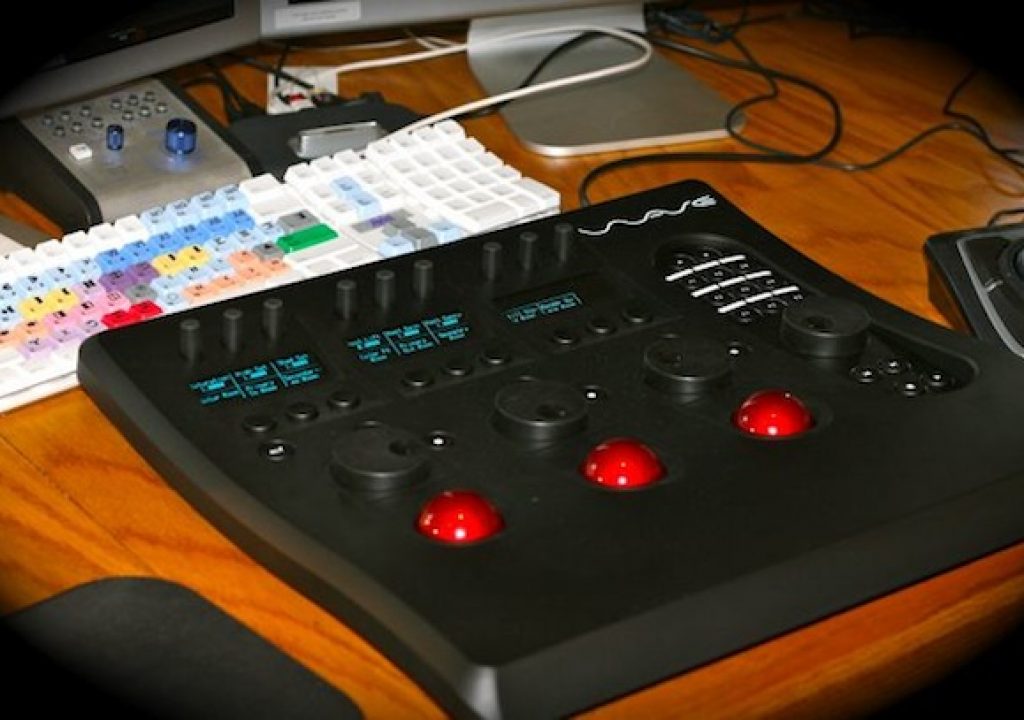
I had a small wave of sadness come over me the other day as I boxed up the Tangent Wave control surface in order to return it back home to Tangent Devices in the UK. As I saw Color’s dark gray interface and colorful video scopes shinning in the back of the room I thought to myself … “I’ve had my problems with you Color, I’ve said some pretty mean things about you in the past but I have to admit, I’m going to miss you Final Touch Color.”
No, I’m not uninstalling the application or moving exclusively to another application for grading purposes, I just don’t want to set foot in any of Color’s rooms again without a control surface to work on. Is that snotty and elitist? Maybe. I would be willing to bet that the large majority of Color installs in the world that actually get used on a semi-regular basis don’t have a control surface with which the operator can interface with Color. I bet way more Color interaction in the world is mouse or tablet based than it is 3-trackball and twisty knob based. I don’t care. I don’t even want to go back to Colorista in Final Cut Pro … via mouse or a poor man’s control surface! The Tangent Wave has spoiled me.
 It’s not necessarily how much more productive a control surface can make you when working with Color, though it can make you much more productive. It’s more about how a control surface can make the application more of a creative tool in an artist’s toolbox rather than just a technical interface between the artist’s eyes and the canvas. In this case the canvas being your grading monitor. By comparison a mouse is so clunky as you have to click and drag from place to place to place. You have to constantly look back at the computer screen to see where you have clicked, how far you may have dragged and exactly where to go next. You have to hear the sounds of the clicks and keep constant pressure applied to the mouse (or trackball) as you drag changing a parameter. You can use the Apple Mighty Mouse scroll ball for some parameter changes but that’s still scroll, scroll, scroll. The new Apple Magic Mouse and its touch surface is a bit more useful in Color (stay tuned for a look at using this new mouse with Final Cut Studio) but it’s still nothing like the elegance of a control surface. And even if you use a stylus and tablet you are tweaking only one of the three main parameters at a time. Hardly efficient when you’ve experienced how a control surface works.
If you think about color grading in a sense of a rubber band stretched around three thumb tacks (as I’ve tried to illustrate below) it can help those unfamiliar with grading understand how a control surface can help. Credit should go to someone somewhere as I’ve heard the rubber band metaphor used before. It’s a great way to illustrate:
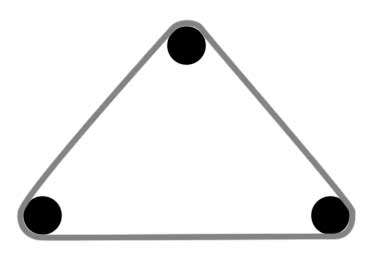
If you pull on one of the three sides of the rubber band it will also stretch or contract the other two sides, even if by a small amount. Every action has a reaction somewhere on the rest of the rubber band. Something very similar happens when grading but instead of a rubber band with three sides you have Lift/Gain/Gamma or Shadow/Midtone/Highlight. Just watch your waveform monitor and you can see this happen. Crank up the highs (the top of the waveform) via Highlight or Gain and you will see movements in the middle and at the bottom of the waveform. Often after “crushing the blacks” in an image, say via Lift, you will have to go back and re-adjust Gamma and Gain settings to get the image just right. It’s a very give and take type of relationship amongst all of the parameters you can adjust in a proper color grading application. If you think of grading as an art (and it is), say like painting, this is where a control surface could be analogous to the right kind of brush. The proper brush (mop, round, fan) will help the artist realize his or her vision in a faster, more realistic way. The same is true for a Color control surface. It frees your mind from the technical operation of the application and allows much more fluid input from the colorist, translating those ideas and artistic choices to the screen in an elegant way.
 Setup of the Wave is very easy since it is a USB connection and receives power through that USB connection. Download and install the appropriate Color plug-in and you get the Tangent Wave as an option in the Color control surface dialog box. I had my Wave plugged into a USB hub and it worked well. There was one instance where I hadn’t used the Wave for over a week and it took a couple of restarts of Color before it recognized the unit. There’s also a Wave user manual for Color available (pdf link) so you can give that a read to see all of the fine detail about the unit.
The Tangent Wave Hardware
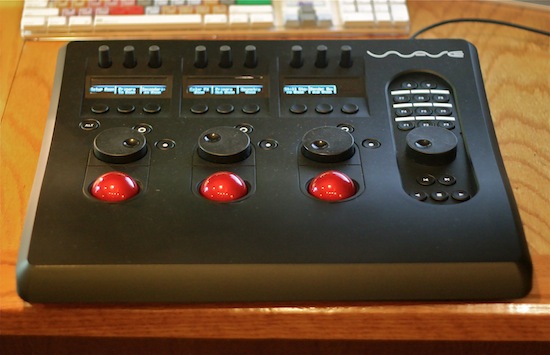
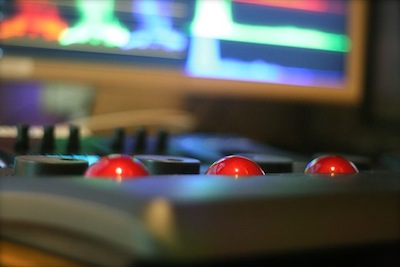
The main focus of the Tangent Wave are the 3 red trackballs (or trackerballs as the Tangent literature calls them) that dominate the rather large unit and correspond to the three color wheels in the different Color rooms. These three balls feel very much like billiard balls and once inserted into their spaces (see my earlier post on setting up the Wave) and move very smoothly and very easily. Gone are the mechanical, dust-collecting rollers that used to provide the movement for trackballs as the Wave uses optical sensors. They are well spaced and the three trackballs can be easily operated at once with a two-handed operation. A two-handed move where you can adjust all the trackballs at once is key to control surface interaction with a color grading app. You can make adjustments and see those changes in real time on your frame. No clicking, dragging or moving the mouse to a different parameter and changing it one at a time. Above each of the trackballs sits a rotary dial that is used for adjusting Shadows, Midtones and Highlights. The two buttons next to the dials are the reset buttons for both the trackballs and the dials. Above lies a horizontal row of buttons that by default corresponds to each of Color’s rooms. One press of a button will take you to each individual room. Above those are rubber covered rotary knobs that control various functions with each room and each knob includes a reset function by pressing straight down. The knob reset is really the only place where I saw an issue with build quality. On a couple of the knobs a slight jiggle or a less than firm push of the reset might register a tiny parameter change. You’re never going to jiggle the knob from side to side but you will use the reset function a lot. The right side of the Wave is a recessed area. The top two buttons are arrows that step through the “banks” for the knobs, meaning that knobs might have more than one function per room and to access the functions you change the bank. A good example of this is the Secondary room where the knobs mght access the position, size and aspects of a vignette window as well as the regular color controls. Below that lies 9 function keys that are user assignable. And below even further are transport controls for the Color timeline including a jog dial for moving frame by frame. On the left side of the panel is an ALT key that when pressed allows for an alternate mapping to the buttons. That gives you 18 function keys instead of 9.
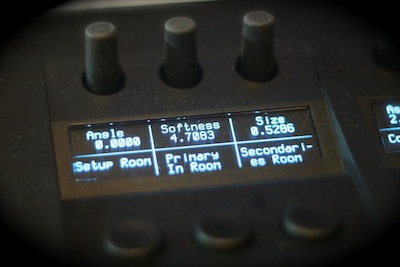
Operation and understanding of how the Wave works is quite simple with the blue OLED displays. They reflect the room and/or function of the knob or button they are above or below. Want to know what one of the rotary knobs or 9 buttons do? Just look at the display. It would be nice if the display could reflect which room you are currently in, say by having the name of that room in red instead of blue. That would probably require a different type of display which would surely raise the $1,795 cost. The 9 function keys have no display so you’ll have to settle for your own titles labeled onto a plasticy overlay. I might suggest using a small labelmaker to label your function buttons so they can be changed later. I found myself changing the F keys several times in the short time I had the Wave. At the end this is how my function buttons ended up (pretty much all remapped from the default settings):
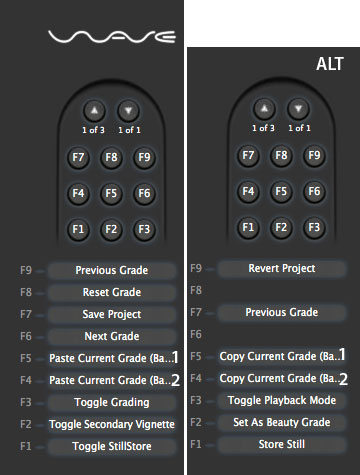
My custom mapping of the F keys using the Wave Control Mapper software
I found this little picture that I printed from screenshots of the Wave Control Mapper software a handy reference until I learned my function keys. The unit also includes a rubber wrist pad that can be affixed to the surface of the Wave in the area below the trackballs. It’s rather thin and isn’t made to elevate your wrists more than it is more to provide a little bit of padding and a different type of surface.
Mapper software makes the Wave even more functional
Like any good computer hardware input device with buttons and knobs, there is software that controls what exactly the buttons do. For the Wave it’s the Wave Control Mapper software. The main window of the software is an image of the Wave itself:
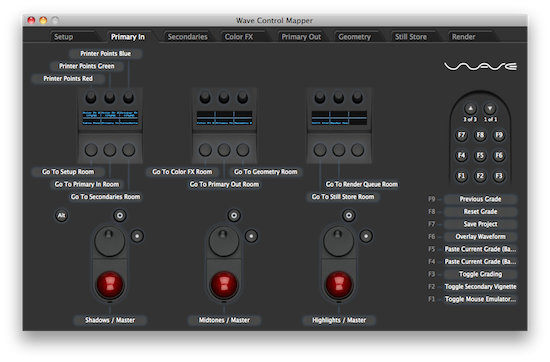
The Tangent Wave Control Mapper software
Click on a knob or button and you get a very long list for many of the functions in Color with which you can assign to a knob or button. There are tabs across the top of the Wave Control Mapper window for each room. It’s also possible to make a button assignment “stick” in all of the rooms with one assignment. Not every function in Color is assignable in the Mapper software but most all of them are. I found a couple of instances where the name of a function in the Mapper software wasn’t the same as the name under the Color menus, like Start Render was listed as Print Queue. A minor gripe sure but when the Mapper terms more closely match the phrases or menu items in Color is makes them way easier to find. At first I thought there was no Mapper equivalent to the Control+G command to Disable Grading (which I use a lot) until I realize it was listed in the Mapper software as Toggle Grading. Yes you are toggling grade but if Color didn’t see fit to name the command toggle grading then no one else should either.
Mouse emulation makes the Wave more usable
When the Wave is starting up you might notice the Firmware version listed on the display. This would indicate that the Wave is firmware upgradable in the future but expanded functionality is more likely to come in the form of software updates. One such recent update included a new Mouse Emulation mode. With this, a toggle of a button will allow a trackball of your choice to act as the mouse pointer and the reset buttons as mouse buttons. This is indicated by the word mouse on the display:
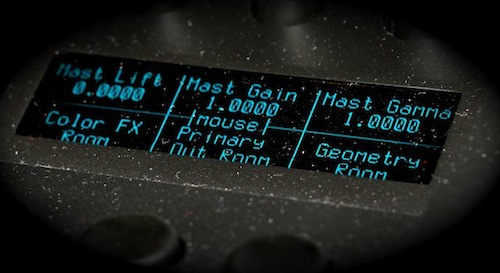
The Tangent Wave in mouse emulation mode
This mode can be useful if you use Curves as you can add points and manipulate the curves with the mouse mode without having to reach to another input device on the desk. The Color FX rooms is another place where this will come in very handy as that particular room is probably the most mouse friendly room in Color. It’s also very convenient to be able to jump into mouse mode when setting up a key in the Secondary room as that is a mousing procedure as you choose your key color with the eyedropper and drag handles to fine-tune your key with the HSL sliders. This mouse mode is a small addition to the software but a nice stroke of genius for the dedicated Color suite as it could collectively save a lot of time if you don’t have to reach away from the Wave to operate a mouse. Using the reset buttons as mouse buttons is a bit awkward and might require two hands so you probably won’t be doing a lot of Finder work with it but it is more than good enough to allow you to stay entirely on the Wave for most Color operations.
 Tangent has also seen fit to allow the trackballs to operate both the framing of the Geometry room and the orientation of the Vignette in the Secondary room. It’s a more interactive setup for both of these parameters than using the rotary knobs or a mouse. I also discovered by accident (though I’m sure this is listed in the user manual) that if you hold down the ALT key while changing a parameter, say with the control knobs, it will “gear up” the parameter change allowing for very large and very fast changes. While just a couple of “geared up” turns will almost always produce an extreme with unusable results I found this a great way to see what I was working on and how a given parameter was going to change the image. I’m not a dedicated professional colorist and still have a lot to learn so using the ALT key in this manner has been a great learning tool.
And then there’s the RED .R3D parameter tab
With a recent update of Color Apple allowed for the direct import of QuickTime wrapped RED .R3D files. With this update came the RED tab in the Primary room that allows for the changing of all of the basic .R3D parameters:
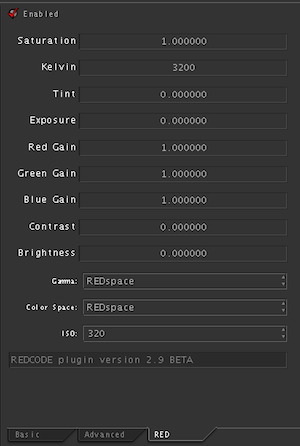
As of this writing the Wave doesn’t support those .R3D parameters in the RED tab but with the ability to change banks in any room your working in I don’t see why this couldn’t be added. It seems only natural that this would be in a future Wave update as this RED tab feels like a very natural part of Color. I would venture to guess that a lot of Color’s usage has been driven by the need to grade RED footage and capturing the RED market is something that the Tangent marketing folks should jump on. Support for this tab would help with that. Of course Color still has some issues with its RED support but it has gotten better with round-tripping in general from Final Cut Pro in version 1.5.
Final Thoughts
So do you really need a Tangent Wave if you use Apple Color? If you are just a casual user who jumps over to Color on occassion for a short color correcting session on a small piece then probably not. Given the device’s $1,795 price tag it is not cheap. That said it is more affordable than offerings from JL Cooper and that price should be in line with the upcoming MC Color from Euphonix. If you use Color on a more regular basis and get into any serious grading work where you’re trying to do more than just match cameras then the Wave is a great investment. It’s not that it makes Color easier to use … it makes it more pleasent to use. It allows for more experimentation and interaction with the software and really removes a technical veil from between the artist that is the colorist and the canvas that is the grading application. If you’ve only used a mouse to control Color then you’ll almost find a new beginning with the software once you begin using a control surface like the Tangent Wave. At least I know I did. Now I don’t want to go back to that ancient mouse.
Pros: Easy setup, customizable software, makes Color much more usable
Cons: High price is not for the casual Color user, No support for the RED parameters tab
Wish List: How about a stripped down version for half the cost with only the trackballs, dials and a few user programable knobs and buttons?!
I’d buy it if I were a dedicated colorist or spent a significant part of my post-production work day in Apple Color. Rest assured that if you do buy a Tangent Wave it will make working in Color a much more pleasant, much more professional experience. And clients will think it’s cool.
FTC Disclosure: Per the new FTC guidelines regarding bloggers and disclosure, Tangent sent the Wave unit to me free of charge per a request I made to them. It was on loan for just over a month and then returned at my expense. I’m glad I asked them for this demo unit to review as I really learned the value of a control surface!

Filmtools
Filmmakers go-to destination for pre-production, production & post production equipment!
Shop Now