Video professionals looking to create 3D content for the Apple Vision Pro, for other VR devices, or for 3D-capable displays, have only a few camera options to choose from. At the high end, syncing two cameras in a beam-splitter rig has been the way to go for some time, but there’s been very little action in the entry- or mid-level 3D camera market until recently. Canon, working alongside Apple, have created three dual lenses, and one is specifically targeted at Spatial creators: the RF-S 7.8mm STM DUAL lens, for the EOS R7 (APS-C) body.
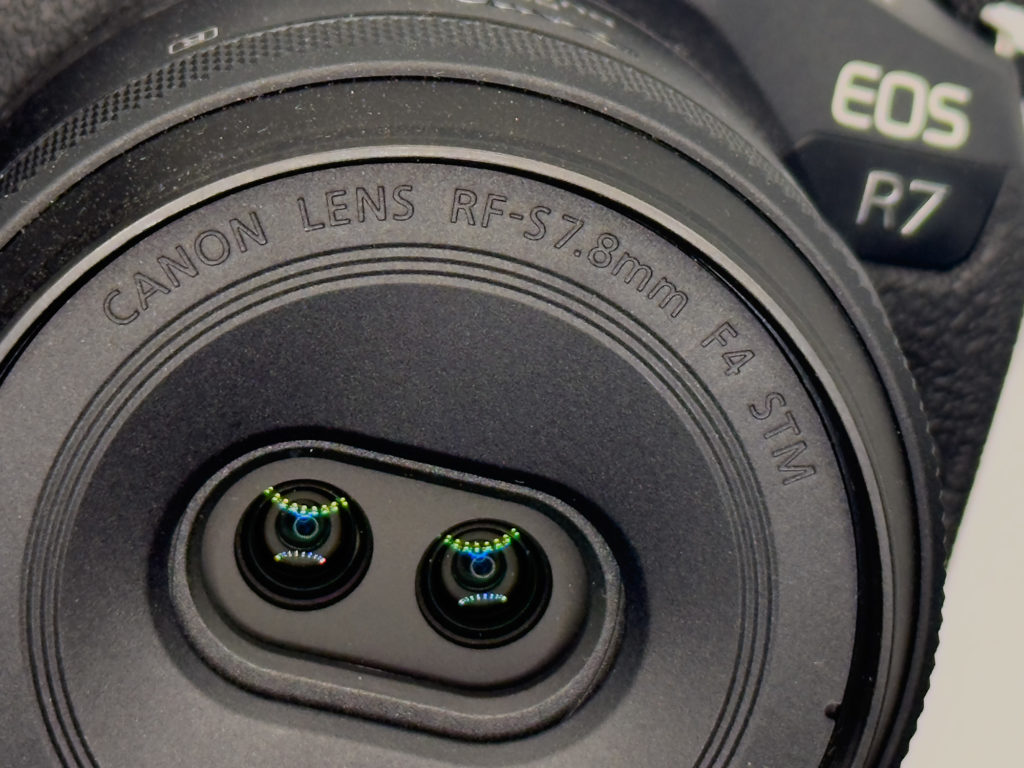
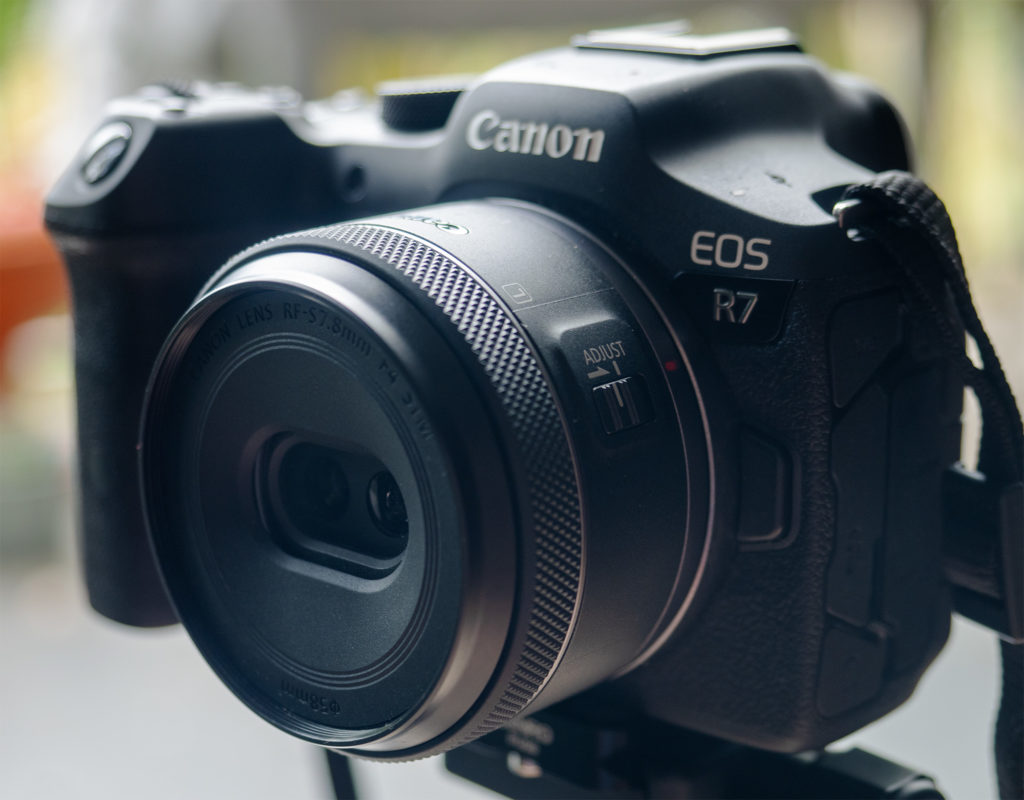
From the side, it looks more or less like a normal lens. You can add 58mm ND or other filters if you wish, a manual focus ring on the front works smoothly, and autofocus is supported. From the front, you’ll see two small spherical lenses instead of a single large circle, and on the back of the camera, you’ll see a separate image for the left and right eyes. Inter-pupillary distance is small, at about 11.6mm, but this isn’t necessarily a problem for the narrower field of view of Spatial.
Spatial ≠ Immersive
As a reminder, the term “spatial” implies a narrow field of view, much like traditional filmmaking, but 3D rather than 2D. Spatial does not mean the same thing as Immersive, though! Immersive is also 3D, but uses a much wider 180° field of view. It’s very engaging, but if you’re used to regular 2D filmmaking, shifting to Immersive will have a big impact, on how you shoot, edit and deliver your projects. The huge resolutions required also bring their own challenges.
If you do want to target Immersive filmmaking, one of Canon’s other lenses would suit you better. The higher-end RF 5.2mm f/2.8L Dual Fisheye is for full-frame cameras, while the RF-S 3.9mm f/3.5 STM Dual Fisheye suits APS-C crop-sensor cameras. On these lenses, the protruding lenses mean that filters cannot be used, and due to the much wider field of view, a more human-like inter-pupillary distance is used. While I’d like to review a fully Immersive workflow in the future, this time around, my focus here is on Spatial.
Handling
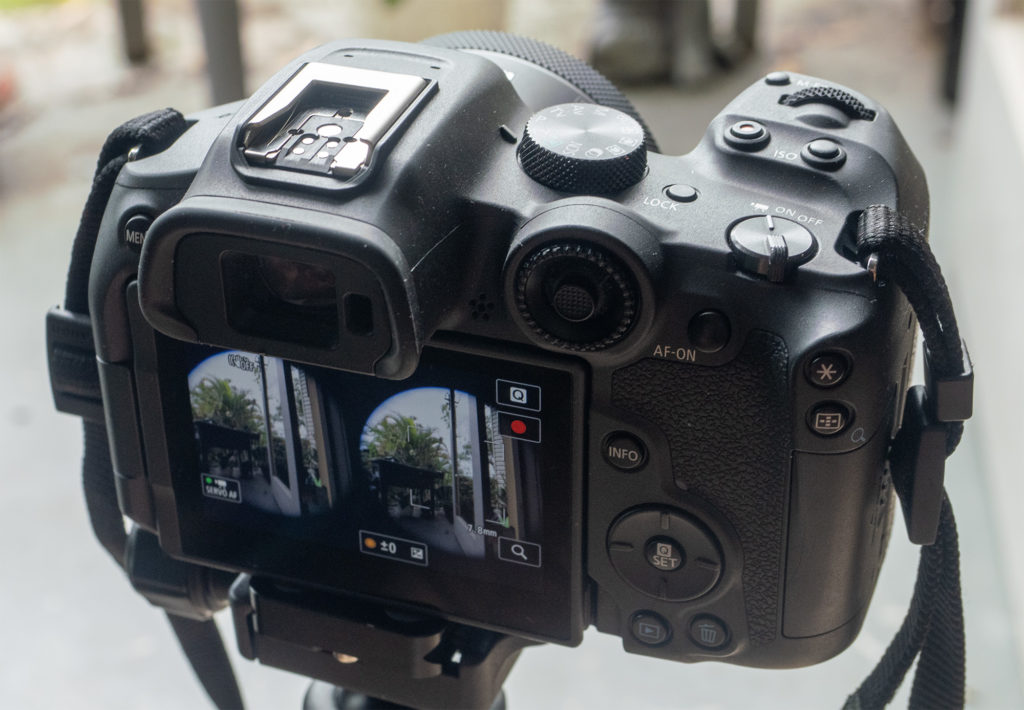
While it’s been a while since I regularly used a Canon camera, the brand was my introduction to digital filmmaking back in the “EOS Rebel” era. Today, the R7’s interface feels familiar and easy to navigate. The flipping screen is helpful, the buttons are placed in unique positions to encourage muscle memory, and the two dials allow you to tweak settings by touch alone. It’s a solid mid-range body with dual SD slots, and while the slightly mushy buttons don’t give the same solid tactile response as those on my GH6, it’s perfectly usable.
Of note is the power switch, which moves from “off”, through “on”, to a “video” icon. That means that on the R7, “on” really means “photos”, because though you can record videos in this mode, you can’t record in the highest quality “4K Fine” mode. If you plan to switch between video and stills capture, you’ll need to master this one, but if you only want to shoot video, just move the switch two notches across. Settings are remembered differently between the two modes, so remember to adjust aperture etc. if you’re regularly switching.
Dynamic range is good (with 10-bit CLog 3 on offer) and if you shoot in HEIF, stills can use an HDR brightness range too. That’s a neat trick, and I hope more manufacturers embrace HDR stills soon.
Since the minimum focal distance is 15cm, it’s possible to place objects relatively close to the camera, and apparently the strongest effect is between 15cm and 60cm. That said, be sure to check your final image in an Apple Vision Pro, as any objects too close to the camera can be quite uncomfortable to look at. It’s wise to record multiple shots at slightly different distances to make sure you’ve captured a usable shot.
While autofocus is quick, it’s a little too easy to just miss focus, especially when shooting relatively close subjects at wider apertures. The focusing UI can take a little getting used to, and if the camera sometimes fails to focus, you may need to switch to a different AF mode, or just switch to manual focus. This is easy enough, using a switch on the body or an electronic override, and while the MF mode does have focus peaking, it can’t be activated in AF mode.
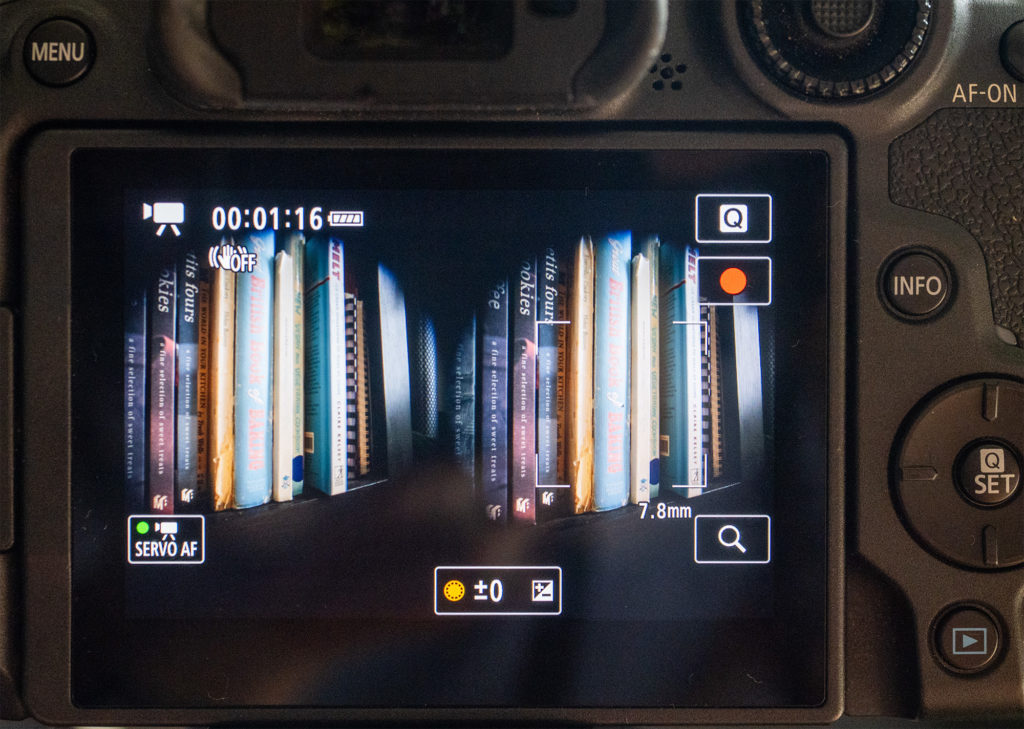
Another issue is that as the viewfinder image display is quite small, showing both image circles side by side, you’ll struggle to see what you’re framing and focused on without an external monitor connected to the micro HDMI port. However, when you do plug in a monitor, the touchscreen deactivates, and (crucially!) it’s no longer possible to zoom in on the image. It’s fair to say that I found accurate focusing far more difficult than I expected. For any critical shots, I’d recommend refocusing and shooting again, just in case, or stop down.
Composing for 3D
Composing in 3D is a lot like shooting in 2D with any other lens, except for all the weird ways in which it isn’t. Because the image preview is two small circles, it’s hard to visualize exactly what the final image will look like after cropping and processing. If you don’t have a monitor, you’ll want to shoot things a little tighter and a little wider to cover yourself.
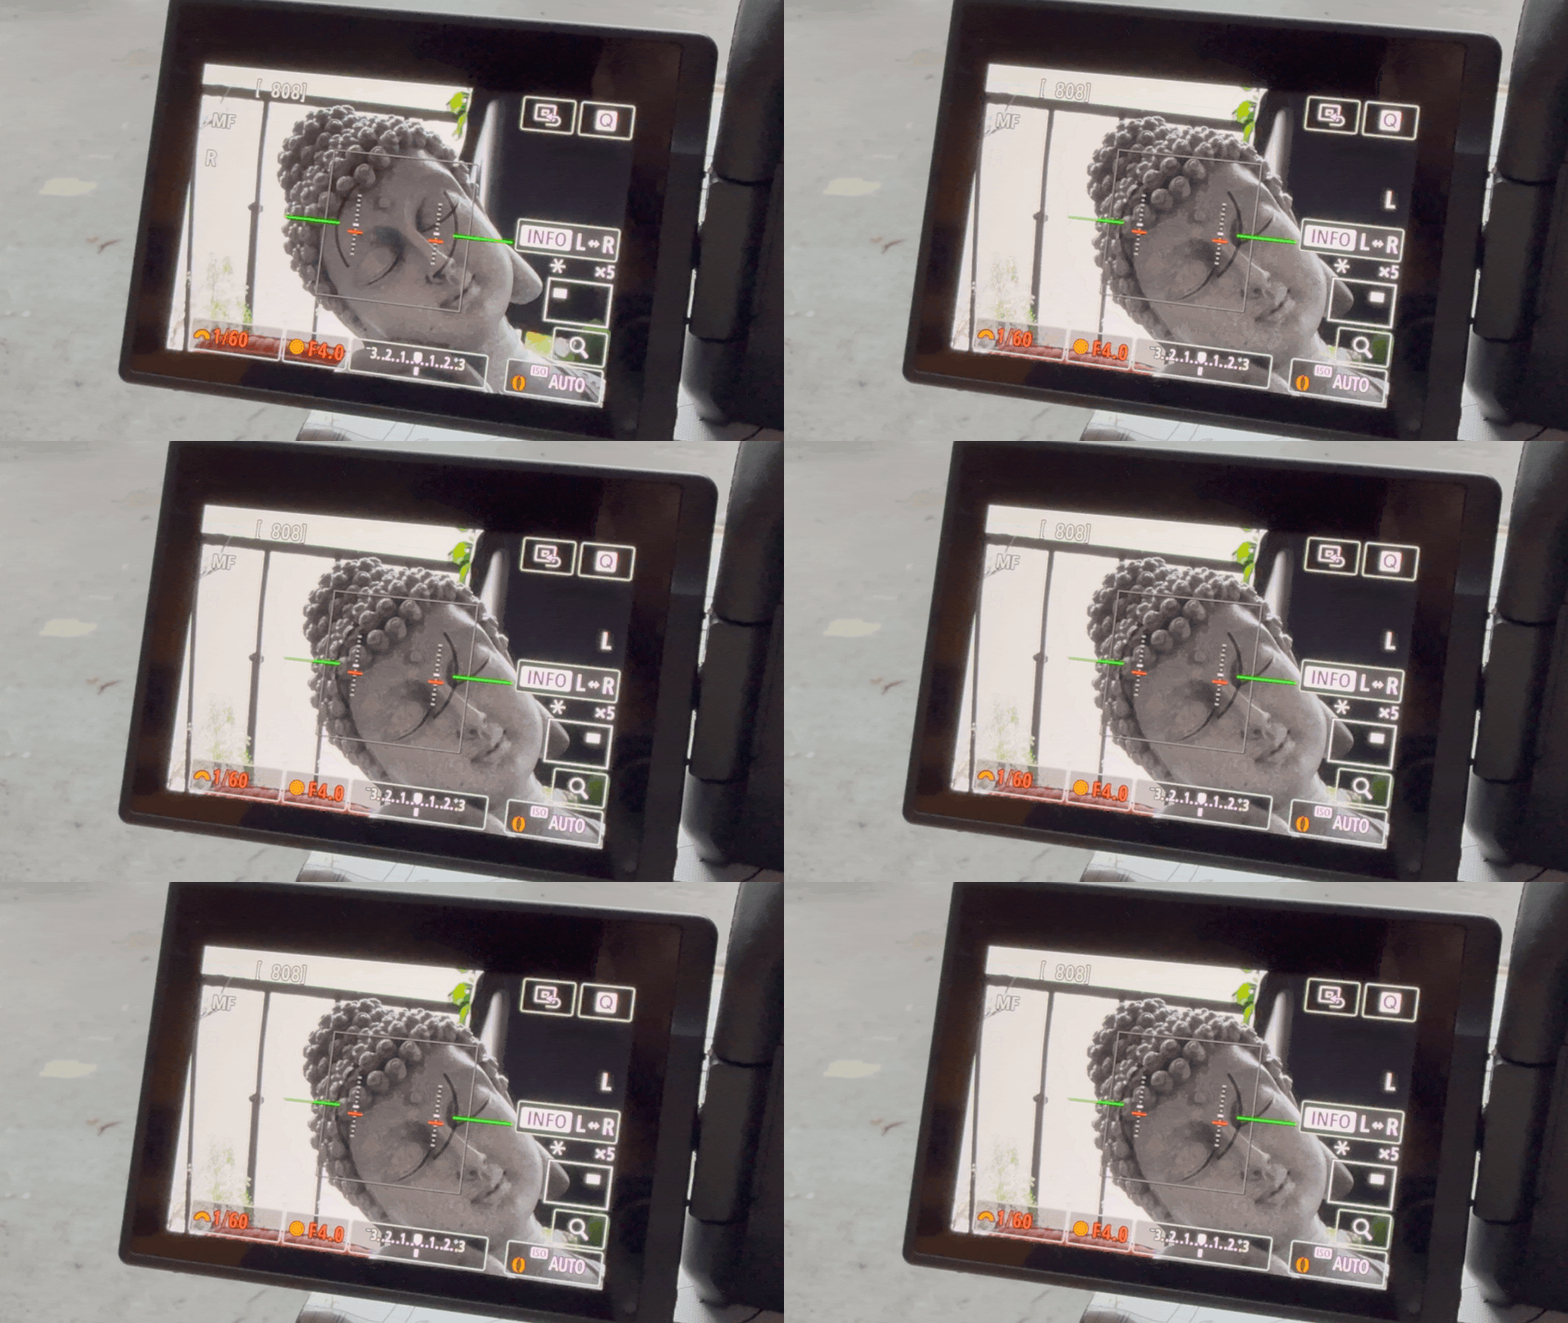
To address the focus issue, the camera allows you to swap between the eyes when you zoom in, to check focus on each angle independently, though this is only possible if a monitor is not connected. Should you encounter a situation in which one lens is in focus and the other isn’t, use the “Adjust” switch on the lens to set the focus on the left or right angle alone.
Importantly, because 3D capture is more like capturing a volume than carefully selecting a 2D image, you’ll be thinking more about where everything you can see sits in depth. And because the 3D effect falls off for objects that are too far away, you’ll spend your time trying to compose a frame with both foreground and background objects.
Some subjects work really well in 3D — people, for example. We’re bumpy, move around a bit, and tend to be close to the camera. Food is good too, and of all the hundreds of 3D clips I’ve shot over the last month or so, food is probably the subject that’s been most successful. The fact that you can get quite close to the camera means that spatial close-ups and near-macro shots are easier here than on the latest iPhone 16 series, but remember that you can’t always tell how close is too close.
Field tests
To run this camera through its paces, I took it out for a few test shoots, and handling (except for focus) was problem-free. Battery life was good, there were no overheating issues, and it performed well.
To compare, I also took along my iPhone 16 Pro Max (using both the native Camera app at 1080p and the Spatial Camera app at UHD) and the 12.5mm ƒ/12 Lumix G 3D lens on my GH6. This is a long-since discontinued lens which I came across recently at a bargain price, and in many ways, it’s similar to the new Canon lens on review here. Two small spherical lenses are embedded in a regular lens body, positioned close together, and both left and right eyes are recorded at once.
There’s a difference, though. While the Canon projects two full circular images on the sensor, the Lumix lens projects larger circles, overlapping in the middle, with some of the left and right edges cropped off. More importantly, because the full sensor data can be recorded, this setup captures a higher resolution (2400px wide per eye, and higher vertically if you want it) than the Canon can.
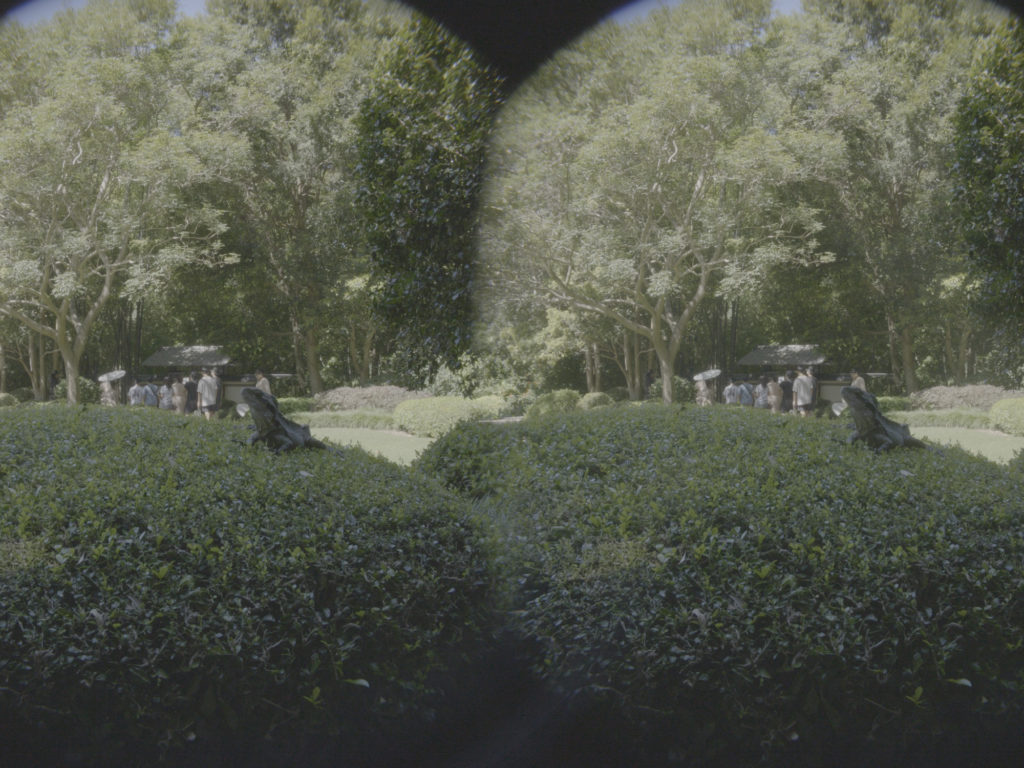
That’s not to say the image is significantly better on the Lumix — the Canon lens is a far more flexible offering. The Lumix 3D lens is softer, with a far more restrictive fixed aperture and 1m minimum focus distance. Since this isn’t a lens that’s widely available, it’s not going to be something I’d recommend in any case, but outdoors, or under strong lighting — sure, it works.
Interpreting the dual images
One slight oddity of dual-lens setups is that the images are not in the order you might expect, but are shown with the right eye on the left and the left eye on the right. Why? Physics. When a lens captures an image, it’s flipped, both horizontally and vertically, and in fact, the same thing happens in your own eyes. Just like your brain does, a camera flips the image before showing it to you, and with a normal lens, the image matches what you see in front of the camera. But as each of the left and right images undergoes this flipping process independently, when the camera flips the image horizontally, the left and right images are swapped too.
While the R-L layout is useful for anyone who prefers “cross-eye” viewing to match up two neighbouring images, it makes life impossible for those who prefer “parallel” viewing. If the images were in a traditional L-R layout, you could potentially connect a monitor and use something similar to Google Cardboard to isolate each eye and make it easier to see a live 3D image. As it is, you’ll probably have to wing it until you get back into the edit bay, and you will have to swap the two eyes back around to a standard L-R format before working with them.
Processing the files — as best you can
Canon’s EOS VR Utility is designed to process the footage for you, swapping the eyes back around, performing parallax correction, applying LUTs, and so on. It’s not pretty software, but it’s functional, at least if you use the right settings. While you can export to 3D Theater and Spatial formats, Spatial isn’t actually the best choice. The crop is too heavy, the resolution (1180×1180) is too low, and the codec is heavily compressed.
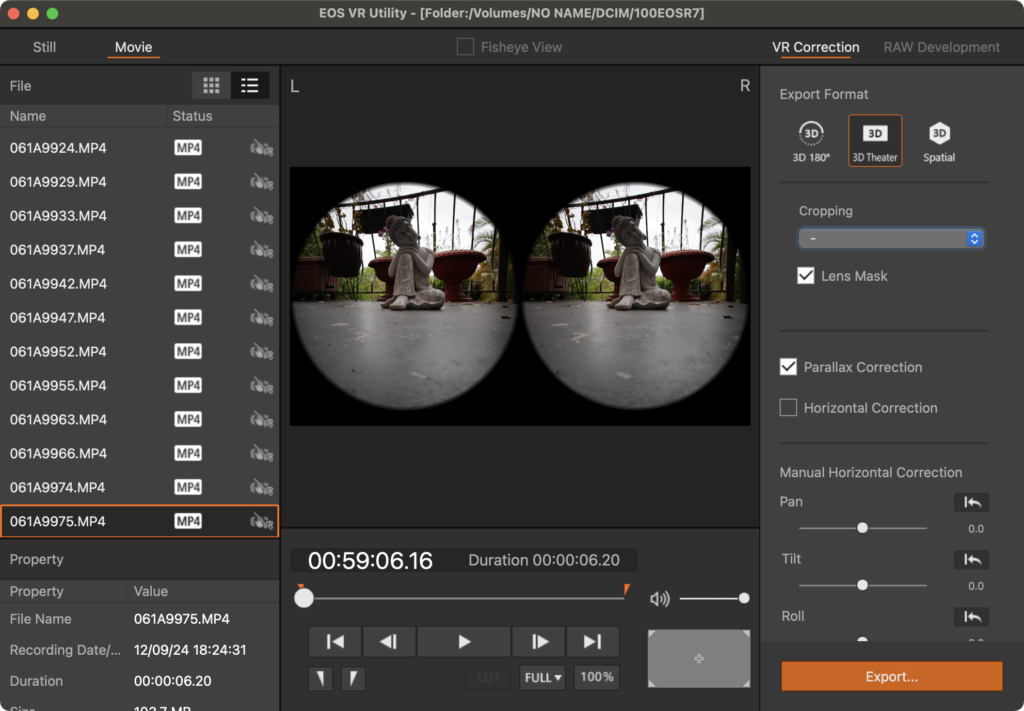
Instead, video professionals should export to the 3D Theater format, with a crop to 16:9. (Avoid the 8:9 crop, as too much of your image will be lost from the sides.). The 3D Theater format performs the necessary processing, but as it converts to the ProRes codec instead of MV-HEVC, most issues from generation loss can be avoided. Resolution will be 3840 across (including both eyes) and though this isn’t “true” resolution, it’s a significant jump up from the native Spatial option. When you import these clips into FCP, set Stereoscopic Conform to Side by Side in the Info panel, and you’re set.

(Note that if space is a concern, 3D Theater can use the H.264 codec instead of ProRes, but when you import these H.264 clips into FCP, they’re incorrectly interpreted as “equirectangular” 360° clips, and you’ll have to set the Projection Mode to Rectangular as well as setting Stereoscopic Conform to Side by Side.)
A third option: if you’d prefer to avoid all this processing, it is possible (though not recommended) to work with the native camera files. After importing to FCP, you’ll first need to set the Stereoscopic Conform metadata to “Side by Side”, then add the clips to a Spatial/Stereo 3D timeline. There, look for the Stereoscopic section in the Video Inspector, check the Swap Eyes box, and set Convergence to around 7 to get started.
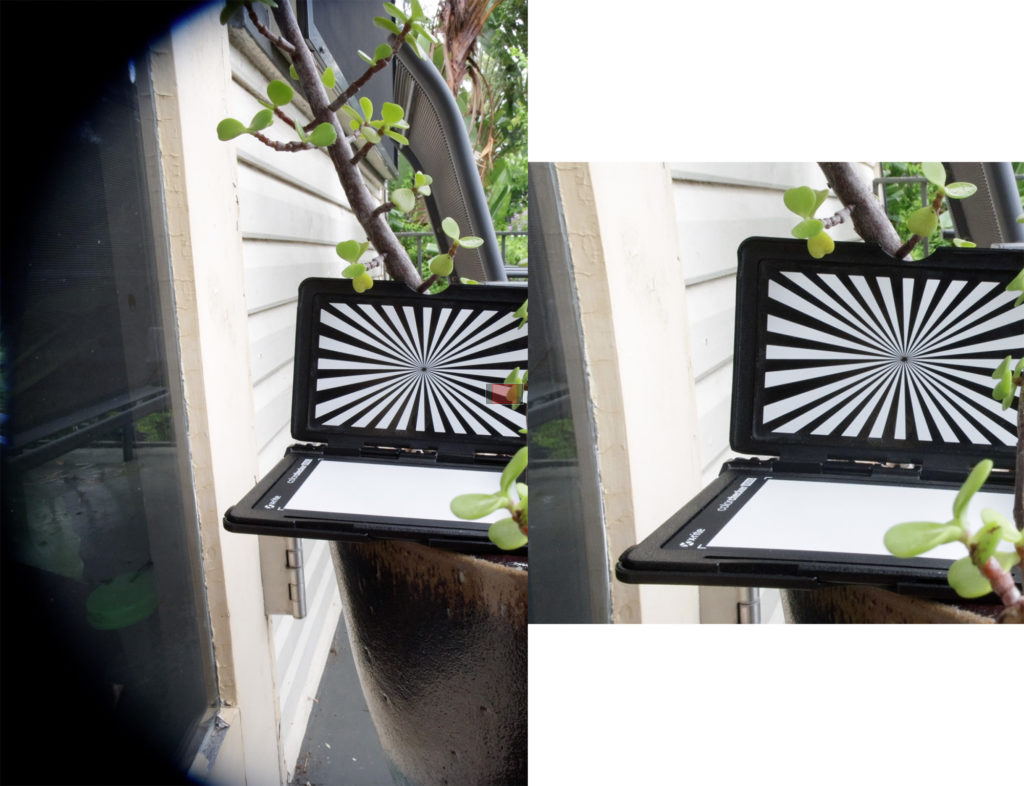
With this approach, you’ll have to apply cropping, sharpening and LUTs manually, which would be fine, but the deal killer for me is that it’s very challenging to fix any issues with vertical disparity, in which one lens is very slightly higher than the other. That’s the case for this Canon lens, and also my Lumix 3D lens — presumably it’s pretty tricky to line them up perfectly during manufacturing. Although the EOS VR Utility corrects for this, unprocessed shots can be uncomfortable to view. Comparing the original shots with the 3D Theater processed shots, I’ve also noticed a correction for barrel distortion, but to my eye it looks a little heavy handed; the processed shots have a slight pincushion look.
It’s worth noting that the EOS VR Utility is not free; to process any clips longer than 2 minutes, you’ll need to pay a monthly (US$5) or yearly (US$50) subscription. While that’s not a lot, it’s about 10% of the cost of the lens per year, and some may have objections to paying a subscription to simply work with their own files. Another issue is that the original time and date are lost (and in fact, sometimes re-ordered) when you convert your videos, though stills do retain the original time information.
Here’s a quick video with several different kinds of shots, comparing sharpness between the Canon and the iPhone. While you can argue that the iPhone is too sharp, the Canon is clearly too soft. It’s not a focus issue, but a limit of the camera and the processing pipeline. If you’re viewing on an Apple Vision Pro, click the title to play in 3D:
Stills are full resolution, but video is not
Unlike the video modes, capped at 3840×2160, the R7’s full sensor can be captured to still images: 6960x4640px. They’re sharp and they look great. Unfortunately, EOS VR Utility can’t directly convert still images into a spatial stills format that works directly on the Apple Vision Pro, and though it can make side by side images with the 3D Theater export option, since this resolution is capped at 3840 pixels across, you will be throwing away much of the original resolution.
To crop and/or color correct your images, use Final Cut Pro. Import your 3D Theater processed stills into FCP, add them to a UHD spatial timeline, adjust convergence, then use any color correction modules you want to. To set each clip to one frame long, press Command A, then Control-D, then 1, then hit Return. Share your timeline to an Image Sequence made of side-by-side images. For the final conversion to Spatial, use the paid app Spatialify, or the free QooCam EGO spatial video and photo converter.
This lens can certainly capture some impressive images with satisfying depth, but unfortunately the limitations of the pipeline mean that you don’t quite get the same quality when shooting video. Not all pixels are equal, and resolution isn’t everything, but there are limits, and 3D pushes right up against them.
The resolution pipeline
Pixel resolution is one of the main issues when working with exotic formats like 360°, 180° and 3D of all flavors. And as already mentioned, although the 32.5MP sensor does offer a high stills resolution of 6960×4640 pixels, the maximum video resolution that can be captured is the standard UHD 3840×2160, and that’s before the video is processed.
How does this work? The lens projects almost two complete circles across the width of the sensor, leaving the rest blank. But remember, the camera downsamples the sensor’s 6960px width to just over half that: 3840px across. Because two eyes are being recorded, only half of that is left for each eye, so at most we’d have 1920px per eye. The true resolution is probably about 1500px after cropping, but it’s blown back up to 1920px per eye with 3D Theater, or scaled down further to 1180×1180 in Spatial mode.
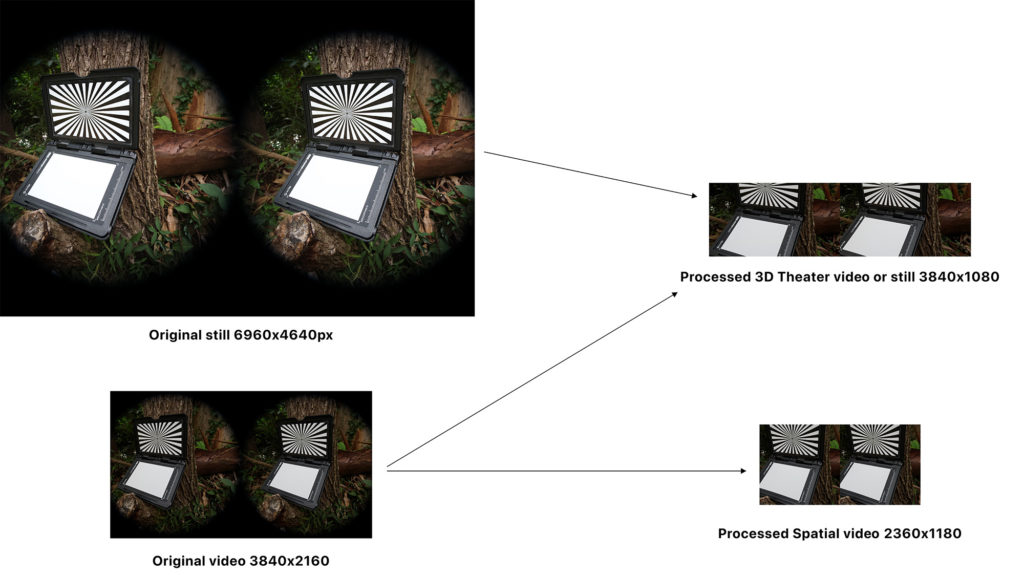
While it’s great that the whole sensor is downsampled (not binned) if you record in “Fine” mode, a significant amount of raw pixel data (about 45%) is still lost when recording video. While this is expected behavior for most cameras, I’ve been spoilt by the open gate recording in my GH6, where I can record the full width of the sensor in a 1:1 non-standard format, at 5760×4320. NLEs are way more flexible than they once were, and it’s entirely possible to shoot to odd sizes these days. If the R7 could record the original sensor resolution, the results would be much improved.
Here’s a Spatial video comparison of stills vs video quality, and again, if you’re viewing on an Apple Vision Pro, click the title to play in 3D:
While some 3D video content can appear slightly less sharp than 2D content in the Apple Vision Pro, resolution still matters. I can definitely see the difference between Spatial 1080p content and Spatial UHD content shot on my iPhone, and although the R7’s sensor has high resolution, too much is lost on its way to the edit bay. Spatial video shot on an iPhone is not just sharper, but more detailed than the footage from this lens/body combo.
Conclusion
The strength of this lens is that it’s connected to a dedicated camera, while its chief weakness is that camera and its pipeline can’t quite do it justice. For videos, remember not to use the default Spatial export from EOS VR Utility, but to use 3D Theater with a 16:9 crop. Stills look good (though they could look much better) and if you’re into long exposure tricks like light painting, or close-ups of food, you’ll have a ball doing that in 3D. But the workflow. For video? It’s just not as sharp as I’d like, and that’s mostly because the camera can’t capture enough pixels when recording video.
In the future, I’d love to see a new version of EOS VR Utility. It’s necessary for correcting disparity and swapping eyes, but it shouldn’t distort images or lose time and date information, and it should be able to export Spatial content at a decent resolution. I’d also love to see a firmware update or a new body with even better support for this lens, either cleverly pre-cropping before recording, or by recording at the full sensor resolution. The high native still photo resolution is a tantalising glimpse into what could have been.
So… should you buy this lens? If you want to shoot 3D stills, if you’ve found the iPhone too restrictive, and you’ve been looking for manual controls on a dedicated camera, sure. Of course, it’s an easier decision if you already own an R7, and especially if you can use another app to process the original stills at full resolution. However, as the workflow isn’t straightforward and results aren’t as sharp or detailed as they could be, this won’t be for everyone. Worth a look, but I’d wait for workflow issues to be resolved (or a more capable body) if video is your focus.
RF-S 7.8mm STM DUAL lens $499
Canon EOS R7 $1299
PS. Here’s a sample of light painting in 3D with a Christmas tree:

Filmtools
Filmmakers go-to destination for pre-production, production & post production equipment!
Shop Now


