After several months of waiting, I finally received a DreamColor evaluation unit from HP. Back in May of 2009, I had included the DreamColor in an article called How to connect your HD evaluation monitor to your editing system properly: Let me count the ways! That article included a comparison chart that I had made called Affordable 1080 HD monitors for critical color evaluation. Even back then, the DreamColor looked attractive compared to the specs of the competition, which included contenders from JVC and Panasonic. Before receiving the evaluation unit, I had the experience of going to Guatemala to install a DreamColor. However, because I had to integrate an entire system while I was in Guatemala, I didn’t have a chance to spend enough time with the DreamColor then as I have had now. In this article you’ll discover many reasons why the DreamColor is probably the the most sensible monitor to purchase for video production or post-production when you need critical image evaluation, even if it may mean purchasing it with a converter box, if your current NLE or grading system doesn’t have an an ideal connection for it. Even after adding the cost of a converter box (if required) or otherwise upgrading your current system, the DreamColor will still cost thousands of dollars less than a comparable competitive critical evaluation monitor with a true 10-bit panel.
One DreamColor monitor model so far
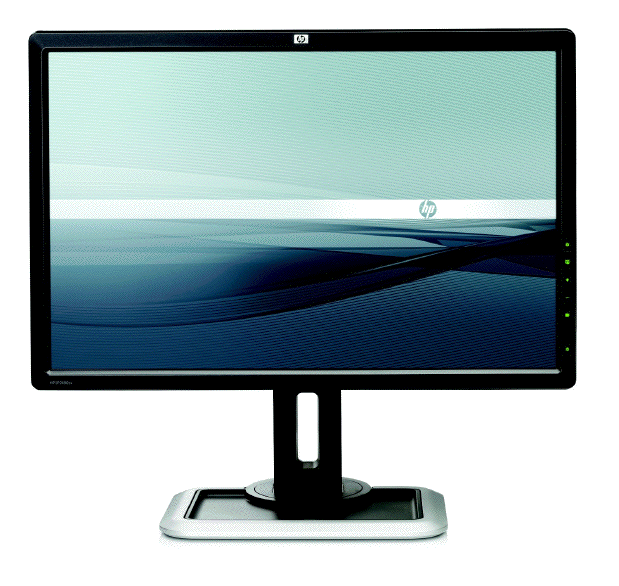
At the present time, there is a single DreamColor monitor model available from HP, which is the 24-inch LP2480zx. That’s the model referenced in the rest of this article. The optional dedicated colorimeter with software costs US$349. Depending upon your NLE’s or grading system’s current interface, you may or may not need a converter box. More about that (and about DreamColor’s US$1999 official price) later in this article.
Reasons to love the DreamColor for critical image evaluation in pro video and digital cinema
- Beyond CRT gamut
- Color temperature set by adjusting LED backlight, not by manipulating the video signal
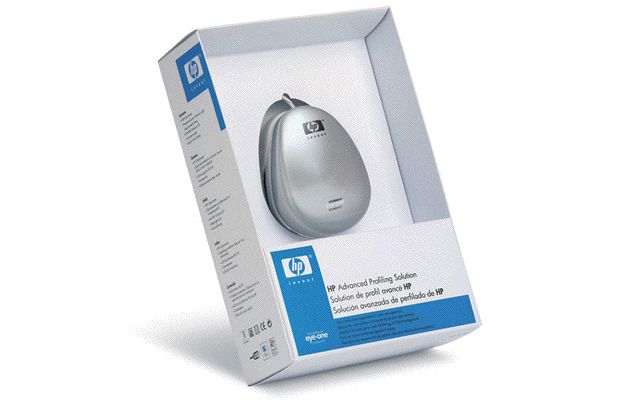
- Inexpensive dedicated colorimeter with software for Mac & Windows (both from HP) and for Linux (open source version)
- ITU-R Rec.601 color space for SD video
- ITU-R Rec.709 color space for HD video
- DCI P3 color space for digital cinema
- Custom profiles for atypical client situations
- IPS (In Plane Switching) panel = extremely high contrast ratio even at very indirect angles (off-axis)
- Matte panel (not reflective)
- True 30-bit (10-bit per each subpixel x3) panel, which means full color, and no banding or dithering
- Very low black level (CRT class)
This article does not reiterate all of the DreamColor’s specs. For that, just go to HP.com. I’m covering and emphasizing details which are not so obvious when simply reading the specs there.
Color spaces for other industries
For other industries (i.e. graphic design, medical, and pre-press), the DreamColor monitor offers other color spaces, including AdobeRGB and sRGB.
Do you dream in 18-bit color, 24-bit color, or 30-bit color?
Each pixel in any color LCD monitor contains three subpixels. Each subpixel corresponds with one of the three primary video colors: red, green, and blue. The bit-precision of the display determines how many levels of brightness can be shown for each primary color. A 6-bit monitor offers 64 (26) levels from darkest to brightest for each primary color. An 8-bit monitor offers 256 (228) levels for each primary color. The bit-precision is determined by the electronics which control the liquid crystal cells in the panel. Since there are three subpixels, the maximum number of colors that a pixel can display is 2n x 2n x 2n where n is the bit-precision of a subpixel. Therefore, an 8-bit monitor offers 28 x 28 x 28 = 16,777,216 colors (which is often rounded as 16.7 million). Many consumer LCD monitors have inexpensive 18-bit panels (6-bit per subpixel x3). Most professional LCD monitors have 24-bit panels (8-bit per subpixel x3). Only a very few high-end LCD models have 30-bit panels (10-bit per subpixel x3). Since the DreamColor LP2480zx has a 10-bit design, it can display a simultaneous palette of 210 x 210 x 210 = 1,073,741,824 colors which is often rounded to 1.07 billion* colors.
Beware the term billion in international circles
*That number you just read is expressed with the USA billion nomenclature. In European English, that number would be written and spoken as 1,07 thousand million (except for those Europeans who have adopted the USA billion)! Castilian readers should interpret it as 1,07 mil millones… or 1,07 millardos if they use very modern terminology 🙂
Both in European English and in Castilian, the term billion (or billón) is a much bigger number, with 12 zeros instead of 9.
Ideally, to see 10-bit/30-bit video, the source and hardware that feeds the DreamColor should be 10-bit/30-bit. Fortunately, Apple ProRes422(HQ) is 10-bit, and many modern NLE interfaces also output 10-bit for the DreamColor. However, later in this article you’ll learn why it is better to monitor with a 30-bit panel even if your NLE outputs DVI (like the discontinued MultibridgeExtreme from Blackmagic), and DVI is 8-bit by definition.
First impression from Julio Borrayo in Guatemala
When Julio Borrayo of STAFF HDTV in Guatemala first saw the DreamColor working in his third edit suite, he was stunned by the off-axis performance. By published specs, the DreamColor monitor was only two degrees better than the two JVC DT-V24L1 monitors Julio already had in two of his other edit suites, but in practice we both walked back and forth and saw practically no change in contrast even from the extreme sides. Julio also appreciated the fact that the DreamColor panel was matte, not reflective.
Firmware update procedure
I have upgraded firmware countless times in cameras, computers, NLE interfaces, and Internet routers, but I had never had to do it with a video monitor before this trip to Guatemala. I had read previously about a firmware update for DreamColor, so I first compared the current version on HP’s website with the one I had there in the monitor, and -as you guessed- it needed to be updated. Unfortunately, updating the DreamColor’s firmware currently requires Windows, but fortunately my MacBookPro has Windows XP installed via BootCamp, so I rebooted into Windows and downloaded the updater from HP’s website and connected my MacBookPro via USB to the monitor. The updater acted as if it had worked (no errors on screen), but the monitor didn’t get updated. I contacted HP tech support via SkypeOut at their 800 number, but none of their suggestions helped either. HP’s tech support and I were both stumped. Finally, I e-mailed Greg Staten -the DreamColor Solutions Architect at HP- and he explained that it is necessary to connect the same computer’s video output to the DreamColor’s input to initiate the firmware update (just a temporary connection), in addition to the USB cable. I would have never expected that, and it didn’t indicate that in the updater on screen. Fortunately, I had a video adaptor with me to go from my MacBookPro to the DreamColor, and from there forward, the firmware update went smoothly.
Translation problem in the “Spanish” DreamColor menu
We were in Guatemala -where the first language is Castilian- (even though many people call it “Spanish”). That’s why we were looking at the DreamColor’s menus in that language. We wasted some time before I realized that HP’s contracted translator had mistranslated “Hue” as Contraste, which (as you might guess) means Contrast. I reported this to Greg Staten, and hopefully this will be corrected in a future firmware update. Perhaps HP will hire me next time for their technical translations 🙂
Page 2 of this article covers:
- DreamColor’s inexpensive dedicated colorimeter
- DreamColor’s optional LCD hood
- Recent tests in Miami
- Special demands for color management
- Why to avoid the DreamColor’s DVI input even from a DVI source
- The importance of 1:1, pixel-by-pixel monitoring
- RGB versus component video
- Pricing and availability
- Warranty
- Pros and Cons
- DreamColor direct interfaces
- DreamColor converter boxes for non-compliant systems
- Why should I care if my monitor shows ITU Rec.709?
- Who is the ITU and why should I care?
Inexpensive dedicated colorimeter

HP offers (and I highly recommend) the KZ300AA calibration kit, which costs US$349. For calibration only, it is necessary to connect the computer’s video output (i.e. DVI or DisplayPort) to the DreamColor, and the colorimeter logically must connect via USB to the same computer. As stated earlier, this software is available for Mac, so that’s how we did this in Guatemala. The final setting for each mode (i.e. 601, 709, or any custom profiles) is fortunately stored in the DreamColor itself, since in normal use, the DreamColor doesn’t have to be connected to anything via USB, and its video input will not come directly from a computer, but from your professional NLE interface directly or via a converter box (as explained later). The profiles also include the desired white point. If you have a particular client who for some reason wants her/his project graded in a non-standard color temperature, you can create and save a profile for that client and even name the profile with the client’s name, and then that custom profile you created will actually appear with the client’s name in the DreamColor’s on-screen menu.
Some people ask me why the calibration kit doesn’t come included with the DreamColor. The answer is that many purchasers end up buying several monitors for use in different suites in the same facility. They only need one calibration kit for the entire facility, and it wouldn’t make sense to inflate the price of the monitor to include it with each one.
Optional LCD hood

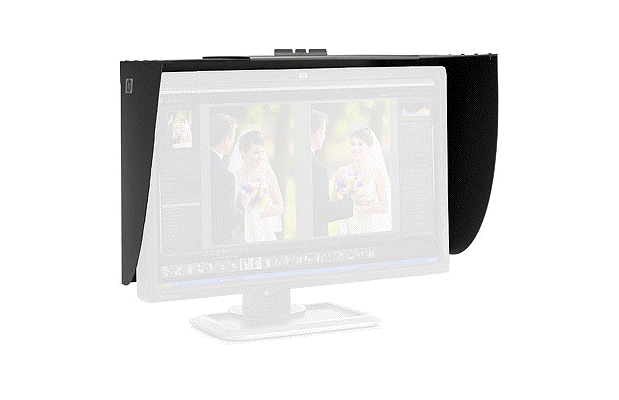
HP offers an optional LCD hood for US$129, for use when there is strong light above. I didn’t receive one, and none was necessary in the environment where I tested the DreamColor.
Recent tests in the Miami area
So far, I have brought the DreamColor monitor to several editing suites and to one pro video dealership in Miami. Everyone has been blown away at the DreamColor’s specs, look, performance, off-axis quality, and affordability. One editor said that if he only looked at the image (not the cabinet), he could swear that he was looking at a CRT (tube). After about 15 minutes of testing it, another local editor decided that he would definitely purchase one. The rest of our meeting was about how to connect it to his system which currently uses a Blackmagic MultibridgePro whose HDMI output is not compatible with the DreamColor Engine. You’ll learn about that in the next section. He is now debating whether to sell his MultibridgePro (with its current HDMI monitor) to someone else, and then replace it with an interface that is directly and fully compliant with the DreamColor Engine, or to keep the MultibridgePro and buy a converter box. I am sure that after he reads this article and the companion articles, he will be very well informed to make the best decision possible.
Special demands for color management
As I explained back in my May 2009 article called How to connect your HD evaluation monitor to your editing system properly: Let me count the ways!, in order to have the DreamColor Engine available (which is necessary to manage color spaces like Rec.601 and Rec.709 in this monitor), we absolutely must send a signal that is already true progressive (no interlaced or PsF) and RGB. If the signal is interlaced, PsF, and/or YUV component, the DreamColor Engine will become inactive, since the monitor’s CPU must then use all of its resources to de-interlace and/or convert YUV into RGB. In that case, the monitor can no longer manage the color as ITU Rec.709 (or any other profile), and will be very too saturated. On the other hand, if we alleviate those two details externally, then the DreamColor’s engine will be available to us. Having Rec.601 and Rec.709 are some of the DreamColor’s most valuable features. That’s why it is so critical to make sure that your current system either can already comply with the DreamColorEngine‘s demands (at least in your typical formats), or get external hardware to make your system compliant. If you are building a system from scratch (or considering upgrading your current interface), read the companion article called DreamColor direct interfaces. If you already have a interface that doesn’t yet comply, you have two options: Either replace your current interface, or add a converter box which will deliver a truly progressive RGB signal over HDMI or DisplayPort. For those options, see the second companion article DreamColor converter boxes for non-compliant systems.
Avoid the DreamColor’s DVI input (even from a DVI source)
For two reasons, you are better off avoiding the DreamColor’s DVI input. First, the DVI input is 8-bit only, while the HDMI and DisplayPort inputs are potentially 10-bit. Second, the DreamColor’s custom scaling (or 1:1) options are not available with the DVI input. Even if you have to connect from an NLE interface that only outputs DVI (like Blackmagic’s now discontinued MultibridgeExtreme), connect it using a DVI<>HDMI cable. Even though you will only be monitoring 8-bit (24-bit color), at least you will keep the custom scaling (or 1:1) options in the DreamColor menu. In addition, see HP’s comment:
“The HP DreamColor LP2480zx display’s 30-bit panel delivers a benefit even when displaying 24-bit pixels. The internal electronic system in the display, known as the HP DreamColor Engine, adjusts pixel colors and luminances to map them accurately to the user’s selected standard color space. This engine operates at very high (36-bit) precision, and the results are displayed at 30-bit precision on the panel. This means that the 30-bit panel improves the ability of the display to show exactly the correct color for every pixel. A 24-bit panel would introduce larger deviations from accuracy, which can give rise to banding and other undesirable effects.”
The importance of 1:1, pixel-by-pixel monitoring
1:1, pixel-by-pixel monitoring is important to be able to bypass the monitor’s scaler, especially when you are creating a moving transition, and want to rule out whether any artifact you may be seeing is due to the way you programmed the move… or to the result of the monitor’s own scaler. The DreamColor monitor allows 1:1 for both 1080HD and 720HD sources. In the case of 1080HD sources on the DreamColor, the image will fill the screen horizontally, but not vertically, since the DreamColor has 1200 vertical pixels, so there will be 60 extra pixels above and 60 below which will be tiny black bars. In the case of 720p in the 1:1 mode on a 1920×1200 panel, obviously there will be a very large border which will completely surround the image. My recommendation: If you are editing a 1080 project, monitor it 1:1 all the time. If you’re editing a 720p project, have the monitor scale the video up to fill the screen horizontally most of the time (maintaining aspect ratio), and only select 1:1 manually if and when you need to verify whether a motion artifact that may pop up in a motion move is due to to your programming in the move, or it is due to an artifact in the monitor’s scaler. This is definitely feasible and easily switchable directly from the DreamColor’s front panel when your compliant NLE interface feeds the DreamColor directly and natively (without a converter box). However, with some of the converter boxes HP and I have tried so far, this requires reconfiguring the converter box itself each time you change among different types of timeline formats, which is more of a pain (although certainly not the DreamColor’s fault). For details about this, read the companion articles DreamColor direct interfaces and DreamColor converter boxes for non-compliant systems.
RGB versus component video
As I originally explained in two prior articles: the primary colors in video are RGB, or red, green, and blue. However, a long time ago, video engineers discovered that given a situation of limited bandwidth, it is often more efficient to handle the video in a component version of RGB. This is because the human eye is more sensitive to the luminance portion of the video than the chroma portion. Component video assigns more of the bandwidth to the luminance. Over the years, there have been many different ways of expressing component video, including:
- Y, R-Y, B-Y (Y=Luminance, R=Red, B= Blue)
- Y,Cb, Cr
- YPbPr
- YUV
Sometimes the terms are associated more with one context than with another. In the component analog days, there were even fights among the standards in terms of the chroma levels (the EBU N10 level, the SMPTE level, and the Sony Betacam USA level, etc.) which sometimes caused mismatches when interconnecting equipment. I remember having to re-calibrate component analog switchers to work with a different standard… and having to prove to Leader Instruments that in the PAL world, Sony had accepted the EBU N10 level, so they would not stop forcing PAL component vectorscope users to have the display say “MII” in order to show the proper level for PAL Betacam SP. It was very different in the NTSC world, where the Sony USA chroma levels won over in popularity over the SMPTE levels. But that’s all nostalgia now:)
Nowadays, most NLE timelines have component video, since almost all editing códecs are component, and almost all camera códecs are component. The only exceptions I know are raw RED material and some HDCAM-SR material (those shot in RGB 4:4:4 mode and captured via dual-link HD-SDI or 3G-SDI).
Why we can’t simply use Apple’s “Digital Cinema Display”
Way back in 2005, Apple launched Final Cut Pro 5, together with a new feature called the “Digital Cinema Desktop”. The purpose was to allow FCP editors to preview full screen video on an independently connected computer monitor. However, together with the launch of the Digital Cinema Desktop feature, Apple warned us that it was for content only, and was not to be trusted for color correction purposes. This warning was stated both verbally at NAB 2005, as well as in writing in Apple’s support article TA27705. The reason for the color precaution has to to with the accuracy of the conversion between RGB and component video. Someday, this may change, if and when Apple’s FCP team gets together with some GPU manufacturer to do a hardware 10-bit YUV>RGB conversion to DisplayPort or HDMI, but that hasn’t happened yet and may never happen.
Pricing and availability
In the USA, the LP2480zx DreamColor is available directly from HP for US$1999. Pricing from resellers in the USA varies all over the place from slightly under to several hundred dollars higher, and can change radically from one day to the next. For example, at publication time, it is available from B&H Photo for US$2,234.95, from, PC CONNECTION for US2,499 and from PCMall for $2,429.99. (I suppose their customers aren’t aware of this, or are willing to pay several hundred dollars extra out of convenience or loyalty.) Given this situation, many pro video dealers aren’t so anxious to stock or recommend the DreamColor. I asked Larry Mahoney from HP’s marketing deparment, and he responded: “The product is available direct from HP and indirect via partners. The US web price remains $1999. You can check web prices in other countries by using the country selector in the upper right corner on hp.com.”
DreamColor’s impressive warranty
Here is the official warranty information, directly from HP:
Three years parts, labor, and on-site service. 24-hour, 90-day, toll-free technical support. Replacement options may include second business day on-site service, or next business day direct replacement, at HP’s sole discretion. With direct replacement, HP will ship a replacement display product directly to you. Using the prepaid shipping labels provided, return your failed display to HP in the same packaging as the replacement. Certain restrictions and exclusions apply. For details see your product warranty or contact HP Customer Support.
DreamColor pros
- Excellent value and performance.
- Flexible color spaces for SD video, HD video, digital cinema, and other markets like graphic design, medical, and pre-press.
- True 30-bit panel.
- Warranty
DreamColor cons
These are really minor quibbles, and both are likely to be fixed via firmware/software:
- Mistranslation in menu in Castilian.
- No firmware update from Mac.
Conclusion
I highly recommend the DreamColor monitor for anyone who needs to make critical image evaluation, together with its US$349 calibration tool. Just be careful to make sure your interface is compliant with the DreamColor engine, or make it so, either by replacing it or adding a converter box.
Read the related articles
- DreamColor direct interfaces
- DreamColor converter boxes for non-compliant systems
- Why should I care if my monitor shows ITU Rec.709?
- Who is the ITU and why should I care?
Disclosure, to comply with the FTC’s new rules
HP is not paying Allan T©pper to do this review.
Allan T©pper’s articles and seminars
Get a full index of Allan T©pper’s articles and upcoming seminars at AllanTepper.com. Listen to his podcast TecnoTur, together with Tanya Castañeda, Rub©n Abruña, and Liliana Marín, free via iTunes or at

Filmtools
Filmmakers go-to destination for pre-production, production & post production equipment!
Shop Now


