
Many of you are familiar with our book, Creating Motion Graphics with After Effects. As imposing as it may be in print, some miss that there’s another 180+ pages of bonus chapter PDFs on the book’s disc.
One of those chapters is Deeper Modes of Expression, which goes into more advanced expression functions. To make sure more people get to benefit from the information it contains, we’ve decided to serialize it into a series of 12 installments here on PVC. It’s still worth having the book – it contains an accompanying project file with examples and sources, not to mention an introductory chapter for those new to expressions – but hopefully this online version helps some of you looking to expand your expression toolbox.
In this first installment, we’re going to discuss some useful math functions beyond the typical +, -, *, and /. Among other things, you’ll learn how to keep numbers inside of boundaries, and how to trace out perfect circles using expressions instead of motion paths.
Important Syntax Notes
If you find that the exact wording of the expressions you create don’t match the wording you see in this chapter or in our example project, here are the probable reasons why:
- Verify that Preferences > General > Expression Pick Whip Writes Compact English is enabled (it’s the default).
- The pick whip in earlier versions of After Effects used just the word position, rotation, et cetera for these transform properties. Later versions use the more formal transform.position and the such for the same properties. Both work; we’re using the shorter form here to be less long-winded.
- When you’re writing an expression that employs the property it is applied to (such as Position), you do not need to refer to that property by name (such as position[0]); you can often use the generic name “value” (for example, value[0]).
We know many artists consider math to be incompatible with creativity; we’re sympathetic. Fortunately, the standard add/subtract/multiply/divide math operations will probably be all you need for 99% of your expressions. However, there will be times when you need to do something special, such as round off a number, or cause a property to move in circles. On those occasions, you will have to use some advanced math functions; we’ll demonstrate a few of them here. (For those of you who love math, we’ll be showing just the tip of the iceberg; the main thing for you is to know how and where to access these functions.)
After Effects supports a large number of additional math functions in expressions. You’ll find most of them in the expression language menu under JavaScript Math. They are not discussed in the manual (a JavaScript book will have to serve as your definitive reference for these). But never fear: Here are a few of our favorites, with practical applications.
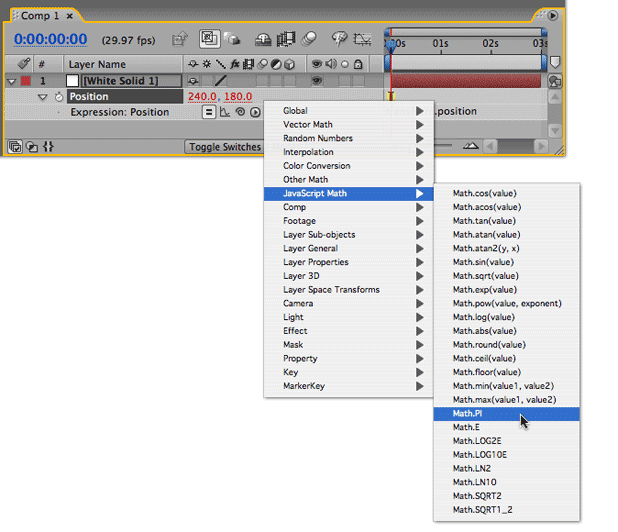
Advanced math functions can be found in the expression language menu under the JavaScript Math category.
Rounding Off
There are occasions when you don’t want a value in all its gory precision; you just want it rounded to the nearest whole value (also known as an integer). This is especially true when you’re creating step-type animations. There are three math functions that do this for you:
Math.round, which rounds to the nearest integer
Math.floor, which rounds down to an integer
Math.ceil, which rounds up to an integer
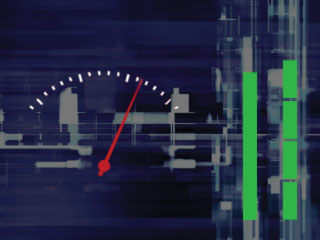
Say you were trying to create some signal meters. The illustration at left contains a graphical representation of an old-style analog “Vµ” volume meter on the left, and a pair of bar graph meters on the right. Say that as the analog meter swings through 100 degrees of rotation, the leftmost of the bar graphs should scale in height from 0 to 100%. This can be accomplished with a fairly simple expression for Scale, which uses the dial’s Rotation as the bar’s Y Scale value (preserving its X Scale, value[0] – if that doesn’t make sense, sit tight; we’ll cover arrays in more detail in a future installment):
Background courtesy Digital Vision/Prototype.
[value[0], thisComp.layer(“dial”).rotation]
However, bar graph meters tend to be broken into clear segments; they don’t flow smoothly and continuously. For this example, we want to split this bar graph into five segments. That means one segment represents values of 0 to 20, the next represents 20 to 40, and so forth. To do this, first we need to divide the 100 degrees of rotation by 20, yielding a range of values from 0 to 5. Then we need to round off that value to the nearest whole number, to “turn on” full segments of the bar graph one segment at a time. Finally, we need to multiply that result by 20, to expand the 0-to-5 value back out to a 0-to-100% range for Scale. Here’s the resulting expression, using some temporary variables to hold intermediate values as we go:
volume = thisComp.layer(“dial”).rotation / 20;
barheight = Math.round(volume);
[value[0], barheight * 20]
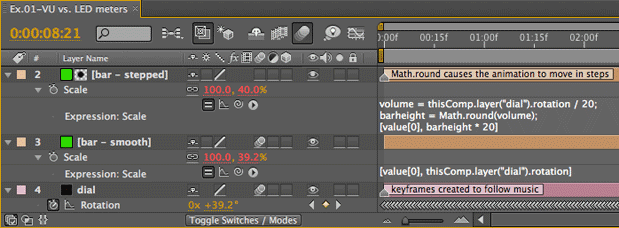
To better simulate a bar graph meter divided into segments, we used the Math.round function to round off our continuous “analog” value to a stepped “digital” value.
If you wanted to round the value down so a segment will come on only when its maximum value has been exceeded, use Math.floor instead of Math.round. If you want to round the value up, turning on a segment as soon as the value creeps into its range, use Math.ceil.
As a final touch, we used a solid with the Generate > Grid effect applied as a matte to break our stepped bar graph into segments. As expressions can’t access the volume of a layer, we used SoundKeys from Trapcode to create audio-based keyframes for the Rotation property of the dial layer; you can also use the keyframe assistant Convert Audio to Keyframes.
next page: restricting a range of values to place boundaries, or roll over a display
Keep a Clamp on It
There are a variety of math methods that can restrict values to a desired range. The simplest is absolute value – Math.abs(value) – which turns negative numbers into positive ones. Then comes clamp – clamp(value, limit1, limit2) – which prevents values from going outside the defined range. Finally there’s modulus – value1%value2 – which “rolls over” numbers, as 59 minutes rolls over to 00 instead of 60 on a digital clock.
Say that we had a wheel which rotated between -100° and +100°, and that we wanted its Opacity to fade on and off based on its Rotation value. However, Opacity cannot go below 0%, so if we just tied Opacity directly to Rotation, the wheel would be invisible while it swung between 0° and -100°. To cure this, we can use the expression Math.abs(rotation), which causes Opacity to climb back up from 0% to 100% as the wheel rotates from 0 to -100°.
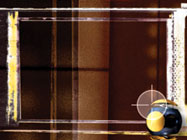
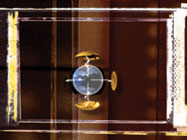
There are many other occasions when you might want to prevent a value from wandering outside a useful range. For example, say you want to restrict how far one layer can move as it follows another. In the example below, we’ve set up an animation in which a gizmo is flying around a comp. A crosshair is trying to track it. However, we want to limit how far the crosshair can wander, as if it’s trapped inside a pen or physically limited by its machinery. To pull this off, we can use clamp in our expression: Give it the value to work on, and your desired limits, and it returns a value restricted inside your defined limits. To make the expression easier to follow, in the first two lines we assigned our desired limits to a pair of variables, then in the last line we do the actual clamping to restrict the crosshair’s Position:
upper_left = [60,60];
lower_right = [260,180];
clamp(thisComp.layer(“gizmo”).position, upper_left, lower_right)
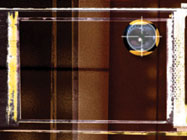
Gizmo courtesy Quiet Earth Design; background courtesy Digital Vision/Prototype.
The crosshair is expressed to follow the gizmo around, but it is restricted by the clamp expression to stay inside its box during its pursuits (center).
If you forget the format of the clamp expression, look for it in the expression language menu under Vector Math (a subject we’ll get into more detail a little later on).
Finally, the modulus math function is another way to restrict a value’s movement, causing it to start over at zero after it reaches a predetermined value. You use the modulus operator – % – like other familiar math operators, such as + (plus) or / (divide). For example, to restrict a value to a range between 0 and 99, you would write value % 100.
As you may remember from your early days stuck in math class, after you divide one number by another, you end up with a “remainder.” For example, 10 ÷ 3 = 3 with a remainder of 1. Another way of thinking of modulus is that it gives you the remainder of a division operation. The modulus math operator is useful for creating digital clocks, odometers, and other rollover-type displays.
An example is shown below: As the wheel on the left continuously rotates, the ball on the right falls, moving one pixel per degree. Every 200° of rotation, the ball rises suddenly back to the top of the comp. In this example, as Rotation moves from 192° to 204°, the Y Position jumps from 192 pixels to 4 pixels. To accomplish this, the following expression was applied to the ball’s Position:
[value[0], thisComp.layer(“wheel”).rotation % 200]


The ball’s Y Position is expressed to the wheel’s Rotation, “modulus 200” – which means reset every 200 degrees. As the rotation progresses from time 192° (left) to 204° (right), the ball jumps to Y = 4, not Y = 204 (c).
A quick note on the difference between displayed and internal values in After Effects: When you rotate a layer beyond 359°, After Effects displays its value as a number of revolutions plus an angle less than 360°. However, internally After Effects is thinking of the total number of degrees, not revolutions – so “2x + 45°” to you is 765° internally. After Effects is performing its own modulus operation in its user interface to show you a friendlier number that uses revolutions and degrees.
What if you needed to get both the “2” – the number of revolutions – and the “45” – the remainder? This is an occasion when you can use the rounding functions we discussed on the previous page:
my_rotations = Math.floor(rotation / 360);
my_degrees = rotation % 360
Just when you thought you grasped that, we’re afraid we have to throw a curve ball at you: Math.floor keeps rounding numbers down, even when they are negative. For example, the expression above would round -270° down to -1 revolution, not up to 0 revolutions. Likewise, Math.ceil rounds numbers up, even if they are negative. To get around this, you will need to do some clever programming that requires if/then tests (discussed in a later installment) and Math.abs functions (mentioned earlier). We won’t torture you with that now; just something to keep in mind. If you know your values will always be positive or always negative, then you have far less to worry about.
next page: using sin and cos to oscillate and create perfect circles
Going in Circles
JavaScript – and as a result, After Effects – supports a good number of trigonometric math functions. Among other things, this makes it easy to have objects go in circles.
One of the most common trigonometric math functions is sine: Math.sin(angle). In short, as the angle rotates around a circle, the sine’s output varies in a smooth fashion from 0 to +1, through 0 to -1, and back to 0. Its sibling is cosine: Math.cos(angle). Cosine works just like sine, but it’s ahead of the game: With increasing angle, when sine = 0, cosine = 1; as sine moves to +1, cosine is moving to 0; when sine is moving back down to 0, cosine is already heading to -1.
A common use for these functions is to translate rotation values into position values that would trace a circle. This is demonstrated in the example below, where the Rotation of the wheel is translated via an expression to the Position of a gizmo “attached” to its rim, like seats on a Ferris wheel. To pull this off, we use Math.cos for the X Position offset, and Math.sin for the Y Position offset:
angle = degreesToRadians(thisComp.layer(“wheel”).rotation);
x_offset = Math.cos(angle);
y_offset = Math.sin(angle);
wheelsize = 75;
value + ([x_offset,y_offset] * wheelsize)


Here the sine and cosine math functions are exploited to make the gizmo travel in a circle, linked to the wheel’s rotation.
The first three lines use cosine and sine functions to translate Rotation into numbers that vary between +1 and -1. We then multiply this by a wheel size (how far away from the center we want the gizmo to orbit), and add these results to the initial value for the gizmo’s Position.
Self-Animation
You don’t have to use rotation to drive these circular expressions – you can use the comp’s time. This opens the door to self-animating objects, which move on their own as time moves along. Instead of using Math.sin(rotation), you would type Math.sin(time), with any additional multipliers you liked applied to time to make the result oscillate faster or slower.
 The figure at left shows a simple dragonfly-like creature we created. The wings flap by themselves without keyframes. We do this by rotating them with the Math.cos expression, driven by the comp’s time.
We then used Expression Controls attached to a null as a user interface to make it easier to control the speed of flapping, as well as how far they flapped. These controllers may then be keyframed to alter the flapping over time. This is set up below:

(Oldtimers who have used Motion Math may remember the Blink.mm script. This used a sine function to vary the Opacity of a layer over time.)
Radians and Degrees
While you may be used to rotation angles being defined in degrees, expressions define rotation in a unit called radians. Instead of there being 360 degrees to a full rotation, there are 2 x PI radians (roughly 6.308). After Effects provides a pair of math methods that can translate between these for you, found in the expression language menu under Other Math:
radiansToDegrees(angle) plug in radians for angle, get out degrees
degreesToRadians(angle) plug in degrees for angle, get out radians
When you work with the trigonometric math functions such as Math.sin and Math.cos, you will need to convert degrees to radians. For example, instead of Math.sin(rotation), you may need to enter Math.sin(degreesToRadians(rotation)). Fortunately, you can enlist the expression math menu to do most of this typing for you.
Seconds to Radians
Time is measured in seconds. Math functions such as sine and cosine expect values in radians, with 2 x PI (~6.308) per revolution. This bit of expression code converts time into revolutions per second:
seconds_per_rev = 1; //set this number to taste
time_to_radians = (time/seconds_per_rev) * 2 * Math.PI; //convert to radiansAfter adding these two lines of code, you can now plug time_to_radians in for angle in functions such as Math.cos(angle). It’s a good idea to select and pick whip the “1” after seconds_per_rev = to a Slider Control, to make it easier to adjust speed later.
PI and E
Speaking of PI, as you may have noticed above, After Effects can automatically plug in highly accurate values for those occasionally useful but hard-to-remember math constants, pi and e. Just type in Math.PI or Math.E in place of their values.
Next Installment: Interpolation Methods
In the next installment, we will discuss a highly useful method for matching different ranges of values without having to pull out a calculator. Until then…
The content contained in Creating Motion Graphics with After Effects – as well as the CMG Blogs and CMG Keyframes posts on ProVideoCoalition – are copyright Crish Design, except where otherwise attributed.

Filmtools
Filmmakers go-to destination for pre-production, production & post production equipment!
Shop Now


