There are a lot of misconceptions about transcoding, and discussions on transcoding pop up in forums and groups quite often. This is an attempt to bring some facts and practical advice on the table.
The Myth we’re busting: Transcoding your 8-bit source material to 10-bit will magically make it more robust, so you can do heavy color grading in Premiere with better results.
After yet another discussion on transcoding, I recently arranged a test in the “Moving to Premiere Pro” Facebook group to bust this myth. I did some heavy contrast adjustments both on an original 8-bit DLSR clip and on a DNxHD 10-bit copy made with Adobe Media Encoder (AME) and exported two files. 8 people made a guess without knowing what file was made which way. 7 out of 8 were wrong!
The reason they were wrong is that the 10-bit copy actually looked worse after grading than the 8-bit original, and we’ve always been told that 10-bit is better – so they assumed the best looking clip was from the 10-bit file.
Here’s a longer test with texts, so you know what you’re looking at.
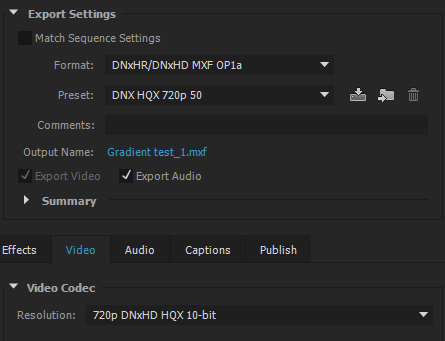
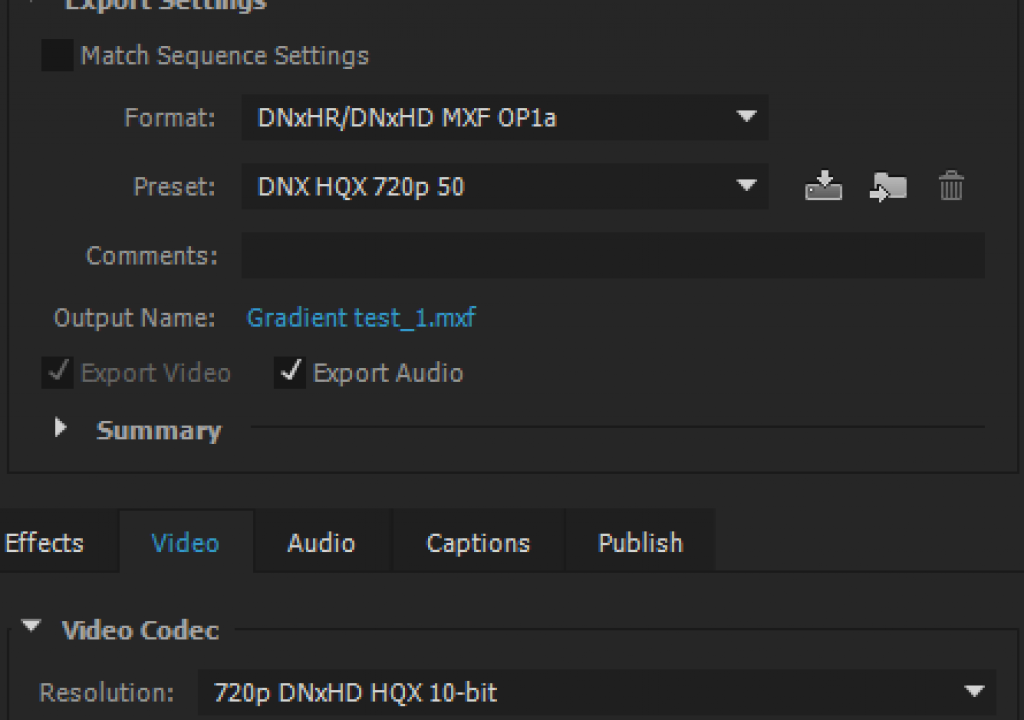
This was a DNxHD 10-bit copy. I also tried Cineform 10-bit and ProRes 422 HQ. They all show the same problem. Links to videos are provided at the bottom of this post for reference. Here are the Export Settings I used in the original test.

But let’s go back to the test. Why does the 10-bit look worse than the 8-bit original? The 10-bit copy is a second generation digital video file. It was converted from one format to another. If you transcode to a lossy format, it will always be a tiny bit degraded for each conversion. Heavy grading exaggerates the differences, and in this test you can clearly see that the original looks best. Only if you don’t touch the pixels and do smart rendering or re-wrapping (which is just copying data, not altering it) will you have no loss, so transcoding will never increase the quality of your footage. At the best, it will keep the original quality.
Lossy or Lossless?
Almost all the video codecs we use are lossy. There are a few options for storing lossless video, like Uncompressed, the Lagarith codec and the QuickTime Animation codec – but many of them only support 8-bit video, so they’re not an option in this urge for 10-bit video awesomeness. Besides, the files get humongous and you need really big and fast drives. And even when using lossless codecs, things like the color subsampling or the color space may be changed, so pixel values may change – and the whole point of the lossless-ness is gone.
Terms like Visually Lossless and Virtually Lossless do not exactly help people understand this. The term Visually Lossless (like ProRes 422 HQ) means that our eyes cannot see the difference when you see the original and the copy. That’s great – until you do some heavy grading, which is when the tiny differences are exaggerated, and our eyes will possibly see the difference. For practical purposes though, it really is visually lossless.
Virtually Lossless is what Apple calls their ProRes 4444, and the name indicates that it’s virtually (but still not completely) lossless, due to the very high bitrate. But again, the files get big and eat drive space for breakfast.
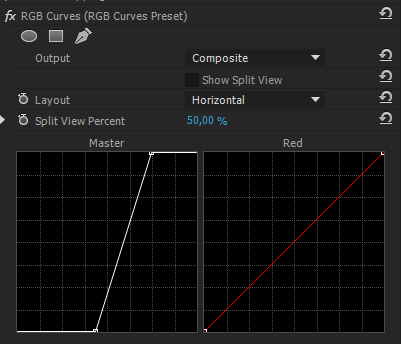
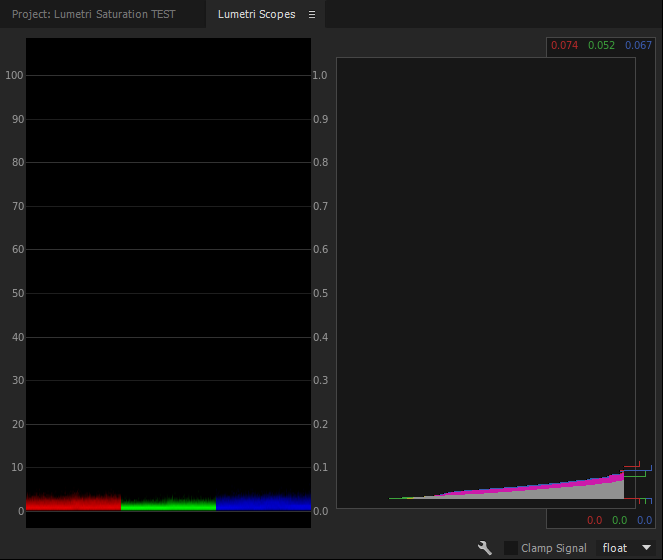
So in my test, there is of course a difference between the original file and the transcoded copy. The difference could not be seen until I increased the contrast a lot. Here are the RGB Curves settings and the Scopes when showing the clips stacked in Difference Mode. Even after this heavy treatment, the difference is not huge, but it’s there.


So why doesn’t it help to transcode to 10-bit?
Since Premiere Pro by default operates internally in 32-bit color (that’s 32 bits per channel), it doesn’t make much sense to transcode your 8-bit footage to 10-bit. The 8-bit footage will be up-sampled to 32-bit anyway when you start grading. So what you’re adding is just one more step of digital processing – at the cost of time and drive space.
Lead programmer on the Premiere Pro team, Steve Hoeg, explained how this works in Karl Soule’s blog post back in 2010. His explanation is at the end of the post, and is recommended reading for everyone who wants to understand the image processing in Premiere.
“When you add an effect and the timeline render bar turns red, this should trigger your attention.”
To make sure everything is done in 32-bit, you need to know for sure if you’re in 8-bit or 32-bit mode in Premiere. And it’s not always straight forward. Here’s the run-down.
- If you set your project settings to GPU acceleration mode and use only the GPU accelerated effects (the ones with the speedy Lego brick icon) it’s easy. You’re always in 32-bit mode. Your timeline render bar is yellow, and all is good.
- If you use non-accelerated effects, even with the project set to GPU mode, Premiere switches to Software mode, which is by default 8-bit. When you add an effect and the timeline render bar turns red, this should trigger your attention. Go to Sequence > Sequence Settings and turn on “Maximum Bit Depth”, and you’re in 32-bit again – provided the effect supports it. You can have a look at the other Lego brick in the Effects panel, which says 32 if it is 32-bit capable. You will have to park the Playhead or render the timeline to see the image in its 32-bit treated glory when using non-GPU accelerated effects.
But now you also have to remember to set the export to render in 32-bit, or the output will not match what you see when you edit! You do this in the Export panel under Basic Video Settings > Render at Maximum Bit Depth. - If you’re working in Software Only mode because your GPU doesn’t have enough video RAM, then you always have to set the Sequence settings and the Export settings to Max Bit Depth to be able to work in 32-bit. The red render bar is your reminder to check this – and again you will have to park the Playhead or render the timeline to see the actual result.
So what can you take away from this list? To make your life easy, use a system with a good GPU, and only use effects with the speedy Lego brick badge.
![]()
![]()
What about transcoding in other software?
Now, if we use DaVinci Resolve to do the transcoding before grading in Premiere, it looks a lot better. Why? Because Resolve uses dithering to avoid banding issues. Dither is actually adding some minor errors to the signal, but it will look better. A lot better. https://en.wikipedia.org/wiki/Dither. It still won’t be more robust for grading if you’re working in GPU mode in Premiere since it’s all done in 32-bit, but it won’t be noticeably worse either. Note that there’s a gamma shift in the ProRes file from Resolve because of the different ways Resolve and Premiere “interpret” the H.264 codec.
This looks a lot better than the ProRes we get from AME. Here’s the AME ProRes test for comparison.
So there’s no doubt about it; Dithering is a good way to avoid banding and blocking issues when transcoding. So let’s hope that Adobe adds dithering as an option in future versions.
Proxy workflow for the win!
With the proxy editing workflow coming in the summer 2016 update, the need for good transcoding will diminish. Using automatic proxy generation, you can edit smoothly with proxies even on a not-so-beefy system, and you can switch to the original files with the click of a button before grading and finishing.
![]()
We get the best of both worlds! All this at the cost of some drive space of course – but the proxy files are much smaller than high-quality transcoded files.
Anyway – and sorry to be the bearer of bad news, but you don’t magically gain any 10-bit quality on your footage by transcoding. There is absolutely no reason to transcode 8-bit material to 10-bit before grading in Premiere.
Other reasons to transcode
There are lots of other good reasons to transcode of course, like getting timecode if the source files do not have this, and the fact that you’re editing an intra-frame format which will make your timelines scrub like butter.
Some people confuse transcoding with the “prepping” of material that some people do to create a “digital negative” (I hate that word) before editing. If your prepping means you do some voodoo like convert RAW and/or Log to linear video, run a denoiser and add some grain – then you should obviously save the resulting file in a 10-bit codec to retain all the details. That’s not transcoding, though – it’s image treatment.
The process of transcoding does costs time, storage, and personnel to administer, tough – and all this translates to money. On big 4k productions, the additional costs can be considerable, and transcoding may not be worth it. At least now, you know you don’t have to do it to gain better image quality.
“Transcoding will never increase the quality of your footage. At the best, it will keep the original quality.”
Disclaimers
Just to be clear: I don’t think anyone would normally do such crazy grading as I did in this test. It was done to make the differences in quality more visible. In addition, the video clip was carefully selected because it had a very smooth gradient sky that I knew would really show the artifacts. The quality loss in the output with more “normal” grading would be almost negligible.
Also, the test and this article say nothing about how other software would handle a 10-bit transcode of the same material. In FCP7 it is a great idea to transcode to 10-bit, since it forces FCP to work in 10-bit instead of 8-bit. Modern NLEs typically work in 32-bit color internally. But the point is to show that at least in Premiere Pro, it’s a waste of time and drive.

Jarle Leirpoll is an Adobe Premiere Pro Master Trainer and the author of The Cool Stuff in Premiere Pro. Between film projects he travels the world doing Premier Pro and After Effects training for both beginners and high-end professionals. Jarle also runs PremierePro.net, where you can find lots of free templates, presets and tutorials.
Additional tests
The following video shows results of transcoding to 10-bit GoPro Cineform YUV.
The following video shows results of transcoding GoPro footage to DNxHD. As you can see, this footage looks pretty much identical before and after transcoding, even after grading. So the impact of the transcoding process depends on the footage.

Filmtools
Filmmakers go-to destination for pre-production, production & post production equipment!
Shop Now


