
By default, expressions assume you are interested in values at the current time. If you need to know the current time, just use the keyword time in an expression, and After Effects will return the current time in seconds (not frames, as we discussed in the previous section).
However, expressions allow you to access values at different points in time. They also let you find out what time keyframes and markers are located at so you can have animations change as they approach or cross one of these keys, as well as reference what other layers are doing. In this installment, we’ll explore a couple of ways to exploit time.
Time Echoes
A common animation trick is to have a series of layers performing the same animation, but offset from each other in time. This is easy to accomplish by adding the valueAtTime(t) expression method to the end of an expression that grabs another layer’s values. This method resides in the Property submenu of the expression language menu.
The example below contains a pair of wheels rotating. The wheel on the right (red) is slightly behind the wheel on the left (blue).


An alternate way to visualize this is to look at the resulting values curves in the Graph Editor. The identical but offset curves show how one value is following the other, slightly delayed in time:

To make this happen, the red wheel has the following expression applied to its Rotation:
thisComp.layer(“wheel 1”).rotation.valueAtTime(time – 0.1)
This says take wheel 1’s Rotation, but take its value at a time equal to the current time, minus 0.1 seconds. In other words, follow wheel 1’s animation, but delayed by 0.1 seconds.
It was very easy to create this expression: We just dragged the pick whip from wheel 2’s Rotation to wheel 1’s Rotation (which normally makes them exactly the same), then added .valueAtTime(time – 0.1) to the end.
If we wanted, we could replace the 0.1 with an Expression Control, allowing us to edit the time offset without having to edit the expression’s text. After you’ve set this up, remember that you can hold the Command (Control) key while you’re scrubbing the Slider Control’s value to go in smaller increments. We could also set a positive value for wheel 2’s animation to be ahead of, rather than behind, wheel 1.
The valueAtTime trick works for any property. For example, say you had a few words of text that needed to fade on and off, staggered from each other. Once you decide the timing for one word, you want the others to have the same timing, just delayed. You could copy and paste keyframes and slide either the keyframes or text layers later in the Timeline, or use an expression to automate the process (handy if you’re going to be changing the master’s timing later). We’ve done this in the example below:
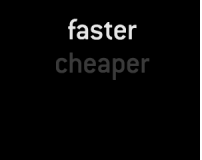

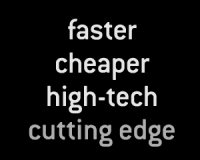
To make this happen, the second word has the following expression attached to its Opacity property:
thisComp.layer(“word 1”).opacity.valueAtTime(time – 0.5)
This adds a half-second delay to the way word 2’s Opacity follows word 1’s Opacity. To make the remaining words stagger behind the previous word by the same amount, we had to edit the expression for word 3 to be delayed by 1.0 seconds, and for word 4 to be delayed by 1.5 seconds. The resulting keyframes and expressions look like this:

To have a series of layers follow the same animation as a master layer, but staggered in time (A-C), you can add .valueAtTime(t) to the end of their expression value, then decide how much to stagger time by – for example, (time – 0.5) says to trail 0.5 seconds behind the current time.
next page: creating expressions based on the layer number
Indexes and Time
The valueAtTime method is an excellent way to create a number of layers that all follow another. However, it quickly becomes cumbersome to edit the expression for each layer – for example, giving each layer its own time delay setting. This is where the concept of layer indexing comes in handy.
You can refer to layers two different ways inside an expression: either by its name (surrounded by quotes), or by its number in the Timeline panel stack (no quotes necessary). A layer’s own number is referred to as its index; you can offset this index to look at other layers that are above or below the layer that has the expression applied.
Here is an alternate version of the text example shown on the previous page, which uses this indexing method.


In this example, word 2’s Opacity has this expression applied:
thisComp.layer(index – 1).opacity.valueAtTime(time – 0.5)
What this expression says is rather than look for a layer with a specific name, use my own index (layer number), subtract 1, and use that layer’s value. As word 1 is above word 2 in the Timeline panel, this expression for word 2 points to word 1.
What is really cool is that we can use the same expression for each layer in the comp. This means each word would delay itself by the same amount of time compared with the word above it in the chain, rather than just word 1. This makes it easy to copy and paste the same expression to multiple layers, apply it with an Animation Preset, etc.
You must keep track of the layer order in the Timeline panel: Swap the order of the layers around, and the layers will respond differently, following whoever is above. If you drag word 2 to the top of the layer stack, you will get an error message, because it’s impossible for it to look at a layer with an index = 0 (1-1). (We’ll discuss error checking and recovery in a later installment.) On the upside, since the expressions are looking at a layer’s number rather than its name, you can save Animation Presets that aren’t reliant on a specific layer name in order to work.
Absolute versus Relative Indexing
The trick of looking at a layer that’s a certain number above or below your own layer number is referred to as relative indexing. It works great, but it starts to break down if you have too long of a chain of layers looking at each other. It takes After Effects a lot of time to say “For my value, I have to look at the layer above me…who has to look at the layer above it…who has to look at the layer above it…who has to…” The result can have a slight effect on performance and rendering times.
Once you get past about four or so of these references, you should give serious thought to using absolute indexing, which sets values based strictly on the layer’s own number. Using absolute indexing requires discipline in stacking layers properly in the Timeline panel, but pays you back in improved responsiveness. Let’s put it to work.
Let’s put this concept to work with our staggered word fade example. We still want our other words to follow word 1’s lead, but to delay them based strictly on their layer number. Our expression then becomes:
stagger_time = (index – 1) * 0.5;
thisComp.layer(1).opacity.valueAtTime(time – stagger_time)
This expression works only if the master – word 1 – is placed at the top of the stack as layer 1, and all of the other words are stacked immediately below it. The first line takes the layer number (index) of a staggered layer, subtracts 1 to compensate for the master layer being on top (in other words, the first delayed layer is the second layer, which should only be delayed once, not twice), and multiplies the result by 0.5 seconds. Each higher-numbered layer gets an additional 0.5 seconds of delay. The second line then says to look at the Opacity of layer 1 (word 1 in this case), and then offset the time you look at it based on the stagger_time we calculated in the first line. This is shown below:

These layers use expressions based on their layer index (number), not their names. This means you can rename them without breaking the expression, but reordering them in the Timeline stack will change how they behave.
Yes, using absolute indexing is a little more confusing, but the results will render a little bit faster. And by just thinking a little, you can rearrange the relative timing of layers just by dragging them up and down the layer stack in the Timeline panel.
Of course, the danger here – and with expressions in general – is that you may spend more time and energy being clever than you would have spent merely copying, pasting, and sliding keyframes around. Clever is nice, but clarity and meeting deadlines are even better…
next page: deriving a parameter’s speed and velocity
Speed and Velocity
In addition to finding the value of a property, you can find the velocity of a property at either the current time or a defined time. This opens the door to some interesting animating interactions, such as creating a speedometer that automatically tracks the speed of a layer flying around a comp, or scaling a layer up and down as it moves or rotates faster or slower.
There are two variations on this expression. The most versatile form is the speed expression. To find the speed of a property (as in the case of Rotation), you would add .speed onto the end of the property: for example, rotation.speed or rotation.speed_at_time(t). The speed expression works for multidimensional properties such as Position as well, calculating the speed of the point in 2D or 3D space. If for some reason you want to isolate the speed of just one dimension of a multidimensional property, you would use the velocity expression – for example, position.velocity[0].
The values you get in return for these expressions are the same as the “/sec” numbers you see in Speed Graphs in the Graph Editor. This means it may take a little planning to scale the resulting values into a useable range: You will need to keyframe your animation, study the Speed Graph, note the maximum or minimum velocity, then factor that into how you scale the value .velocity or .scale returns. (Fortunately, the interpolation methods we discussed earlier take some of the pain out of this.)
Let’s look at some examples using .speed. In the example below, a spinning wheel varies between 50% and 100% size depending on how fast it spins. A numeric display in the lower right corner displays how fast the wheel is spinning:
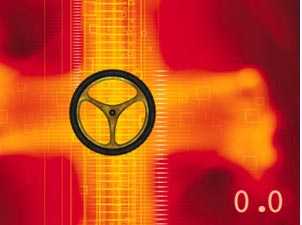
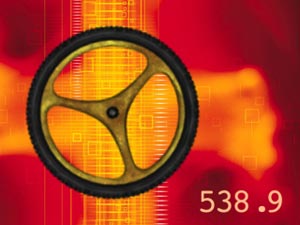
We connected the wheel’s Scale to how fast it is rotating (above). The additional numeric readout gives us confirmation of its speed (below). Background courtesy Digital Vision/Data:Funk.
Here’s the expression we applied to its Scale parameter:
raw_speed = rotation.speed;
pos_speed = Math.abs(raw_speed);
new_scale = ease_in(pos_speed, 0, 540, 50, 100);
[new_scale, new_scale]
We used a couple of tricks (both discussed in earlier installments of this series) to get the animation look we wanted, including using the ease_in interpolation method instead of linear to give something closer to exponential scale, and the math function Math.abs to always have positive Scale values instead of negative ones when the wheel was spinning backward.
We also added a Numbers effect to a second layer in this comp, to give a numeric readout of the wheel’s speed. The Graph Editor display below shows how the wheel’s Rotation value graph (the turquoise line that starts below the horizontal centerline) relates to the resulting speed that the expression derives (the light blue line, which reflects the value displayed by Numbers):

As the wheel starts to rotate, the speed graph starts at zero and increases. As the wheel’s rotation eases to a halt at its maximum value at 02:00, the speed graph drops back to zero. As the wheel starts to rotate backward (the turquoise line going down), the resulting speed graph is negative (below the centerline).
Pretty soon, you can start to imagine how you might create alternate expressions to drive the height of a bar graph speed indicator, or rotate the dial on a gauge. Such an example is shown below:
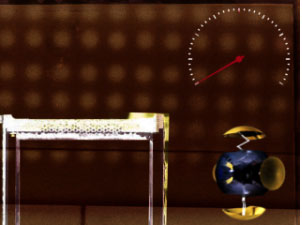
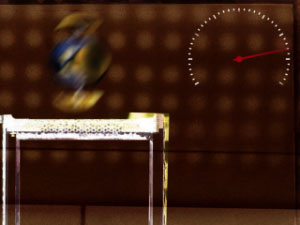
As the gizmo flies around the comp (the amount of motion blur gives a clue as to how fast it is traveling), a speedometer updates to match. Background courtesy Digital Vision; gizmo courtesy Quiet Earth Design.
In this example, we are tracking the Position of the gizmo. Here is the expression we used to derive the speedometer dial’s rotation:
gizmo_speed = thisComp.layer(“gizmo”).position.speed;
linear(gizmo_speed, 0, 325, -120, 120)
Since Position has more than one dimension, we need to use position.speed, not position.velocity. To make things a bit easier to read, while creating the expressions we created a variable – gizmo_speed – and typed an equals sign, dragged the pick whip to the gizmo layer we want to track, and then appended .position.speed to its end. We then used gizmo_speed in a linear interpolation method to rescale the speed values to fit the rotation we wanted for the dial.
Velocity Kills
Be careful when applying .velocity to an array with more than one dimension. If you write an expression such as scale[0].velocity, After Effects may give you an error message. The correct form is scale.velocity[0].
last page: deriving the time of keyframes and markers
Keyframe and Marker Time
In addition to accessing values at certain times, After Effects allows you to access values at certain keyframes or markers. You can also access the time at which markers and keyframes are placed. This means, for example, you can have an animation triggered by the placement of markers.
To find the time of the keyframe that is nearest to the current time, use nearestKey(time).time. To find the time of this layer’s nearest layer marker, use marker.nearestKey(time).time; to find the nearest comp marker, use thisComp.marker.nearestKey(time).time. To find the time at which a numbered comp marker is located, use thisComp.marker.key() and place the desired marker number in quotes. For example, thisComp.marker(“1”) returns the time of marker #1. If you leave out the quotes, After Effects will return the time of the first marker, not the marker numbered “1.” If the marker has not been created or assigned, you may get an error.
To find how close you are in time to the nearest keyframe or layer marker, just subtract time from either of those expression phrases. This will give you a positive value if the current time is just before the nearest keyframe or marker (in other words, the current time is a smaller number than the time of the nearest key), and a negative value if the current time is just after the nearest keyframe or marker.
If you need the absolute value of this difference in time (in other words, a positive number regardless of whether you are before or after the nearest keyframe or marker), use the Math.abs(value) expression discussed earlier in this chapter – for example, Math.abs(marker.nearestKey(time).time – time).
In our final example in this installment, we’ve trained an alarm clock to scale up to 50% as it crosses a layer marker, and to scale back down to 0% whenever it is more than 0.5 seconds away from the nearest marker:
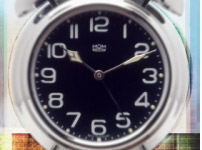


In this example, an alarm clock’s scale varies depending on how close the time indicator is to a layer marker. The three images on top are taken at 00:00, 01:00, and 02:00; look at the Timeline panel above and observe the relationship between markers and time. Alarm clock courtesy Classic PIO/Sampler; background courtesy Digital Vision/Inner Gaze
To do this, we used the following expression applied to its Scale property:
time_to_marker = Math.abs(time – marker.nearestKey(time).time);
linear(time_to_marker, 0, 0.5, [50,50], [0,0])
The first line is the same as we just discussed: Get us the absolute value of the difference between the current time, and the time of the nearest marker. The second line uses a linear interpolation method (discussed in an earlier installment) to look at this time difference. As this difference varies between 0 (right on top of a marker) and 0.5 seconds (0.5 seconds away from the nearest marker), it produces a number that varies proportionally between [50,50] and [0,0]. We used the double values inside brackets because Scale is an array with two dimensions (three, if the layer was in 3D); just plugging in 50 or 0 would not work.
Hopefully, you can start to think of some creative applications of letting markers trigger animation events. For example, you can set up the expression, then add markers by tapping along with a piece of music or narration. There are other expressions you can create to extract the values of properties at specific keyframes or markers, or even to determine how many markers or keyframes a layer has. These features are discussed in the online Help file.
Next Installment: Making Decisions
Our next installment will discuss one of the most complex subjects in expressions: how to make decisions. This includes if/then/else statements for animation decisions and error checking, do/while loops to create “simulation” animations, and additional notes on equivalence tests, accumulating values inside loops, and formatting expressions. Until then…
We’re in the process of serializing the Deeper Modes of Expression bonus chapter from our book Creating Motion Graphics with After Effects into a set of 12 posts here on PVC.
The next edition of Creating Motion Graphics – for After Effects CS5 – is due out by the end of June 2010.
The content contained in Creating Motion Graphics with After Effects – as well as the CMG Blogs and CMG Keyframes posts on ProVideoCoalition – are copyright Crish Design, except where otherwise attributed.

Filmtools
Filmmakers go-to destination for pre-production, production & post production equipment!
Shop Now


