
Nothing is more boring that having to keyframe supposedly random movements. Fortunately, there’s a simple, powerful expression that can add randomization to virtually any parameter for you: wiggle. Here we’ll explain how to apply the basic wiggle expression, and then add finer degrees of control to it.
Wiggly World
Many users of After Effects (including those who have been avoiding expressions) may be familiar with the Wiggler keyframe assistant. Wiggler creates new keyframe values from scratch, which are variations on two or more originally-selected keyframes. By contrast, the wiggle expression creates offsets from the constant or keyframed values you have already set for a property.
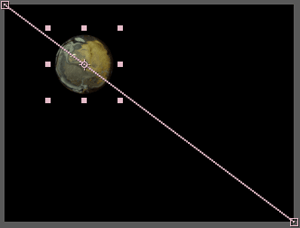
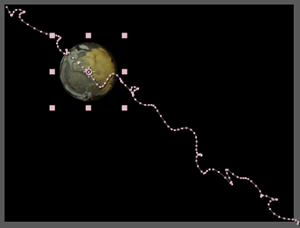
A simple application of wiggle is demonstrated above. Here, a sphere has been keyframed to move slowly from the upper left corner to the lower right corner of the comp; this is shown in the image on the left. However, with wiggle applied, the sphere instead follows a drunken path between corners, as shown in the figure at right. Below is the resulting Graph Editor display: the straight lines are the keyframed values; the undulating lines show wiggle added onto this path. By enabling the Post Expression Graph switch (where the cursor is pointing) in the figure below, the Comp panel and Graph Editor will display the result of the original keyframed animation plus the expression.

The expression to do this is wiggle(4,20). The two values in parentheses represent the number of wiggles per second, and the amplitude of the wiggles – in this case, 20 pixels.
Wiggle has other options you can set. You can optionally have up to five values inside its parentheses:
wiggle(freq, amp, oct, mult, time)
The third value is “octaves of noise” (how complex and nervous the wiggle path is), the fourth is the strength of the additional octaves of noise, and the fifth is a time offset – akin to the valueAtTime method we discussed earlier. You can enter two, three, four, or all five values; the ones you leave off the end take on default values. If you forget what these additional parameters are or their order, look under the Property submenu in the expression language menu – it will give you a shorthand reminder of what each value is for.
Wiggling Time
A variation on wiggle is temporalWiggle. Rather than offset a property’s values, temporalWiggle keeps a layer on its original path, but varies how fast or slow it interpolates between keyframes. You can think of it as wiggling the speed of an animation. You can see this by looking at the spacing between the dots in the first image below (each dot reflects where the object will be at each frame in time); the speed graph below that shows the variations in speed the sphere experiences along its path.
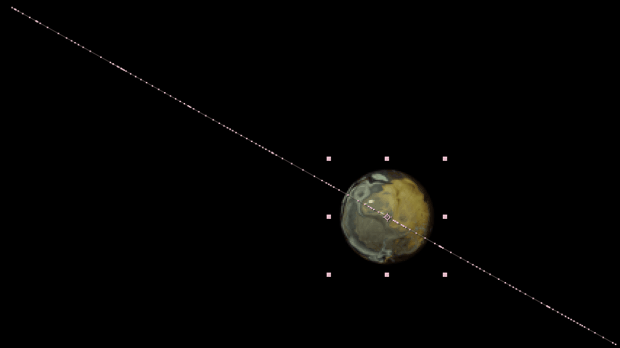

The temporalWiggle expression has the same parameter as the normal wiggle; since you are wiggling time – in seconds – you will find you need much smaller values for the second number inside the parentheses to get results that aren’t too jerky. The example above uses the expression temporalWiggle(4,0.2), which wiggles time by two-tenths of a second.
Controlling Wiggle
When the wiggle expression is applied to a property with more than one dimension – such as Position or Scale – all properties are wiggled independently. This may not be desirable for Scale, because quite often you want to keep the X and Y Scale values the same so as not to distort the original image.
To force both dimensions to be the same, you can set a variable equal to the result of the wiggle expression, then use just one dimension of this variable for both dimensions of Scale. The resulting expression below would be applied to the Scale parameter; remember that the “X” dimension is identified as parameter [0] in an array
tempwig = wiggle(4,30);
[tempwig[0], tempwig[0]]
Another issue with the wiggle expression is that it keeps wiggling, even when the layer is not keyframed to animate. This can be controlled by adding an Expression Controls > Slider Control to the layer being wiggled, selecting the amplitude value in the wiggle expression (the second number inside the parentheses), and dragging the pick whip to your new slider. Keyframe the Slider Control, and you’ve keyframed your wiggle amount. The result is shown in the Graph Editor display below: the slider “wiggle amp” is represented by the pink line; the resulting Scale values are represented by the red and green lines:

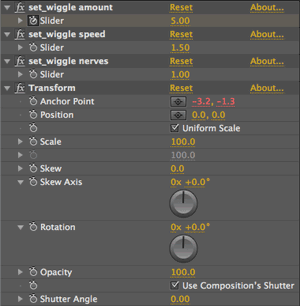 This technique comes in particularly handy when you are trying to add some humanization to motion control camera moves you are keyframing inside After Effects. The best approach is to keyframe the layer with your normal move, add the Distort > Transform effect, and add the wiggle expression to Transform’s Anchor Point to randomize the layer’s composite position. Add further Slider Controls as a user interface to keyframe or adjust the amount of wiggle, as we have at left. Note that the “wiggle” Animation Presets use a similar strategy.
Randomizing Wiggle
The wiggle expression randomizes itself, depending on the “index” (layer number in the Timeline panel) of the layer it is applied to. This means you can duplicate a layer with a wiggle expression multiple times, and each copy will behave slightly differently. The result can be observed in the figures below: Four layers have been given the exact same expression wiggle(3,20); they are offset from each other thanks to the wiggle’s auto-randomization. The top row shows the different offsets of the overlapping globes; the Graph Editor below that shows the resulting Position graphs.
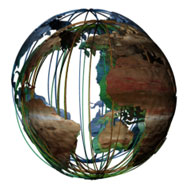

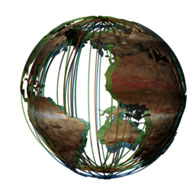
You can insert null objects between layers to further randomize them from each other. If you want to make sure a layer always has the same wiggle pattern, place it in its own precomp where it is always layer 1.
This auto-randomization lends itself nicely to “flocking” behavior. In the next example, we’ve keyframed a gizmo to fly around the comp. We copied the gizmo’s animation to a tracking sensor object, and added a wiggle expression to the sensor. To add some humor to the chase, we added a time delay to the wiggle expressions, so it lagged behind the gizmo’s movements. We then duplicated this sensor twice, resulting in three sensors. Because they are on different layers, each of their wiggles are slightly different, giving us the swarming look we were after:
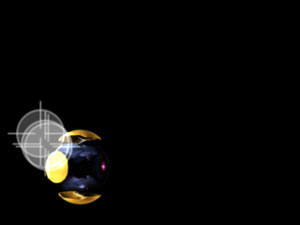
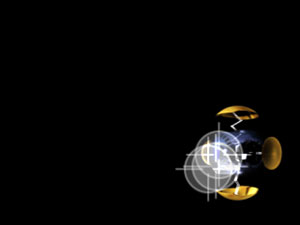
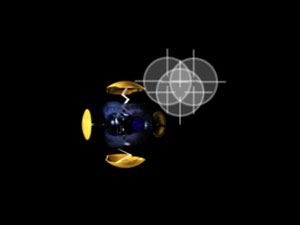
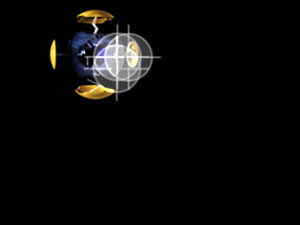
Gizmo courtesy Quiet Earth Design.
The core expression to cause this behavior would be wiggle(2,20,1,0.5,time-0.2), which says “wiggle twice a second, by 20 pixels, with 1 octave of noise, with any additional octaves scaled in at 50% strength” (these last two numbers are their defaults). The value time-0.2 says “lag 0.2 seconds behind the current time.”
The final expression we applied to the Position of each sensor layer is:
thisComp.layer(“gizmo”).position.wiggle(2,20,1,0.5,time-0.2)
The code before the wiggle part of the expression is what tells us to use the Position of the “gizmo” layer as our original value to wiggle.
Next Installment: Random Numbers
We think the wiggle expression is one of the core tools to include in your expression toolkit. However, you should know that many basic wiggle moves are available as a set of Animation Presets (look in the Behaviors subcategory).
If you want to dive even deeper into random values, the next installment is for you. In it we’ll discuss the differences between random, gaussRandom, and noise, changing seed values, and freezing animations. Until then…
We’re in the process of serializing the Deeper Modes of Expression bonus chapter from our book Creating Motion Graphics with After Effects into a set of 12 posts here on PVC.
The latest edition of Creating Motion Graphics – covering the updates introduced in After Effects CS4 and CS5 – is shipping now.
The content contained in Creating Motion Graphics with After Effects – as well as the CMG Blogs and CMG Keyframes posts on ProVideoCoalition – are copyright Crish Design, except where otherwise attributed.

Filmtools
Filmmakers go-to destination for pre-production, production & post production equipment!
Shop Now


