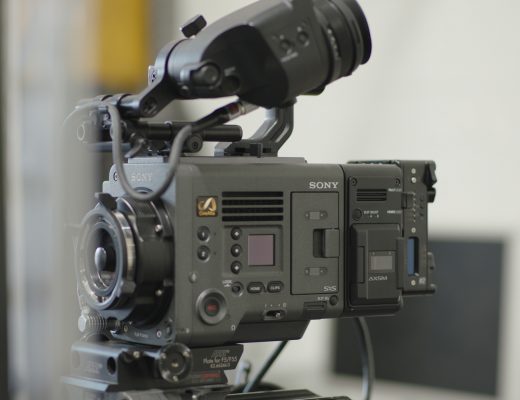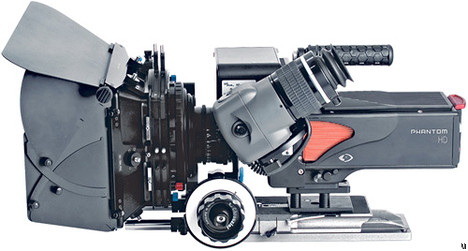
A while back I wrote this article about some high speed tests I did in preparation for an upcoming regional spot. The results convinced the client, Rambus, that the extra expense of shooting their upcoming spots at 1000fps was well worth it.
Rambus creates technology, literally, and their inventions live in a number of everyday items that we take for granted: digital projectors, laptop and desktop computers, and video game consoles. The goal of these spots was to show how these products are used in daily life. And since daily life isn’t always that interesting, director Jono Schaferkotter, of production company Compass Rose Media, opted to show reality from a different perspective to make the mundane more exciting.
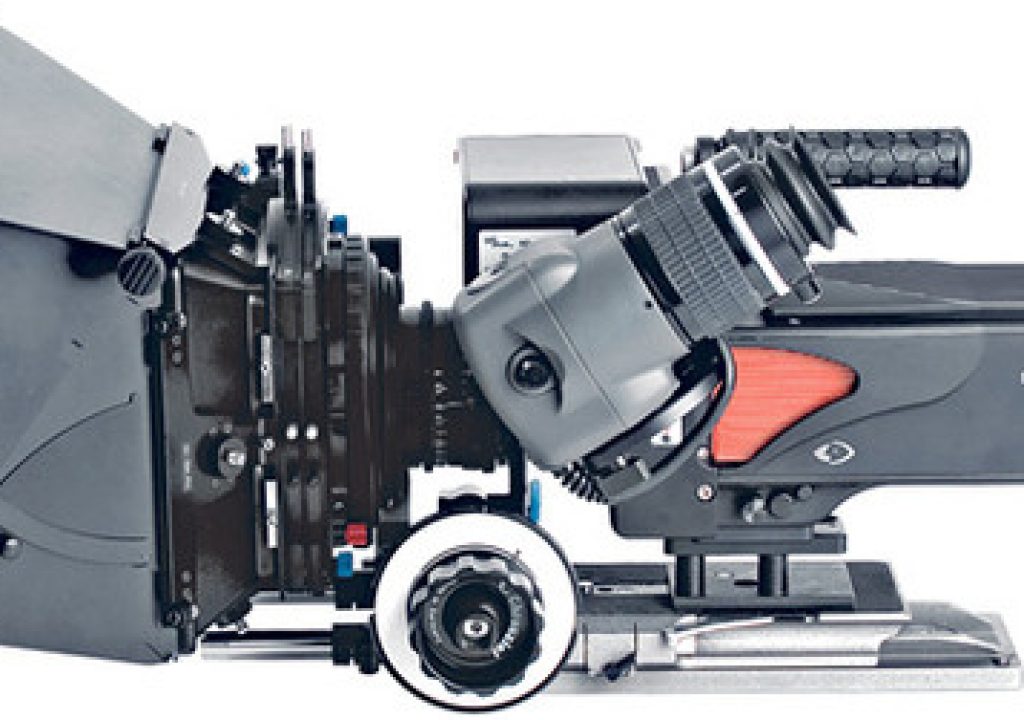
While I’d tested the Phantom HD Gold I’d not done any actual work with it, so I called some friends and colleagues and asked their advice. I’d heard, for example, that shooting faster than a few hundred frames per second could be problematic when using small lights (anything less than a 5k) on AC power because the smaller filaments dim between cycles and cause flicker. I wanted to use Maxibrutes–inexpensive units that consist of an array of nine or twelve tungsten par lights–because they put out a tremendous amount of light for the price, but as the individual lamps were small (1k-1.2k) I had to figure out how to power them with DC current.
First I did some calculations. Starting with the formula T2.8 = 100fc @ ISO 100 (with a 180 degree shutter) and working with an ISO of 250 as recommended by the rental house (Chater Camera), I found I needed nearly 2000fc of light just to shoot at T2…and that was if I left the shutter completely off! I’d never lit anything so brightly so I quickly looked up the photometrics of a Maxibrute with MFL (medium flood) lamps and discovered that by using a couple of Maxis through diffusion I could guarantee reaching that level of illumination

It’s not easy to watch a monitor surrounded by 2000fc of light!
Next I had to figure out how to power them with DC current. DC current doesn’t alternate, so the lamp filaments don’t dim between cycles as there are no cycles. The lights just stay on. The disadvantage of DC current is that it doesn’t travel very far, so line loss can be a problem over long runs. That’s why our electrical grid uses AC power instead of DC.
It turns out that most generators offer a rectified DC option, so the next question was whether rectified DC was good enough. Some people I spoke to said not to trust rectified DC at 1000fps so I discussed the situation with a local DIT who’d just worked on a Phantom shoot with Maxibrutes and a rectified DC genny. He said they’d had no problems at all, so we made sure to order the same generator.
Another budgetary issue raised its head when we discussed post options. The Phantom records to a very expensive Flash memory mag, and it’s normal to shoot during the morning with one mag and then dump it to a hard drive in the afternoon while using the second mag. (While the Phantom records 16gb of data at a time, it takes about a gigabyte a minute to transfer to a hard drive for post processing.) In post the raw data has to be deBayered and color graded, and our budget didn’t really allow for that. So we opted to use an alternate method: we recorded the HD-SDI monitor output to a Ki Pro deck in ProRes 422HQ. This method doesn’t offer the same kind of latitude that raw does, and the paint controls are simply what’s available in the monitor output menu (which isn’t much!), but under controlled circumstances this procedure works quite well.
So, knowing that I could use my favorite brute lights and work at 1000fps with enough control to expose the image within the limited Rec 709 monitor output range, I proceeded to lay out a cunning plan. And it worked. I suspect you want proof, so here it is:
The first spot is a conceptual piece that the production company, Compass Rose Media, submitted to a design festival. The second piece is what actually ran on the air and is a compilation of three different spots. We originally shot four spots of three to four shots each, and Rambus opted to combine them all into one. Some of this footage has never been seen before publicly.
Turn the page to read how we pulled off this off in two days on a small stage…
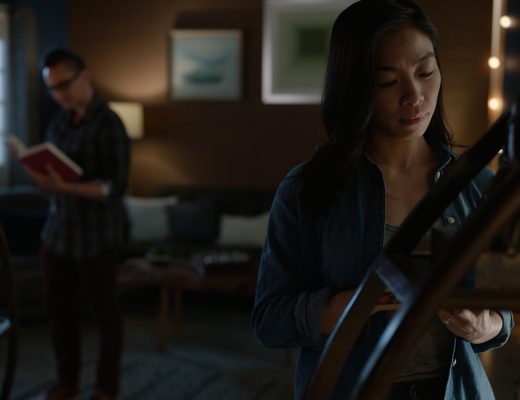
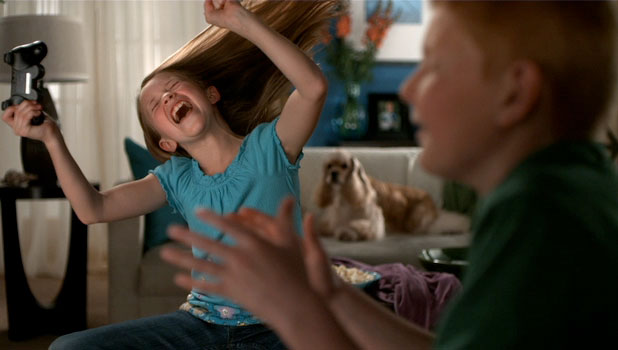
This is raw footage from the first setup, daytime in the living room:
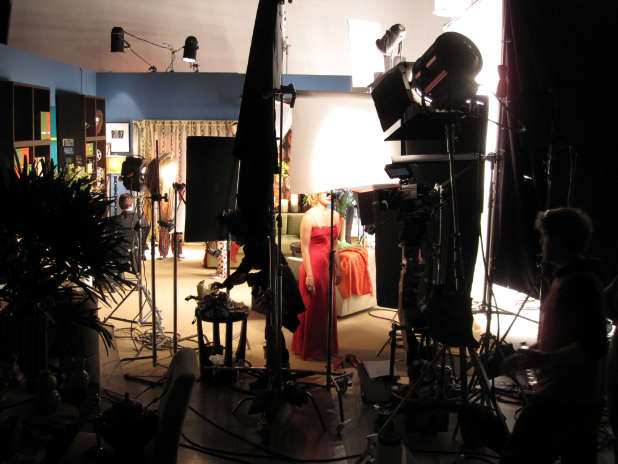
Here’s what it looked like behind the scenes:
The trick was to pour 2000fc (plus or minus) into the set and make it look reasonably natural. (Later on we opted to turn the shutter off and reduce our light levels to 1000fc as none of the action was fast enough to show the difference.) During preproduction I took a look around the internet to see if I could find some examples of naturally-lit interior high speed work and I couldn’t find any. Everything I found was either shot day exterior or photographed within a very, very small and brightly-lit space. I had to start from scratch, so I opted to build up a base level of soft light and then add hard light accents.
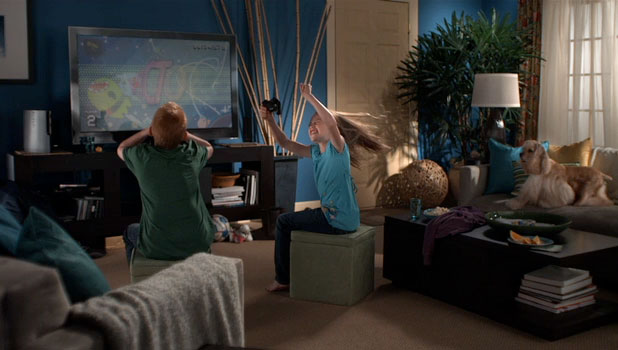
We started out by bouncing several 12-light Maxibrutes off a 12×12 UltraBounce outside the right frame, where the right wall of the room would be, to create a base level of ambient light. We then added a couple of Maxibrutes to the left of camera (later, when we moved in for closer shots, they came over the top of camera) through a poly silk, followed by 1.2k tungsten VNSP (very narrow spot) “firestarter” pars to create sunny accents around the room. (Firestarters are called that because, if you put something too close to them, they will.) We also poked a nine-light bulbed with Firestarters over the corner of the set as general backlight.
The sunny window effect was a combination of warm 10k accent lights raking the curtains and additional units lighting the white cyc wall behind.
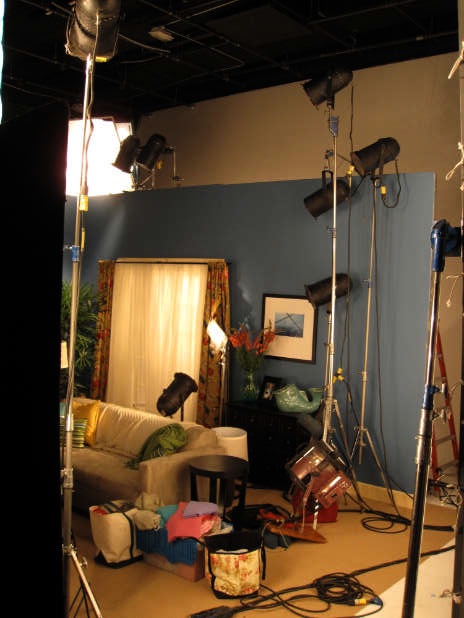
All the black lights are Firestarters, very hot and very spotty par lights that add “hits” of sunlight around the room. The one in the center is aimed into a mirror. A nine-light Maxibrute backlights the room through a frame of diffusion, probably Lee 250.
The wide shot took a bit to light but worked very well. Initially we captured the kids separately from the dog as we didn’t know how the dog would react to cues. Later we tried tried shooting all three performances at once for the medium shot and got one that worked perfectly. While the dog was comped in for the wide shot, it performed live during the medium shot.
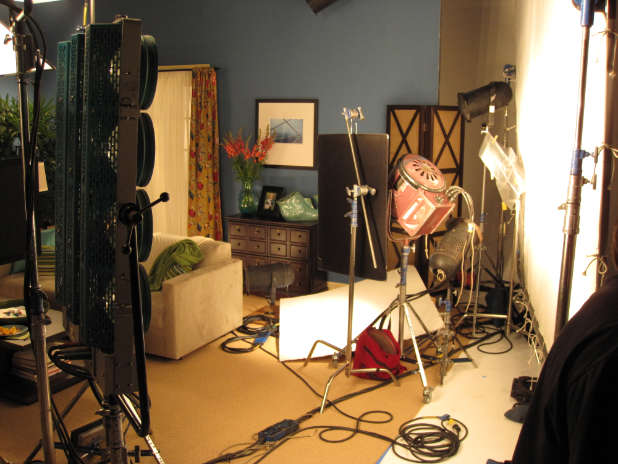
Here you can see the 12’x12′ Ultrabounce that’s providing most of the base light for the set. The fresnel in the center of frame is bouncing off a white card to create soft upward shadows on the bookcase, as if sunlight was bouncing off the floor. There’s another bounce hidden behind the couch. We were clearly working at the limits of the stage.
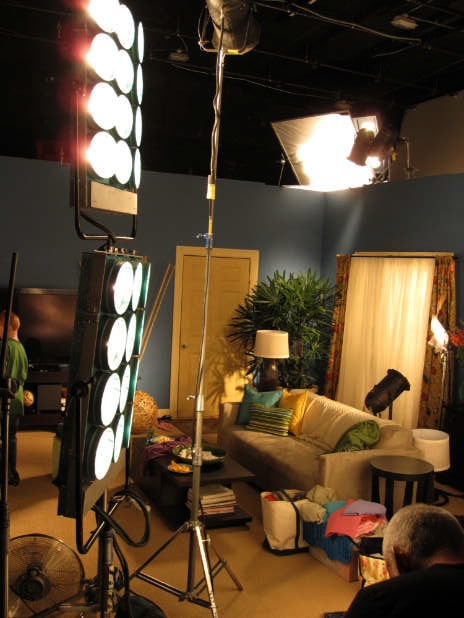
The rest of the set.
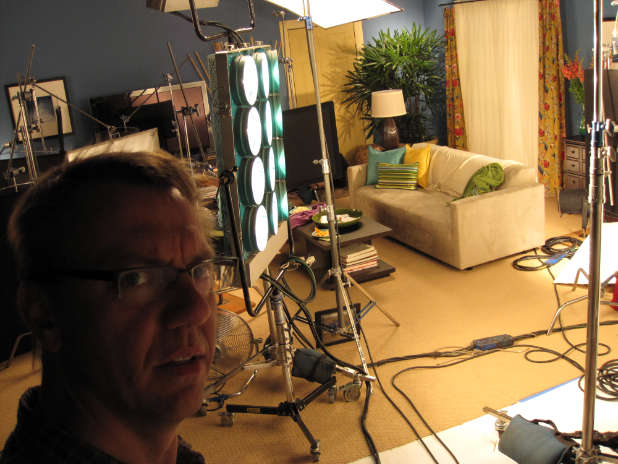
Gaffer Luke Seerveld wonders what he did to deserve all this.
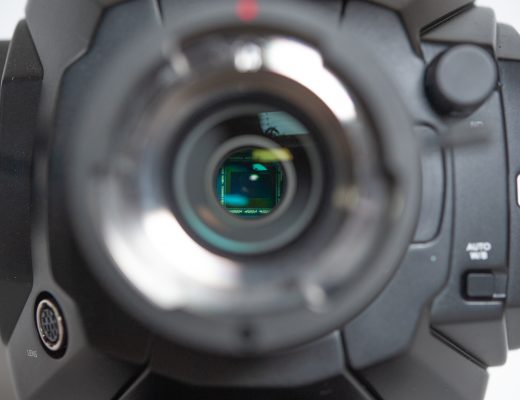
The Phantom HD Gold is an odd camera: it is always, always, always capturing imagery. The camera has a 16gb buffer and image data is always flowing in one end and out the other. “Rolling” the camera simply means that you capture whatever is in that buffer. There’s no “roll camera” and “cut,” only “action!” And then you look at what you’ve got. At 1000fps that buffer holds four seconds of real-time footage that plays back at 24fps over about three minutes.
Imagine the Phantom’s capture buffer as a pipe. Data flows in one end of the pipe and exits out the other. When the capture trigger is tripped, whatever is in the pipe is saved. What’s really cool is that you can set the capture trigger anywhere along that four second pipe: if you set it at the beginning of the pipe then hitting the trigger saves the next four seconds of real time at 1000fps. If you set it in the middle of the pipe then hitting the trigger captures two seconds that are already in the pipe and the two seconds that follow. (This is handy if you want to capture data just before and just after an action. For example, if you’re dropping something in water and want to see its entrance and the subsequent splash, you’d put the trigger in the center of the pipe and hit it just as the object touches water.) You can even set the trigger at the end of the pipe and trigger capture as the event ends, capturing the previous four seconds of action.
In this case my Phantom Tech, Jay Farrington, often set the capture trigger about 1/4th or 1/5th of the way into the pipe, or buffer, as he knew how to gauge his reaction time in relation to the action on screen. As soon as he saw the sweet spot of action he’d hit the trigger, and he nailed it every time.
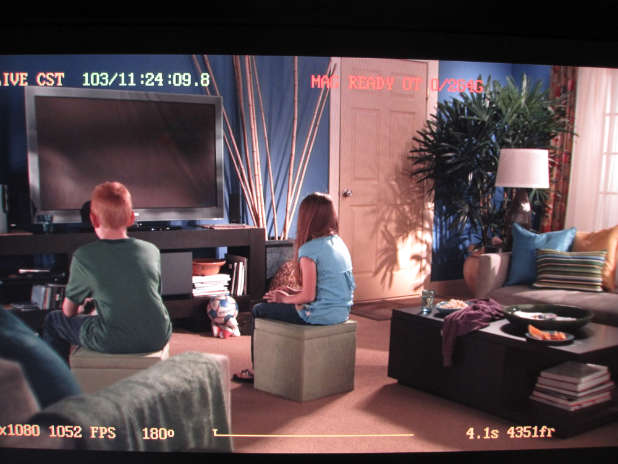
This is the monitor output of the Phantom HD Gold. The line across the bottom represents the buffer, or data “pipe,” and the triangle indicates at what point the camera will start saving data when triggered. Usually Jay set this a little in from the left, but he varied the settings as needed to make sure he got the shot. The monitor says we’re using a 180 degree shutter but we turned that off at some point to reduce light levels. 1/1000th of a second exposure turned out to be plenty to freeze the action we were shooting, instead of 1/2000th of a second with a 180 degree shutter..
After shooting a circle take the most important portion of the shot is marked with in and out points in the camera and that section only is transferred from the camera to the Flash mag. The Flash mag footage is then played back through the monitor out port (with the character generator turned off!) and captured by the Ki Pro. It’s rare for an entire take to be recorded as three minutes of 1000fps footage is a huge amount of data, and most of it isn’t usable. We only needed ten seconds out of three minutes of playback time.
As we wanted to capture ten second shots we only had about a quarter of a second (240 frames out of 1000 per second) for all the elements of a shot to gel. That’s pretty amazing when you think about it, and even more amazing when you see it actually work. The kids nailed their performances, and we added the dog in the medium shot and got a take where all three living beings in the frame did exactly what we wanted them to do within a quarter second of capture time.
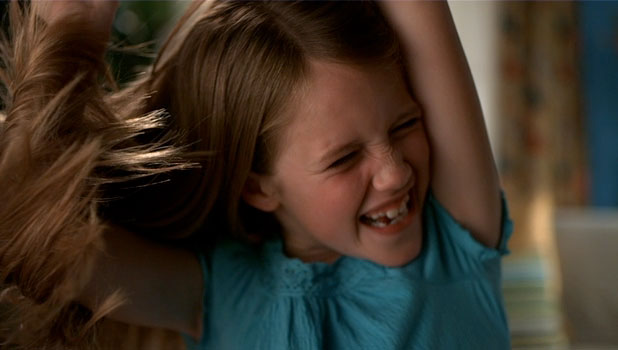
I gave little sister a bit more light in the wide shot as I wanted her to “pop” as the center of attention. I brought that light in a little closer when we did the tight shots as I wanted it to wrap around her face a bit more.
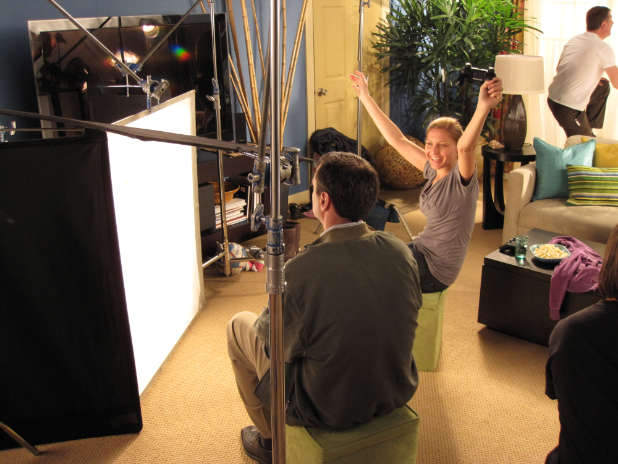
Production manager Vanessa Tomasello, sitting in for little sister, bursts with joy over being on time and on budget.
We used a six light FAY fixture (it looks like a smaller version of a Maxibrute) to give little sister some extra light on the wide shot, and for the medium and close shots we moved it in a bit to make the light wrap around her face and look more natural. Soft light from near the lens is very flattering to faces. The position and angle of the diffusion puts most of the light on little sister, making her the star of the shot, while big brother gets some fill from the same light and a little modeling from the nine light Maxibrute over the corner of the set. The diffusion in front of the FAY light is probably Lee 216.
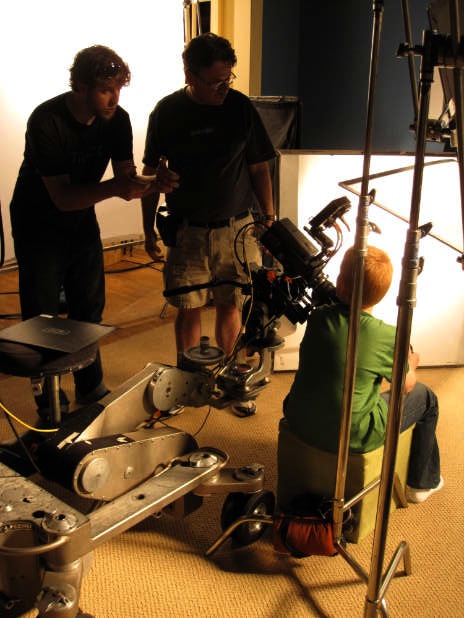
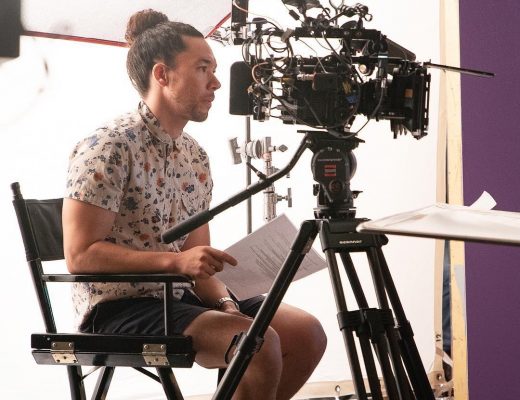
Director Jono Schaferkotter offers wise words of advice to big brother while I stand in shorts next to a very hot lamp. Behind us is the over-the-camera fill light, a Maxibrute through an 8’x8′ frame of poly silk.
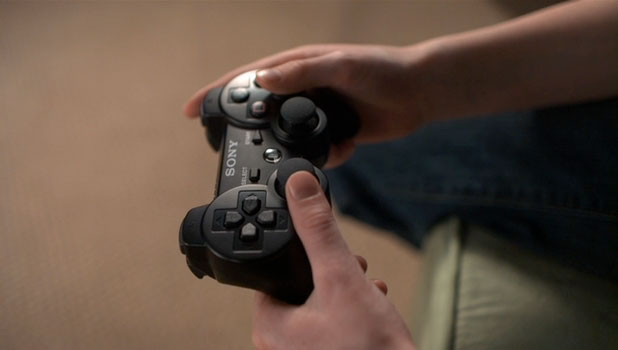
The shot of the controller was done with existing lighting. The trick to most product photography, especially for objects that lay flat, is to light the object from behind, so I found an angle where the controller reflected the diffused nine-light Maxibrute poking over the corner of the set. If the product is shiny I use a big source that reflects in the shiny surface. If the product isn’t shiny and has surface texture then I use a harder light to bring out the texture. The shadows should always fall toward the camera.
Let’s move on to the den for some quiet evening laptop action…
The point of this setup was to show off the laptop, which uses Rambus technology in some fascinating way. (I don’t remember exactly how, but it has something to do with RAM.)
And here’s what it looked like behind the scenes:
High-speed cinematography creates the illusion of objects defying gravity, and the quilt did a marvelous job of making an otherwise dull product shot at 24fps look startlingly beautiful at 1000fps.

We tried something a little different with this setup: we aimed two Maxibrutes into an 8’x8′ silver/gold checkerboard and aimed that through a 12’x12′ frame of full grid. This rig, positioned just off the left edge of frame, washed the set with warm beautiful evening light. We also added some soft warm light through the curtains, in contrast to the slightly hotter and less warm light from the previous setup.
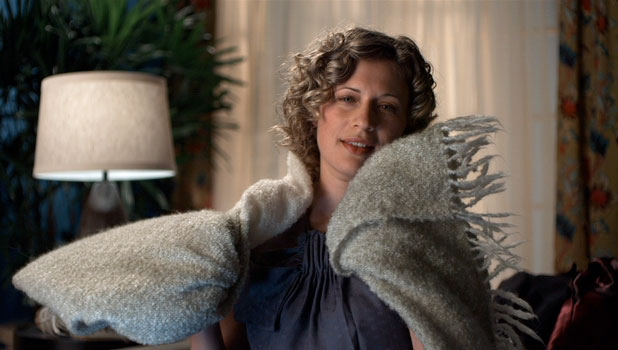
Medium shot of mom.
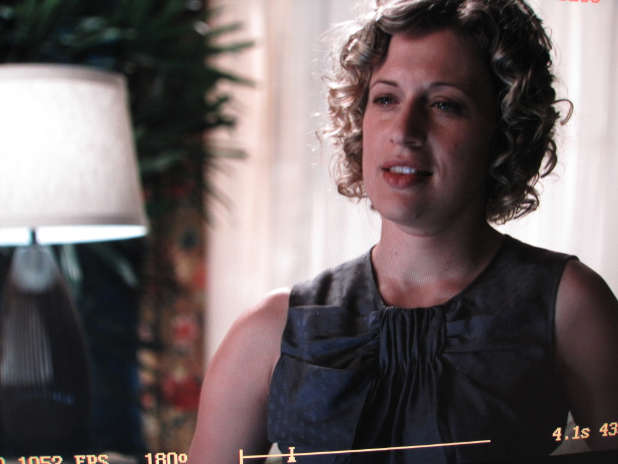
Mom’s medium shot on the Phantom monitor. Jay has moved his trigger point about 1/5th of the way down buffer time line.
Mom is backlit from over the top of the set, probably with the nine-light Maxibrute, and this light really accentuates the flow of the quilt. The back light brings out texture, and as this shot is all about flow and texture it was important to rake some light across the fabric to enhance the feeling of flow.

The laptop shot was fairly straightforward: the best way to light shiny surfaces is to reflect something in them, so we put a piece of showcard on a stand and reflected it in the laptop’s shiny surface from just outside the frame.
This shot is interesting in another way. Can you see the blue light on mom’s right arm, or on the quilt in mom’s medium shot above? The laptop screen wasn’t on for this shot as the display images were going to be added later, and even if it was on it wouldn’t have been bright enough to interact with mom at all. Part of selling the illusion that the monitor is on is to show that interaction, so we put a 1k Tota light gelled with CTB on a wood tray over the keyboard to create the subtle glow of the screen. (Subtle glow… from a 1000w positioned three feet away??? Welcome to 1000fps.)
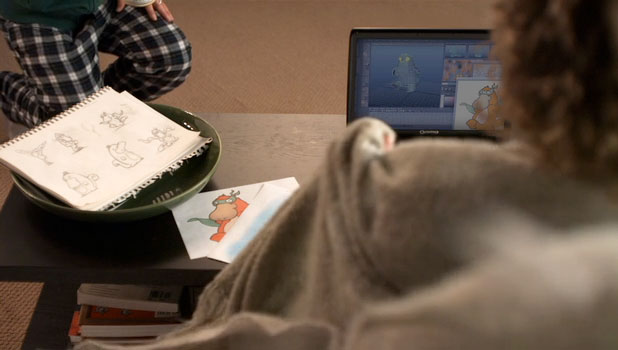
This next shot was a bit more difficult. In addition to the silver/gold bounce through grid on frame right we had to bring in a 12’x12′ silk on frame left to light the floor and make it look “normal.” (Otherwise it was a little too obvious where our key light was coming from.) We also tried to light the laptop keyboard to make it pop, so we hung a Firestarter par about 5′ overhead to really punch the keys. At some point I looked down and noticed a crater in the keyboard… we’d melted it! Fortunately director Jono Schaferkotter was able to stage the quilt action to cover up the crater and we got the shot.
I remember holding my hand under the Firestarter, just above the keyboard, and thinking “That isn’t so hot.” Ten seconds later it nearly caught fire! Lesson learned…
Turn the page for an evening out on the town…
Nothing from this sequence ended up in the final piece, which is a shame as Jono designed it in a neat way: every shot in the sequence references another aspect of action in the background, and one shot ties it all together. The shot of the girl shows dad turning around; dad’s shot shows the son karate chopping a cushion in the background; and mom’s shot shows all of them.
This was a tricky setup to light because we had to light up a large space using light sources that were right at the edges of the set. A difference of a few feet could mean a dramatic change in exposure, and due to the blocking some of the actors were right under lights and some were on the other side of the set!
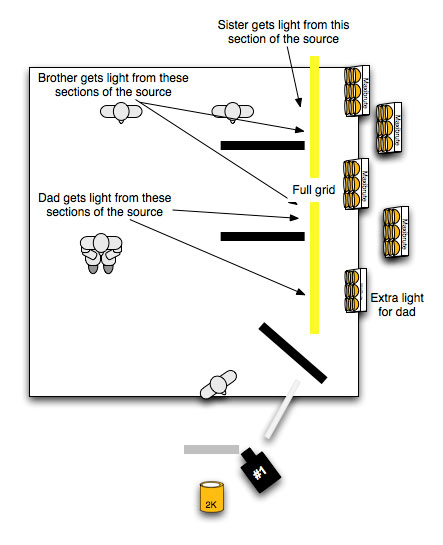
For example, little sister is jumping on the couch a couple of feet from a 12’x12′ frame of grid cloth with four Maxibrutes behind it, while little brother is six feet farther away from the same source and is getting a lot less light. Dad is on the other side of the room, and mom is standing in the foreground beyond the bounds of the set.
I opted to egg crate this big soft source, dividing it up into a number of smaller sources that were easier to control. You can see that in this picture:
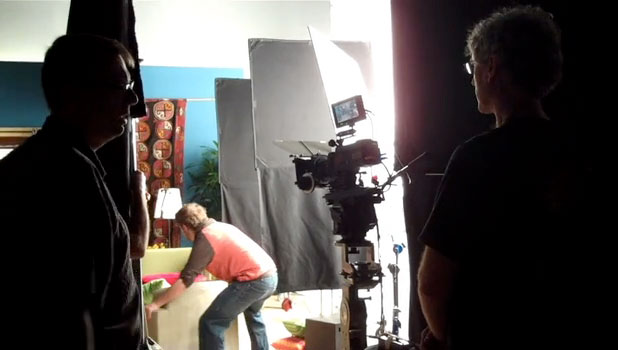
Gaffer Luke Seerveld and best boy Alan Steinheimer conspire to stop the madness.
The 4’x4′ floppies effectively divide the diffusion into three light sources. Little sister is lit by one section of the 12’x12′ source because, from her perspective, she can only see her third of the diffusion. The two sets of floppies prevent her from seeing the rest of the diffusion, reducing the amount of light she receives. If she can’t see 2/3’s of the light source, it can’t see her.
Dad, on the other hand, needs all the light he can get, so from his perspective the flags are dead on, blocking almost no light at all. We added an additional Maxibrute to the section closest to him to punch him up a bit more as he was so far from the source.
Big brother was kind of in-between, so he got light from little sister’s source as well as some from the middle section.
And mom needed to be lit from a different angle entirely, so she was flagged from the 12’x12′ source completely.
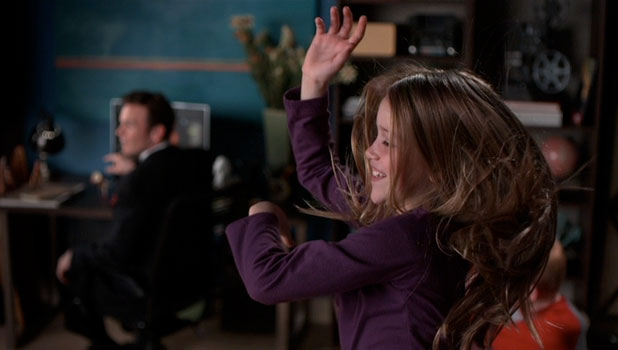
Little sister was mostly front lit by her section of the 12’x12′, but I didn’t mind that at all. While some say that frontal light is to be avoided at all costs, I consider front light to be quite beautiful in a number of circumstances. In this case it set her off nicely from the rest of the room and gave her skin a kind of luminous glow. The backlight, from the nine-light Maxibrute poked over the corner of the set, accentuates the flow of her hair. (Dad is getting a little edge light help from a six-light FAY light through a frame of diffusion outside the left of frame.)
Though little sister is being lit largely from the front the source is small enough and off axis to the lens enough that her fingers show a lot of contrast. Soft light from near the lens doesn’t have to be flat; it’s often easy to create some beautifully subtle contrast by moving to source slightly off the lens axis.
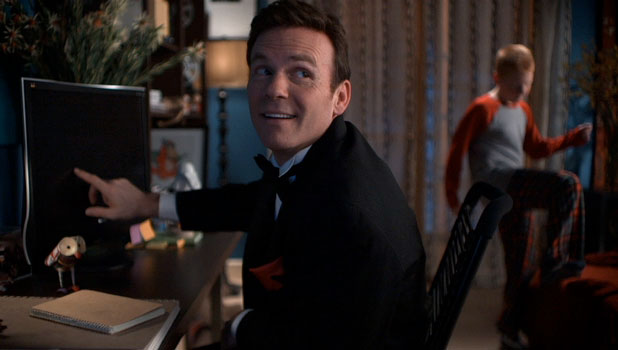
While big brother looked a little under from the perspective of the previous shot he was darker from dad’s perspective. What was once front light from little sister’s shot is now sidelight, and he doesn’t have much fill–and I didn’t want to add any fill as I quite liked the look of the shot.
A while back I picked up a trick for these kinds of situations and it came in handy now: as long as some light is hitting him that is “normally” exposed he’ll look okay, and in this case his back light (from a Firestarter popped over the edge of set behind him and to the right) gave him enough exposure that his underexposed face didn’t cause much concern. Without the back light, though, he’d look unusually dark and his lighting would feel like a mistake.
Dad’s lighting was fairly simple: we added a couple of 4’x4′ frames of light diffusion (probably Opal) to soften the light from the 12’x12′ and wrap it around his face a bit more. We put the six-light FAY unit through one of the frames to give dad a little key-side fill. He’s filled from the left side of camera with a Firestarter gelled with full CTB bounced into a 2’x3′ gryfflon next to the lens. I wanted Dad to look as if he was getting some light from the monitor, which wasn’t on and wouldn’t have cast enough light anyway, and often adding light from the general direction of a light source is convincing enough.
In this case bouncing a blue light off a 2’x’3 gryfflon to the left of the lens was enough to give him that hint of blue, and even though it is coming at him from the front it gives the illusion that he is lit partially by the computer screen. You can see a hint of blue in the whites of his eyes and on the left side of his face. At 1000fps a subtle bounce source doesn’t do much! His hand should be really blue as it’s touching the screen, but we didn’t have the time to finesse that little detail. If this scene had been used and the screen was comped in the little bit of blue on his face was probably enough to sell the effect.
At some point we had to cover the 2’x3′ gryfflon bounce with showcard because the gryfflon started to melt.
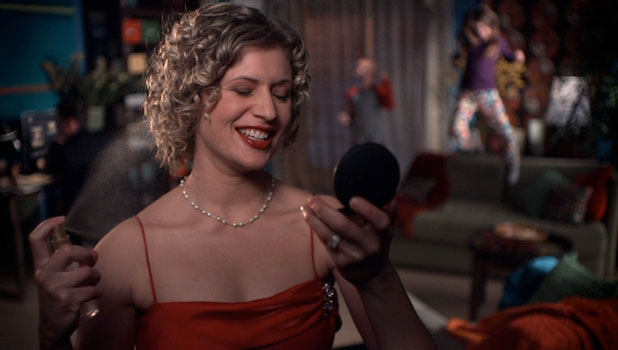
Mom presented an interesting lighting challenge: when lit from the right side of frame, in the direction of her look, her eyes looked quite tired and baggy. By shifting the light to the other side of her face, such that she’s looking away from her key, the bags go away. I don’t know why this happens on some faces, only that it does. This is a trick I keep on reserve whenever I’m lighting women.
She’s lit by a 2k punched through a piece of Lee 250 diffusion, and the 2k is spotted way in to create a pool of light on her face. In the final shot her face is quite bright while her hands drop off into shadow; that’s intentional, as I want the audience to look at her face and the mist from the spray bottle.
The placement of the key light worked out quite well when I added the kicker for the aerosol spray. Liquids show up best when back lit, as each drop becomes a little lens and directs light toward the lens, and I was able to make this effect light do double duty as a scratch light on mom’s hair. The “traditional” method of putting a scratch, or edge, light on the fill side of an actor’s face often feels “lit” to me, and there are a couple of things to avoid when lighting an actor or actress this way, such as not hitting the nose with the scratch light or creating awkwardly large ear shadows. A scratch light shows up much more dramatically on the fill side because the contrast of the scratch against the dark side of the face makes it more noticeable.
Adding a scratch from the key side avoids most of these problems because you’re now effectively hiding a bright light inside another bright light. The effect is much more natural as the face transitions from very bright (scratch) to bright (key) to dark (fill) in a natural progression from left to right. The same thing happens when filling from the key side: the face transitions from (key) to (fill) to (unfilled) in a very natural way that accentuates its roundness and looks less obviously lit.
As the contrast between the scratch and the key is so low it’s possible to be a lot sloppier with the scratch or make it do double duty. Its placement is less critical than it would be on the fill side, where the contrast is higher and it doesn’t blend with another bright light source.
Mom is getting a little fill from a showcard on camera right but otherwise she is completely blocked from the 12’x12′.
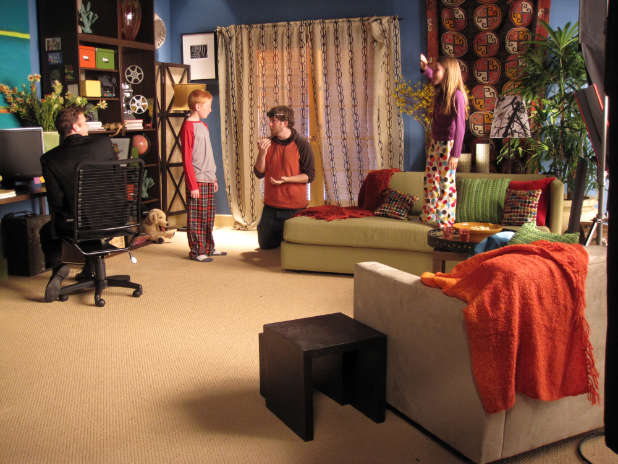
Jono sinks to his actors’ level to give direction. He’s great with kids.
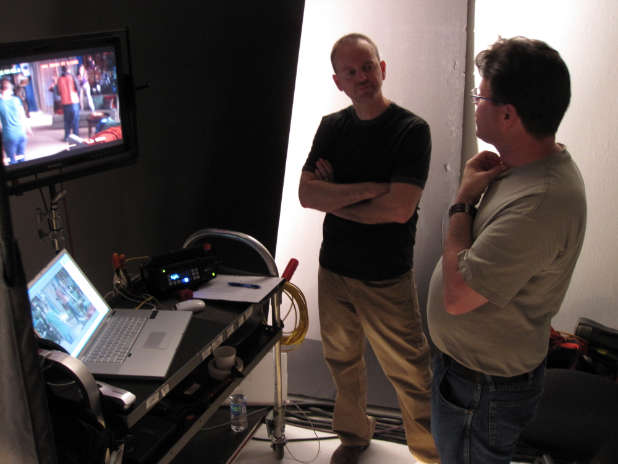
Jay listens politely as I pontificate. The laptop controls the Phantom’s every function and is used to trigger capture mode.
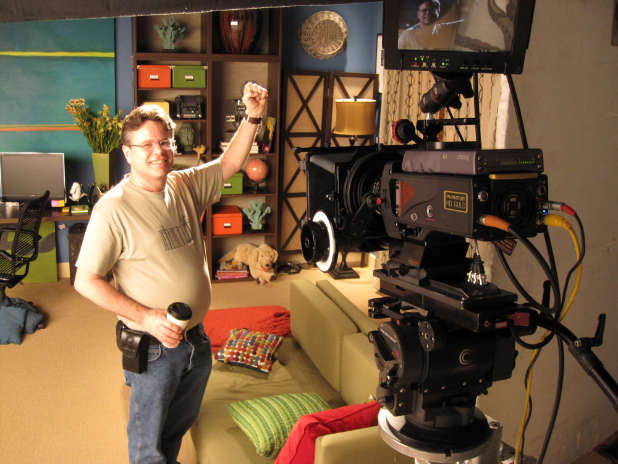
The sign of a true professional: guiding the aiming of a light with one hand and holding a cup of coffee with the other.
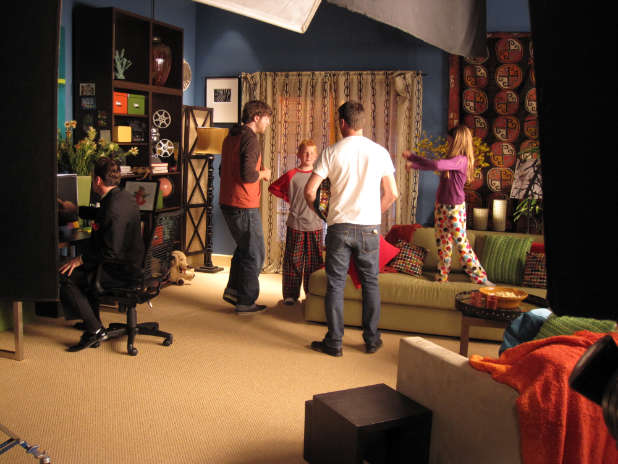
In the top of this picture you’ll see part of the duvetine teaser the grips hung across the set for me. When washing a set with soft light it helps to give it some shape by reducing the amount of light hitting the top of the walls, otherwise it just looks… wrong.
The table is set for dinner on the next page…
This was our last setup of the shoot, and it promised to be a tough one. How could I light a set bright enough to see slow motion detail while keeping it dark enough for the projector image to look real? (The projector image is a post effect, by the way.)
Originally I’d thought about bouncing light off the tablecloth from above, but I opted not to do this for a number of reasons. Bouncing light off a low flat surface, like a table, is a great way to quickly light a space and make it look real. Soft uplight looks great on people placed around the table, and the glow from the table’s surface drops off quickly which helps create a sense of space and volume. Hard lights and lights with beams are wonderful tools for lighting at a distance and bringing out texture, but soft bounces and lights that simply glow define a space because they create soft areas of light that people and things can pass through. You can “feel” where they are in relation to objects and people in the frame.
But I didn’t do that.
I wasn’t sure I could hang enough lights over the table to get the amount of bounce light needed so instead I opted for two Maxibrutes popped over the back wall of the set and aimed through diffusion. I had some qualms about this as I wanted to keep the soft light from spilling down the wall; fortunately I had an excellent grip crew who took care of that for me. (This was a great opportunity for me to not have all the answers. I simply told my grips what I wanted, but not how to do it, and they did it faster and better than if I’d told them what to do. That’s an important thing to learn: hire good crew, tell them what you want, and get out of their way.)
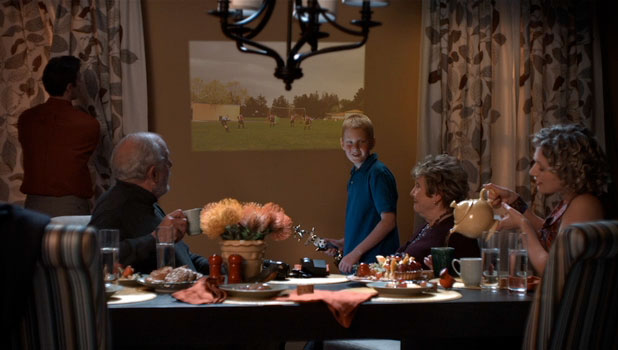
The fill light is another Maxibrute, gelled with half CTS (Color Temperature Straw) and pushed through an 8’x8′ frame of grid cloth. CTS is a tough gel to work with in HD as it often “tips” over into green. Strong oranges are the same way. Yellow and orange are awfully close to green on a vectorscope and many cameras will accentuate that relationship in unpleasant ways. Fortunately the Phantom didn’t have this problem with this strength of CTS gel.
It’s nice that the fill is coming from the left as it blends nicely with the blue light on the left side of big brother’s face and then drops off into shadow on the right, giving him a bit of shape.
The window lights are 10k’s gelled with a combination of full CTO and half CTS. I first read about this formula in the American Cinematographer article about the movie “Fargo,” where the DP (Roger Deakins) sought to emulate sodium vapor lighting using tungsten units. The rich orange color really conveys the sense of streetlights outside a window.
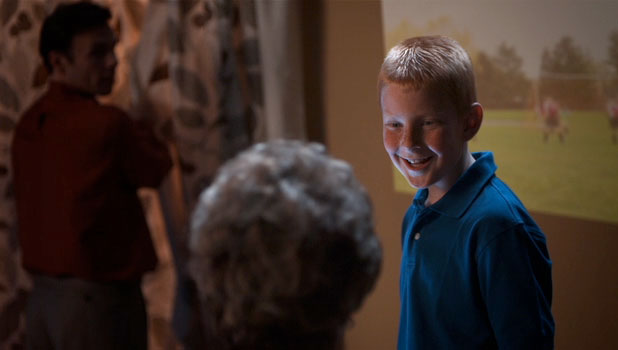
Little brother was the focus of the shot and I wanted to pop him out from the others with an additional light. The most obvious motivated light source was the projector, but there was no way I could hide a light near the projector lens that would light the boy but not light the wall. (The wall had to remain dark so the video projector image, added later in post, appeared plausibly contrasty.) I opted instead to bounce a Firestarter par gelled with full CTB off a silver card taped to the floor. The blueish color sold the idea that he was being lit by spill from the projector, and even though the light was coming from below it was still coming from roughly the same direction as the projector and felt very natural.
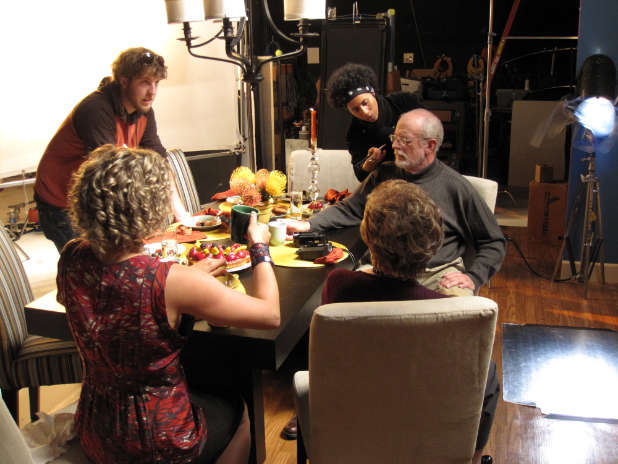
The Firestarter par on the right is gelled with full CTB and bouncing off a silver card to light big brother. Our fill light, a Maxibrute through 8’x8′ full grid and gelled with 1/2 CTS, is behind Jono.
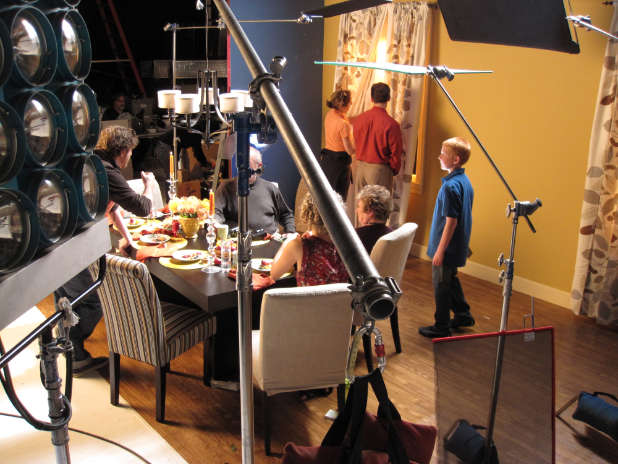
Faking a ceiling: here a menace arm holds a practical light in the proper position. The various flags and nets were necessary to control burned-out highlights as we were lighting the scene from behind and had to dodge a number of bright white and shiny surfaces. The Rec 709 output of the Phantom is not nearly as forgiving as raw mode is, but that was a different budget.
Noise shows best in flat even surfaces, and DIT Jay Farrington noticed that the flat wall showed more noise than it did in any of our other shots. In order to reduce the amount of noise we changed the camera’s ISO to 160 and dropped our frame rate to 500 or 600fps. This didn’t reduce the noise at all, but as the shot didn’t contain as much dramatic motion as the others we opted to keep the frame rate anyway.

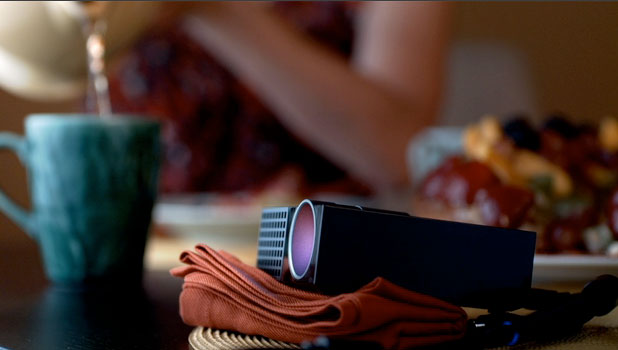
We went back to 1000fps for these two shots, which were completely gratuitous but really cool. These were primarily lit with a Maxibrute through thick diffusion (one or two frames of Lee 216) in order to create a nice soft highlight in the side of the pot. The liquid picked up the light nicely and looked a bit like liquid gold. The portion of the image containing the projector is a freeze frame as we discovered it didn’t put out red, green and blue light simultaneously. Instead it flickered through each color as it painted the frame with red, green and blue light in rapid sequence. Although the effect was very pretty it was also distracting.
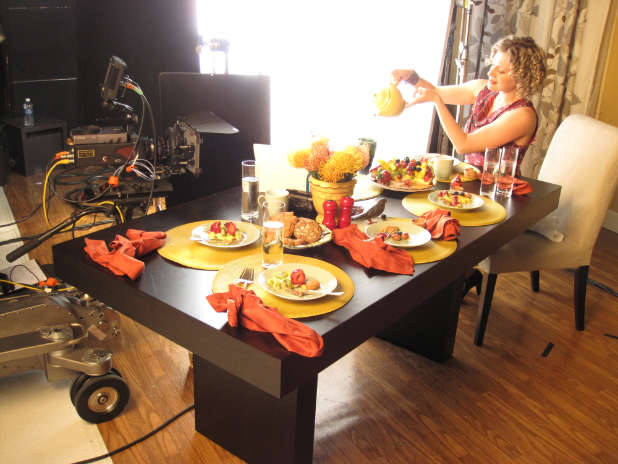
Double-diffusing the light to create a nice clean highlight on the tea pot.
Thanks for reading, and I hope you learned something new and interesting. This was a great learning experience for me, and I’m fortunate to have been able to pick the brains of a number of experienced colleagues before taking this shoot on. I also had a great crew to lean on, which is always the key to success.
“RAMBUS XDR”
Regional Spot (Northern California)
Production Company: Compass Rose Media
Director: Jono Schaferkotter
Production Manager: Vanessa Tomasello
Executive Producer: Steve Weisser
DP: Art Adams
DIT: Jay Farrington
Gaffer: Luke Seerveld
Electricians: Alan Steinheimer & Ernie Kunze
Grips: Todd Stoneman & Jeff Nealon
Production Designer: Mykael Merryweather
Camera: Chater Camera
Thanks are due Luke Seerveld, for a ton of great stills, and to Compass Rose Media, for their behind-the-scenes Flip camera footage.
Art Adams is a DP who likes to shoot quickly, even in slow motion. His website is at www.artadamsdp.com.

Filmtools
Filmmakers go-to destination for pre-production, production & post production equipment!
Shop Now