As you are aware by now, we’re going through our book Creating Motion Graphics with After Effects 5th Edition (“CMG5” for short) and pulling out a few “hidden gems” from each chapter. These will include both essential tips for new users, as well as timesaving gems that experienced users may not be aware existed.
Chapter 11 covers the art of track mattes: borrowing the luminance or alpha channel from one layer to serve as a new alpha channel for the layer underneath. In the book, we talk about how to optimize mattes, the ability to animate the matte and/or “fill” layers independently from each other, strategies for keeping the two component layers together, and other important techniques. Here are a few tips and gotchas that might not be apparent from just poking around in the program, starting simple and ending complex:
First, The Obvious…
We’ll start with the basics – although everyone gets caught out by at least one these at some point in their time with After Effects:
- In the Timeline panel, the layer providing the alpha channel (the matte) must be on top; the layer being cut out (the RGB fill) must appear directly underneath.
- The track matte mode popup (labeled “TrkMat” in the column headers) must be set for the fill layer underneath; do not set this popup for the matte layer on top.
- The matte layer almost always should have its Video switch (the eyeball icon) off. When you first set the TrkMat popup from None to one of the four valid matte modes (Luma or Alpha Matte, inverted or not), After Effects will automatically turn off the Video switch for the layer above. However, if you turn that switch back on, and then change the TrkMat popup to another matte mode (such as from Luma Matte to Luma Inverted Matte), After Effects will not turn the Video switch back off again; you will need to do it yourself.

When the TrkMat (track matte) popup has been set for a fill layer, both it and the matte layer above get special icons next to their names in the Timeline panel, indicating the matte (on top) and the filled result (underneath).
(So, when would you want the Video switch for the matter layer turned on? You may wish to turn it on temporarily as you apply effects to it or animate it. Just remember to turn it off when you’re done!)
You Can See It All
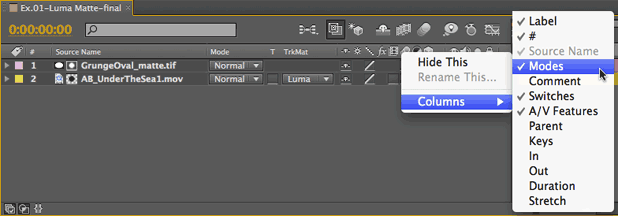
The TrkMat popup exists in the same column as Blending Modes, which normally shares space with the Switches column. To flip between them, click the Toggle Switches/Modes at the bottom of the column in the Timeline panel, or just press F4.
However, if you have a wide enough monitor, you can see both at the same time: Just right-click on any Timeline panel column header (those Mac users still suffering with a one-button mouse can Control-click), and select whatever columns you want to see or hide. You can then re-arrange columns by clicking on their headers and dragging them left and right.
Not All Colors are Created Equal
A Luma Matte derives the overall luminance value from an RGB matte image to determine how transparent or opaque to make the pixels in the fill layer. If you’re using a color image for your matte (such as the one below on the left), there’s a good chance its luminance values may be lacking (below center), and that the result may be more transparent or washed-out than you hoped (below right):

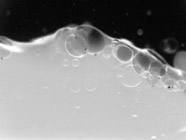
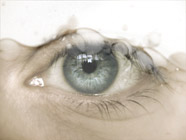
Water courtesy Getty Images/LiquidFX; eye courtesy iStockphoto (© HenryGrey, Image #9563051).
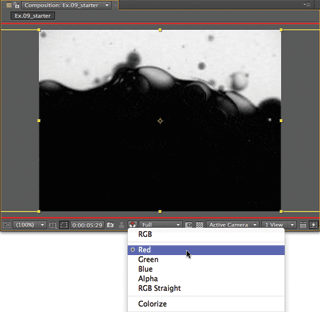 Instead, you want to pick the color channel in the matte layer that has the best contrast. To do this, turn on the Video and Solo switches for the matte layer to see it in isolation. Then use the Show Channel popup along the bottom of the Composition panel to audition the various color channels to see which works best.
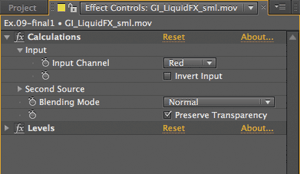
Return Show Channel to RGB, and apply Effect > Channel > Calculations to the matte layer. Set the Input Channel popup the color you chose above. If necessary, follow this with Effect > Color Correction > Levels and use the Input Black and White as well as Gamma controls to maximize the contrast. Then turn off the matte layer’s Video and Solo switches, and you will have a better matte:

Where’d My Shadow Go?
A common source of frustration when working with track mattes is you can’t seem to get shadows or other edge treatments to work properly. If you apply them to the fill layer, the matte layer usually chops off these treatments; if you apply them to the matte layer, they just alter the alpha channel of the resulting composite – not the color channels.
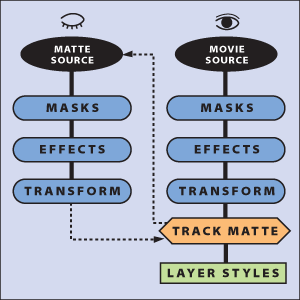
To work around this, place the track matte layers in their own composition and then effect this “nested” composition in a new comp downstream. Or: You can take advantage of Layer Styles. Borrowed from Photoshop, the little-known Layer Styles have a unique place in the internal rendering pipeline, being processed after the track matte is calculated. Just select the fill layer (the one on the bottom), and apply Layer > Layer Styles > Drop Shadow or any other desired treatment, such as Bevel and Emboss.

Footage courtesy Artbeats Digital Moods (background) and Ocean Water Effects (fill inside the text).
The movie and the matte each have their own set of Masks, Effects and Transformations, which are calculated before the Track Matte module. Layer Styles applied to the fill layer render after the Track Matte is calculated.
 Multiple Mattes from One Source
Track Mattes require that their component layers be kept in pairs. However, sometimes you want to use the same source as a matte for multiple fill layers. If you don’t feel like duplicating the same source every time you need it inside a composition, you can try Effect > Channel > Set Matte instead.
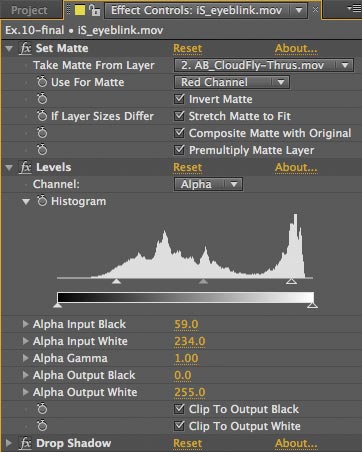
Set Matte is applied to the fill layer, where it can then select any channel from itself or another layer to use as a matte, regardless of its placement in the layer stack. Since the Set Matte effect determines the transparency of the movie, you can then follow it with normal edge treatment effects such as a Drop Shadow, and they will work on the fill as expected. If you want to affect the strength or contrast of the matte, you can still use Levels (applied immediately after the Set Matte effect), but you must set its Channel popup to Alpha rather than the default RGB. An example of such a hierarchy is shown here.
The biggest drawback is that Set Matte is a “compound” effect, which in short means that any effects or animation applied to the matte layer must take place in a precomp.
Another solution for applying a single matte to multiple layers is to use a stencil, and that will be the topic of our next installment.
Trish and Chris Meyer share seventeen-plus years of real-world film and video production experience inside their now-classic book Creating Motion Graphics with After Effects (CMG).
The 5th edition has been thoroughly revised to reflect the new features introduced in both After Effects CS4 and CS5. New chapters cover the new Roto Brush feature, as well as mocha and mocha shape. The 3D section has been expanded to include working with 3D effects such as Digieffects FreeForm plus workflows including Adobe Repouss©, Vanishing Point Exchange, and 3D model import using Adobe Photoshop Extended. The print version is also accompanied by a DVD that contains project files and source materials for all the techniques demonstrated in the book, as well as over 160 pages of bonus chapters on subjects such as expressions, scripting, and effects.
We will be pulling a few “hidden gems” out of each chapter to share on ProVideoCoalition.com roughly every week. These will give you a taste for the multitude of time-saving tips, not-obvious features, little gotchas, and other insider knowledge you will find in CMG.
The content contained in Creating Motion Graphics with After Effects – as well as the CMG Blogs and CMG Keyframes posts on ProVideoCoalition – are copyright Crish Design, except where otherwise attributed.

Filmtools
Filmmakers go-to destination for pre-production, production & post production equipment!
Shop Now