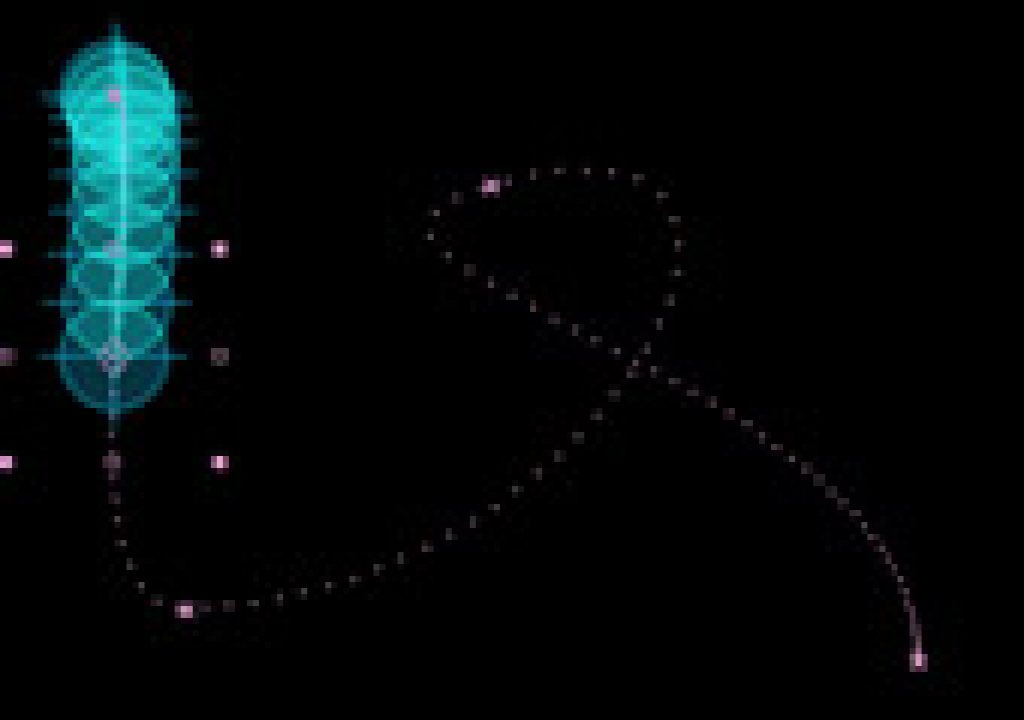

Rhythm – repetition, with variation – is the backbone of many pieces of fine art, as well as motion graphic designs. However, it can be tedious to create and animate hordes of layers – and tedium is not a ticket to inspiration. In the next two columns, we’ll discuss approaches to more easily creating visual rhythm. In this column we’ll start with techniques that can be executed inside Adobe After Effects; in the next column we’ll discuss alternate tools such as Apple Motion and Maxon Cinema 4D.
Simple Swarms
One fun animation style is when a large number of objects all seem to want to occupy the same point in space or follow the same path, but there are random variations between them. This swarming behavior is a version of controlled chaos. In chaos theory, the centerline of this position or path is known as a “strange attractor”: You can predict within what range around the attractor that objects will appear, but you can’t predict precisely where an individual object will appear at a specific point in time.
The random variation is easy to create in After Effects using the wiggle expression. In its simplest form, wiggle needs two numbers: how fast a parameter wiggles, followed by how much it wiggles. For example, to make the position of a layer randomly wander by 50 pixels, at a rate of one wiggle (excursion in a particular direction) per second, reveal the layer’s Position parameter in the Timeline window, Option+click on Mac (Alt+click on Windows) on the animation stopwatch icon next to Position, and type the following expression, followed by the Enter key:
wiggle(1, 50)
You can still keyframe the position of this layer; the wiggle offset will be added to the layer’s keyframed position path. This very same wiggle expression can be applied to virtually any parameter, including a layer’s scale, rotation, or opacity.
If you want one layer to be your strange attractor and to have other layers swarm around it, you can build upon this basic expression. Expose the position property (or whatever property you want to swarm) for both your master and slave layers. Enable expressions for position of the slave layer, and first type (without hitting Enter):
wiggle(1,50) – value +
This gives you a pure wiggle that removes the original position value of the slave layer. To make the slave (loosely) follow the master, place your cursor after the “+” sign, and use the pick whip tool for the slave’s position and drag it to the name of the same parameter for the master layer, followed by hitting Enter. You can animate the master however you like, and the slave will follow.
You won’t always know exactly how fast or much you want to wiggle by before you start. It’s a good idea to add a pair of Effect > Expression Controls > Slider Controls to the master layer, and rename them by selecting their names in the Effect Controls window, hitting return, typing, and hitting return again. Then, instead of entering “1” or “50” inside the parenthesis for the wiggle, drag the pick whip to these sliders in the Effect Controls or Timeline window (see below). You can then edit these two sliders, and affect the behavior of the slave without having to manually edit the expression.
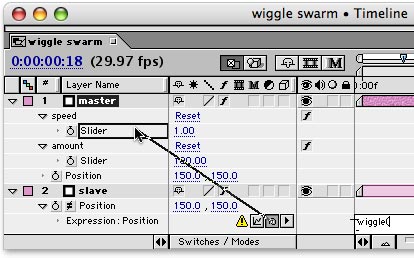
To make the wiggle expression easier to control – especially if you plan to duplicate the layer – link its parameters to an Expression Control applied to a master layer, such as the Slider we used here.
The fun part comes when you duplicate the slave layer multiple times. Each copy will be wiggled slightly different from each other. Duplicate it a bunch of times, and now you have a swarm. Consider using blending modes such as Add or Overlay to make the layers interact where they overlap; colors and partial transparency aid the impact of this effect (see the sequence below). You can also replace the source footage used for any copy of the original layer: Select the layer to replace, select a new footage item in the Project window, and type Command+Option+/ (Control+Alt+/).
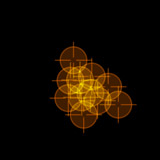

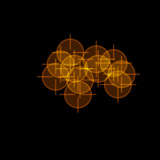
A swarm of layers created using the wiggle expression, blended together using Add mode.
The Slinky Effect
Sometimes you don’t want the pure randomness of the wiggle expression; you just want the animation of slave layers to trail behind a master layer – as if they’re slow to react, and then playing catch up. This trick requires the lesser-known expression valueAtTime.
To make one layer precisely follow another, first keyframe the master layer, and then use the pick whip tool to connect the position (or again, any other parameter) of the slave layer to the position of the master. This expression should look like:
thisComp.layer(“master”).position
You can then add the valueAtTime expression to look at the position of the master layer at a time other than the current time. Say you want the slave to be where the master was at the current time minus 0.1 seconds. Add the following text onto the end of the above expression:
.valueAtTime(time – 0.1)
If you were to duplicate the slave layer with the above expression, all of the slaves would be delayed by the same amount. To get the slaves to spread out over time, you need to use the layer’s number in the timeline stack to determine how much of a delay each slave should use. Assuming the master was layer #1 and the first slave was layer #2, the complete expression would be:
thisComp.layer(“master”).position.valueAtTime(time – (index-1) * 0.1)
Then duplicate the slave as many times as you want to create your slinky effect. Before doing so, you might want to add a Slider Control to the master layer (as we did for the wiggle trick), select “0.1” in your expression, and drag the pick whip to the new slider to replace this hardwired-value with something you can adjust. Beyond that, all of the suggestions we mentioned above about replacing the source for some of the layers and using blending modes applies. Play with the velocity of the master layer’s animation using Easy Ease and the such to see the slinky expand and contract (see below).


The valueAtTime expression can be used to delay the animation of layers, creating slinky-style effects.
What if you want to combine the swarm and slinky effects? Take your slinky expression for the slave layer, and add to its end:
+ wiggle(1, 50) – value
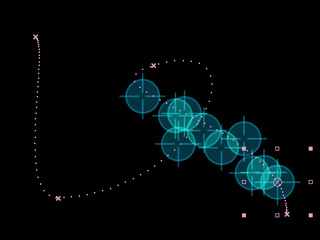 The final result is shown in at the right. Of course, you can replace the speed value of 1 and the amount value of 50 with Expression Controls to make them easier to adjust later.
Click here (16 kB .zip) to download an After Effects project that demonstrates these swarming and slinky techniques.
Trapcode Echospace
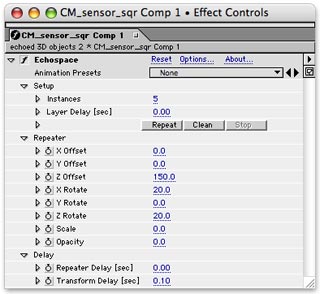
At the 2005 NAB show, Trapcode – creators of the much-loved Shine light ray plug-in – previewed a new effect they created in conjunction with the studio Belief called Echospace. It presents a lovely evolution of the slinky effect we just discussed in that it allows the user to control delay time, position offsets, rotation, scale, and opacity of the slave – or “echoed” – layers all from one plug-in (see figure at right). You can delay the slaves at the time you create them, or through separate Repeater and Transform Delay parameters which may also be keyframed.
The significant twist of Echospace is that rather than just play follow-the-leader, the echoed layers are offset in 3D space as if mirrored roughly around the center of the composition. This means when you animate the master from, say, the top left corner to the bottom right of the comp, you don’t get a stiff, obedient chain of slaves following; the slaves twist and move around, as if you are viewing them through a hall of mirrors. The result is a nice mix between being controllable yet unpredictable, quickly creating complex animations you might not have originally imagined (see below).
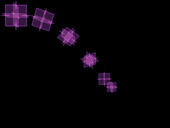
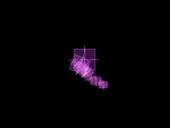
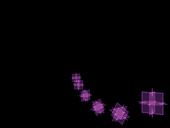
Animating the master layer with Echospace causes the copies to form writhing chains that are echoed roughly around a comp’s center in 3D.
Echospace can work on any single layer. Of course, a layer in After Effects can be a nested composition that contains several other layers. These layers can exist in their own 3D space. If you enable the Collapse Transformations switch for the master nested composition before setting Echospace to work, the result is all the 3D space transformations in the nested comp being echoed by Echospace, creating very complex animations. We look forward to exploring this effect in greater depth; it shipped right around the time this column originally appeared.
Digital Anarchy 3D Assistants
Another great tool for quickly arranging a large number of layers in 3D space are the 3D Assistants from Digital Anarchy. A Lite version came bundled with After Effects 6.5; a more detailed version is available from Digital Anarchy.
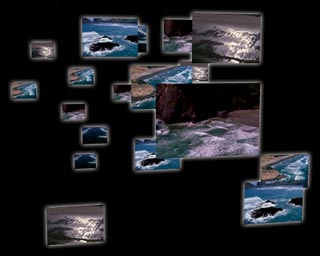 Many think of 3D Assistants as a way to arrange layers in a box, cylinder, or other shapes. However, they can also be used to randomly arrange 3D layers in space (see figure at right). A great trick is to create one arrangement, set Position keyframes for the layers, move to a different point in time, use 3D Assistants to make a new arrangement, create another set of keyframes, and continue. The result is a form of synchronized swimming, where layers seem to have their own group intelligence as they form new arrangements over time.
And don’t forget you can always combine techniques. For example, use 3D Assistants to arrange layers in space, and then use the wiggle expression to slowly vary their scale or rotation.
Replication and Arrays
In the next column, we will look at a pair of tools outside of After Effects for creating visual rhythms: the Replicator in Motion 2, and the Array in Cinema 4D.
The content contained in our books, videos, blogs, and articles for other sites are all copyright Crish Design, except where otherwise attributed.

Filmtools
Filmmakers go-to destination for pre-production, production & post production equipment!
Shop Now