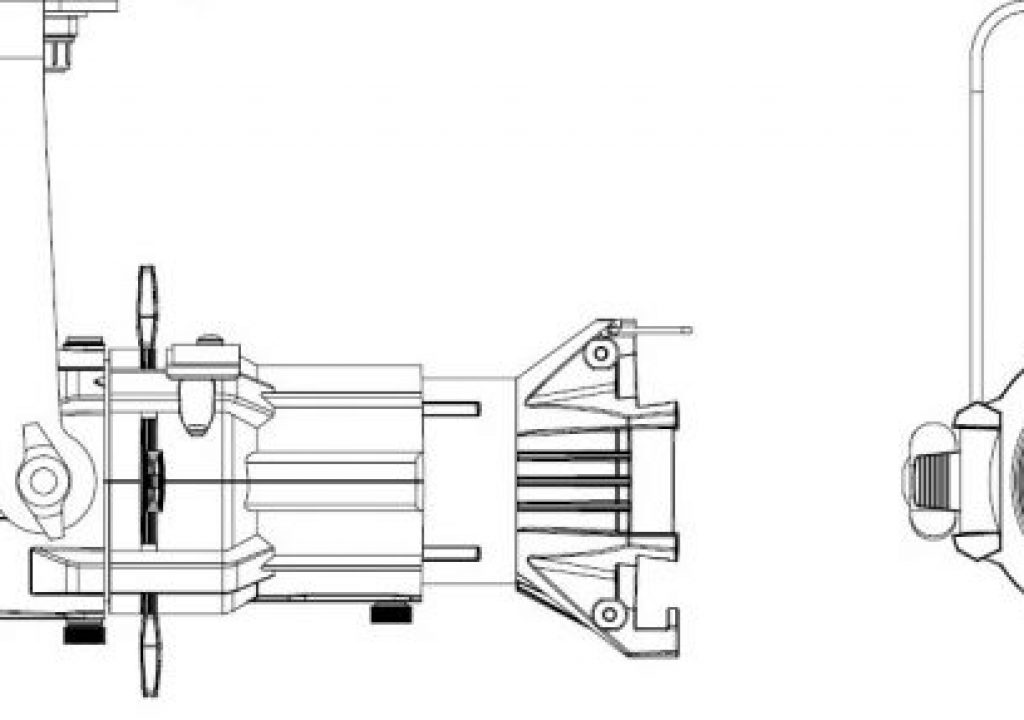
One of the light fixtures that I often use is the ETC Source Four Ellipsoidal, or leko. If you aren’t familiar with them, this particular type of ellipsoidal fixture hails from the theater world, but they are also incredibly useful on a commercial or film set. Below you’ll find a basic introduction to these fixtures, and also a handful of handy tips & tricks that I’ve picked up over the years.
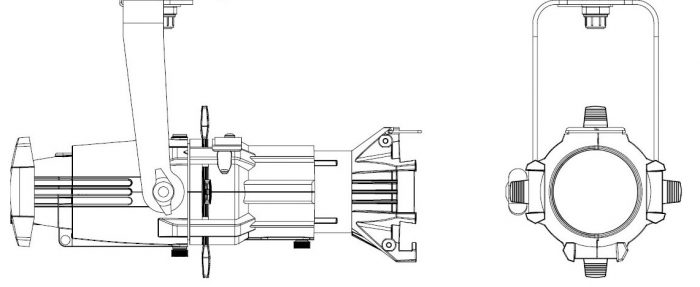
Lekos use internal optics to create a tight projection pattern of light. Because the output is focused and concentrated, these lights put out a surprising amount of light in a controlled beam. With the right lens they will throw farther than a conventional fixture of a comparable wattage. There are a number of ellipsoidal manufacturers, but the ETC Source-Four seems to be considered the standard in film & video use, and they are the only brand I have much experience with.
Source 4’s can be lamped with 575w or 750w HPL (tungsten-balanced) bulbs, and they feature internal cutters that allow you to control and cleanly cut the light beam. You can also use them to project tight gobo patterns on backgrounds, while controlling the focus of the projected pattern (simply by sliding the lens barrel in and out). Newer models include LED luminaire options, though the CRI ratings appear to be relatively low and I personally am somewhat skeptical of their color accuracy. I have yet to use the new LED models personally, but have heard some praise for the S4 Lustr line. Perhaps I’ll update this article in the future if I get a chance to use them.
Lekos are fairly commonly used here in the US film and video industry. Generally a good gaffer owner/op with a grip truck will have a few of these useful little fixtures in their package, and most will also have JoLeko adapters (more on that below). I did learn that they apparently aren’t well-known in Australia…on a recent production there, I found them impossible to source through film rental houses. They were available from theatrical rental sources, however. Lekos are also surprisingly affordable to rent, and purchase…see the bottom of this article for a link on that topic.
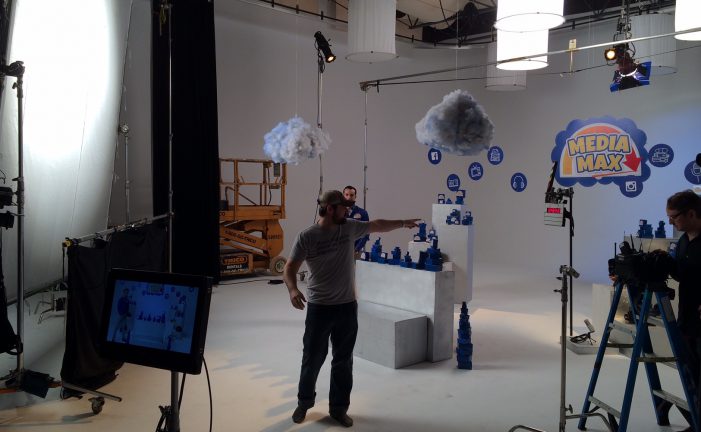 Here you can see a few Source Four lekos used to spotlight products on a stage.
I find Source Four lekos most useful as a bounce source for interior setups. I will often use a S4 to push a clean pattern or slice of light off the ceiling, or bounce them off a distant wall with minimal spill. For instance, consider an interior room that doesn’t have enough space to place a fixture from a specific angle; you can tape a showcard or beadboard on the wall, or in a ceiling corner, and then fill that card with light from a leko fixture from across the room. Boom, presto – you’ve got a large light source emitting from an impossibly tight area. You can also use them to evenly fill a diffusion frame without errant spill. Simply use the cutters to trim the projected source size to fit the edges of your bounce or diffusion frame.
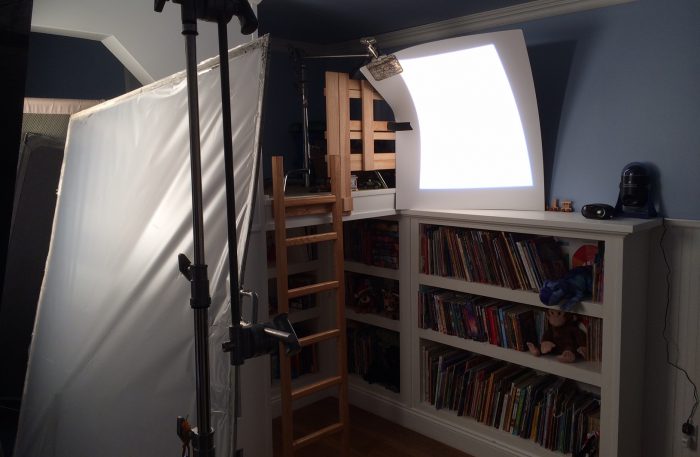 Here’s an example of a typical showcard bounce in a tight location. We were keying with a different light through the diffusion frame that you see on the left, and the leko (not shown) is bounced off that curved white card to create a soft back edge on talent.
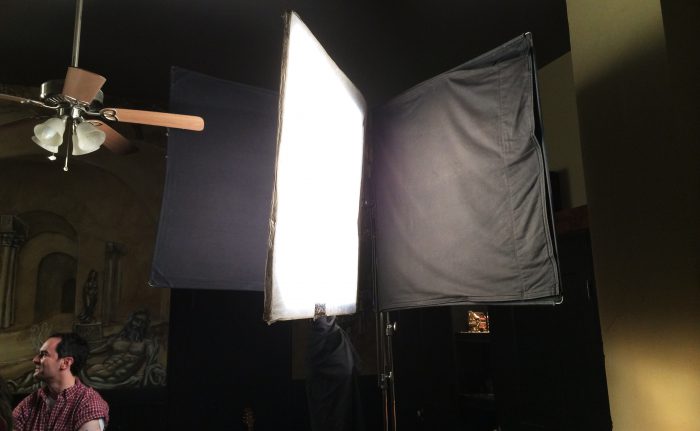 This is an odd setup created so that we could whip-pan from talent on one side of the room to talent on the other side of the room. I wanted a roughly 4×4-sized soft bounce keying each, so we mounted a single white/white beadboard in the center of the room to do double-duty, and used a leko on opposite ends of the room to bounce light into each side of the board. A little duvetine on the stands in the middle made them disappear in the motion blur of the whip-pan. There are plenty of other ways to accomplish this, but it’s what was simplest for us with our available tools.
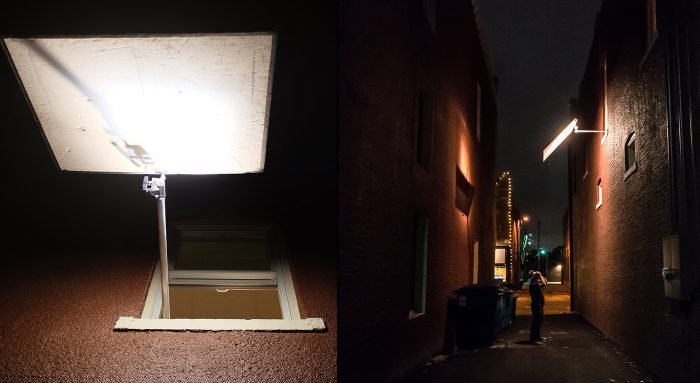 For this setup, I wanted a soft toppy streetlight look in an alley. Unfortunately, we didn’t have the rigging to safely hang a light overhead. The simplest solution was to clamp a lightweight beadboard to a stick of speedrail, and hang it out the window. We shot a leko through the window to fill the bounce, and redirect the light downwards into the alley. If we had wanted a harder source with less spill on the alley walls, the silver side of the bounce would have accomplished that.
Lekos can be fitted with a variety of standard lenses to control the beam angle, and ultimately how far it throws. 19-degree, 26-degree, 36-degree, and 50-degree beam angles are some of the most commonly available. As an example, 19 is a tight beam spread, and 50 is fairly broad. There are additional specialty options as well. For instance, mount a 5 or 10 degree lens on a leko, and you can push a tight beam of light to a building a few blocks away. These lens barrels are relatively lightweight, and easily changed on-set with a single tool-less screw. Source Four also offers zoom versions of their lenses, so that one barrel can cover multiple beam angles. Here’s an example video that shows you the different beam spreads for standard lenses, and this video by Shane Hurlbut demonstrates hands-on use of the ETC Source Four fixture and accessories.
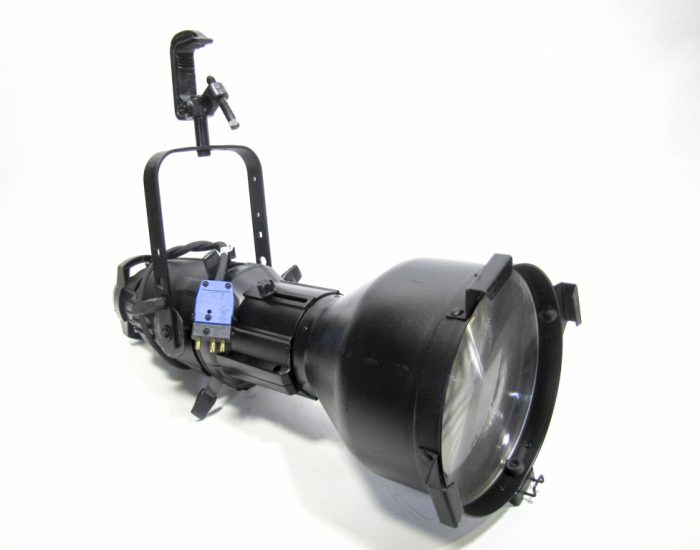 This is a fairly unique lens setup, a 10-degree lens for projecting a tight beam long distances. Notice the theatrical lighting truss mount and Bates power plug.
Add a K5600 Bug-A-Beam “Jo-Leko” adapter in place of the tungsten lamp module, and the S4 fixture body can now accommodate a Joker 400 or 800 HMI (and now the Joker 1600 as well). With a Jo-Leko, you get all the benefits of a projected light source in a bright, efficient daylight source. On almost every commercial shoot I spec a few tungsten leko units and at least one Joleko setup. If you’re interested, here’s a video tutorial on mounting a Joker in a Source Four, and K5600’s instructions can be seen here.
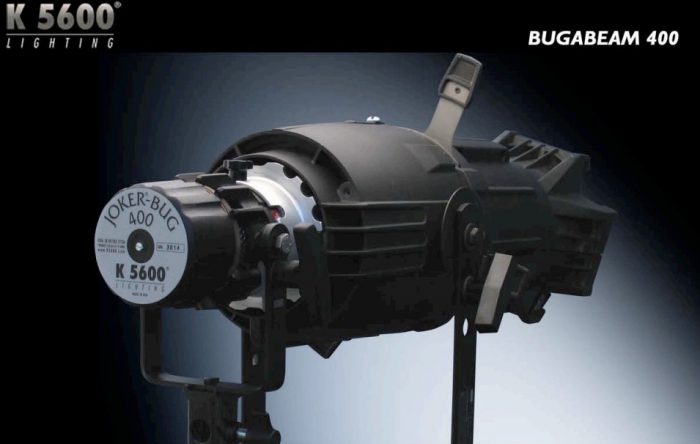 A Joker 400w HMI mounted in a Source Four leko using K5600’s Bug-A-Beam adapter.
One of the most interesting techniques I’ve heard of for working with lekos comes from a recent film production in Memphis that was lensed by DP William Wages. Wages uses something he calls a “Wag Bag” to solve the common issue of flagging spill from a ceiling bounce on interior setups. The Wag Bag is simply a homemade black plastic balloon that is filled with helium and sealed with a rubber band. Make the bags big enough, and they will even bear the weight of a teaser cut from black plastic catering tablecloths.
Wages has his grips float the bags up on the ceiling to flag off spill from bounced sources. They tie a bit of string or monofilament to the bag, and simply float them around the room as needed to solve ambient spill issues and control contrast. The floating bags can apparently stay put on the ceiling with friction alone, no need to be taped or secured. By floating in flags, you can avoid the need to create a mess of stands and arms and give yourself more floor space to work, and also free up shooting angles.
On that Memphis production, friends on the crew told me that they would often light entire interior setups with bounced lekos and the wag bags. If you’re interested in more info on this floating flag technique, Wages has a more thorough writeup on his website.
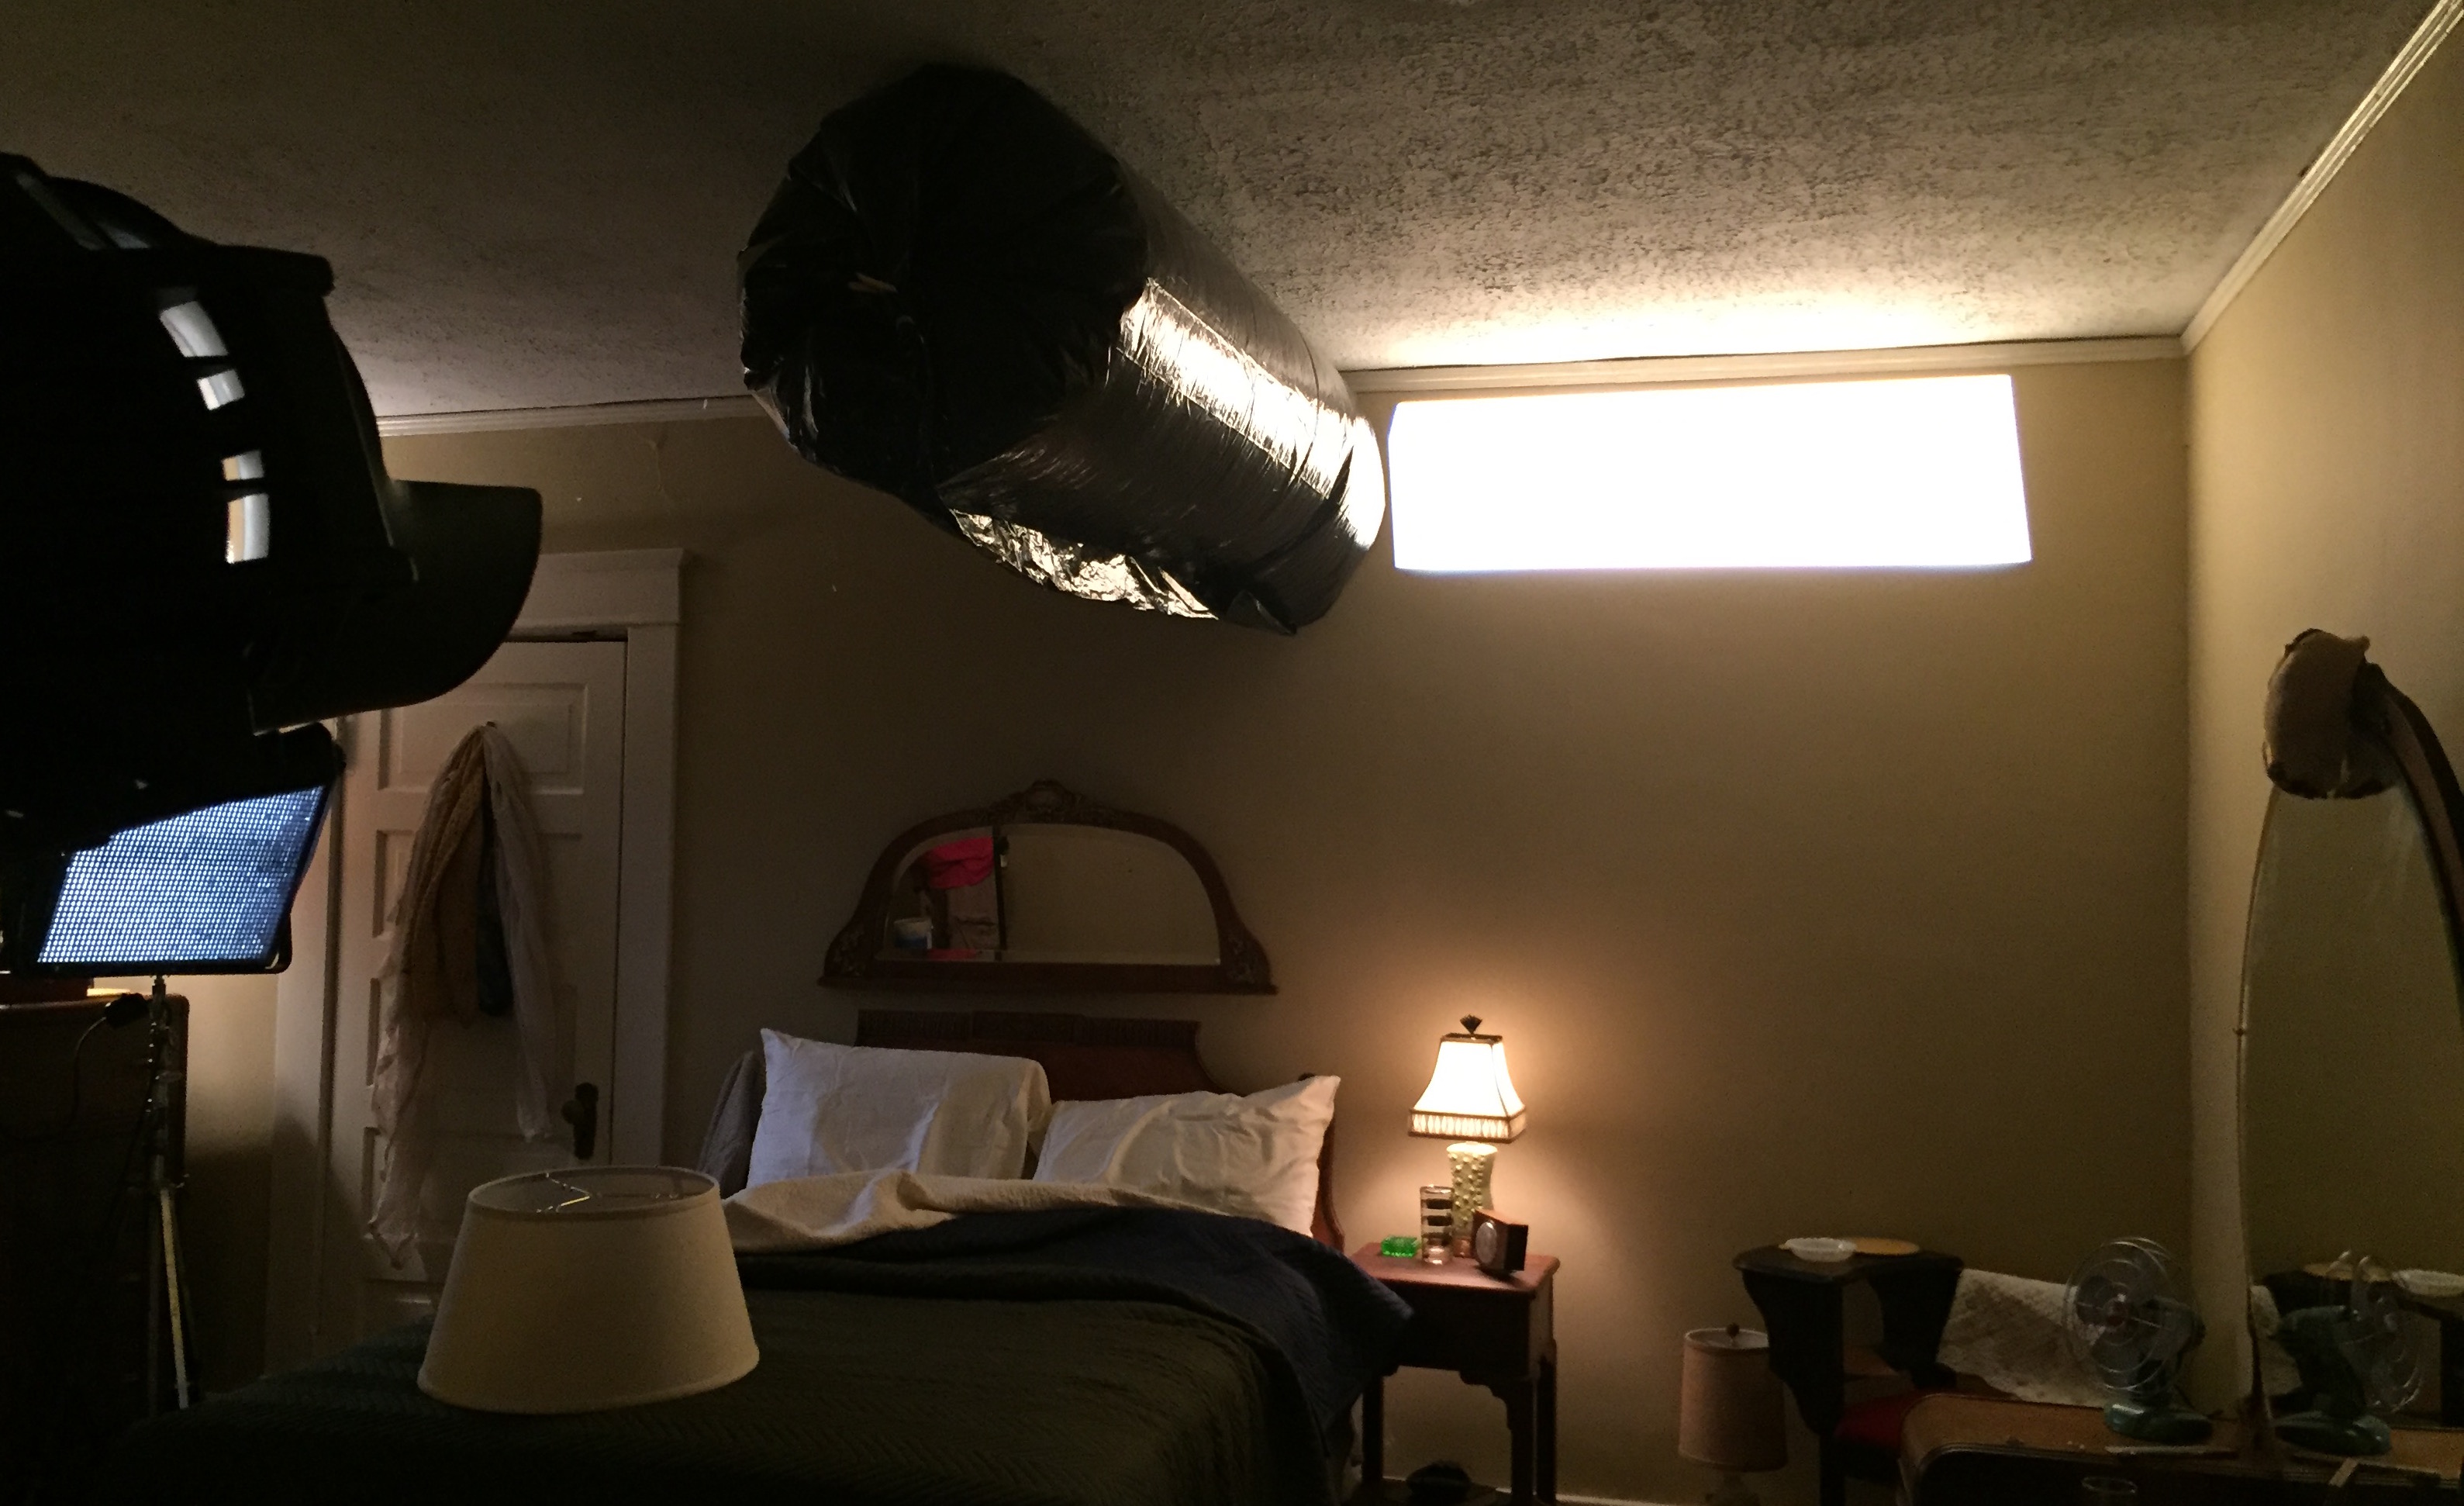 Here a Wag Bag is used on an interior scene to flag spill off the bed from a tightly-cut leko bounce. Notice how much space there is to work in this room without the typical c-stands and flags a bounce source like this would require.
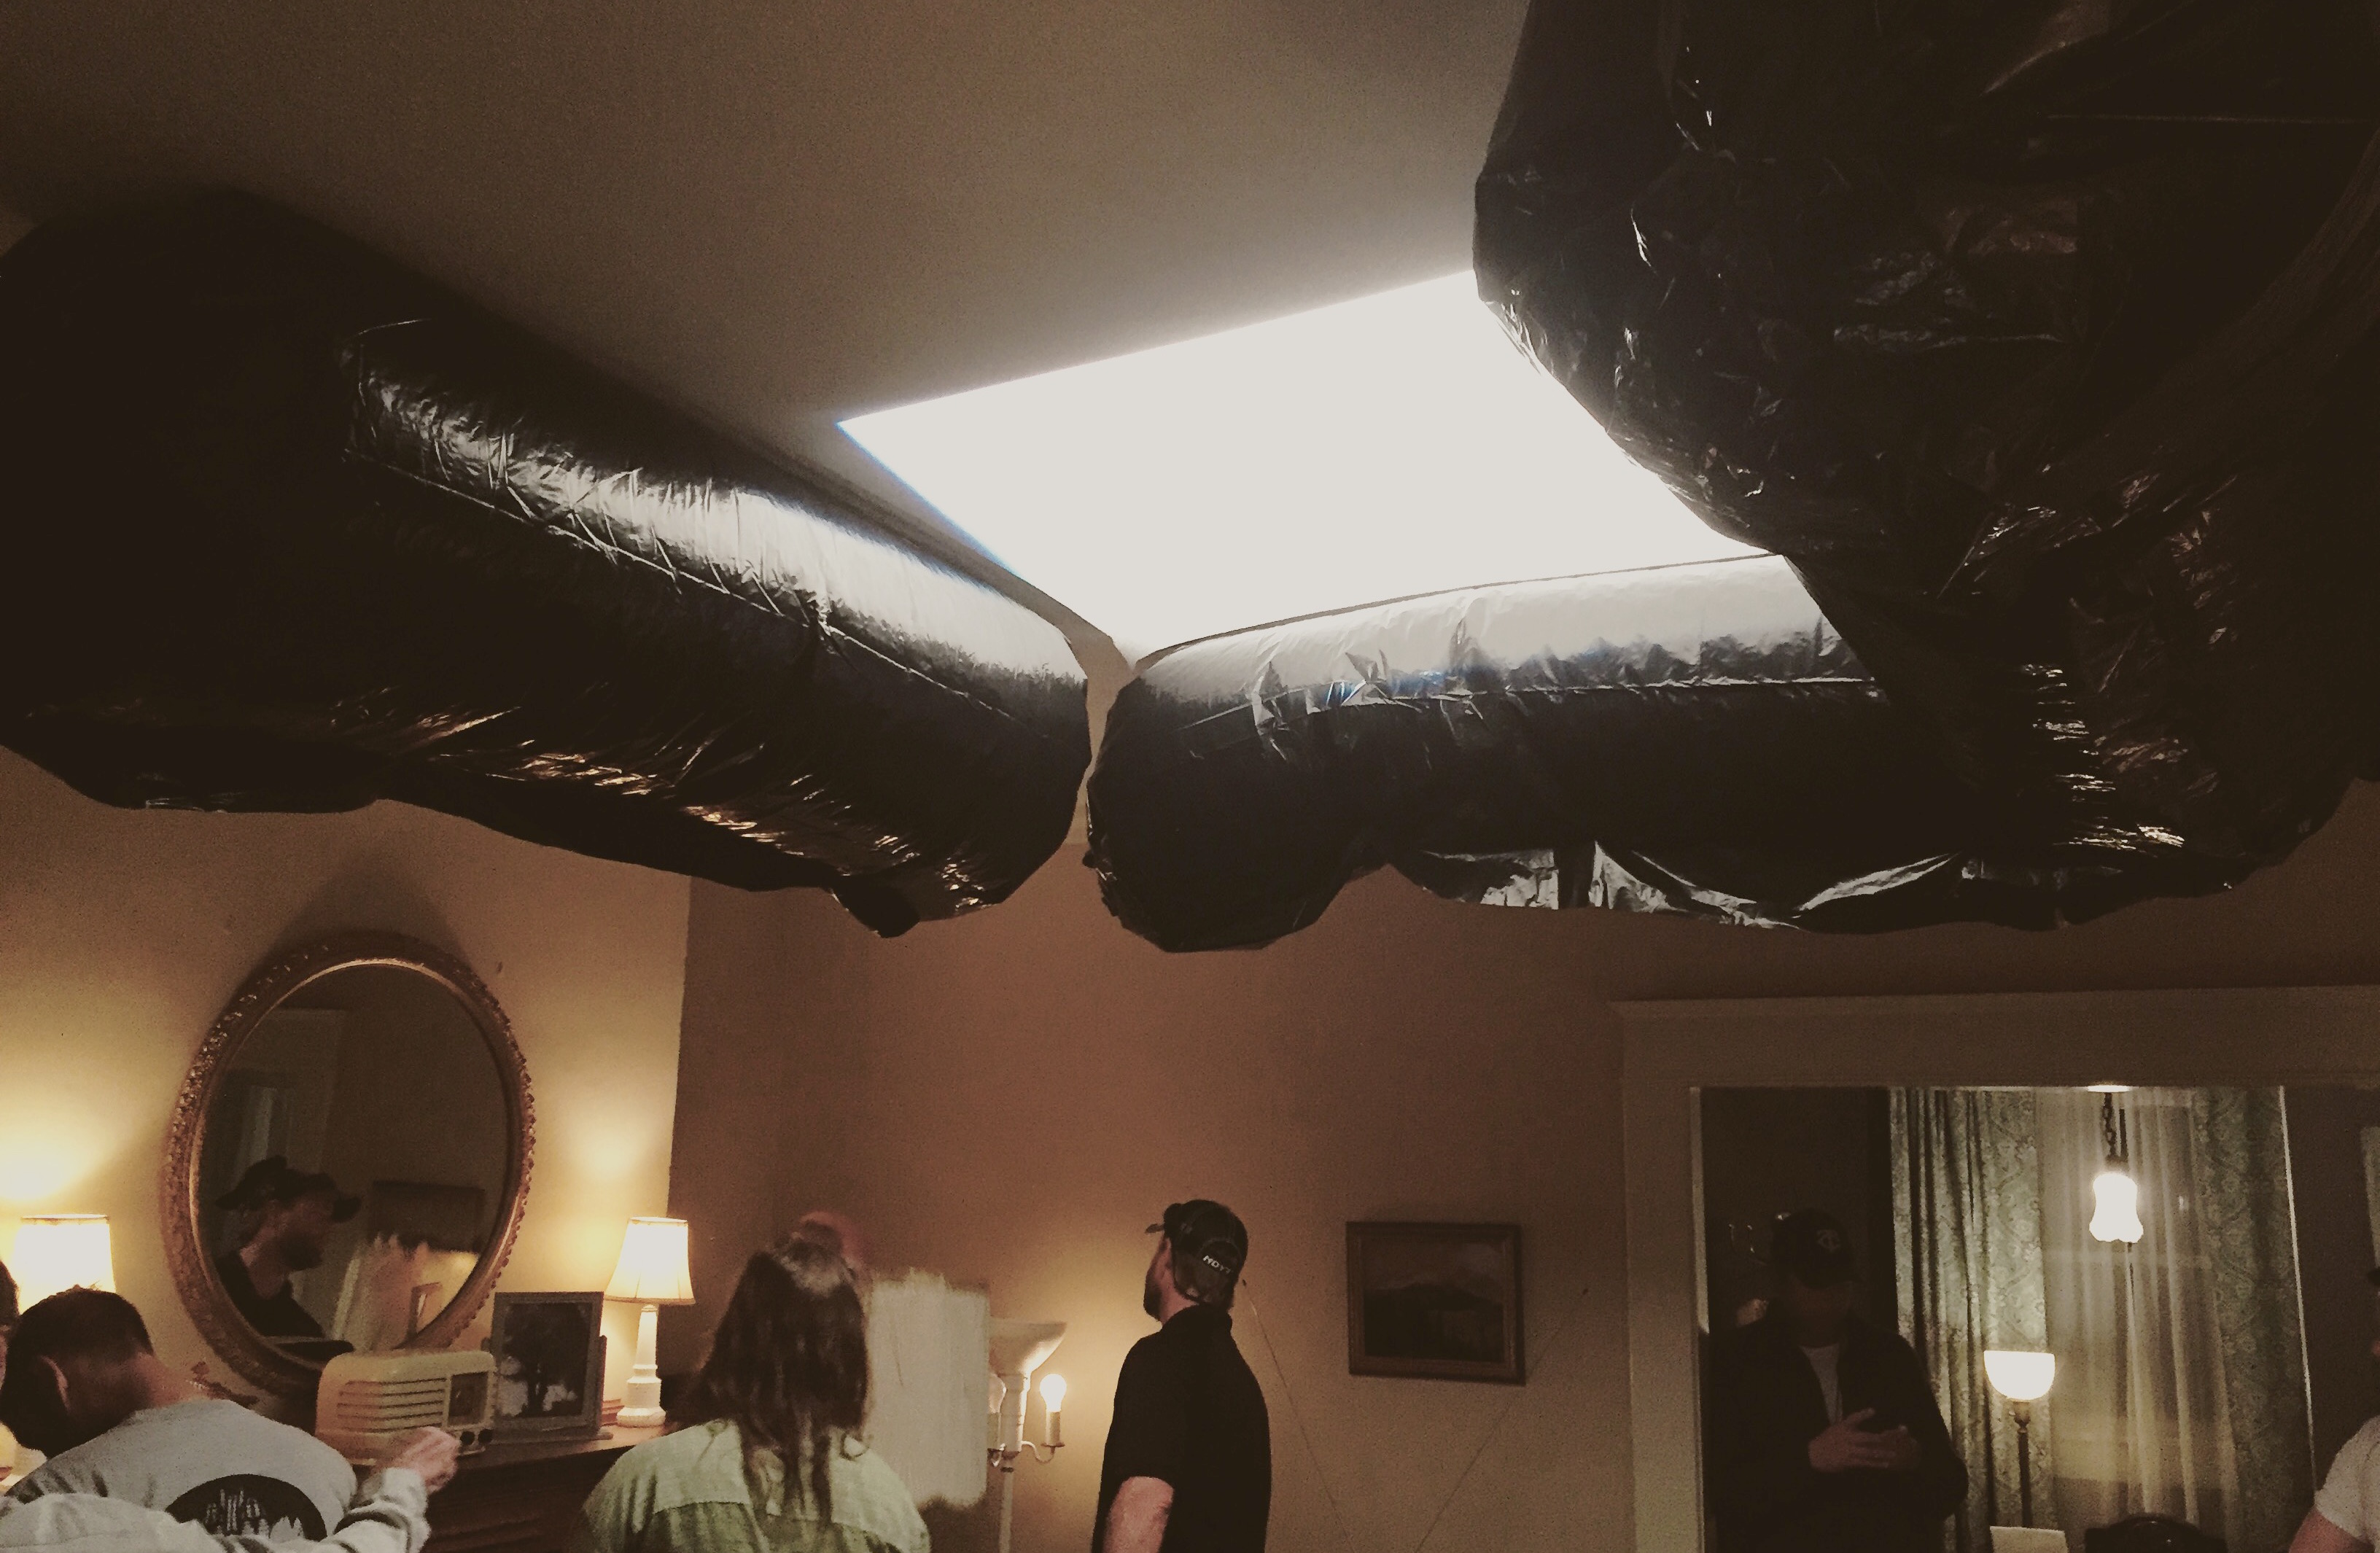 This array of three Wag Bags solves a common issue when using a ceiling bounce…keeping spill light off the walls. This setup would deliver a look that is similar to a skirted china ball, without having to build a menace arm to support the light source. Another advantage of a setup like this is the fact that you would have nearly 360-degrees of freedom to film in this space. You have clear looks in almost every direction. The only stand you would have to avoid is the Source Four fixture itself.
Leko Tips & Tricks
For those just getting into using lekos in your work, here are eight simple tips and tricks that I’ve picked up over the years.
#1. Hot light is hot
I promise that this fixture is screaming hot, and it wants to burn you. Wear gloves, obviously. And give it plenty of time to cool off when you wrap a location.
#2. Squeeze it
Put a dimmer on the light, preferably one with an on/off switch. Because this is a stage fixture that is designed to be run from a dimmer board, there is no power switch on the light. If you are modding your own from Bates to Edison, you might consider adding an inline switch to the cord.
#3. Get the right plug, mate
When renting, make sure the fixture has been modified to an Edison plug from the standard Stage Pin/Bates connector. Also you should ensure that they come with a TVMP adapter for mounting on a baby pin. This should not be an issue when renting from a film & video lighting house, but you would potentially see both these issues when renting from a theatrical rental house.
#4. Extra lenses are cheap insurance
Rent multiple lens degree barrels in your leko package for maximum flexibility. I personally use the 19 and 50 degree versions the most. If you have to choose, go with the 50 and use the cutters to trim it down as needed.
#5. Deer in the hazelights
If you are hazing a location, you are naturally going to see light beams in the room atmosphere. So for hazed setups, you often cannot bounce a light across the room invisibly, which is one of my favorite ways to use this fixture. Know this and plan accordingly. A related note; when projecting a distant bounce, know where talent will be moving so you can position the source to avoid them crossing the beam.
#6. Leggo my gobo
You might want to rent or buy a handful of drop-in gobos along with your leko fixtures. Rosco offers a massive catalog of available shapes and patterns for ellipsoidal fixtures, and you can easily break up your light with one of these patterns instead of that bundle of leafy branches you just told the PA to go find. (Long live the branchaloris!). While you are renting gobos, ask them to include the drop-in iris accessory as well…I find that to be quite useful for quickly cutting down the output of a leko or creating a tight round projection pattern.
#7. Cut gels and save time
If you use lekos often, have your gels pre-cut for the size of the light’s gel frame, so you can quickly swap out diffusions and correction gels. And sometimes rental houses don’t include the gel frames unless you specifically request them, so bear that in mind when renting.
#8. Jokers and the lies we tell ourselves
A Joleko is an amazing thing. I generally prefer the 800w variety over the 400w (because it spits out more light, duh). But I always make sure to spec them on my lighting order as a fully-assembled kit. You want everything mated together before arriving on-set, so that there is no build time. Mounting a Joker into a Leko fixture is not very complicated, but it does take some time and care. Trust me, have the fixtures pre-built so you can move quickly. And resist resist resist the temptation of using a Joker head both in and out of the leko fixture. Chances are, any money you save on fewer Joker head rentals will be wasted on time spent rigging and de-rigging the damn thing.
In short, I think lekos are awesome lights. They are cheap, readily available, and very useful. If you’re new to using these lights, I hope these tips will prove useful in getting you started and perhaps help you avoid a few common pitfalls. And if you’re in the market to buy as an owner/operator, you may also be interested in a related article I wrote on this topic.

Filmtools
Filmmakers go-to destination for pre-production, production & post production equipment!
Shop Now