We’re going through our book Creating Motion Graphics with After Effects 5th Edition (CMG5) and pulling out a few “hidden gems” from each chapter. These will include essential advice for new users, plus timesaving tips that experienced users may not be aware of.
One of the strengths of After Effects is that it can be expanded through plug-ins. After Effects itself ships with over 200 effect plug-ins from Adobe and third parties including Cycore, Digieffects, Synthetic Aperture, and The Foundry; numerous third-party plug-ins are also available for purchase. We’ll assume you know how to apply an effect to a layer using either the Effect menu or the Effects & Presets panel. If you need instructions, please consult Help > After Effects Help.
The Bonus Chapters folder on the DVD-ROM that comes with CMG5 contains a large PDF file (65 pages) plus an After Effects project that goes over many of our favorite effect groups by categories, and tells you how we might use them. Below are just a few of our favorites:
 Turbulent Displace
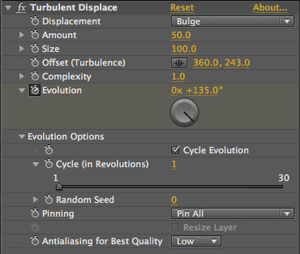
Effect > Distort > Turbulent Displace is one of our favorite effects: It provides an easy way to distort a layer such as text in a cool, liquid fashion. The secret is to animate the Evolution parameter. To make your distortion loop seamlessly, twirl open Evolution Options, enable Cycle Evolution, and set Cycle to the number of revolutions of Evolution you want to make a complete loop. Try different settings for Displacement, Size, Amount, and Complexity.


Distort >Turbulent Displace creates fluid, easy-to-animate, loopable distortions of the layer it is applied to. The left image is the original; the image at right is after applying Turbulent Displace.
 Distressing Edges
Effect > Stylize > Roughen Edges (demonstrated at right) is another one of our favorites: It can take the outline of a layer or alpha channel and chew it up with a number of different patterns. You have extensive control over the size and detail of the decay introduced; some options also have a secondary color that adds a selective tint around the edges. For a softer edge, try adding a little Fast Blur before Roughen Edges.
The Photocopy options under Edge Type leave the edges intact but hollow out the insides of your shapes. Less obvious is the ability to animate these edges via the Evolution parameter. To make your animation loop, twirl down the Evolution Options in the Effect Controls panel, enable Cycle Evolution, and set Cycle to the number of Rotations in the Evolution parameter you wish to add up to one loop.
Roughen Edges isn’t your only choice for distressing edges. Beyond their obvious keying-related applications, the Matte effects have some creative uses, such as “eroding” the edges of text for a grungier feel or providing an unusual way to wipe an object on- or offscreen.
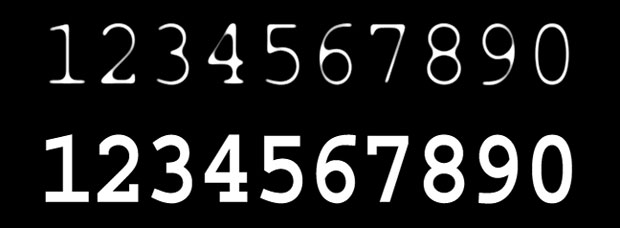
The bottom is normal Courier text; the top shows it eroded with Matte > Simple Choker. The Choke Matte value can be animated to erode the text away to black.
Motion Tile
Effect > Stylize > Motion Tile allows you to change the size (through its Output Width and Height) and scale (using Tile Width and Height) of the layer it is applied to, repeating the original image to fill the layer’s new boundaries. The resulting rows or columns can be offset using Phase, and the result can be animated using Tile Center. Believe it or not, it is the only one of the tiling plug-ins that renders motion blur – hence its name.
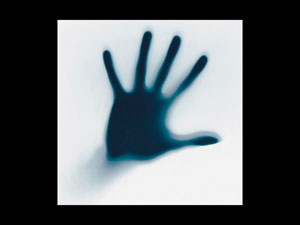
Stylize > Motion Tile can take an image (a), scale and tile it, then move the result with motion blur (b).
The other tiling plug-ins included with After Effects include :
- Distort > Offset: offsets the image inside the layer’s boundaries, akin to the Photoshop effect of the same name;
- Distort > CC Tiler: tiles an image as needed to fill out the boundaries of the original layer by Scaling down the image;
- Stylize > CC RepeTile: expands the size of the layer it is applied to then replicates the original image to fill out the new layer boundaries; and
- Stylize > CC Kaleida: repeats the underlying image with a variety of kaleidoscopic patterns.
Card Wipe
Effect > Transition > Card Wipe is related to Simulation > Card Dance in that it can break an image into multiple squares or rectangles, then animate those rectangles in response to a gradient map. Rather than offset the cards in space as Card Dance does, Card Wipe causes these rectangles to flip over to reveal a second layer (if you don’t define a second layer, they will flip around to transparency, revealing whatever layer is behind).
You have considerable control – and options for randomization – in determining how these rectangles (“cards”) flip. One trick is using this effect to reveal or conceal text elements: The rectangular pieces lend a nice, high-tech, “binary” feel. Card Wipe is a 3D effect, and can be set to react to the comp’s camera.
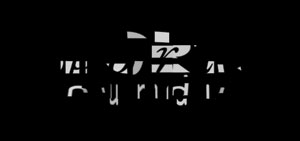

Transition > Card Wipe can provide an interesting way to reveal text.
Grow Bounds
Several effects – primarily those in the Distort category, but also Generate > Stroke and others – attempt to render images that are larger than the original underlying layer size. If the result is clipped (part of the new image is missing), apply Utility > Grow Bounds, drag it to the very top of the effect stack, and increase its Pixels value until the entire image is just visible.
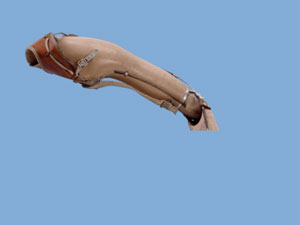
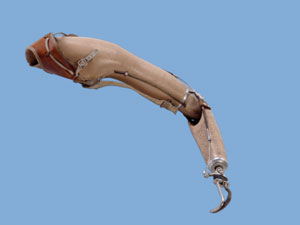
Some effects (such as CC Bend It show here) can result in an image being clipped (a). Placing Grow Bounds first and increasing its Pixels value will increase the apparent size of the underlying layer, solving clipping problems (b).
Note: Grow Bounds should be placed before all other effects, but if you are using it with the Tint effect in CS5, it needs to render after Tint. This long-standing bug has not been fixed; we suspect it’s ingrown at this point. Also, if Grow Bounds appears not to be working when you first apply it, adjust any parameter in an effect that follows to cause the cache to update. Worst case, close and reopen the project.
Trish and Chris Meyer share seventeen-plus years of real-world film and video production experience inside their now-classic book Creating Motion Graphics with After Effects (CMG).
The 5th edition has been thoroughly revised to reflect the new features introduced in both After Effects CS4 and CS5 (click here for free bonus videos of features introduced in CS5.5). New chapters cover the new Roto Brush feature, as well as mocha and mocha shape. The 3D section has been expanded to include working with 3D effects such as Digieffects FreeForm plus workflows including Adobe Repouss©, Vanishing Point Exchange, and 3D model import using Adobe Photoshop Extended. The print version is also accompanied by a DVD that contains project files (CS5-only) and source materials for all the techniques demonstrated in the book, as well as over 160 pages of bonus chapters on subjects such as expressions, scripting, and effects.
We will be pulling a few “hidden gems” out of each chapter to share on ProVideoCoalition.com roughly every week. These will give you a taste for the multitude of time-saving tips, not-obvious features, little gotchas, and other insider knowledge you will find in CMG.
The content contained in Creating Motion Graphics with After Effects – as well as the CMG Blogs and CMG Keyframes posts on ProVideoCoalition – are copyright Crish Design, except where otherwise attributed.

Filmtools
Filmmakers go-to destination for pre-production, production & post production equipment!
Shop Now


