We’re going through our book Creating Motion Graphics with After Effects 5th Edition (CMG5) and pulling out a few “hidden gems” from each chapter. These will include essential advice for new users, plus timesaving tips that experienced users may not be aware of.
One of our favorite recent additions to After Effects has been Shape layers: The ability to create vector-based artwork using the Pen tool or a variety of common starting points such as rectangles, ellipses, and polygons. A nice assortment of parameters and shape effects allow you to create quite complex results with relatively little effort. And as is the case with the rest of After Effects, virtually everything can be animated. Here are but a few tips of how to create and control shape layers.
Mask, or Shape? How About Masking a Shape?
The same tools can be used to create shape layers as well as mask out portions of any layer. So how does After Effects know which it is you want to do? By following these rules:
- If no layer is selected, After Effects assumes you want to create a shape.
- If a non-shape layer is selected, After Effects assumes you want to create a mask.
- If a shape layer is selected, the Tool Creates pair of switches determine whether the Shape and Pen tools will create a mask on the shape layer, or a new shape path:

The After Effects Toolbar, highlighting the elements used in the creation and modification of shape layers.
Shaping as You Drag
While dragging out a parametric shape in the Composition panel, you can press the following keys before releasing the mouse to alter some of the shape paths:

If you have a mouse with a scroll wheel, it will have the same action as the up and down cursor keys. You can also change the outer radius of the Star by pressing Command on Mac (Control on Windows) when dragging to create a shape.
You can also reposition any parametric shape before releasing the mouse by holding the spacebar and dragging.
To reset a parametric shape to its default number of points, amount of rounding, and so forth, select the Shape Tool, then double-click it. This will create the requested shape at the full size of the composition, using the default parameters (a good trick by itself). You can then either resize this shape, or delete it and drag out a new one.
Note that these helpers can be used while drawing mask paths as well. The difference is, after you release the mouse, mask vertices are created that you must then edit manually; there are no interactive parametric controls over mask shapes.
Gradient Start and End Points
It happens to all of us: You create a gradient, and you see nice user interface handles in the Comp panel for the Start and End Points that you can grab and interactively move around:

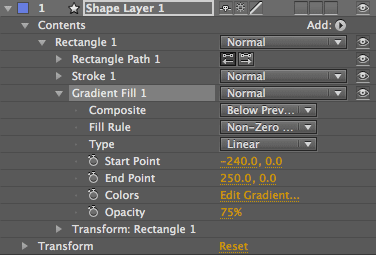 You then go off and do something else, come back to your shape layer…and no gradient handles. The secret is that you must explicitly select the shape group that contains the gradient in the Timeline panel – just selecting the shape layer itself is not enough. So twirl open the shape layer, then Contents, then select the group (such as “Rectangle 1” as shown at right).
By the way, if you keep going and twirl open the Gradient Fill object itself, you’ll find numeric values for the Start and End Points that you can then scrub like any other parameter.
 Dashed Lines
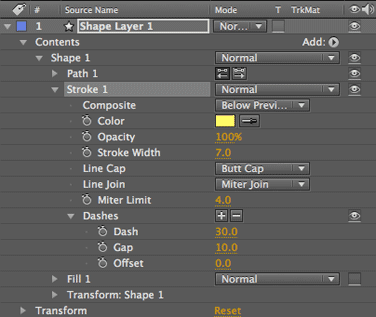
A real “hidden gem” is the ability to create dashed lines using the Stroke parameter for a shape layer. To access this feature, you have to Twirl open the Shape Layer, then the Contents, then the shape group, and then the Stroke operator. Then, click on the + symbol to the right of Dashes inside the Stroke operator: The line will become segmented in the Comp panel, and Dashes will twirl open in the Timeline panel revealing Dash and Offset parameters. Scrub the Dash value to change the length of the dashes as well as the spacing in-between.
Want independent control over the length of the dashes and the length of the spaces? Click the + symbol again: A Gap parameter will appear; scrub it to taste. Click + two more times, and now you have control over an alternating pattern of two pairs of dashes and gaps. (Click the – symbol if you got carried away and created too many segments!)
For your next trick, set the Line Cap popup to Rounded Cap: The dash segments will get longer as rounding is added to their ends. Set one Dash value to 0, and you will have alternating dashes and dots:
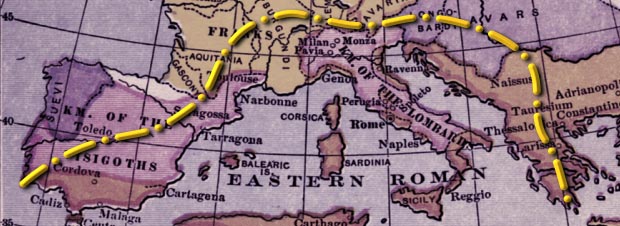
It’s possible to create custom dashed lines by diving into the Stroke parameters for a shape layer. We then added Layer Styles for the bevel and drop shadow. Map from Duruy’s History of the World published in 1898.
There are a couple of way to animate these lines. Animate the Stroke’s Offset to move the line along the path; you can also use it to just nudge where in the dashed pattern the line starts. To animate the entire line on or off, add and animate the Trim shape effect.
 Shape Effect Order
One of the cool things about shape layers is the ability to apply multiple shape effects to quickly create complex imagery. However, keep in mind that the order of the effects has a large impact on the final results.
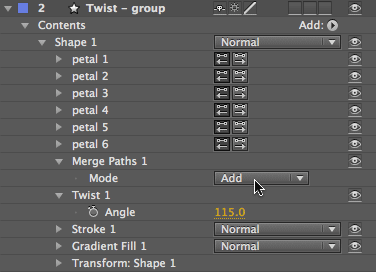
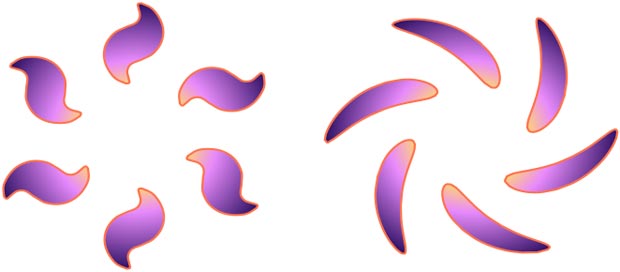
For example, if you add Twist after multiple shape paths, each shape will be twisted individually, as seen below at left. However, if you insert a Merge Paths effect between the shape paths and Twist (shown at right), then the group will be twisted as a whole (below right):
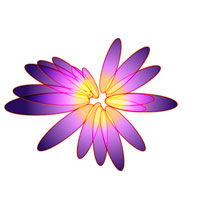
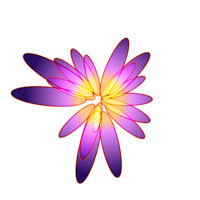
Similarly, it is quite common to pair together the Repeater – which creates multiple instances of the existing shape paths in a shape group, each offset in scale, position, rotation, and opacity – with the Wiggle Transform effect, which randomizes the scale, position, and rotation for all the shape paths. If you have one shape path in your shape group, place Wiggle Transform after that path, and then Repeater after Wiggle Transform, that single shape path will be wiggled, then duplicated – resulting in all of the repeated shapes wiggling in the same way:
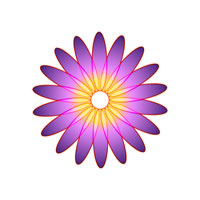
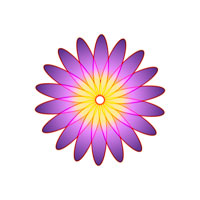
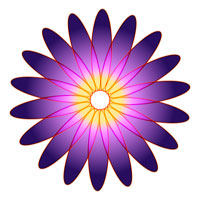
However, if you place the Repeater after your single original shape path, and then place Wiggle Transform after the Repeater, every repeated instance of that one path will be wiggled independently, creating a very different animation:
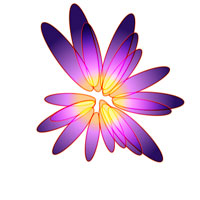
Fortunately, it’s fairly easy to reorder shape operators and effects in the Timeline panel by dragging them up and down. Every now and then you might find you cannot move an item all the way down the list; you may have better luck dragging it outside the shape group, or cutting and pasting it back into the group.
Trish and Chris Meyer share seventeen-plus years of real-world film and video production experience inside their now-classic book Creating Motion Graphics with After Effects (CMG).
The 5th edition has been thoroughly revised to reflect the new features introduced in both After Effects CS4 and CS5 (click here for free bonus videos of features introduced in CS5.5). New chapters cover the new Roto Brush feature, as well as mocha and mocha shape. The 3D section has been expanded to include working with 3D effects such as Digieffects FreeForm plus workflows including Adobe Repouss©, Vanishing Point Exchange, and 3D model import using Adobe Photoshop Extended. The print version is also accompanied by a DVD that contains project files (CS5-only) and source materials for all the techniques demonstrated in the book, as well as over 160 pages of bonus chapters on subjects such as expressions, scripting, and effects.
We will be pulling a few “hidden gems” out of each chapter to share on ProVideoCoalition.com roughly every week. These will give you a taste for the multitude of time-saving tips, not-obvious features, little gotchas, and other insider knowledge you will find in CMG.
The content contained in Creating Motion Graphics with After Effects – as well as the CMG Blogs and CMG Keyframes posts on ProVideoCoalition – are copyright Crish Design, except where otherwise attributed.

Filmtools
Filmmakers go-to destination for pre-production, production & post production equipment!
Shop Now