Avid Media Composer 7 has actually streeted a little earlier than planned, so I thought I'd spend a couple of articles filling you in on the new features, one at a time.
So, one of the features I saw demonstrated at NAB in April that I thought was pretty cool was Spanned Markers. Markers or Locators (as they used to be called) have always simply provided a mark on a moment of time – a specific frame. But I have often felt that it would be very useful to mark a SEGMENT of time, like an in to an out point, for example.
Avid kind of addressed this a while ago, with a feature that allowed you to “Mark Markers” which sounds like a bad stage name for a kid in a boy band or an artistic mobster nickname. Basically place a Marker at your intended in point and another at your intended out point. You can do this multiple times in the same clip to create multiple in and out marks in a single source clip. Then when you want to convert them to actual in and out points, you simply park your timeline locator in the middle of any of the markers and hit the Mark Markers button and the Avid puts an inpoint at the Marker before the timeline locator and an outpoint at the Marker after the timeline locator.

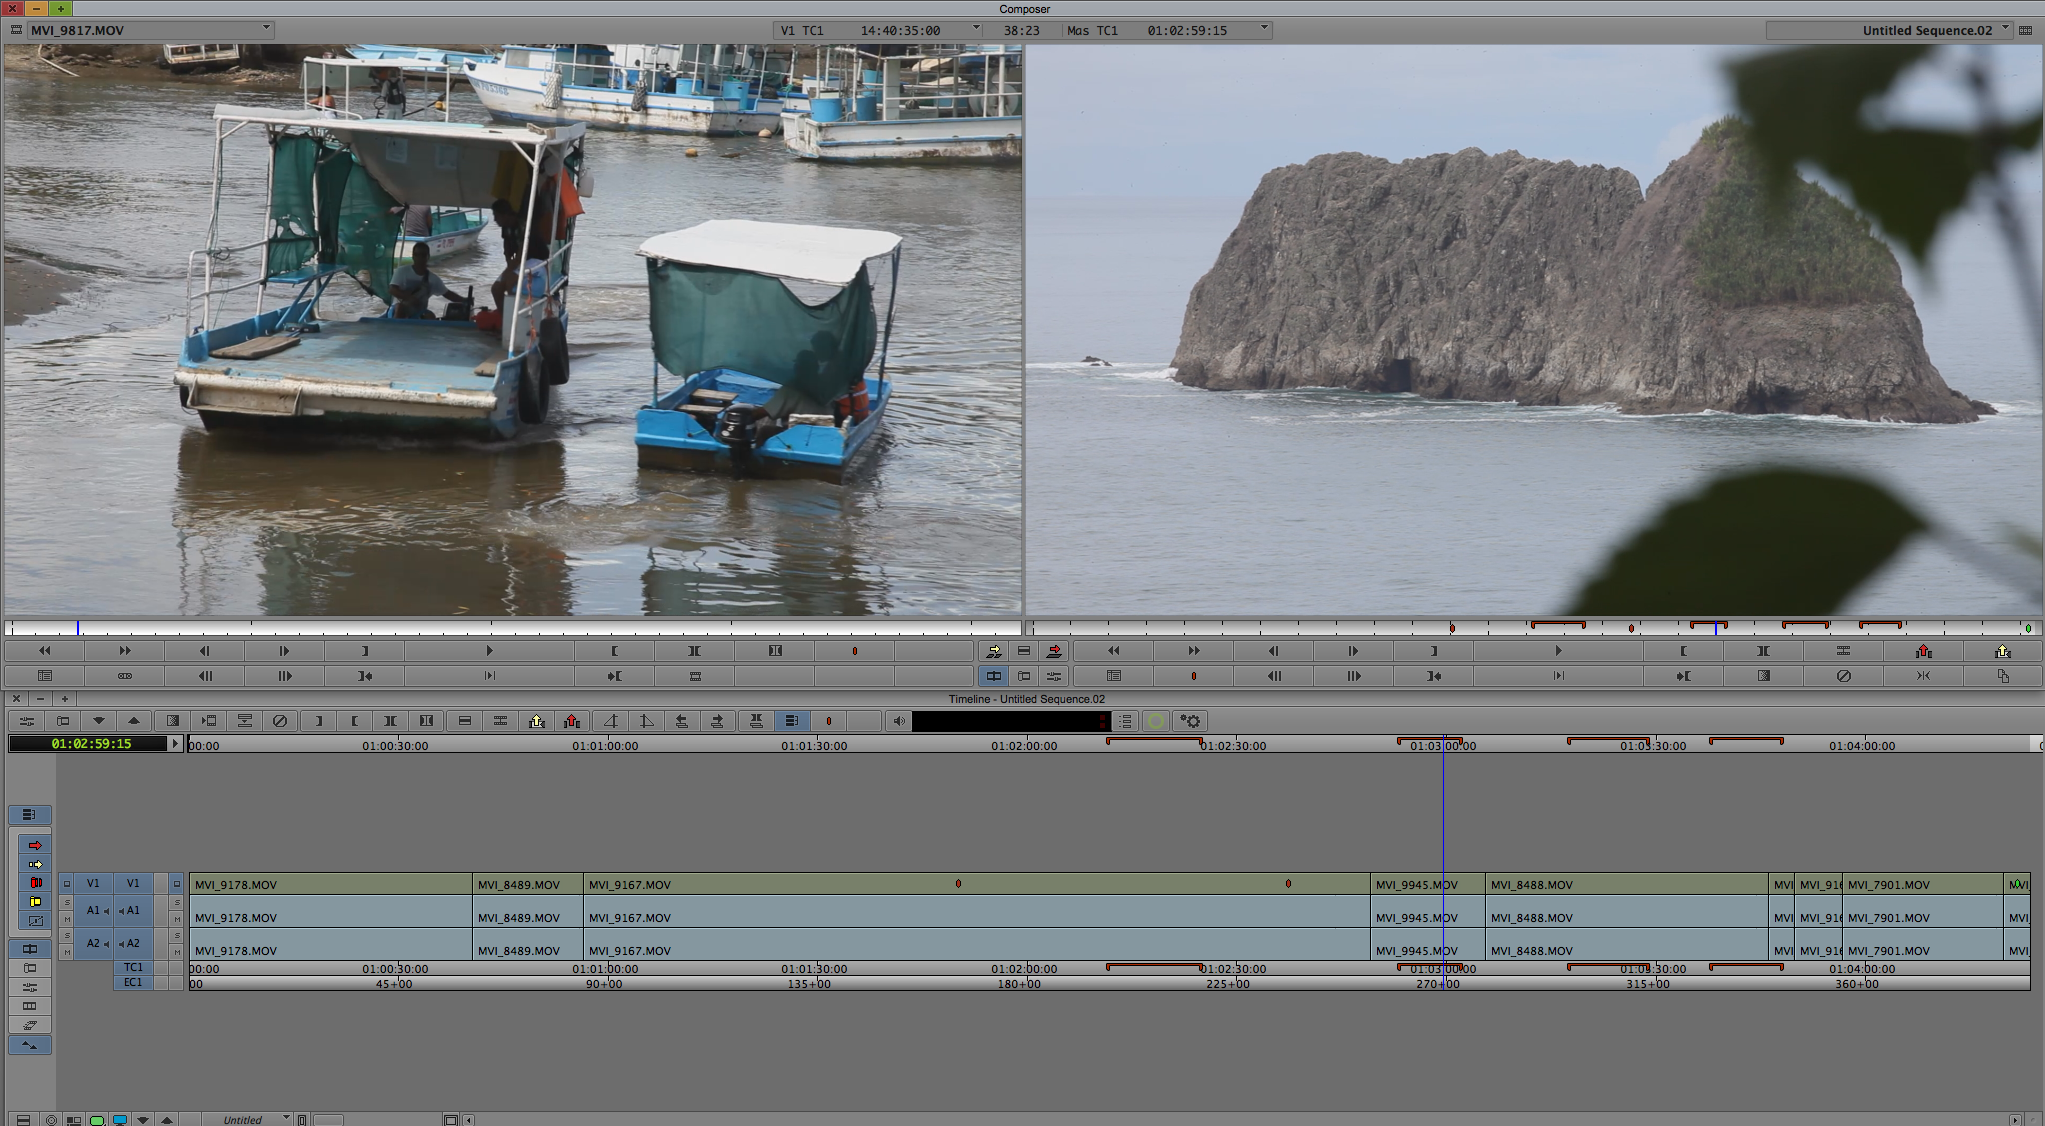
So Avid decides to up the ante and create Spanned Markers which actually define spans of time in the clip or sequence. This is pretty cool. If you’ve got an interview, for example, you could put Spanned Markers around all of the good answers. This is very helpful visually, as you can see from this example of three Spanned Markers in a Source clip (with some regular Markers as well)
So how do you use this cool feature? Well, lucky for you, you’re reading this column, because if you decided to rely on the Avid documentation, you would be out of luck. The Avid documentation for this feature is sorely lacking. Firstly, it explains that Spanned Markers can only be added to sequences. This is not only incorrect, but it negates probably the most important use of Spanned Markers, which is in the Source Window on source clips. In truth, you CAN put Spanned Markers on either the Source or Sequence side. The other problem is that the modifier keys in the documentation to enable Spanned Markers for Macs are incorrect.
Placing Spanned Markers on a clip or sequence is a lot easier than the documentation in the What’s New in 7.0 guide suggests. Ignoring their advice, we’ll just hop into the truth of the matter.
Most people probably already have the keystroke for a Marker somewhere on their keyboard or editing UI. The factory default does not have it on the keyboard or on the Sequence side of the UI, but it does have it on the Source side, on the right side below the Source monitor. If you want to efficiently add Spanned Markers to your Sequence side, you'll first need to map a Marker below your Sequence Monitor or to the top of your Timeline. To add a Spanned Marker, on a Mac, first you have to set an In Point and and Out Point to set the span of time you want to mark, then you hold down Command+Option while pressing a Marker button in the UI. For PCs, press Control+Alt+Marker to create a Spanned Marker. If you want, you can then name the Spanned Marker and/or change the color.
UPDATE: The actual modifier for Spanned Markers is ONLY option-Marker (Mac) and alt-Marker (PC). The Command or Control key is not needed, just the option or alt key.
Now for one of the bad or ugly parts of Spanned Markers: Usually, if you have a specific set of keyboard commands that modify a behavior of a key, you can use that set of commands with a MAPPED keystroke. In other words, if you have a Marker mapped to a key – in my case, the Up Arrow key (though I tried other locations as a test) – then pressing the modifiers and the mapped key will create the desired effect. However, this is not the case. The ONLY way to get spanned markers to work is to use the modifier keys with a Marker button that is mapped to the UI, not the keyboard. That means that you’ll need to map a Marker under your Source monitor and under either your Sequence monitor or at the top of your timeline to get Spanner Markers to work for you. (Or you can follow the crazy documentation advice and call up the Command Palette from the Tools menu, then go to the More Tab, every time you want to add a Spanned Marker.) Usually Avid tries to help you NOT have to use your mouse. With Spanned Markers, you’ll need to mouse the button. Also, you can usually map the alt and cntl (PC) or option and command (Mac) functionality to another key, like a marker, so that you can get the modified key functions without having to hold down two or three keys at once, but this is not working for Markers. It's possible to map the alt/opt and command/control “dots” to a Marker button, but pressing it doesn't get you Spanned Marker functionality, unfortunately.
UPDATE:
It is possible to get Spanned Marker functionality without mousing. You can't currently map the “option” functionality to a Marker to get “one-click” Spanned Marker functionality, but you can have a regular Marker mapped to a keystroke and, by clicking on that key while holding down the option key (Mac) or the alt key (PC) you can get Spanned Markers from the keyboard.
The Spanned Marker is shown in the timecode line below each of the monitors. The spanned color matches the color of the regular Marker that you use with the modifier keys. The Spanned marker also shows up in the top timecode track at the top of the timeline for Sequence Spanned markers only. If you switch the timeline to show the Source side, spanned markers don’t show up.

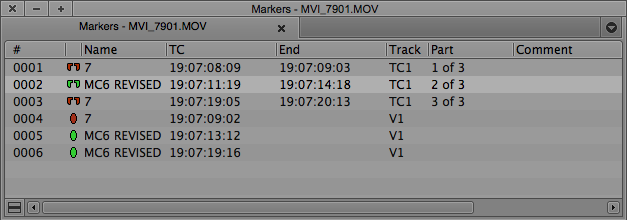
 Spanned Markers do show up with their own special icon in the Markers tool, allowing you to see, and jump to, the beginning of a Spanned Marker from within the tool (but not to the end of it). The Marker window does display the incoming and outgoing timecode of the Spanned Marker.
A small change in the functionality of regular Markers and Spanned Markers in MC7 is that Markers are now automatically named after the User that creates them, so in previous iterations of Media Composer, if you created a Marker and didn’t type any comments or information, it just stayed “blank.” But now, each Marker defaults to having your editing User name. Obviously, you can change this and type whatever identifying information you want in the Marker text.
So, what’s the use of a Spanned Marker? As I mentioned before, it’s a nice way to visually refer to the useful parts of a source clip. It would be a handy tool in collaboration to make notes or point out specific parts of a shot.
 Some other issues to note include the fact that Spanned Markers do not transfer from Source side to Sequence side, even though regular markers can, if set up that way in user preferences. Also, you can’t overlap Spanned Markers. And finally, there is no way to use Spanned Markers like you can with regular Markers and the Mark Markers button to set in and out points. This is completely befuddling to me and is my biggest complaint. You can create a “marked clip” from regular Markers, but not from a Spanned clip. As a matter of fact, if you have your Composer settings set so that you can jump from Marker to Marker using the FFWD an REW commands, Avid only recognizes the FIRST part of a Spanned Marker, but NOT the tail of the Spanned Marker. This actually means it takes more work to use a Spanned Marker to temporarily identify sections in a source, and later create in and out points, than it does to use regular markers. Also, because the Spanned Markers are related to the timecode track instead of a video or audio track, if you have a Spanned Marker on a section and you move that section to another spot in your sequence, the Spanned Marker stays in the same position in the sequence. That could be a good thing, but at present, there’s not way for a user to change the functionality to work either way.
Still, Spanned Markers is a pretty cool little concept that I’ll definitely be using in my workflows, and I have the utmost faith that Avid will complete the implementation of this by allowing for keyboard mapped Spanned Markers and allowing for Spanned Markers to easily and efficiently be turned into Mark in and Mark Out points for editing.

Filmtools
Filmmakers go-to destination for pre-production, production & post production equipment!
Shop Now


