I recently completed a feature-length documentary edit using Adobe Premiere Pro CC 2018 (12.1.2), and we had zero* crashes during the four week + edit. Was I shocked by this? Not at all. PPro is very stable for me, and I had no fears about stability when I jumped into this edit. It’s not the first longform documentary with a mountain of different formats and frame rates I’ve cut in PPro, and it won’t be the last.
Adobe Premiere Pro has gained a reputation as the lest stable of the major NLEs. I would agree that PPro crashes more than Media Composer or Final Cut Pro X but it isn’t inherently “unstable” across the board and the broad feature set often trumps the competition IMHO, especially on a documentary like this.
Why choose Adobe Premiere Pro on this type of doc?
This edit was a biographical documentary on multi-Grammy and Dove award-winning gospel singer Russ Taff so we knew we would be working with a lot of archival footage and still images in addition to newly shot interviews and supporting footage. That archival footage came in the form of VHS tapes, DVD rips, online videos, phone footage and a few other clips of unknown origin.
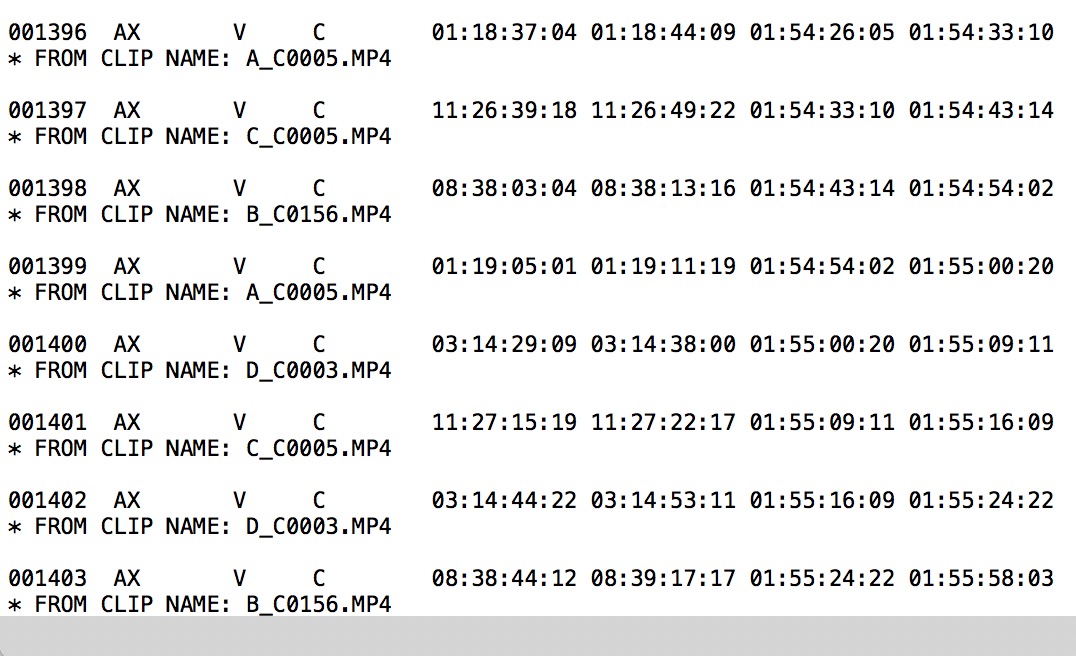
In addition, the director of the film was doing some in-NLE work on his own to organize clips, review footage and occasionally speed the process along where he could. This film was a low budget piece so any time we could save meant money saved in the end. Since he was using a PC and I was cutting on a Mac, cross-platform compatibility was a must.
A fast RAID
One of the most important things to a successful and stable Adobe Premiere Pro edit (really any edit really) is a fast RAID. It is a regular occurrence on internet forums where a poster will be complaining bitterly about bad NLE performance only to reveal they are running their media off of a slow hard drive. It might be a cheap USB portable or a single platter Thunderbolt drive. Slow hard drives mean substandard editing performance and a substandard editing experience with anything beyond a stream or two of a good intermediary codec like ProRes or DNxHD causing pain. If your hard drive can’t keep up you might overwhelm the system as you continue to do things in the timeline with little response from the NLE. That can often result in a crash.
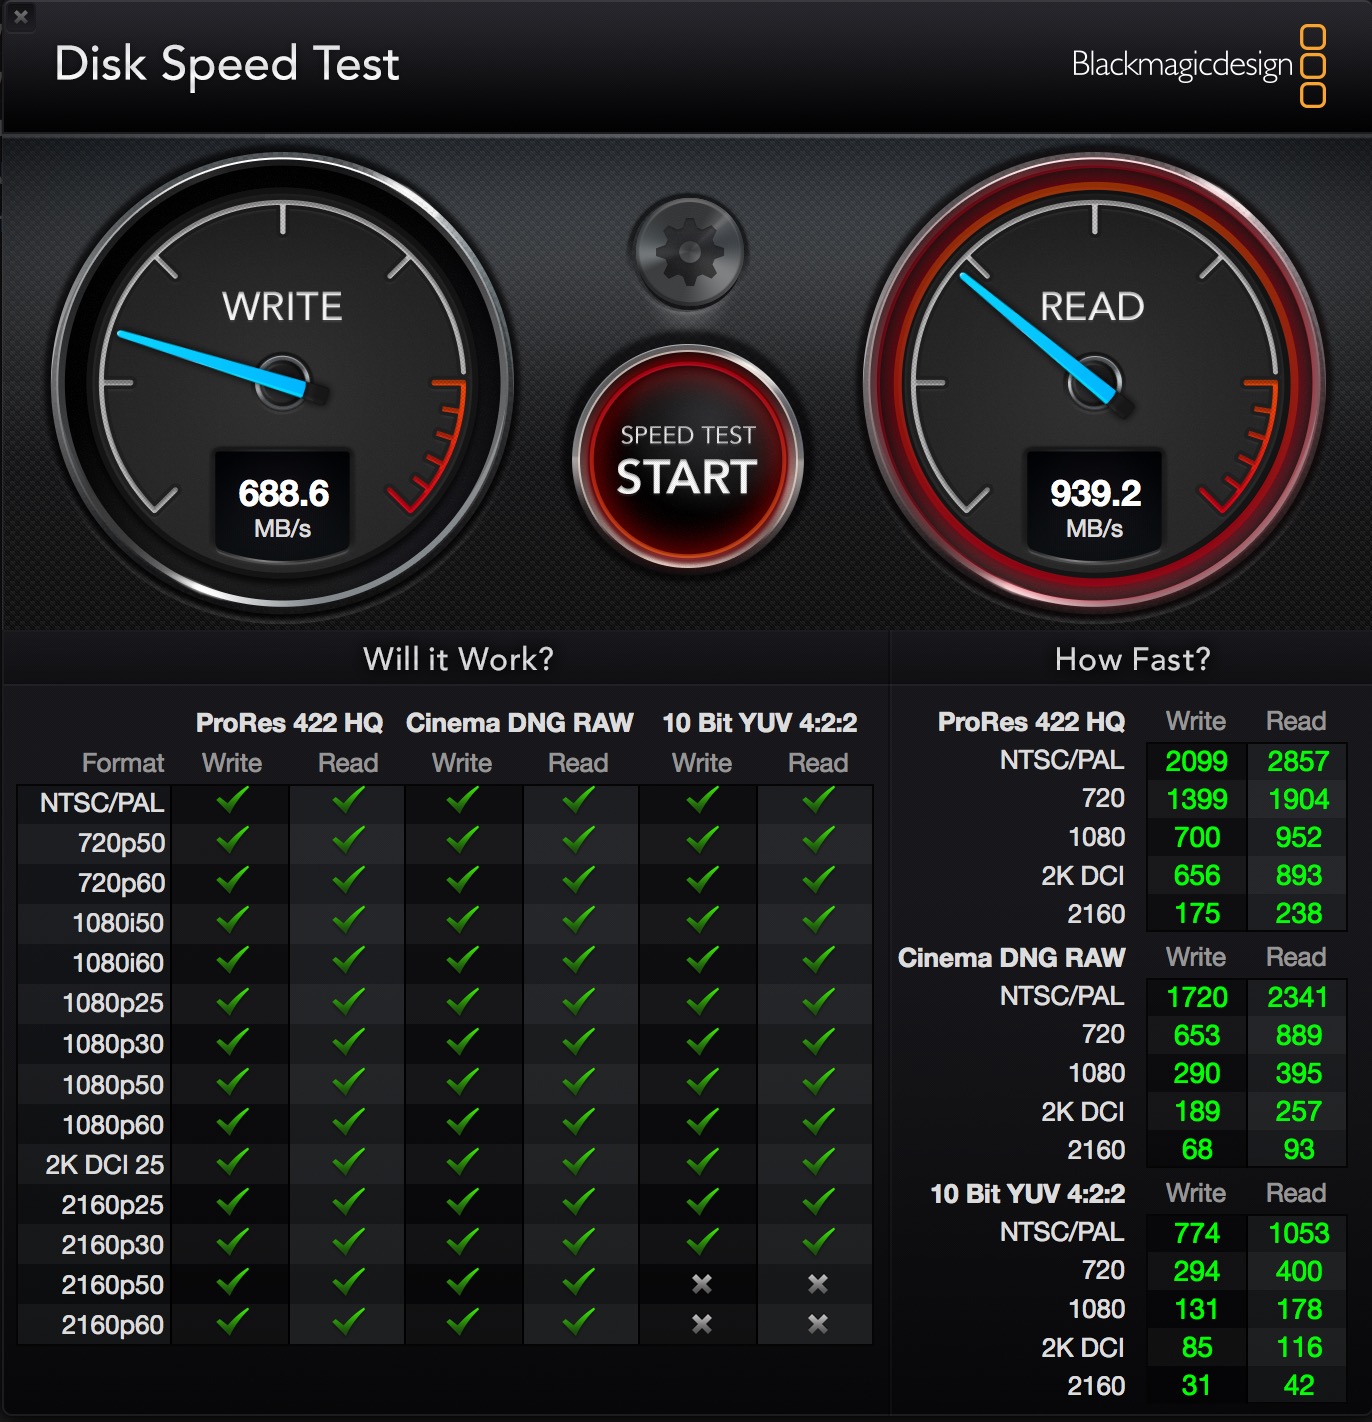
On this edit, I was cutting off of a QNAP TVS-871T connected to an iMac Pro via 10GB Ethernet. It’s a very fast RAID and makes a huge difference in editing performance with everything from file copies to scrubbing the timeline. It’s hard to describe the performance gains you get from a fast RAID until you “feel” it in action. While not everyone can afford the fastest RAID on the market you’ll be amazed at the performance you can get something like this 4-bay RAID 5 unit from OWC where you can get 12 TBs of over 500 MB/s read and write speeds for under $1,000. There are a lot of affordable, fast RAIDs out there. If you’re doing any serious video editing that should be a no-brainer.
A fast computer
In the 4K/UHD era a fast computer seems to go without saying but I’ve read through forums and Facebook comments time and time and time again where a poster complains (sometimes quite vehemently) about Premiere crashing only to have their system specs come out as a many years old laptop, and they are trying to cut 4K media natively. Without proxies. Blaming Premiere.
You can’t expect that work yet … they do.
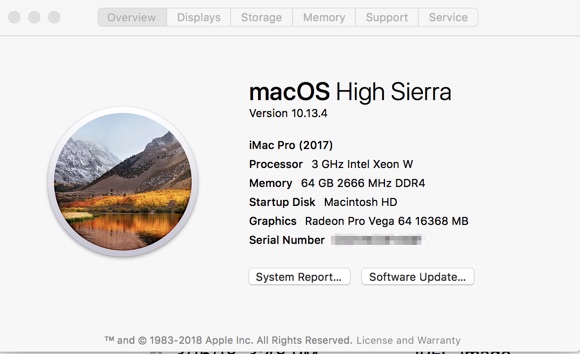
This documentary was the most substantial edit to date on my iMac Pro and it performed flawlessly. I’ve done similar docs of similar size on a regular iMac with great stability in Adobe Premiere Pro.
A dedicated computer
As long as we’re talking about the computer used to run Adobe Premiere Pro, the most stable machine is always going to be a dedicated editing system that is free of the burdens of being too weighted down by doing everything else a computer has to do. A lean operating system is a healthy operating system when it comes to the hard work a computer has to do to edit video.
Give your system a break; surf the web, watch Netflix, download whatever it is your download, do your banking, tweet, snapchat, Instagram and Facebook somewhere else. Your editing system is for editing. That’s easy to say when you don’t have to spend money on another computer but iPads, Surface Pros and Chromebooks can make a more affordable way to lighten the load for your editing system if it’s feeling too bogged down.
Selective Proxies for certain formats
One thing that Adobe Premiere Pro does well is it enables the editor to selectively create proxy files for problem clips and easily allow Proxy-mode playback where only those clips use the generated, “low-weight” proxy files for playback. It isn’t an all or nothing proxy option like FCPX has.
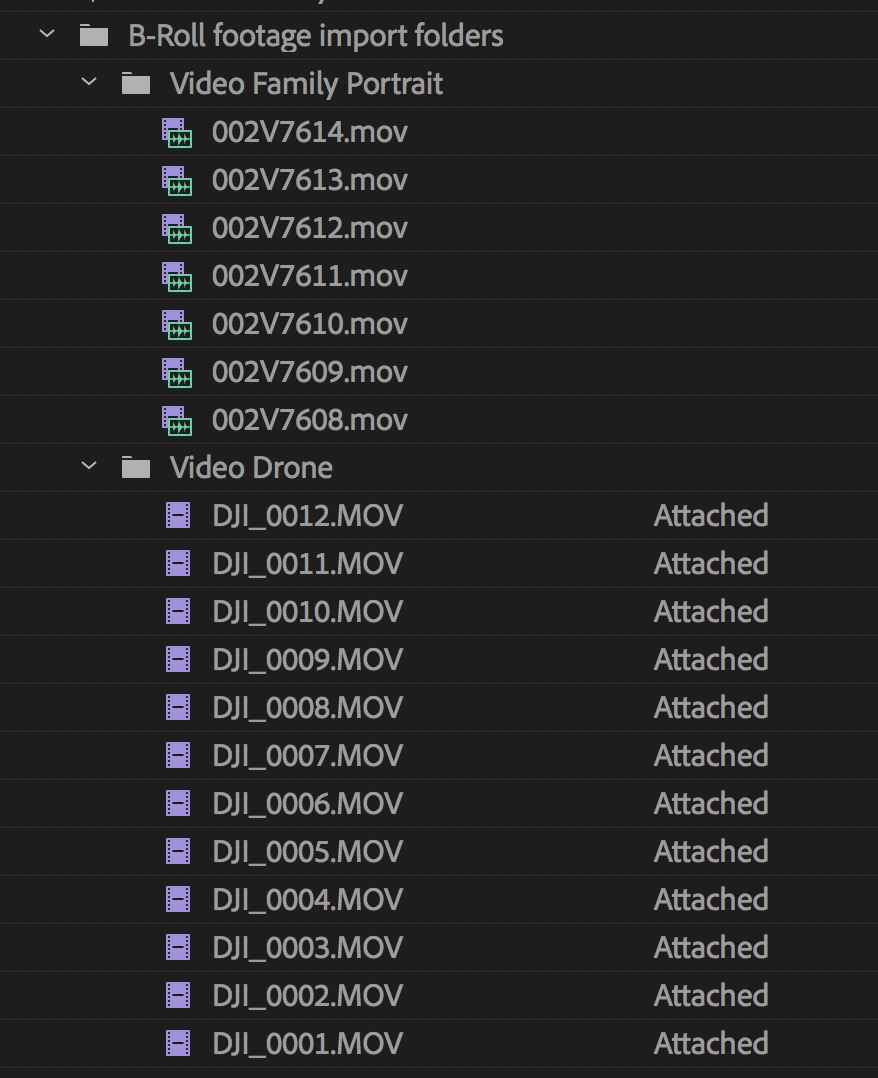
We had several batches of footage that were shot with a DJI Osmo stabilized camera as well as drone footage. While these clips are H.264 .movs and .mp4s, they are notoriously tricky to playback and can bring the system to a crawl. They are nearly impossible to efficiently scrub through in a selects sequence making it all the more difficult to find good shots.
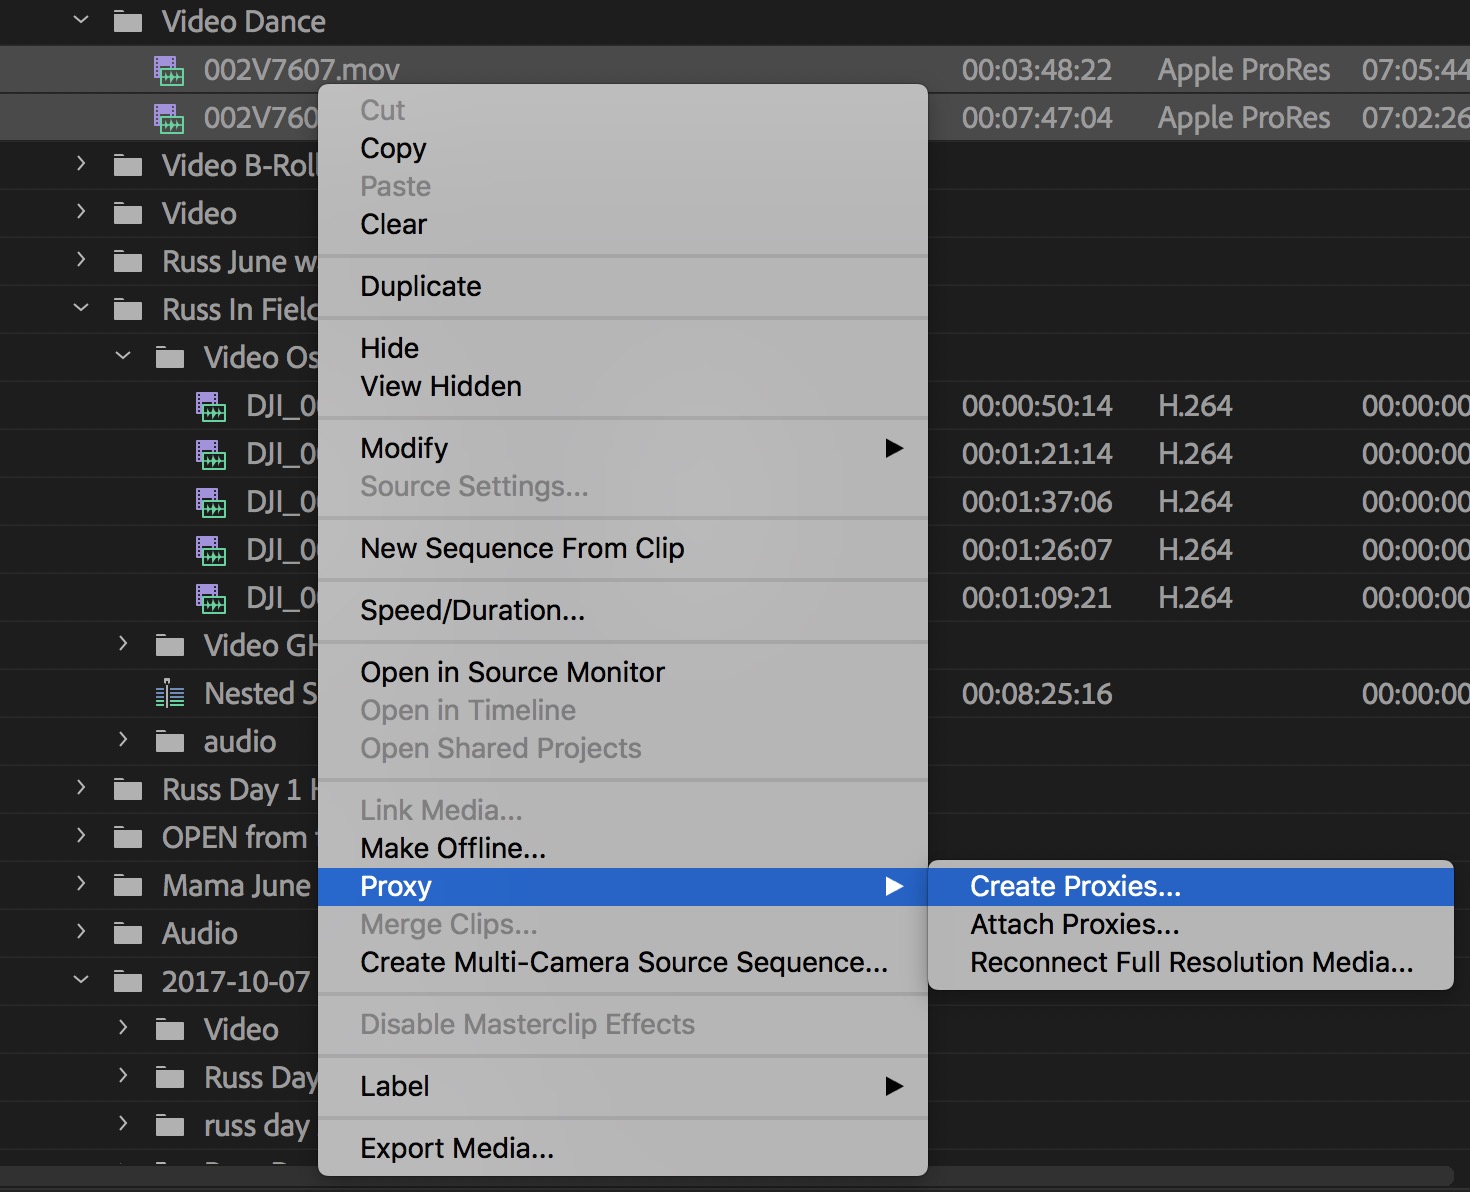
Creating proxy files for just the “heaviest” of clips was easy. Select the clips, right + click, Create Proxies. I was even able to have some of those proxy files generated in the background via Media Encoder when I didn’t generate them overnight. It might only be for two or three files at a time. The director was also able to create some on his own while reviewing footage on a slower laptop and I was able to copy those to my RAID, attach them and continue working. Since we were working with duplicate footage, I could give him the proxy files I had created so he could attach them and get the benefit as well.
Sequence versioning via project files
One fear with Adobe Premiere Pro’s all-in-one project format is that a project file might become corrupt and not open. This would, obviously, be horrific and quite undesirable. While Adobe has made great strides over the last few years to streamline the PPro project file (gone are days of PPro projects ballooning to 100+ MBs of size), lots of very large sequences can result in big project files. As the project file size grows my fear of project corruption and instability grows as well, so I prefer to keep them smaller.
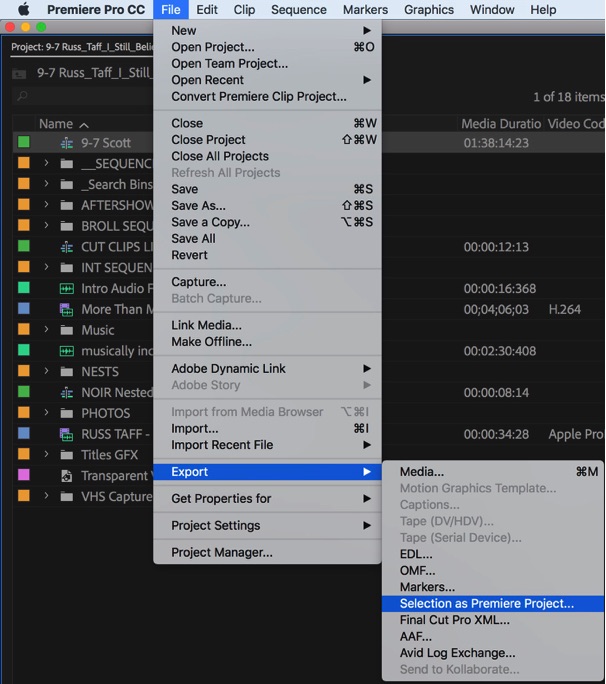
I love this little option to export a Selection as Premiere Project. This makes versioning by project easy. Instead of duplicating a sequence if I felt like I needed a new version I would export that sequence as a new project and then continue the edit. If I wanted to revert to an older version of the edit I could bring that in via the Media Browser.
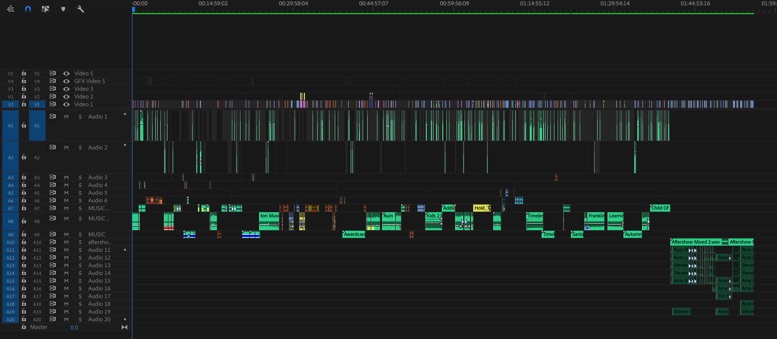
I cut the entire two-hour film in one timeline, only occasionally building a sequence on its own before putting it into the main edit. If I needed to make a significant change, instead of duplicating the sequence in the project I would select the sequence and save the selection as a new Adobe Premiere Pro project. This gave me a backup of the edit before the changes without creating excess fluff in the project file that could increase the size and complexity.

Looking at the two PPro project files above. The smaller of the projects at 7.5 MB is the main edit project with just one copy of the main edit sequence. The 14.8 MB version has eight copies of the main edit with various changes. It’s not overly huge, but I feel much more comfortable keeping those projects files slimmed down.
If I needed to get back to the older version, it was easy to use the Media Browser to either open the sequence up in the Source Monitor and selectively grab a piece of the edit or reimport the whole thing.
Importing only what I needed
When working on a biographical or historical documentary, you’re often faced with a monumental mountain of footage in many different formats. I tend not to import everything as I know that often I’ll not use anything out of a particular batch or only a few bits and pieces. Rather than importing everything from a specific shoot or batch of footage, we would set up different projects depending on shoot day, interview or subject and those projects were used to view, log and pull selects. Then only those selects would be imported into Adobe Premiere Pro.
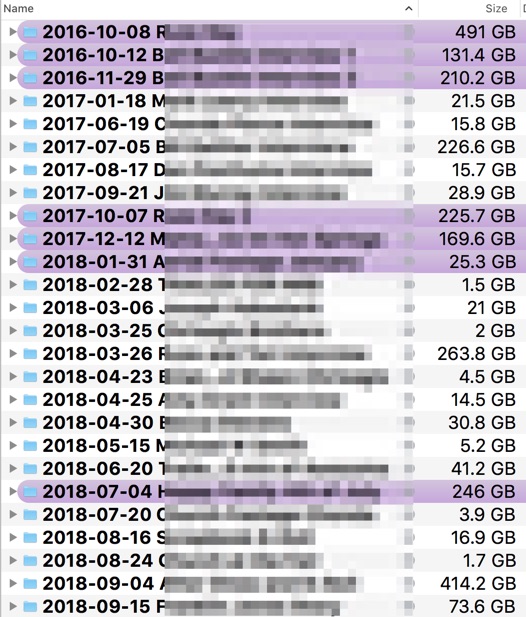
As footage came in from various elements of the documentary they each got their own Adobe Premiere Pro project for organization and logging. As the footage was needed, I would Media Browser into that project and pull the sequence that I needed.
This technique kept the footage being tracked in the master PPro project slimmed way down. Besides keeping project files small it was a lot less to sort through in the top level of the project itself. The Media Browser makes it easy to look into another project if need be but rarely did I find myself digging back into those selects projects once I pulled in the selects sequences. That’s the point of logging footage on the front end; finding what you need.
Rendering to ProRes as we moved along
While Adobe Premiere Pro can muster a lot of real-time playback via a number of different methods, I still like to render the timeline (especially long timelines like a documentary) as I go along. But I think it’s important to know what you’re rendering to when you do just that. One of the best little-known features of PPro is the ability to render the timeline to a codec of your choosing which can make “living” in your timeline a much faster and much easier on your system.
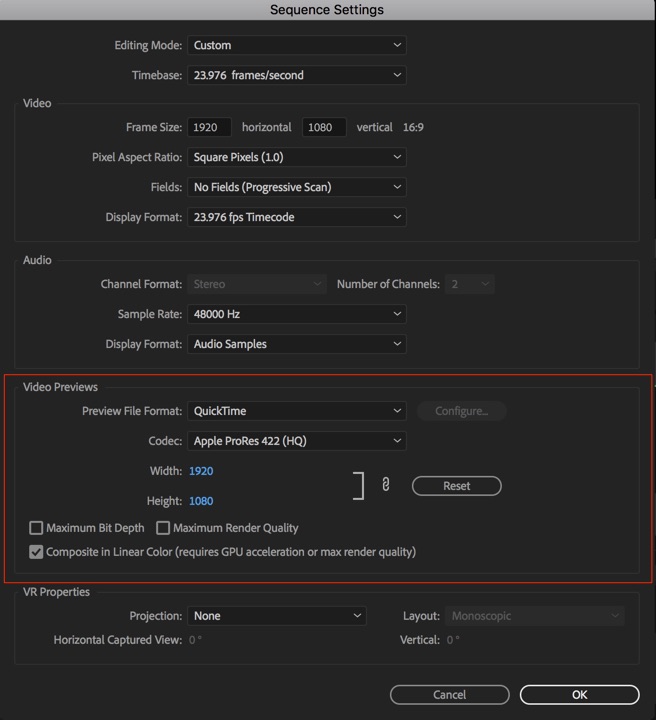
Knowing we had to deliver the project as a ProRes HQ file meant that selectively rendering the sequence to ProRes HQ paid big dividends when outputting near the end of the edit.
Why might this make a difference? If you think about what any NLE is having to do as you edit, it’s having to “render” the frame below the playhead whether it is playing back the edit, being scrubbed at varying speeds or sitting paused where the NLE displays the current frame. If you have a complex composite or are using notoriously “heavy” codecs like R3D files or XAVC footage, that can put extra pressure on the CPU, the GPU or the hard drive(s) where your footage resides. Rendering that timeline to a proper intermediary codec can take a huge burden off the system which can cut down on crashing.
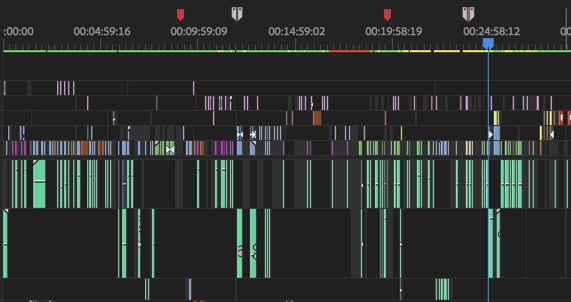
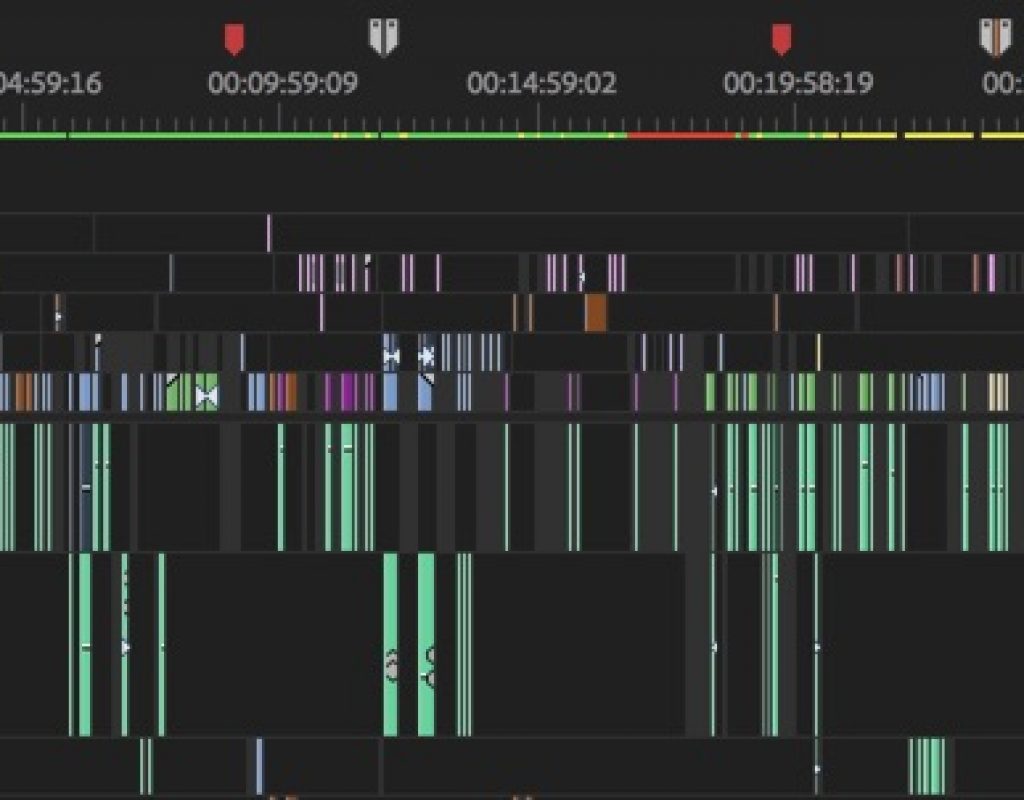
Those colored indicators at the top of the timeline? They indicate the render status of the timeline. Green is rendered to a new full rez playback file. Yellow is realtime but a full quality render file has not been generated. Red is unrendered and you might not get real-time playback. And in my experience red makes PPro less unstable overall.
Don’t believe me? Try to scrub around your timeline when it’s filled with heavy codecs or advanced composites; lots of red and yellow. It just doesn’t scrub well. Try the same after you’ve rendered to a green bar in an intermediary codec like ProRes, DNxHD or Cineform and you’ll immediately “feel” the different and how much less the computer has to work to process this footage.
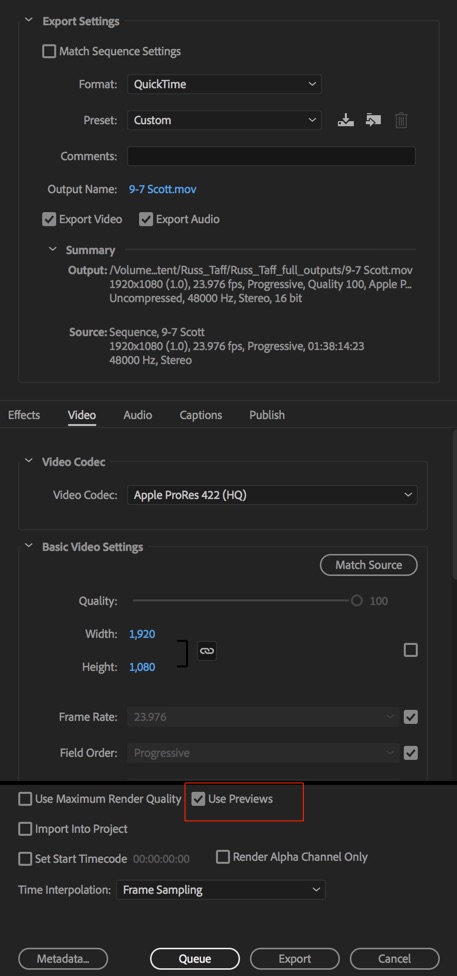
If you’ve set your sequence setting Video Previews up properly, rendered your timeline and are exporting to that same format you can check the Use Previews checkbox in the Export Media box and PPro will dramatically speed up the export. It will use those renders in the export, therefore, reducing the export time as it doesn’t have to render new files, just copy those existing previews into the new export.
On this documentary, I used ProRes HQ for my Video Previews as that was the deliverable format and this nearly two-hour movie outputted to a new file in under 10 minutes. As an experiment, I exported a version to Cineform and that export took just under one hour.
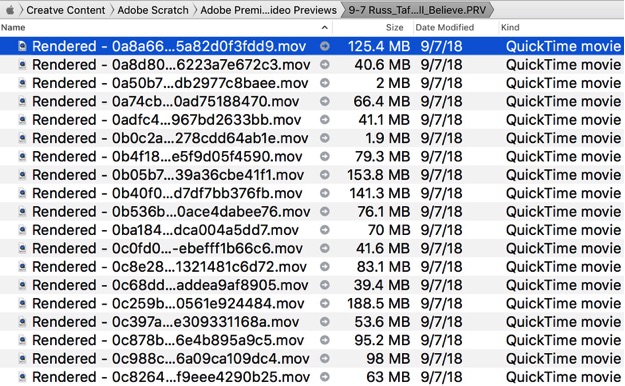
A bonus of this setup is you can if you wanted to for some reason, open up your scratch disks and playback the Video Preview render files PPro has created. They are a bunch of individual ProRes HQ .mov files in this case.
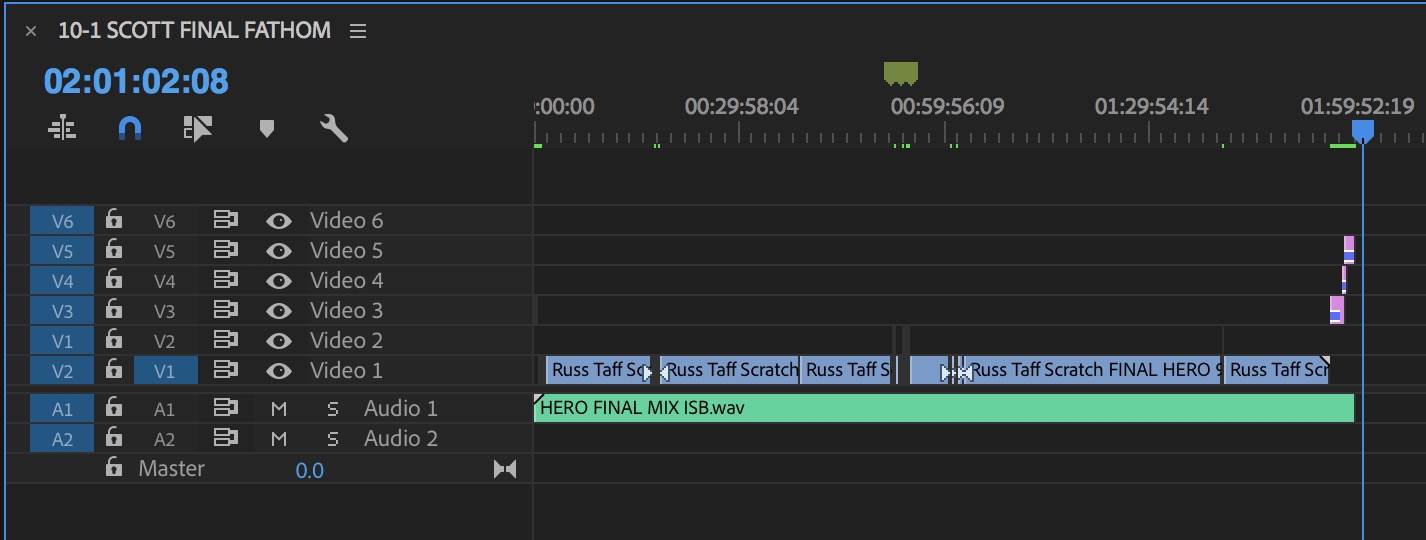
One more added bonus. Say you’re bringing your ProRes HQ color corrected sub-master back into the edit to add titles, credits or do some versioning, if you set up that sequence to match the file then colored render bars disappear as the clip and the sequences matches. You only get colored render bars for those things like titles or places where an effect has been applied. That type of export can also Use Previews upon output. In this example above the two-hour movie exported in under 6 minutes.
Saving things like Warp Stabilizer and Morph Cuts until the very end
There are some operations in Adobe Premiere Pro (and any NLE really) that create data. That data has to be stored somewhere and it can be in the PPro project file. That can increase the size of that project file and run the risk corruption. Or when playing over a clip that has all that data applied it takes power.
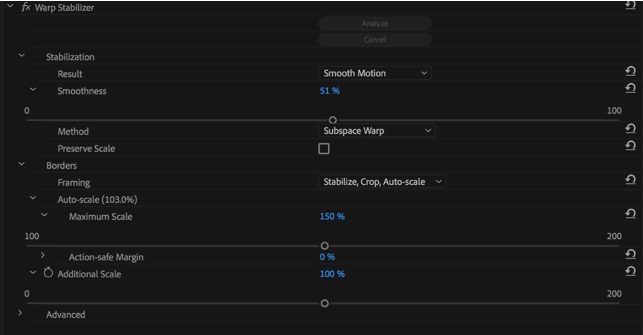
This observation is just anecdotal, but the Warp Stabilizer has always been a “heavy” effect in Adobe Premiere Pro in that it creates a lot of data and feels like it can slow a project down. It used to be a lot “heavier” in its early incarnations than it is these days but I still make it a habit of using it sparingly and only applying it as late in the process as I can.
While we didn’t use any After Effects Dynamic Linking on this project (I did use 26 Morph Cuts thought … if you can find them I’ll buy you a beer at NAB!), I take the same philosophy with Dynamic Links compositions as well. I get nervous with a lot of complex AE Dynamic Links in a big timeline. It’s a very convenient way to get clips into After Effects but after sending the clips over I usually undo the Dynamic Link comp and leave the original clips in the timeline and export a new clip render and bring that back into Adobe Premiere Pro.
Caveat
I’m an editor and not a computer programmer and while I do spend a lot of time on the computer, I don’t claim to know all the “under the hood” workings of what makes an NLE do the amazing things it can do, PPro or otherwise. These are all observations and techniques that I’ve developed over a lot of years working in Adobe Premiere Pro (and other NLEs). I’m happy for any programmers or anyone with a working knowledge of computer-software-nerdy-stuff to comment on some of these inner workings of Premiere that I’ve speculated on and correct my wrongs. But follow some of these recommendations and I bet your crashy-crash Adobe Premiere Pro experience will get a lot better.
* Okay, zero crashes is a lie. I did have one crash that I am blaming myself for because I knew better. This was on one multicam sequence at the end of the movie. While I knew I should create proxy files for a four-camera 4K edit, I chose to try and cut it, mulitcam switch and all, in 4K. As things slowed down and I became increasingly impatient, I tried to do a few too many things and PPro locked up. After creating those proxy files it was smooth sailing after that.

Filmtools
Filmmakers go-to destination for pre-production, production & post production equipment!
Shop Now