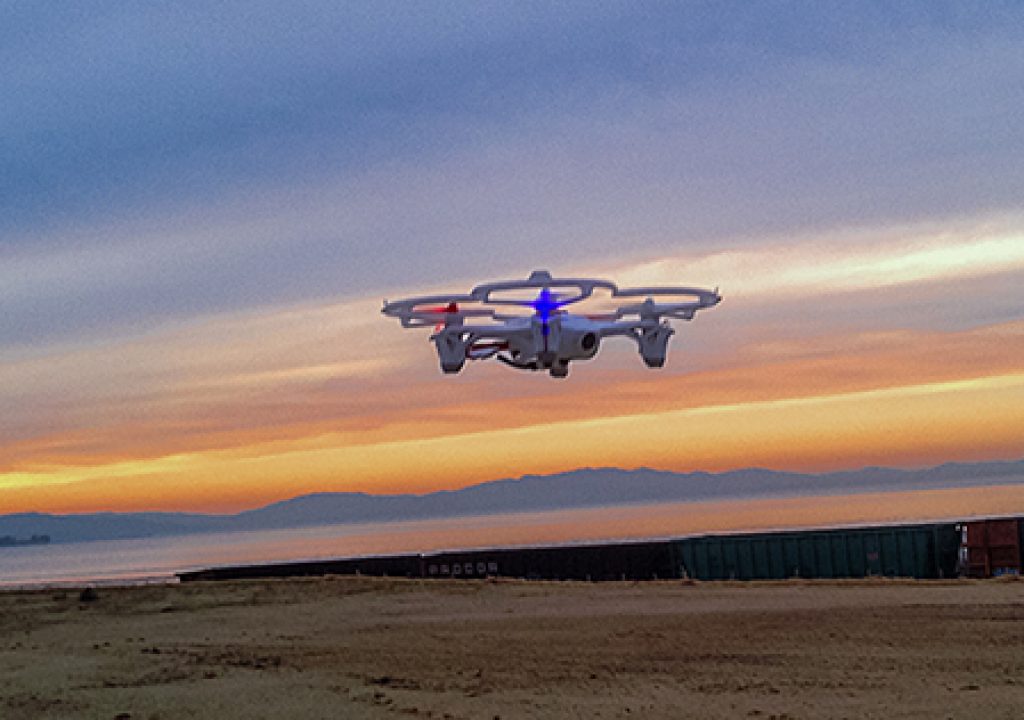
Go ahead and call these mini RC quadcopters “toys”, but they won't be insulted, because they're serious flying machines that have many of the same features that the big boys have! But learning to control and pilot these relatively inexpensive quadcopters may help you manage and fly your more expensive DJI quadcopter with greater ease and precision, and build your skills and confidence.
![]()
Since the enormously-growing popularity of the relatively expensive quadcopters such as the DJI Phantom 2 Vision ($1200) to a more advanced DJI Phantom setup with the Zenmuse gimbal and a GoPro Hero3+ with FPV capabilities (approximately $1500-4000 range, depending on configuration & electronics) this past year, and many reports of expensive crashes, flyaways, etc. (mostly due to pilot error) it only seemed logical to find a “trainer” out there that was inexpensive, reasonably indestructible and very portable – even to fly indoors.
There are several “micro copters” on the market and Hubsan is the leader in the mini quads. This is where my search ended up with the Hubsan X4 H107D FPV RC Quadcopter with Live LCD Transmitter/Recorder.
![]()
Hubsan X4 H107D FPV Kit
The kit comes truly ready to fly right out of the box. All you need to do is charge up the LiPo battery and add 4 AA batteries to the transmitter/FPV monitor and you're ready to go. If you choose to install the included Protection Ring, you will need to remove the props first, then it snaps on over the motor bezels and the props just press back on in place. The kit also comes with one set of replacement props and a prop removal tool that helps you to pry them off at the base so you don't warp/bend them.
![]()
List of Features from the Hubsan website:
- Lightweight airframe with nice durability
- Latest 6-axis flight control system with adjustable gyro sensitivity
- Permits super stable flight, flying outdoor
- Motor(X4): 0820 Coreless
- Frequency: 2.4GHz + 5.8GHz (Video transmission)
- Transmitter: 2.4GHz 4 channels vs 4.3 Inch LCD
- Control distance: 50 – 100meters
- Live video distance: around 100 meters
- Battery: 3.7V Voltage, 380mAh li-po battery with auto cut off safety PCB
- Charging time: about 30 minutes
- Flight time: around 7 minutes
- USB charging cable allows to charge by computer or wall charger
- Camera: 0.3M pixels camera included, resolution: 640 x 480
- Instant video review on transmitter
- Memory card: SD card inserted in TX, Micro SDHC class6 2-16G (option)
- 4 night LED lights & rubber feet
First Impressions
Unless you're already familiar with the size of these mini quadcopters, the “fits-in-the-palm-of-your-hand” scale is quite amazing, for how they perform. The design and build quality of this tiny craft is surprisingly brilliant. The body is a two-piece clamshell design of molded plastic and the arms hold the motors securely and have rubber feet on each leg. The included Protection Ring is an option you can choose to install or not – and of course since I'm new to these little guys, I installed it!
As shown in the photos below, with the X4 H107D powered-on, you'll notice two red and two blue LEDs. On the Hubsan quads, the red LEDs are the back of the craft, as opposed to the DJI Phantoms, where red indicates the front, so it takes some adjustment during flight to not get disoriented. Also, the red props align with the red LEDs, to help with orientation. (I'm sure a simple LED swap and a soldering iron could remedy this if you're so inclined).
![]()
Opening up the X4 H107D, you;ll see familiar components such as the controller boards and the FPV camera, which is small. REALLY small. No wonder it's rated at 0.3MP and a claimed resolution of 640×480 (720×240 actual pixels).
![]()
While the size of the X4 H107D quadcopter itself is quite compact, I was surprised that the transmitter/controller is impressively full-sized. It features two stick controllers, with a spring-loaded rudder/aileron stick and trim buttons for each stick. (NOTE: be sure to indicate MODE 2 when you order yours, so the throttle & yaw control stick will be on the left and the pitch/roll control stick will be on the right – the same as the bigger quadcopters).
There is a switch for stabilized/manual flight control modes, and the menu option for Advanced mode (*see “beginners tutorial” video below) so if you want to do flips and tricks, the manual (advanced) mode will allow you to (I'm not that advanced yet).
The MicroSD card slot and USB port are on the side and record button above the right stick allows you to record what your FPV camera sees (more on the camera and video footage below).
The LCD screen gives you instant feedback from the onboard camera on the X4 H107D, though due to the downward-facing angle of the camera's mount, flying truly FPV without also having line-of-sight is problematic in some situations, such as indoors and low-altitudes.
![]()
With this MODE 2 configuration controller, it feels very familiar to the DJI Phantom controllers so flying the X4 H107D for the very first time requires only adjusting to the size of the craft and immediate response time from your directional input. My only caution is in getting used to flying these mini quads you may want to go easy on the controls of your DJI Phantom when you return to fly it as the larger/heavier craft will require more response time to your inputs.
Camera, Video and Recording Capabilities
The 0.3MP camera on the X4 H107D broadcasts a signal back to the transmitter/controller and gives instantaneous video feedback for quick response FPV flying. I have found that certain environments and conditions (through walls/doors, around corners indoors and other physical obstacles) the video signal may get static or cut-out altogether. But I've found the range of 50-100m to be accurate in my tests outdoors for both controller and video signal.
The video signal can be recorded directly to a MicroSD card on the controller, so this includes all the static, reception interference, dropped video signals and all. So this isn't intended to be like strapping a GoPro to a larger quadcopter and recording high quality video footage – but more of a way to capture your flight experience with the X4 H107D and possibly studying how you might better perform your maneuvers on subsequent flights. Or or course, just for fun.
The recorded video is 720×240 (actual pixels) at 60fps AVI file format. This was easily edited in Premier Pro and “stretched” to 720×480 so the aspect ratio is correct. You might be able to grab a few good still frames from QuickTime 7 Pro (Mac) for sharing images on social media.
Here's a few clips from some of my tests outdoors and inside our offices (take off and landings and even a “basket” dump in the trash can at the end).
*There is also this very helpful YouTube video produced by Sam Lee of Hubsan (Chinese language audio with English subtitles/instructions) – I'm going to be trying some of the more advanced features and modes in the weeks to come and report my updates as well.
Overview:
If you want a fun, easy way to get better at flying your quadcopter and feeling the response of the controls and orientation coordination, I highly recommend getting the Hubsan X4 H107D. At around $200, it's definitely a worthwhile investment toward improving your flying skills. I've seen it for sale online at a few locations, but primarily on Amazon.com. It appears this is coming directly from Hubsan's distribution.
I'd also recommend investing another $25 in this Hubsan X4 H107D FPV Quadcopter Crash Pack, which includes a new shell, four rubber feet, four spare prop sets, 2 motors, 2 LEDs and a spare battery.
![]()
If you don't care for the FPV option and can live with a different style controller (more like a toy RC or video game style controller) then Hubsan also makes a couple cheaper models of the X4 series as well. The new Hubsan X4 H107L (approx $50) has the same flying capabilities with a different style controller and the Hubsan X4 H107C 2.4G 4CH RC Quadcopter With Camera RTF (approx $65) allows you to record your flights but doesn't have FPV/live video feedback and utilizes the different style controller as well.
Hubsan is known for their RC airplanes and helicopters and has many different models to choose from, which you can learn about more from their website.
**EDITS 12/29/13: Edited for corrections on labeling and clarification of controls on transmitter.
_________________________________________________________________
Jeff Foster is a published author of several how-to books and training videos in the motion graphics, animation and video production industries and is an award-winning video producer and artist. Visit his web site to learn more about his training methods, tips & tricks at PixelPainter.com

Filmtools
Filmmakers go-to destination for pre-production, production & post production equipment!
Shop Now


