I hate reading manuals. They don’t tell me what I want to know in the order I want to know it. I’d rather figure things out on my own, or if that learning curve is too steep, have someone show me in the basic concepts. I can usually figure out the rest later. For example, when I first sat down to learn DVD Studio Pro, the manual drove me insane. An editor explained the basic concepts to me in five minutes or less, after which building a DVD became intuitive and easy.
I sought out the same information for encoding and using Flash for the web, and Adobe was kind enough to school me in the basics. Now I get it. I know exactly what I need to do, no more and no less, to create Flash video for the web. Let me share with you what I learned:
This article assumes that you are using Adobe Media Encoder and Adobe Flash Pro. They are part of several Adobe software suite options, such as Adobe Web Premium.
First, let’s encode some video. If you’re familiar with media coding at all, the controls will look familiar:

The big box with the white and gold text is the file input window. I have one video file ready for processing, a 60 fps Quicktime encoded using the Animation codec. The format is FLV/F4V; preset is “custom”; and the file output is to a folder on my desktop. The fourth button down on the right is “settings”, and clicking that brings up this window:
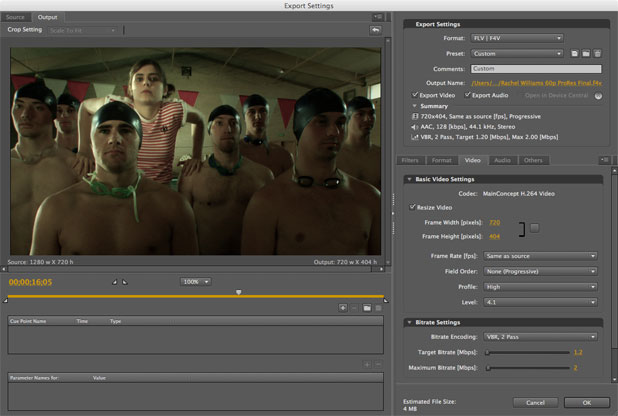
The F4V file is what finally made Flash relevant to my world. This is Adobe’s implementation of the H.264 codec, employed by Apple since Quicktime 7 arrived, and as far as I’m concerned it is the best codec, by far, for high-quality small filesize web video encoding. Prior to using Adobe Media Encoder I played with On2 Pro’s VP6 encoder, and the encoding quality never came close to what I could accomplish so easily encoding H.264 with either Apple’s Compressor or Quicktime Pro. And, frankly, I refused to consider Flash as a viable alternative for web video encoding until H.264 Flash arrived.
This encoder has all the usual settings. I’m reducing a 1280×720 video clip to 720×404 (16×9, square pixel) using the MainConcept H.264 codec and VBR 2 pass encoding. VBR stands for “variable bit rate,” meaning that the data stream expands or contracts depending on how much information changes in the image. A locked-off shot without much movement requires considerably less throughput than a handheld whip pan, for example. “2 pass” indicates that the encoder is going to look over the file first before encoding it, in order to best determine how to compress it.
The bottom setting, “level,” is new to me. I looked it up and discovered that Adobe Media Encoder offers some settings that I’ve never seen in Quicktime: apparently it’s possible to specify an H.264 “level” that tells Media Encoder how much firepower to use when encoding files. The higher the level, the higher resolution the intended playback device. Here I’ve gone with the default of 4.1, but apparently 3.1 would be fine for the frame rate and resolution that I’ve chosen. (For more about H.264 levels, see here.)
I’ve found that a target bitrate of 1.2 megs (1200kbps) works well for H.264 web encoding at SD sizes.
Once we’ve done our encoding, off we go to Adobe Flash Pro to build our Flash project:
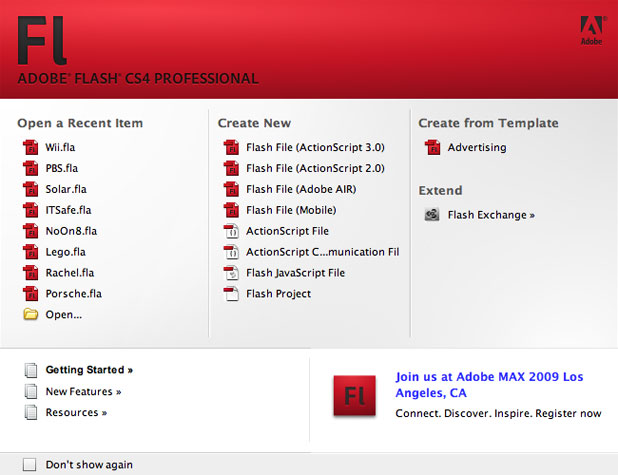
The left column shows previous Flash projects. We’re going to focus on the middle column, “Create New”. Click on the top option, “Flash File (Action Script 3.0)”. You should see the following screen:
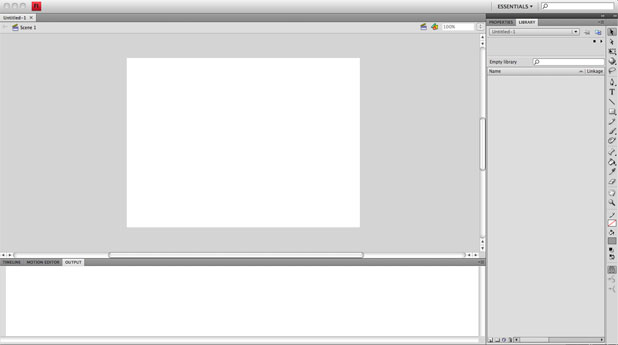
The white box is the empty “stage” where I’ll will build a Flash project. The “stage” defines the area in which my Flash movie will play. (All Flash projects are best thought of as moving picture files, as everything they contain will eventually be displayed as a moving picture.)
The column on the right is the Inspector, which will display pertinent information about whatever component of the Flash project is selected. At the bottom there are tabs for “timeline,” “motion editor,” and “output.” As we’re only focused on delivering a Flash video to the web we’re not going to worry about those right now.
next page: importing the video and “skinning” it
The next step is importing our video:
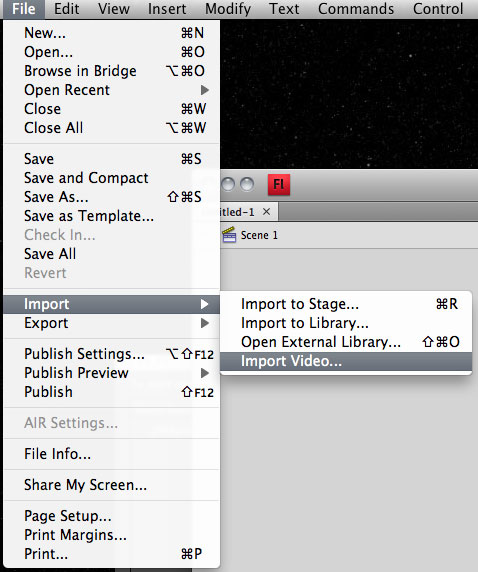
Which takes us to
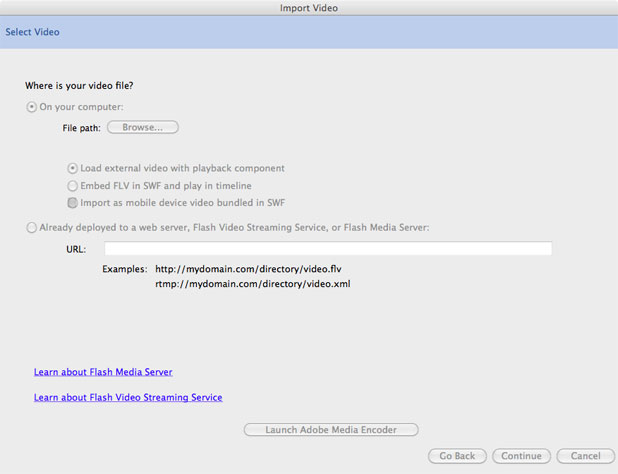
In this case the file is on my computer, so I’ll select the “On your computer” option and click “Browse” to select my file. Having done that, I’ll click “Continue” on the bottom right. This screen appears:
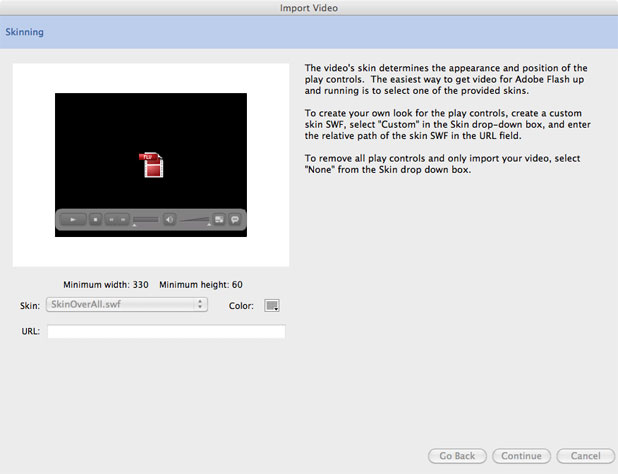
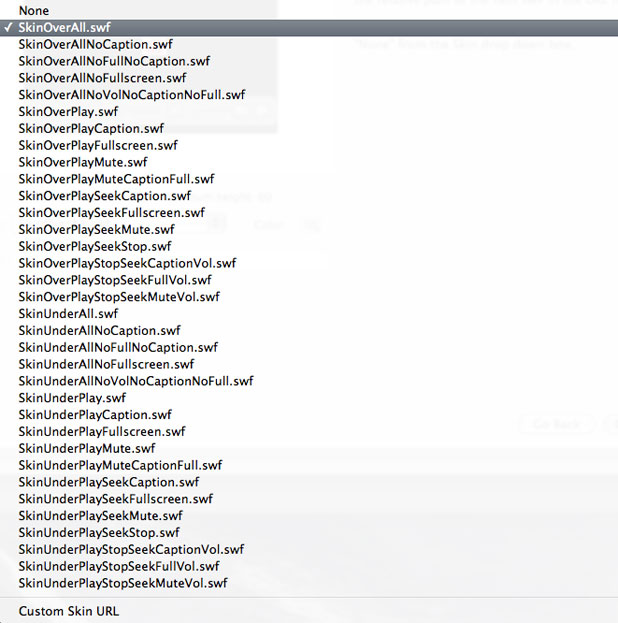
This is where you can select the player “skin” that you’d like to appear with your video. For ease I’ve selected “SkinUnderAll,” about halfway down the list, as this will show all available player controls underneath the video window.
After selecting a skin, clicking “Continue” brings me to this page:
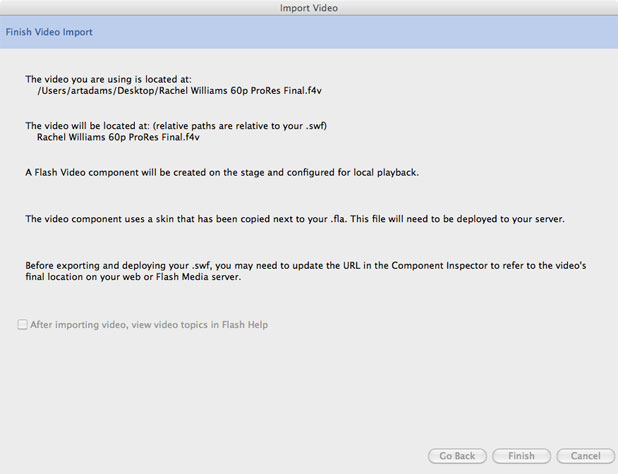
This is a quick summary of what we’ve done so far. Note that the video path path is relative to the .swf, or final Flash movie. We’ll fix that later. Click “Finish” to go back to the stage:
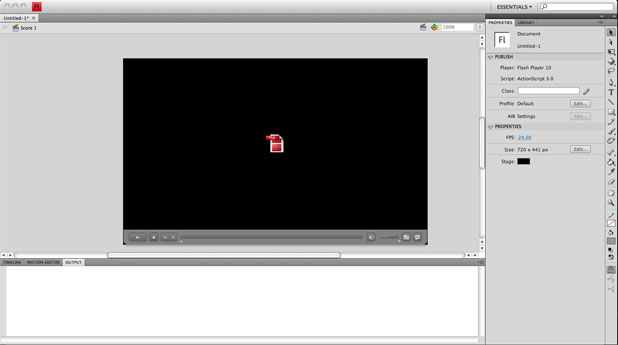
We still have some work to do. Click on the black box representing the video window and look at the inspector:
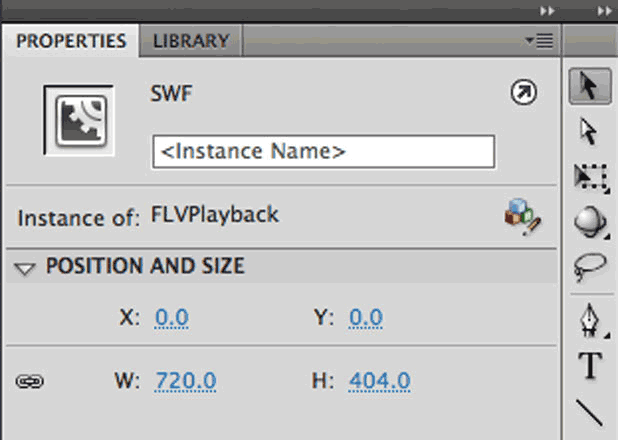
Right now we won’t worry about position and size, as the video-player combination is our only asset. The important thing to do here is to click the chain icon to the left of the video dimensions. This locks the video aspect ratio and prevents it from being deformed in the event a user resizes it on playback.
Now click on the stage itself:
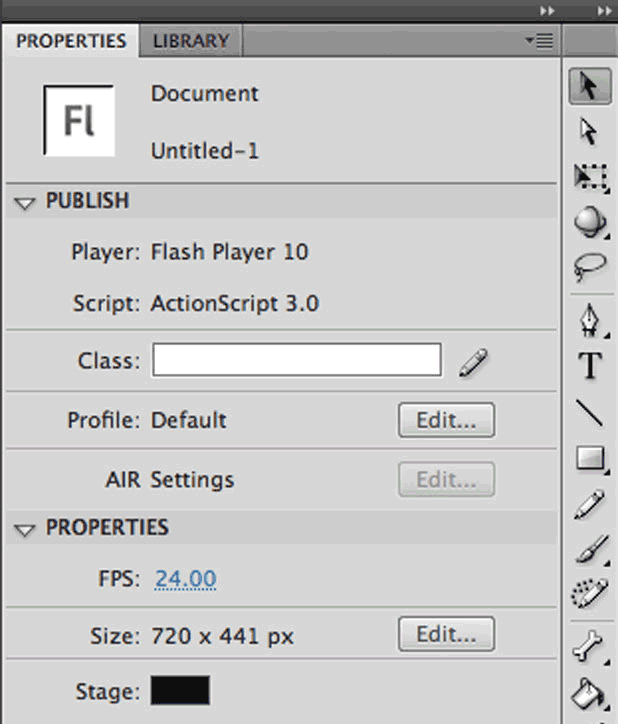
I’m only concerned about what appears in the “Properties” section. This describes how big my Flash “stage” will be. The default was smaller than my video size, so I increased it–adding pixels to the vertical dimension to make room for the player, similar to what has to be done when embedding Quicktime into a web page. (The video is 720×404, but the stage has to be 720×441 so it doesn’t cut off the player.)
The “FPS” setting determines the playback frame rate of the entire Flash project, so this will have an impact on the Flash project’s video assets. My video file was cut on a 60 fps timeline and is a 60 fps video file, but it will be played back at 24 fps if I leave this setting alone. (This setting has very little visual impact on the final Flash movie. The end viewer notices nothing unusual.)
Below “Size” you’ll see an option for “Stage”, along with a color picker box. This allows you to color your stage to match the web page in which it will be embedded. You may have noticed that the corners on the bottom of the player “skin” are rounded: the color of the stage will show through between the edge of the stage and the edge of the player.
next page: testing, exporting, and the thrilling conclusion
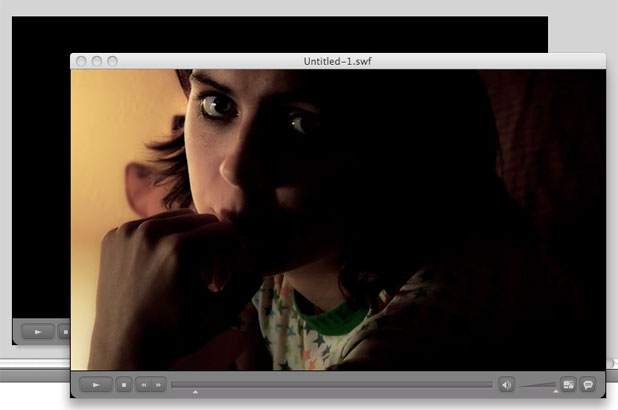
I’m at the point where I can test my movie. I select “Control > Test” and the following window appears:
There’s one more step before we can export files. Go to “WIndow > Component Inspector” and click on the video window on the stage:
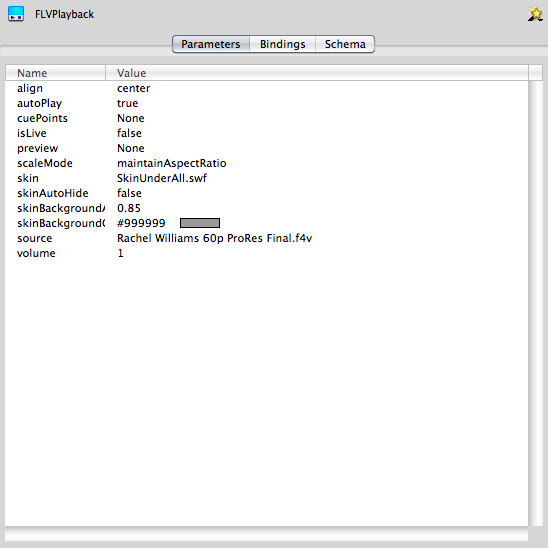
It’s very important that the “source” tag reflect a local file. It should contain ONLY the file name of the video file without showing any path. If there’s any path information in front of the file name, remove it.

All looks well. It’s time to export my final Flash files. First, I save the Flash project to the SAME DIRECTORY that contains my encoded F4V video file. Select “File > Publish Settings” and this page appears:
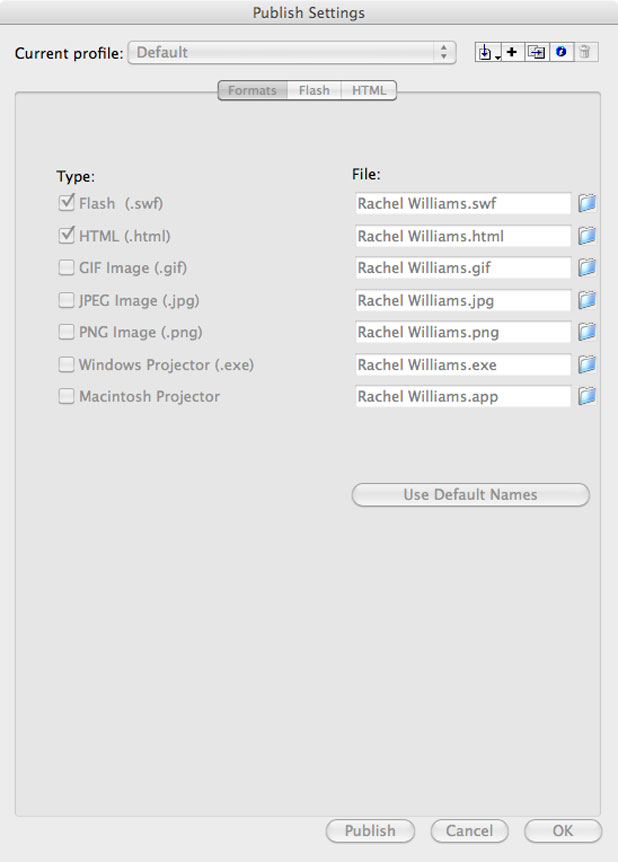
In this case the two elements that I’m looking for, the .swf Flash movie file and the HTML file, are both selected. Select “Publish” from the bottom left and the following files appear in the empty directory to which you’ve saved your Flash project.
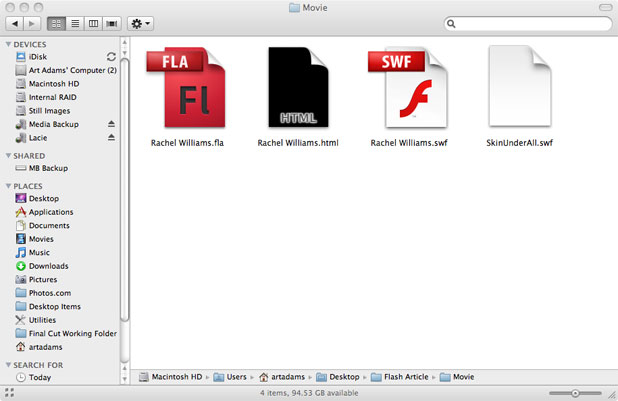
“Rachel Williams 60p ProRes Final.f4v” is the video asset.
“Rachel Williams.fla” is the Flash project that I created above. All the following files, that were generated by the “Publish” process, will be created in the same directory as this file. This is the ONLY file you won’t upload to your web server.
“Rachel Williams.html” is a web page that contains instructions for embedding the Flash movie. I can pull the embed code from this web page and place it in another page, or I can simply open this HTML page from a link–possibly in a smaller window floating on top of the link page. Gray Box is a neat tool for that. This page is optional.
“Rachel Williams.swf” is the Flash movie that contains the stage and my video file.
“SkinUnderAll.swf” is the player skin.
VERY IMPORTANT: In order for the “Rachel Williams.swf” Flash movie to play properly, IT MUST BE IN THE SAME DIRECTORY as the video file (“Rachel Williams 60p ProRes Final.f4v”) and the player skin (“SkinUnderAll.swf”). Remember the step where we used the Component Window to remove any path names from the video file name? That simplifies matters by allowing the main .swf Flash file to easily find the video asset file and the player skin .swf as long as they are all in the same directory.
If you use the “Rachel Williams.html” page, it too should be in the same directory as the others. The only file you wouldn’t upload to your web server would be the .fla Flash project file.
Flash allows direct embedding of video into an .swf file, reducing the number of files that must be placed in the same server directory to the final .swf file and the player skin .swf file. The advantage of keeping the actual video asset (.F4V file) separate is that it allows for progressive downloading. This means the Flash player will automatically buffer the download and start playing the video as soon as it has enough of it loaded. Otherwise, embedding the full video in the .swf requires the entire .swf file to be downloaded before playback can begin.
Here’s the “Rachel Williams.html” web page in action.
And here’s an article about the video project used in this demonstration.
Art Adams is a DP who is too cheap to hire a web designer. His web site is at www.artadams.net.

Filmtools
Filmmakers go-to destination for pre-production, production & post production equipment!
Shop Now