If you’ve been using Adobe video applications for a long time it’s easy to miss new features that arrive in the age of the Creative Cloud subscription. In days past we had monolithic product releases once a year or so with great fanfare. Now releases are staggered throughout the year and cool new features can go unnoticed, leaving you stuck in your slow, old-school ways. Well, let’s fix that.
Following is an assortment of features from the last year or so, some big, some small but valuable. Feel free to drop a line in the comments with any other hidden gems that have become part of your regular workflow.
Premiere Pro
1. Productions
The introduction of the Productions panel in Adobe Premiere Pro brought an entirely new workflow to Premiere. With Productions multiple editors can collaborate like never before whether working locally on shared storage or remotely with editors in different locations. Productions slims down the old Premiere Pro project file buy using an updated project architecture and the new Productions panel to allow for new options when it comes to large project organization. In turn editors get better stability, faster project launches and collaboration options only possible with the new Productions workflow. ProVideo Coalition has extensive coverage of Productions when it was released.
2. Scene Edit Detection
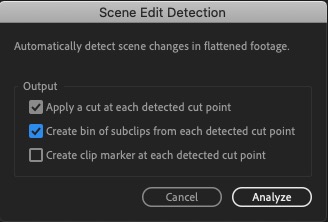
It’s not unusual to receive a completed file for use in video projects. The need to only use pieces of that file isn’t uncommon and Scene Edit Detection makes it easy. Scene Edit Detection uses Adobe Sensei to analyze clips in the timeline and apply cuts to edit points in the clip. This makes things like color correction, adjusting scale or position or removing pieces of the clip a breeze.
3.Hardware-accelerated H.264 and HEVC encoding for NVIDIA and AMD GPUs on Windows
Encoding and exporting are one of those necessary evils of video work and there is no solution other than waiting it out. Hardware accelerated encoding means faster exports across the board on these popular export formats. This brings the Windows platform up par with MacOS as Metal accelerated encoding was already available in Premiere Pro.
4. Keyboard shortcuts for specific marker colors
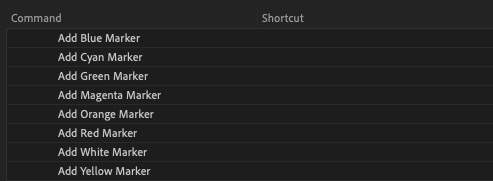
This seemingly minor feature change might seem too high on this list but markers are important tools for organization and labeling while editing. Previously in Premiere, you had to add a marker before you could use a keyboard shortcut to change the color. It was an awkward way to operate. Adding a specific color with a single keyboard shortcut is faster and more efficient.
5. Quick Export
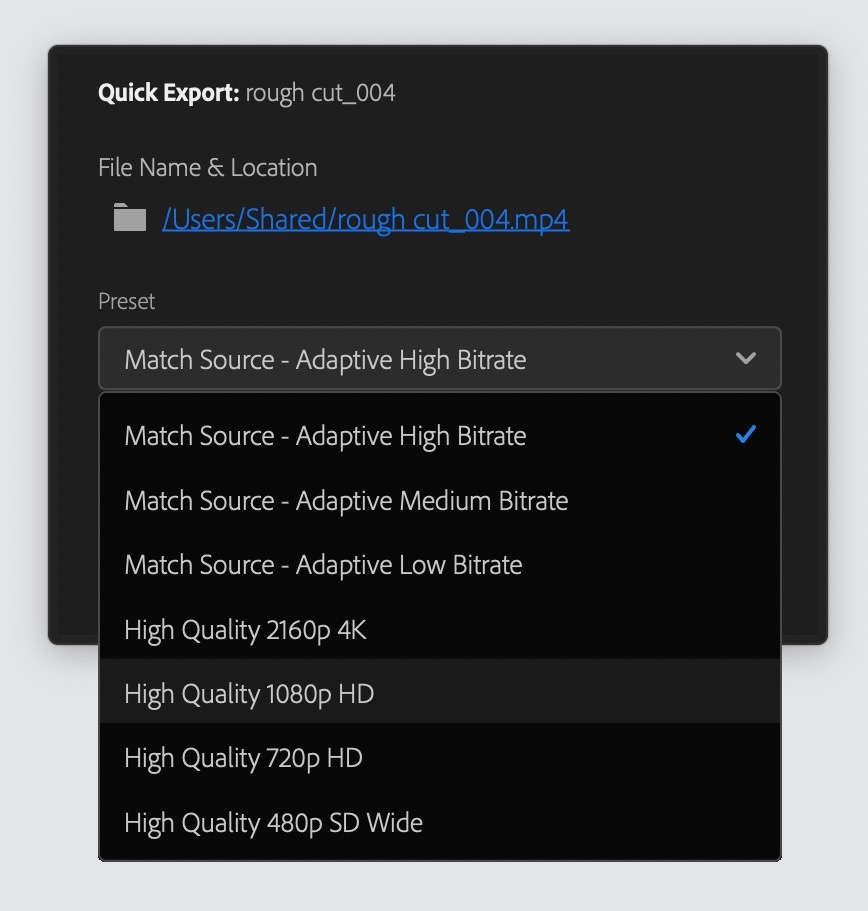
A theme on this list seems to be speed and Quick Export is another example of that. If you don’t need the many options (and often complexities that come with options) of Adobe Media Encoder then the new Quick Export option is a shortcut away. Many popular formats can be accessed easily with very little fuss. Check you keyboard shortcuts and map Quick Export for fast access.
6. Adobe Stock audio in the Essential Sound panel
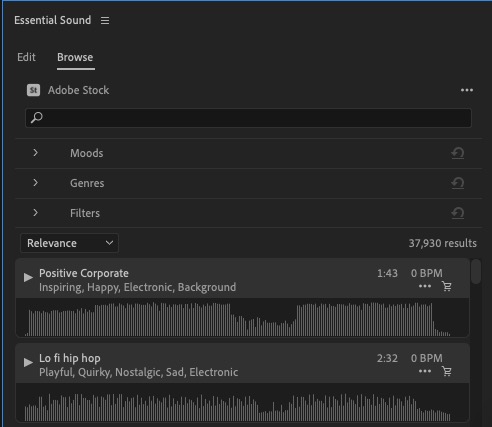
Adobe introduced the ability to browse, audition and purchase stock audio right from within Premiere by building Adobe Stock audio right into the Essential Sound panel. Editors can search, filter, view by moods and genres as well as create Libraries that can be accessed on the web and from within the Libraries panel of all Adobe applications. What makes this new integration especially appealing for editors is the ability to view stock audio waveforms right in the Essential Sound panel and preview tracks with a unique timeline sync option. You can listed to audio tracks against your edit without ever downloading a track or preview.
7. ProResRAW support
Apple’s ProResRAW format is a popular acquisition format and native ProResRAW means no transcoding to an intermediate format for editing. Since ProResRAW is based off of Apple’s ProRes codec it is a perfect choice for editing and post-production. ProResRAW is supported on both Windows and macOS.
8. Better HDR workflows
As finishing for HDR becomes more common Premiere is offering more HDR support options. 202o brought a number of HDR updates including: color managed and GPU acceleration for Apple ProRes and Sony XAVC-I formats, video scopes that can be set to Rec2100 HLG allowing you to view 10bit code values, nits, or IRE, color space overrides for files that have incorrect or missing metadata and support for Rec2100 PQ color working space.
9. Export with Proxies
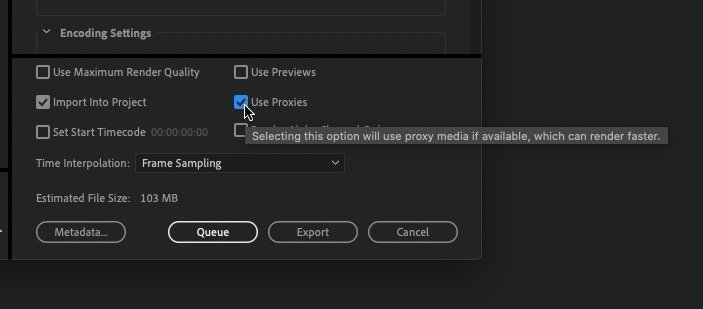
There are times when you’re working with proxy files and you want a fast export. Often the full resolution media can increase export times depending on the format and codec so having the option to use proxies up export allows for flexibility upon export.
10. Access to future features in the beta program
All Adobe Creative Cloud subscribers have access to beta versions of many of the Adobe apps. The Premiere beta can be installed alongside the currently shipping version and provides early access for editors to test out and provide feedback on upcoming features. Beta users were able to test out the new Quick Export option mentioned above as well as things like speech to text and a new captions workflow via a brand new Text panel.
After Effects
After Effects is so many things to so many different people. It’s a mograph artist’s playground, a visual effects platform, and a swiss army knife for video reformatting and sequencing. Regardless, there’s sure to be something on this list that lines up with your personal AE bias.
1. Roto Brush 2
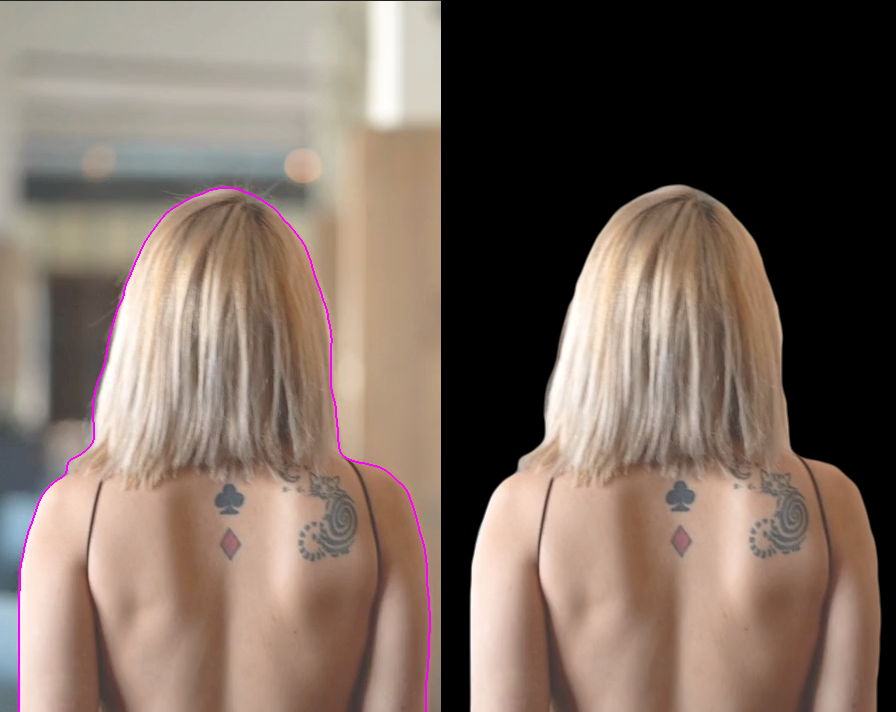 We covered this in a dedicated article, but Adobe has revisited the idea of automatic rotoscoping in the emerging age of ML (Machine Learning). The original Roto Brush was more of a tool for magazine clipping-style art effects, or temp roto. It lacked finessing of edges, was sluggish, and generally difficult to fine-tune. The new Roto Brush 2 gets a lot closer to genuine production-worthy roto. It’s still not going to give you fly away hair detail, but for defined edges it does a solid job with good temporal consistency.
If you were underwhelmed by the original Roto Brush, you’ll want to check out Roto Brush 2. It uses the same basic paint paradigm, but with far superior results. You should find the experience pretty snappy too.
2. ProRes RAW and EXR support
OK, so these lack the coolness appeal of a tool like Roto Brush, but in the world of getting high-end work in and out of After Effects these are a major deal. If you’re not using EXR as your primary format for image sequences, let that be your 2021 New Year’s resolution. After Effects’ snappier EXR playback coupled with a roomy NVMe drive on your workstation gives you the best balance of performance, dynamic range preservation, and predictable color management. And if you’re still using TGA’s for your renders, 1987 wants you and your Truevision board back.
3. 3D Design Space
 After Effects’ 3D system gets quite a workout between mograph animations and VFX card setups. The ux when working with that system has been a little “non-conventional.” So the new 3D design space is a welcome addition. Most applications either now default to Maya-style navigation (Alt-LMB to orbit, Alt-MMB to pan, Alt-RMB to zoom) or at least allow the user to select it. (There are a few stubborn exceptions—yes, we’re talking about you Fusion). And that’s exactly what you get with the 3D Design Space, along with industry-standard rotate, translate, and scale widgets for moving selected layers. So 3D artists now have one less application to remap their muscle memory to.
If you haven’t used 3D in After Effects before you might wonder what the fuss is about. But if you wrestled in your workday with jumping between After Effects 3D and Maya, modo, Houdini, or any of a number of other apps, this new, industry-standard navigation is a magical gift.
5. Edit text properties with expressions
OK, so lots of artists have expression phobia. But After Effects with its pick whip makes it easy to create expressions even if you can barely type. Newly added is the ability to change text properties through linked expressions, saving you the ordeal of updating multiple titles whenever you decide to change the look of your text.
6. JavaScript. Like before only better.
Speaking of scripting, After Effects has radically enhanced its JavaScript to bring it more in line with modern JavaScript as it’s used in web development. JavaScript is actually a pretty great language to learn: it benefits from the forgiving, “loosely typed” nature of languages like Python, but still has the formal structure of C-type languages. Python is the hot item in the post-production world, but I actually don’t think After Effects’ choice to use JavaScript was a bad one. Now that it’s new and improved, all the better time to learn it.
7. The Essential Graphics Panel
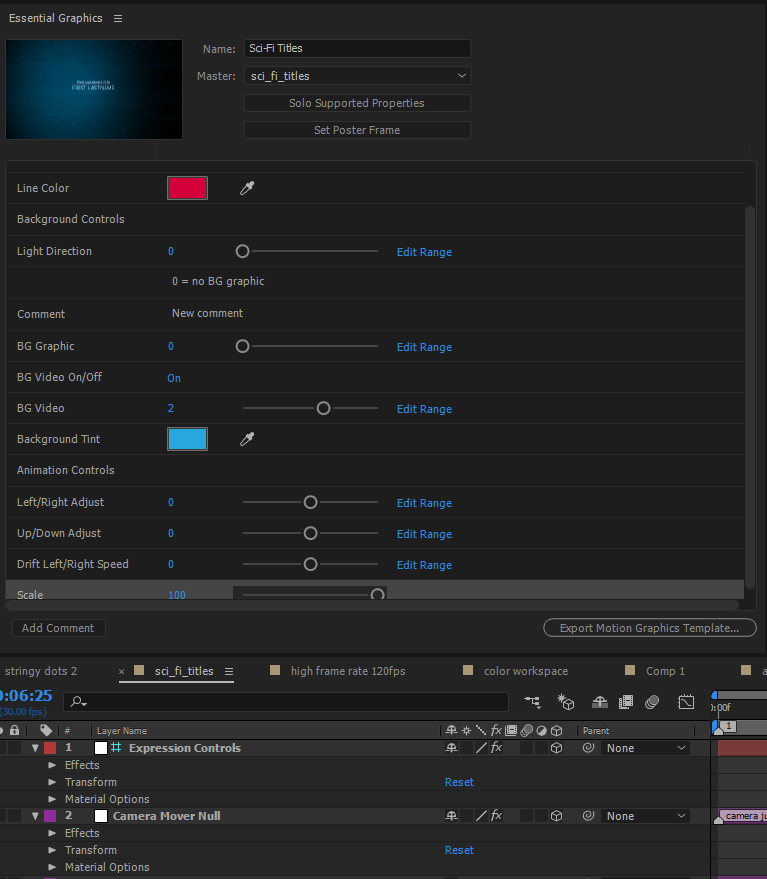 Everyone has mograph templating for their NLE’s these days. If I recall, Apple Motion kicked off the trend with FCP7, but Resolve has it with its Fusion page and obviously Premiere Pro combines it with After Effects. Here After Effects really kicks it to a whole different level with the ability to create custom templates that still allow a Premiere Pro editor to apply different spreadsheet data from the edit timeline. That’s a pretty impressive customization and I can see it being incredibly useful with a lot of presentation work where the data can change minutes before an edit needs to go live.
8. Responsive Design – Time
This is one of those gems that solves a major problem when working with templates. Animations like fade ins and fade outs need to happen at at a consistent, preset rate, but editors want to be able to scale the rest of an animated template to fit their timeline needs. Responsive Design – Time (which in my head is pronounced “Responsive design…TIME!”) allows you to lock certain keyframes so that they remain at fixed timing intervals as everything else is stretched. Again, an understated offering that packs a punch and removes one of the fundamental issues when creating templates for editors.
9. Content aware video fill
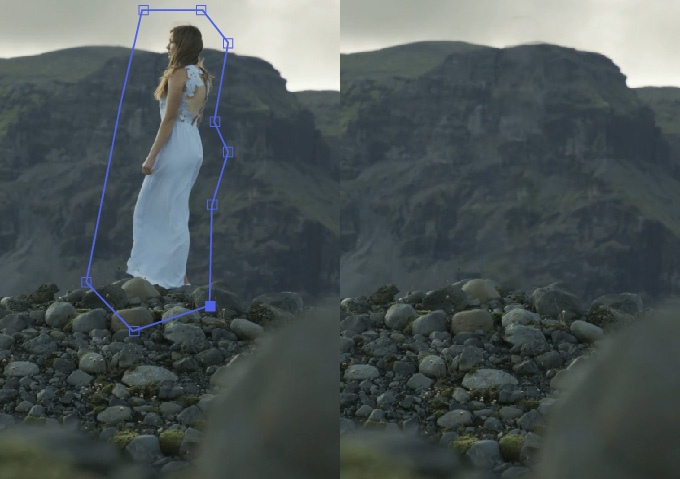 In a former life I owned a stereoscopic conversion studio—back in the days when that was the thing. The most expensive part of the process was filling in the background that was revealed when separating the single camera view into stereo pairs. This is the kind of tool I dreamed about. It automatically fills in detail for removed objects, and creates plausible, consistent motion over time. Even if it only works well for some of the shots you’re working on, it’s an amazing tool. And Adobe has already improved on it since its introduction. Presumably it’ll improve even more dramatically as the ML is trained on more detailed data sets.
10. GPU Acceleration
OK, so more of a performance optimization than a feature, but have you checked out the power on these current crop of GPUs? (Of course, not; none of us can get our hands on an RTX 3090 this side of 2021). At time of checking the following plugins in After Effects are GPU accelerated for smoking performance: Channel Combiner, Channel Effects, Color Balance (HLS), Curves, Fill, Exposure, Linear Wipe, Noise, Tritone, Set Matte, Venetian Blinds, Video Limiter effect, Minimax, Apply VR Color Gradients effect, Apply VR Fractal Noise effect, Apply VR Digital Glitch effect, Apply VR Chromatic Aberration effect, Apply VR Blur effect, Apply VR De-Noise effect, Apply VR Glow effect, Apply VR Sharpen effect, Apply VR Converter effect, Apply VR Plane to Sphere effect, Apply VR Rotate Sphere effect, Layer transforms (position, rotation, opacity, etc.), Layer motion blur, Bicubic sampling, Transform effect, Directional Blur effect, Immersive video VR effects, Drop Shadow, Fast Box Blur (formerly Box Blur), Fractal Noise, Gradient Ramp, Levels, Levels (Individual Controls), Offset, Brightness and Contrast, Find Edges, Hue/Saturation, Mosaic, Glow, Tint, Invert, Lumetri Color, Gaussian Blur, Third-party effects that use Premiere Pro’s Mercury GPU acceleration API.

Filmtools
Filmmakers go-to destination for pre-production, production & post production equipment!
Shop Now