Does adding more RAM to your computer make it faster? It’s a surprisingly tricky question. Strictly speaking: no. But when it comes to After Effects: kind of – yes.
This article is about memory, and how much After Effects loves it – I’d considered posting it on Valentine’s Day as a love story, and like any good love story it involves a hidden secret. Regular users are generally used to After Effects taking up as much memory as it can, but this can be something of a surprise to those who don’t use it on a regular basis. Plenty of 3D animators have tried to figure out why Maya isn’t performing as well as it should, even on a monster machine with 256 GB RAM, only to discover that when they opened up After Effects it took all the memory for itself.
On one hand the story of After Effects and RAM is pretty simple: more is better, and that makes it easier to explain than a CPU. On the other hand, it draws attention to the critical difference between raw speed and overall performance, and that makes it more complex than you might expect.
This series began by considering all of the different parts of After Effects that contribute to the overall notion of “performance”, and raw rendering speed is only one of those things. It’s surprising how small a percentage of overall time is spent actually rendering the “final” output.
Whenever the performance of a computer is considered, the first and most obvious component that is discussed is the CPU. The last few articles have looked at the CPU, and how earlier versions of After Effects attempted to improve rendering speed on multi-core CPUs. Unless your specific project is affected by system bottlenecks such as slow hard drives or slow networks, the CPU is going to be the primary factor that determines how fast your machine renders After Effects projects.
Now that we’re moving on from the CPU to examine RAM, we’re also moving on from focusing on rendering alone. RAM can have some affect on final rendering times, but it has the most impact on general day-to-day usage.
I’ve said in previous articles that there were a few unusually significant years in the history of After Effects – one of them was 2010. The reason for that is all to do with RAM, and what Adobe introduced that year with CS 5.
Pepperidge farm remembers
Roughly twenty years ago, the company I was working for upgraded our edit suite with a brand new Apple G3 tower. At the same time, Steve Kilisky from Adobe – a member of the After Effects development team – happened to be in Australia. Steve was demonstrating the upcoming version of After Effects at the same company we’d purchased our edit suite from, and so I was lucky enough to be invited to a sneak preview of After Effects version 4.
Steve began his presentation by doing a quick survey of how much RAM everyone in the room had in their machines. Because we’d just bought a brand new system, I wasn’t surprised to discover I had the most – 384 megabytes.
“Right”, said Steve. “You’re going to need it”.
The biggest new feature in After Effects version 4 was the RAM preview, something that’s now so fundamental to what After Effects does that it’s difficult to imagine working without it. Before the RAM preview was introduced, users had to render Quicktimes out to disk, before playing them in Quicktime player (or similar).
But now After Effects users could render a preview in RAM – not to the hard drive – and see their work in progress without those intermediate stages. After Effects wasn’t rendering any faster, but the user’s productivity was improved.
The introduction of the RAM preview highlights the subtle difference between raw rendering speed and performance. Not having to render previews to a hard drive and then open them up in another program improves workflow. It also saves disk space, and potentially the hassle of organizing and deleting old preview files.
Twenty years after we bought our new G3 and anticipated the release of After Effects 4, RAM is more critical than ever. While the RAM preview was a very obvious progression from version 3.1, later releases continued to introduce features that rely heavily on RAM, even if they’re not as visible.
What’s it doing again?
In part 2 of this series we looked at exactly what After Effects does: it processes bitmap images. In part 3, we looked at the implications of what a “bitmap image” is, and how more memory is used when we increase resolution and bit depth. While processing images obviously involves the computer’s CPU, all those pixels translate into another hardware issue for After Effects: RAM.
After Effects just loves RAM.
I doubt there is anyone reading this series (especially up to part 9) that doesn’t understand what RAM is, or the difference between RAM and hard drives. When it comes to performance, the key is more about understanding how much faster RAM is than a hard drive or networked storage.
When looking at RAM speeds, and measuring the time taken to shuffle around large chunks of memory, we’re talking tens of gigabytes per second. But when we’re looking at spinning hard drives, it’s tens of megabytes per second. The first edit suite I used in 1996 required a special RAID array just so the hard drives could achieve a sustained transfer rate of 6 megabytes per second. Eventually, individual hard drives were capable of faster speeds even without a RAID array, but RAM is simply thousands of times faster again. As mentioned in part 4, SSDs are significantly faster than spinning drives, but they’re still a fraction of the speed of RAM.
Any image that After Effects is currently displaying or processing has to be stored in the computer’s memory. When working with gigabytes of video files on a hard drive, each individual frame is loaded up into RAM before After Effects can process it. RAM is where After Effects does its work – and so After Effects is constantly shuffling large amounts of memory around. The “Brady Bunch” title sequence, used in part 4 as an example of system bottlenecks, is a great demonstration. Each frame of the title sequence is comprised of at least 9 images, and each one has to be individually loaded into RAM before the CPU can process it.
Because bitmap images take up so much memory, and even today a few seconds of 8K HDR video can require more memory than the average computer has, a significant amount of the time After Effects spends “rendering” is really just shuffling data around and juggling RAM.
Twenty years ago, 384 megabytes was a lot of RAM for a computer. Bearing in mind that some of the RAM was used by the OS, and After Effects itself needs a bunch of RAM to run, there’s not that much left over for RAM previews. Even with 256 megabytes of RAM left free, you’re only getting about 6 seconds of standard definition video.
1 frame: 1.58 MB
1 second: 39.55 MB
256 MB: approx. 6 seconds.
But playing back 6 seconds of video is better than playing back none, which is what you got with v 3.1
Save it for later
It’s nice to look back at early versions of After Effects to remind ourselves of how far we have come. Working without a RAM preview in version 3.1 isn’t the only eyebrow-raiser; the very first version of AE only allowed one effect and one mask per layer. Thankfully that has changed!
Other improvements haven’t been as visible, but have made huge contributions to the general performance of After Effects. One area that’s seen constant improvements is caching, perhaps the most basic feature which makes working with compositions faster for the user.
After Effects version 4 wasn’t just the first version to include a RAM preview, it was also the first version to cache frames in memory. If we use the Brady Bunch titles as an example again, we can see how this can make working in After Effects much faster.
After Effects 3.1 didn’t store any images in memory, except for the current frame of the composition. If we were working on the Brady Bunch titles, each of the 9 frames would be loaded up from the hard drive, transformed into the right position, and then combined with the image buffer to produce the current frame. This is the basic process outlined in part 2 – it’s what After Effects does. But with version 3.1 and earlier, once each frame has been loaded into RAM and processed into the current composition, it was forgotten.

Let’s say you’re in v 3.1 and you’re looking at the start of the Brady Bunch title sequence. After Effects has loaded the nine images it needs from the hard drive and has rendered the first frame of the composition for you to see. So far so good. If you press the “end” key to skip to the last frame of the composition, After Effects dutifully loads up the nine images needed for that frame and again shows you the rendered result. If you press “home” to go back to the start again, then once again After Effects would load up the same nine images it needed to render the frame from the hard drive – even though it had just done that a few seconds ago.
After Effects 3.1 did not “remember” that it had just rendered that frame. For every frame, every layer in the composition was loaded from the hard drive and then “forgotten” as soon as it has been used. But because hard drives are very slow (especially in the era of AE 3.1), this meant that rendering was also slow.
After Effects version 4 changed that, and although there was no obvious sign to the user, rendered frames were now stored in memory where they could be accessed and re-used much faster than reading them from disk. If we load up our Brady Bunch title sequence in After Effects version 4, skip to the end and then back to the beginning, After Effects still has the rendered first frame in memory, and so it displays instantly – without reloading all 9 images from disk and rendering them again.
Perhaps a better example is the echo effect, which involves combining multiple frames into one. Let’s assume we have a simple layer of video and we’ve applied the echo effect with 3 echoes. This means that for every frame of video, the previous three frames are also used. In After Effects 3.1, every frame would load up four frames from the hard drive and then “forget” them. But from After Effects 4, the previous frames were cached in memory. Each new frame only required the current frame to be loaded from the hard drive, as the previous 3 frames would still be in RAM. The rendering process is now much faster, because we’re not relying on as much data to be loaded up from the slow hard drive.
After Effects isn’t rendering faster, it’s rendering smarter. But that makes it faster for the user.
Frag bait
When After Effects stores an image in memory, it isn’t quite as simple as just loading a bunch of numbers into RAM. Those numbers – the image – need to be stored in one continuous section of memory. Technically, the word is “contiguous”, but that always looks like a spelling mistake.
Even if the computer technically has enough free RAM, if that RAM is fragmented into smaller pieces then After Effects can’t use it. It’s like a vending machine that needs a $5 note. You might be able to scrape together five dollars by collecting lots of coins, but if you need a single $5 note then you’re still out of luck – even though you do have $5.
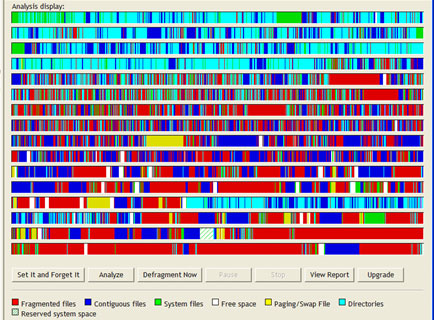
The fragmentation problems facing After Effects and memory are the same as for disk drives, which also become “fragmented” over time. “Defragging” software for hard disks has been around for decades, which boost the performance of drives by collecting scattered files together into one piece.
As After Effects is constantly shuffling images around in memory, it’s easy for the memory to become fragmented – just like files on a hard drive. Even though there might be enough free RAM if you add up all the spare pieces here and there, it can’t be used unless it’s one continuous chunk. Sorry, contiguous chunk…
When Adobe introduced the RAM preview in version 4, it meant that the user was regularly using as much RAM as possible to preview frames, before getting back to work and no longer needing them.
While the user was busily working away, After Effects was just as busy juggling memory and shuffling images around in RAM. The smaller the images, the easier it is to juggle them. But if the user was working with larger resolutions it wasn’t so easy, and it was possible for After Effects’ memory to become so fragmented that it was no longer able to create a RAM preview, or even render a single frame.
The dreaded “After Effects needs 2 or more frames for playback” error, which has probably been seen by most AE users at some point or another, can also be a result of After Effects having some free memory, but not enough continuous memory to store an entire image.

As the name suggests, a RAM preview is playing animation from frames stored in RAM. But the same conditions apply to a RAM preview as they do for a single frame – the preview must be stored in a continuous chunk of memory. If there’s free memory available but it’s too fragmented to be usable, the dreaded error message appears.
Disko Fever
As mentioned earlier, RAM is thousands of times faster than hard drives – and local hard drives are usually much faster than network drives. By storing commonly used and recently used frames in RAM, After Effects can access them much faster than having to load them from a hard drive, or over a network. The more RAM you have, the more frames After Effects can store, and the less time is wasted waiting for those frames to be loaded up.
The RAM preview and image caching was a welcome addition to version 4, and it’s been steadily improved ever since. The next major step forward was the introduction of the disk cache, in 2004 with the release of version 6.5.
Hard Drives are slower than RAM when it comes to transferring frames, but that doesn’t mean they’re slower than rendering frames. Depending on the effects you’re using, rendering a single frame in After Effects may take several seconds – possibly minutes and occasionally even hours. When compared to rendering times, loading a single frame from the hard drive can take a fraction of that time. This is where the disk cache comes in. If the disk cache has been enabled by the user, then After Effects can store rendered frames and precomped layers there, because even though a disk is so much slower than RAM, loading a pre-rendered image off the hard drive is still faster than rendering it from scratch. After Effects intelligently estimates whether a frame will benefit from being cached on disk, and will only cache frames that take longer to render than they do to be loaded from a drive.
One major advantage of a disk cache is its potential size: hard drives are measured in gigabytes and terabytes, on a cost basis they will always be cheaper than RAM. Even in 2020 terms, the average computer has less than 32 GB of RAM while you can buy an 8 TB hard drive at the local mall.
RAM and disk cache don’t necessarily make rendering faster – they can, but not always. What RAM and cache can do is make working in After Effects significantly faster. This difference between raw rendering speed, and productivity speed, is one of the reasons that the overall issue of “performance” is complex.
Bits and pieces – the old 4 gig limit
Anyone working with digital images should be familiar with bit depth, and After Effects allows projects to be manually set to 8, 16 or 32 bits. What you might not be aware of is that a computer’s CPU, operating system and software have their own bit depth too, but this is not something that can be toggled with a mouse-click.
The first generation of home computers, such as the Commodore 64 and Apple II, were 8 bit machines – their CPU processed 8 bits at a time. The first Apple Macintosh and the Commodore Amiga were 16 bit machines, and by the time computers were being used for desktop video in the 1990s everyone was using 32 bit machines. Beginning with the G5 in Apple’s 2003 PowerMacs, the CPUs in desktop computers slowly transitioned to 64 bits – which is what we’re all using now.
Buying a brand new computer with a 64 bit CPU didn’t mean you automatically had a “64 bit system”. The difference between a 32 bit CPU and a 64 bit CPU would only be apparent when running software specifically designed to utilize all those extra bits – and this included the operating system. It was one thing for PowerPC and Intel to release 64 bit CPUs but it was another thing for Apple, Microsoft, and everyone else to update their software to take advantage of them. The G5 might have been a 64 bit CPU in 2003, but Apple’s first full 64 bit version of OS X (Leopard) only shipped in 2007.
More than ten years later again, the latest version of Apple’s OS X – “Catalina” – only runs software that has been updated for 64 bit CPUs. As Apple users upgrade, some are discovering older apps no longer work because they’re still “32 bit”, even though it’s been over 16 years since the G5 first appeared in a Mac.
So very clearly, the transition from 32 to 64 bit systems didn’t happen instantly, and for most users it’s still happening.
The technical differences between an 8, 16, 32 or 64 bit CPU aren’t really important – at least from a hardware perspective. But there was a profound impact on software, and moving from 32 to 64 bit systems had enormous repercussions for memory-intensive applications including desktop video.
The most significant implication of a “32 bit” computer was that programs could only use a maximum of 4 gigabytes of RAM. To someone using a Commodore 64 in 1982, 4 gigabytes of RAM would have seemed like a ludicrously large amount. But as we’ve seen, these days it’s ludicrously easy to fill up 4 gigabytes of RAM with only a few seconds of video. In a worse-case scenario, 4 gigabytes of RAM would only just be able to store 8 frames of 8K, HDR video (that’s less than a second, BTW).
In the years before 2006, if you had enough money you could build a 32 bit machine with more than 4 gig of RAM, it’s just that no single application could use more than 4 gig at one time. Even if you were lucky enough (and rich enough) to have a computer with 8 gigs of RAM in 2004, then After Effects would only ever be able to use 4 gig. This wasn’t just After Effects. Every application was limited to 4 gigabytes of memory.
(NB. Technically, the maximum amount of RAM available to 32 bit applications was different on Macs and PCs, and it was slightly less than 4, but it’s not significant)
The 4 gig limit might not have been a problem for someone reading emails or making PowerPoint presentations. But it soon became a big problem for After Effects users, and other people working with desktop video. Just one frame of HD video takes up 8 megabytes of RAM, and After Effects is generally used to composite multiple layers of video together, and that means lots of images in RAM at the same time.
With only 4 gig of memory available, anyone working with HD video files could quickly fill up all available RAM, which would soon lead to memory fragmentation and the dreaded “After Effects needs 2 or more frames” error.
The period of time when HD resolutions were emerging but After Effects was only 32 bit was very frustrating. Memory errors were regular, RAM previews were short, and in general it felt like a battle just to be productive. The first time I tried working on a 4K composition with After Effects CS3 I almost gave up, because the constant memory errors were so persistent.
While the “purge memory” functions were added to help users with this problem, effectively flushing all images from memory so After Effects could start again from scratch, this still didn’t avoid all problems.
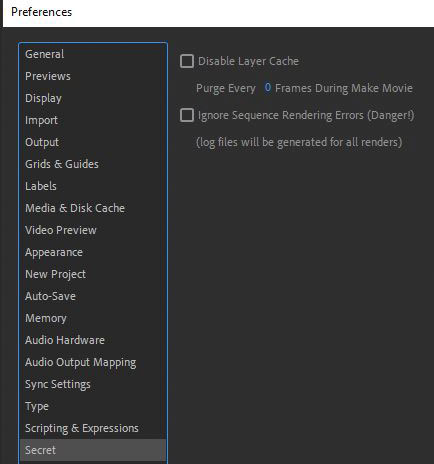
One solution to dealing with memory errors was so drastic it was hidden away in a “secret” menu. By holding down a key and opening the After Effects preferences, a “secret” menu appeared that would allow users to completely disable the image cache altogether. This meant that After Effects didn’t store any images in RAM, and every layer was loaded from the hard drive as needed – just like the olden days of After Effects 3.1
While this made rendering much slower, sometimes it was the only way to avoid problems with memory fragmentation. HD video was well established by the time After Effects CS 3 and CS 4 were released, and occasionally disabling the image cache was the only way to get complex, high resolution compositions to render with less than 4 gigs of RAM. Slow rendering is better than no rendering.
During the era of 32-bit computers, this 4 gig limit effectively placed an upper limit on performance in After Effects. After Effects just loves RAM, but the amount of RAM it could use was constrained by the hardware, and there wasn’t anything Adobe could do about it.
The greatest leap of all
For Mac and PC users, the transition from 32 to 64 bit systems happened over several years. It wasn’t something that happened all at once, but it generally started around 2005, when both Windows and OS X introduced preliminary 64 bit features. As mentioned above, only now have Apple forced all apps running on their latest Catalina OS to be 64 bit, while Windows still allows older 32 apps to run side-by-side with 64 bit software.
By the end of 2006, the entire range of Intel CPUs was 64 bit and developers slowly began updating their software accordingly.
After Effects CS 5, released in 2010, was the first 64 bit version of After Effects and therefore the first version that could access more than 4 gigabytes of RAM.
With CS 5, the 4 gig limit was gone. After Effects could access as much RAM as you had. You no longer had to worry about seeing that stupid “After Effects needs 2 or more frames” error message every time you pressed “0”. Because you didn’t need to purge memory all the time, caching frames in memory became more efficient and effective. After Effects users were still limited by the amount of RAM in their machines, and just because After Effects could utilize more than 4 gig didn’t mean everyone had more than that installed. Memory fragmentation still occurred, users still had to “purge”, and the “After Effects needs 2 or more frames” error message still appeared out of nowhere. But with version CS 5, these problems were hugely diminished and it was finally feasible to work with HD video and larger resolutions without wanting to smash your computer every few minutes.
As someone who was routinely working with HD video and larger frames at the time, I’ve always considered the jump from CS 4 to CS 5 to be the single most significant upgrade in After Effects history. Yes that’s right, I think it was more momentous than the “cartoon” effect we got with CS4.
For as long as computer systems were 32 bit, Adobe had something of an excuse for the level of performance in After Effects. There’s only so much they could do with the 4 gig RAM constraints imposed by the computer’s CPU and the operating system. But with the 4 gig limit gone, the focus could shift away from RAM.
Just Photoshop it
Although CS 5 meant After Effects could access more than 4 gigs of RAM, there was still one noticeable memory-related quirk. One of the defining features of Adobe apps is their inter-operability. Photoshop, Illustrator and even Premiere files can be opened directly within After Effects. The tight integration of Photoshop and After Effects is one of the crucial reasons other software developers have struggled with developing alternative motion graphics apps. To quote one of my other articles, “Any app that’s aiming to compete with After Effects for motion graphics design is also competing with Photoshop and Illustrator, and that’s not so easy.” These days, all Adobe apps contain elements of every other Adobe app, but the Photoshop / After Effects alliance is the oldest.
When the engineering team at Adobe integrated Photoshop support into After Effects, they needed to make a key decision about whether to prioritise compatibility or performance. They chose compatibility. The choice to put compatibility as the top priority was very deliberate, and it meant that Photoshop documents would look exactly the same in After Effects as they did in Photoshop. The flip-side of this decision was that the full Photoshop rendering library had to be incorporated into After Effects, but it had its own unique – and separate – memory management system.
Unfortunately, After Effects had no direct control over the Photoshop rendering library and its memory handling, and importing Photoshop documents could result in After Effects and the Photoshop library fighting over the available RAM. With large enough Photoshop files, the computer would run out of RAM altogether, at which point the OS would start using the hard drive as virtual memory. Once this happened, the computer was effectively running at a fraction of its normal speed. Rendering times could inexplicably jump from a few seconds per frame to a few minutes, as the hard drive thrashed around trying to appease both After Effects and the Photoshop rendering engine at the same time.
Globalisation
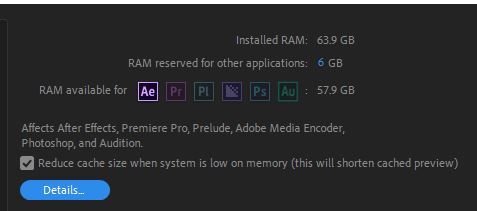
While CS 5 had made a quantum leap forwards by obliterating the 4 gig memory limit, CS 6 introduced a new feature that capitalized on the larger amounts of RAM that were now available: the global performance cache. This was a comprehensive overhaul of the way all Adobe apps managed memory, and it resulted in several new behaviours which were all related. Under the hood, Adobe apps no longer fought over all of the memory in the computer, it was shared in one “global” pool. After Effects would no longer run out of RAM when dealing with large Photoshop documents.
The most obvious change to the user was that cached frames and RAM previews were no longer cleared from memory when you quit After Effects. You could cache a RAM preview, quit After Effects, open it up again and the preview was still there. Adobe introduced the green and blue bars in the timeline to signify which frames were cached in RAM and in the disk cache.
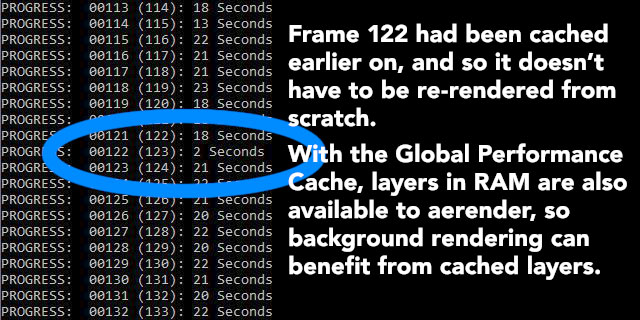
After Effects was also much, much more intelligent about how cached frames were used. A great example by Brian Maffit uses an animation with looping keyframes. When RAM previewing the animation, After Effects knows that looping frames are duplicates and that they don’t need to be rendered twice.
NVMe ‘ind the bollocks, here’s the SSD
When Adobe introduced the disk cache with version 6.5 (no, not CS 6 – version 6.5, in 2004) it wasn’t an immediate hit. The main problem was that to be really effective, the disk cache needs to be significantly larger than the amount of RAM you have. If not hundreds of gigabytes, then terabytes. But having this much spare disk space in the mid 2000’s wasn’t common, and hard drives were generally pretty slow. Also, the initial versions of the disk cache were slightly buggy and needed to be cleared regularly – which negates their usefullness.
But these days it’s a different story. Firstly. loads of bugs have been ironed out and generally the disk cache works very well. Secondly, hard drives keep getting bigger – and faster. And finally, with the emergence of SSD hard drives, the very fastest NVMe SSD drives now offer large sizes and fantastic speeds.
As an example, a typical internal hard drive from the mid 2000s would be able to transfer between 50 and 100 megabytes per second. But a brand new NVMe SSD drive will easily transfer about 2,500 megabytes per second. That’s a pretty big jump.
While it was a nice idea in 2004, the disk cache is one feature in After Effects that has matured nicely. These days, investing in a large, fast NVMe SSD to use as a dedicated After Effects disk cache will provide a noticeable boost in workflow performance.
It must be love
I started this article by saying that – when compared to a CPU – RAM is very simple. The more you have the better. If we look back at some of the earlier articles in this series and start joining all the dots together, it’s pretty easy to understand:
- After Effects is mostly just shuffling around lots of images
- Image sizes get very big, very quickly, and they take up lots of RAM
- All images need to be loaded into RAM in order for After Effects to render them
- RAM is the fastest medium to store images, so it’s beneficial to have images stored in RAM rather than on a hard drive
- After Effects can cache images and layers in memory to speed up workflows and previews
- So overall, the more RAM you have, the more layers can be stored in memory, and the faster After Effects will work.
Simples!
This is part 15 in a long-running series on After Effects and Performance. Have you read the others? They’re really good and really long too:
Part 1: In search of perfection
Part 2: What After Effects actually does
Part 3: It’s numbers, all the way down
Part 4: Bottlenecks & Busses
Part 5: Introducing the CPU
Part 6: Begun, the core wars have…
Part 7: Introducing AErender
Part 8: Multiprocessing (kinda, sorta)
Part 9: Cold hard cache
Part 10: The birth of the GPU
Part 11: The rise of the GPGPU
Part 12: The Quadro conundrum
Part 13: The wilderness years
Part 14: Make it faster, for free
Part 15: 3rd Party opinions
And of course, if you liked this series then I have over ten years worth of After Effects articles to go through. Some of them are really long too!

Filmtools
Filmmakers go-to destination for pre-production, production & post production equipment!
Shop Now