Here is a second installment of random tips for working more productively with Adobe After Effects CS3, including the best place to find Help information (surprise: It’s not the Help file installed on your hard drive alongside After Effects…). Please feel free to add your own questions and alternative solutions in the Comments field at the end.
Tip 1: Incremental Save
You probably know not to keep saving over your only After Effects project file, because if it ever gets corrupted (it happens) you may lose days if not weeks of work. Here’s a tip to make saving multiple versions painless:
When you first Save your new project file in After Effects, give it a name that makes sense followed by a version number, such as ProjectName_v01.aep. Later on, instead of just saving your project (and writing over your existing file), use File > Increment and Save. The shortcut is Command+Option+Shift+S on Mac (Control+Alt+Shift+S on Windows). This will instantly save your project under a new version number (i.e., ProjectName_v02.aep) in the same folder as the original version. Compare that to selecting File > Save As, navigating to your project folder, changing the version number, and clicking Save!
Note that the Increment and Save feature increments the last number in the filename. So if you like to date your files (as in Filename_082808.aep), add the version number after the date (Filename_082808_v01.aep), otherwise After Effects will just increment the last digit in the date!
Tip 2: Revealing Layers
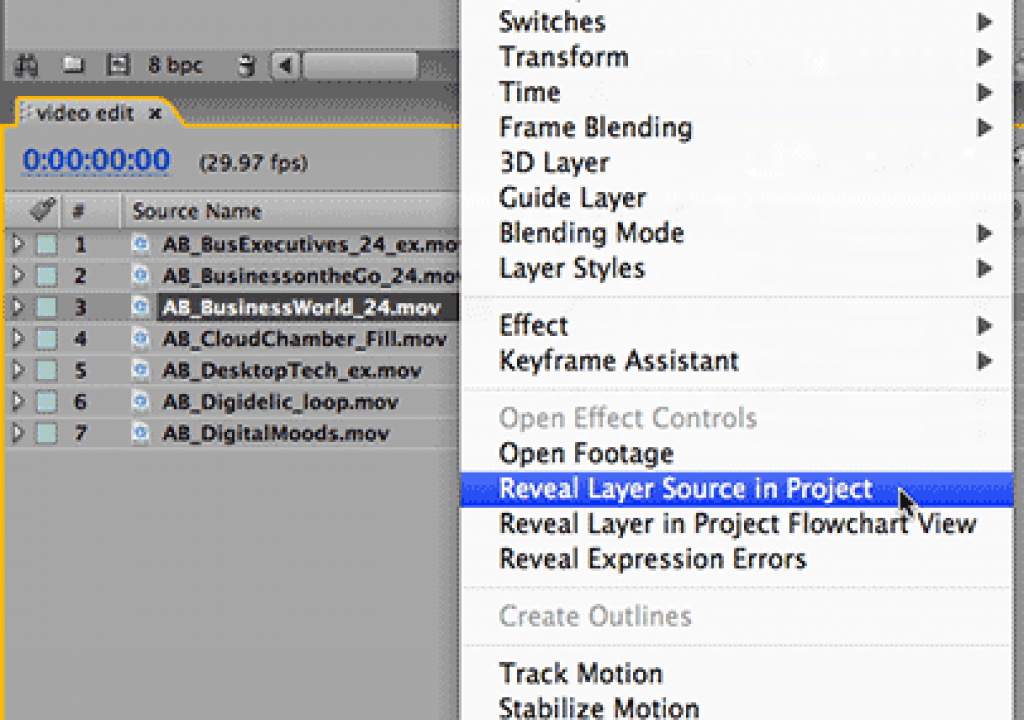
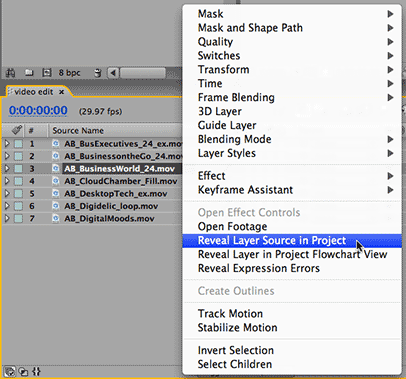
Have you ever had a layer in a composition where you need to find its source in the Project panel (perhaps to change its Interpret Footage settings), but it’s buried in some folder? Right+click on the layer’s name in the Timeline panel and select Reveal Layer Source in Project. The Project panel will come forward with the layer source selected, no matter how many folders deep it is buried. By the way, this also works if the layer is a precomp.
Tip 3: Quick Action
You can quickly toggle on and off the Title/Action Safe guides by Option+clicking on Mac (Alt+clicking on Windows) on the Grid & Guide Options button at the bottom of the Comp panel. You don’t need to drop down the grid and guides menu. Pressing the apostrophe key also works (if you’re good at remembering shortcuts!).
Tip 4: A Better Compound Blur
The Effect > Blur & Sharpen > Compound Blur effect allows you to vary the amount of blur applied to a layer based on the luminance of a second layer. The brighter a pixel is in the modifying layer (the “blur map”), the more blur is applied. Unfortunately, the Compound Blur effect looks boxy and not altogether attractive.
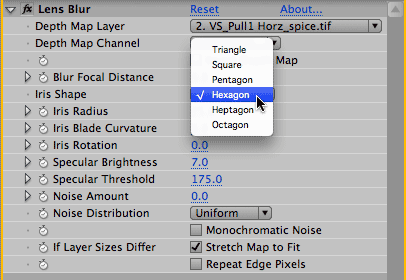
Check out the newer Adobe Lens Blur effect (Effect > Blur & Sharpen > Lens Blur). This effect provides more control over how the blur map (called the Depth Map Layer inside this effect) is interpreted. The pattern of the blur can be set to resemble a camera’s iris, so you can recreate those nice hexagon blurs off of small specular highlights that you see in actual footage that has been defocused. Also experiment with increasing Specular Brightness and reducing Specular Threshold: This will cause the specular highlights in the blurred areas to become brighter and “bloom” out to a larger size. More details on Lens Blur can be found in Adobe’s AE Live Docs.


The original image (top left) is courtesy Artbeats/Establishments Mixed Cuts; blur map (top right) courtesy Pix©lan/SpiceMASTER. The above image on the left is the result of using Compound Blur; the above right image is the result of using the new Lens Blur effect. Observe how the Lens Blur version has more clarity at the edges, and how the sun blooms out nicely. You can click on either of the two results to see a larger image for close inspection.
Tip 5: A Tip of the Hat (and Wag of the Finger)
First, a tip of the hat to Todd Kopriva at Adobe who has been hard at work adding tips and resources to the Adobe Live Docs system. But did you know that you can make the After Effects Help system even better by adding your own Comments?
To check it out, access the After Effects LiveDocs directly through your favorite browser by visiting livedocs.adobe.com/en_US/AfterEffects/8.0/. (Alternatively, from inside After Effects, go Help > After Effects Help, select any topic from the Contents list, and then click the link “This page on the web” that appears below the content.) Once inside LiveDocs, click the “Add Comments” button at the bottom of any page to add your own relevant tips or gotchas.
For instance, under the Effect > Blur & Sharpen category, Pete from Revision Effects gave a plug for their own plug-in set, SmoothKit (which we agree has a most excellent true “compound” blur effect worth comparing to the Adobe effects mentioned above).
You’ll probably notice that in LiveDocs, the URL does not update as you dig down. So if you want to bookmark a page, either copy the link mentioned at the bottom of the page, or right+click on the topic itself in the index on the left side and see what features your browser offers for opening the link in a new window or copying the link location (Safari goes one better with an Add Link to Bookmarks option).
Can you hear a little Monty Python voice saying “I’m Not Live Yet!”? A wag of the finger goes to Adobe’s web programmers for not putting the “live” into Live Docs. When you add a Comment and include a link, it’s a dead link – the viewer need to copy and paste it! Even Adobe support staff can’t add live links, so it’s not a problem for just us plebs!
Mind you, we’ll give Adobe credit for creating a great searchable Help system at community.adobe.com/help/main. Here you can search for the answer to your question by having the Google search engine focus on a subset of the web so that only results relevant to using Adobe software show up. (To limit it to After Effects, be sure to select After Effects from the popup.) For a laugh, search for “particles” in the main Google search engine then compare the result to the more focused results in Adobe’s Search Community Help system.
I just wish Adobe/Google would just make this a Mozilla Search Engine Add-on so it could be selected from the Firefox toolbar. If you know of a widget to do this, please post it in the Comments section below!
UPDATE: The ever-helpful Todd Kopriva of Adobe cooked up a Firefox plug-in that targets the Community Help search. Click here to download it. Un-zip it, and then install it in your {Mozilla}searchplugins directory. Under Windows, this means c:Program FilesMozilla FireFoxsearchplugins; on the Mac, right-click Firefox application package and select “show package contents” – then move the plug-in into the Contents/MacOS/searchplugins directory and restart Firefox. It should then show up in your list of search plug-ins. Thanks, Todd!
The content contained in our books, videos, blogs, and articles for other sites are all copyright Crish Design, except where otherwise attributed.

Filmtools
Filmmakers go-to destination for pre-production, production & post production equipment!
Shop Now