Continuing our series of After Effects tips, including the itty bitty tilde key and other essential shortcuts for manipulating panels, layers and markers:
Expand panel to fill screen
In the old days (After Effects 6.5 and earlier), you could easily make any panel fill the entire screen. This was particularly useful for the Project and Timeline panels, where you often needed to see a lot of data at once. More recent versions of After Effects have an integrated workspace, where making one panel larger scrunches up all the adjacent panels. When you’re done, you then have to resize that panel to return to your previous layout.
Here’s a better way: To make any panel fill the screen, just move your cursor over it, then press the ~ (tilde) key. Press ~ again to return instantly to your previous layout. Don’t forget to add your own sound effects (like “oooh…” then “aaah…”). [Updated: You don’t need to make panel active first.]

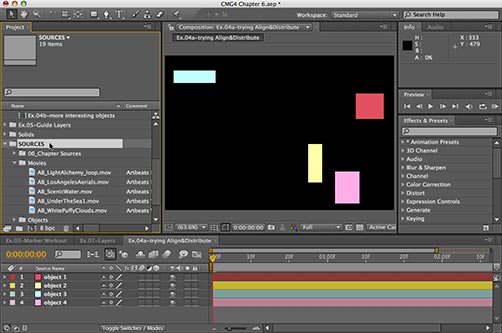
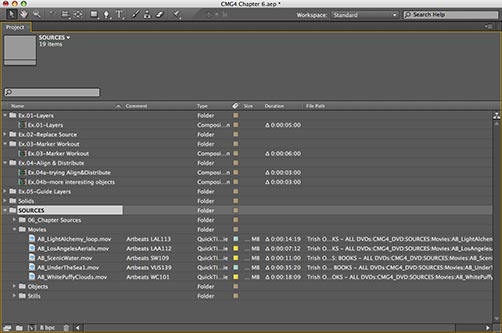
Here we show toggling the Project panel to full screen (below) by pressing the ~ (tilde) key. Repeat to return to the original layout.

Float that Panel
For some panels, such as the Render Queue, you may prefer to float the panel instead of making it full screen: That way you can move it around independently of the other panels, as well as see other panels in the background. To float a panel, right+click (Control+click on Mac) on its tab and chose Undock Panel from the popup menu. If you find an arrangement you particularly like, don’t forget to save it as a new Workspace (go to Workspace popup menu and select New Workspace).

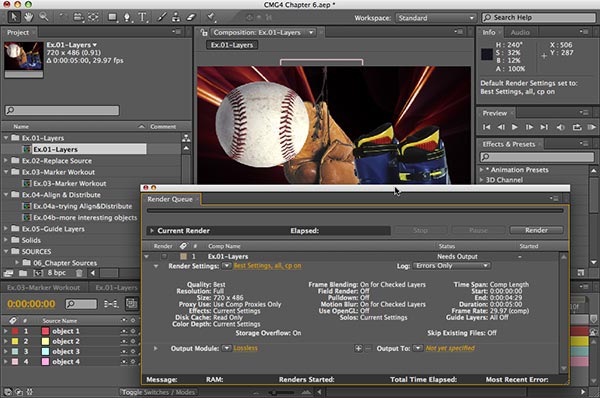
To make the Render Queue panel float on top of all others, right+click and select Undock Panel (above). When you close and reopen it, it will continue to float above the main application. To redock it, drag its tab to the center of any other panel you want it to join. If you make a big mess, you can always select Workspace > Reset “Workspace Name”!

Replace Layer Source
Ever animate a layer and now you want to swap the layer’s source while retaining all the effects and keyframes? To do this, select the layer you want to change in the Timeline, return to the Project panel and select the new source, press the Option key on Mac (Alt key on Windows), and drag the replacement source to the Comp or Timeline panel. The layer will twirl up in the Timeline panel, but all the effects and keyframes from the original layer will be applied to the new source.
The keyboard shortcut is to select the replacement layer in the Project panel and press Command+Option+/ on Mac (Control+Alt+/ on Windows).
To replace the source to a layer while retaining all its keyframes, select the new source in the Project panel (above), press Option (Alt) and drag it into the composition. The layer will twirl up, so press U (the Uber shortcut) to reveal the keyframes again (below).
Background: After Effects is an object-oriented animation program, meaning that it takes a source and applies attributes to it. The project file only has to store these attributes, along with links to the original sources, so it’s generally a pretty small file (meaning there’s no excuse not to keep saving new versions). These layer attributes include masks, effects and transformations, in and out points, blending modes, and so on. Separating the source from its attributes allows you to easily replace the underlying source to the layer and have any attributes applied to the new source. Another advantage to working this way is that the source itself is never physically harmed! No matter what you do to it in After Effects, you will always have the original source on disk. So if you’re new to After Effects, relax – you never have to commit to any edit, and you can’t break anything… (Compare that to how Photoshop works. Most operations in Photoshop are destructive as they change the actual source pixels. You also can’t change the source to a layer and have all the changes you’ve made over the past week apply to the new source!)
(next page: tricks with names and markers)
Rename and Revert Name
In the Timeline panel, you can toggle back and forth between Source Name (the filename on disk) and Layer Name (whatever you’d like to call the layer). Using a Layer Name is handy when scanning your stack of layers: “White Puffy Clouds” is more helpful than “WC101” for instance.
By default, the layer name will match the source name; if the layer name is enclosed inside square brackets, that indicate that it’s the same as the source name.
To rename a layer, select it in the Timeline panel, press Return, type a new name, then press Return again. You can toggle between viewing the Source Name and Layer Name by clicking its column title in the Timeline panel.
You can view layers using their Source name (top) or your own Layer name (above). To rename a layer, select it, press Return, type a new name, and press Return again. Note that Text layers only have one name, and you can’t revert to the source name.
Note that if you later do a Replace Layer Source (see previous page), then the layer name may no longer describe the new source. To quickly revert back to using the source name, select the layer name, press Return, press Delete (so the layer name is blank), then press Return again. The layer name will once again match the source, surrounded by brackets.
Of course, there’s always the odd man out… By default, Text layers get their source and layer name from the characters you type, and their layer name is not surrounded by brackets. You can rename the text layer ( “President – Iran” might be more helpful than “Mahmoud Ahmadinejad”), but when you toggle source/layer name, the new name will be seen in both views. In AE CS3, you could revert back to the original name by deleting the layer name and pressing Return, but not so in AE CS4 (hopefully it’s a bug and not new behavior).
Aside from layer names, you can also rename masks, effects, brush strokes, and so on. When in doubt, select a parameter name, press Return, and see if an editing field appears. Play tricks on your colleagues by renaming effects. Try “Uber Blur v03_beta” instead of “Fast Blur”…
Update Markers from Nested Comp Source
Comp markers can be used to mark important points in a composition’s timeline while Layer markers are used to mark important frames in a layer. When you nest a composition, all of its comp markers will become layer markers applied to the nested comp layer in the second comp. However, if you change the position of the comp markers in the precomp, note that they don’t update automatically in the second comp.
Comp markers in the first comp (top) become layer markers when nested in a second comp (above). But the markers do not automatically synchronize when moved in the first comp.
New in After Effects CS4 is a handy way to resync these markers: right+click (or Control+click on Mac) on any one of the layer markers on the nested comp layer, and select Update Markers From Source from the popup menu (see figure below). Be aware though, that this removes any new layer markers you may have added to the layer after you nested it. (If this option is grayed out, it’s not a nested comp layer.)
Right+click on any layer marker applied to the nested comp layer, and select Update Markers From Source. This will remove all existing layer markers and replace them with the new locations from the precomp.
In AE CS3 and earlier, the workaround to update these markers was to right+click on one of the markers and select Remove All Markers, then do the Replace Source Layer trick (see tip on page 1).
(If you’re new to markers, check out the online help, or refer to pages 106-107 in Creating Motion Graphics 4th Edition. Markers are really useful to help you stay organized. Also new in CS4: you can apply a duration to a marker. )
The content contained in our books, videos, blogs, and articles for other sites are all copyright Crish Design, except where otherwise attributed.


