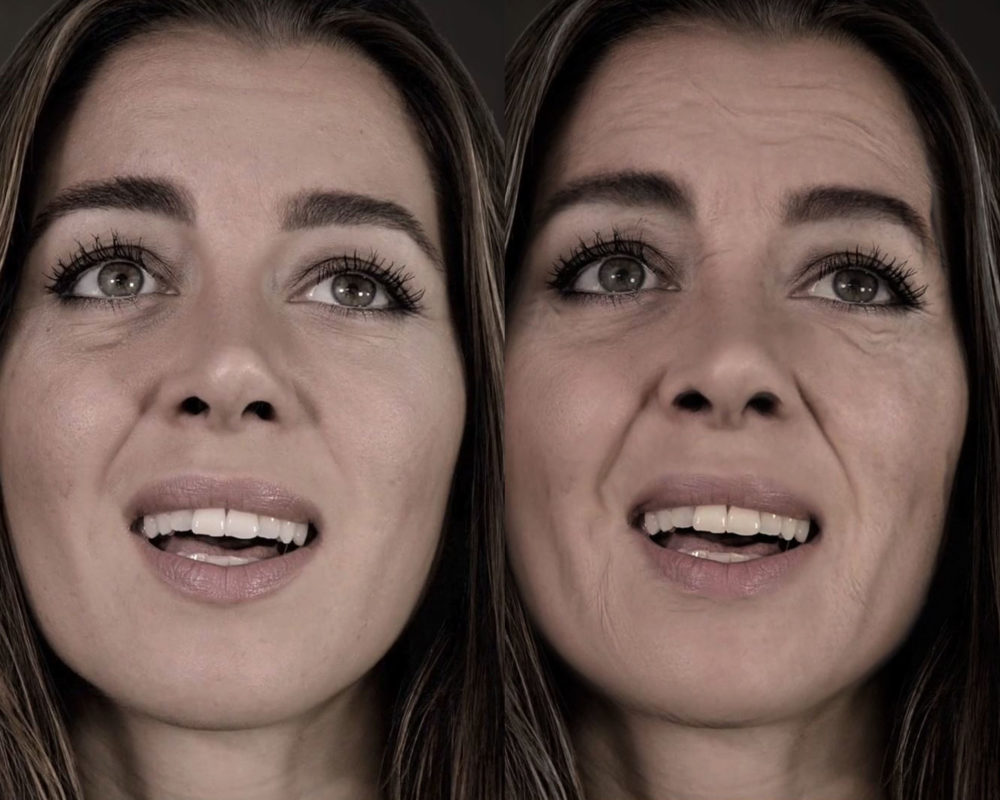
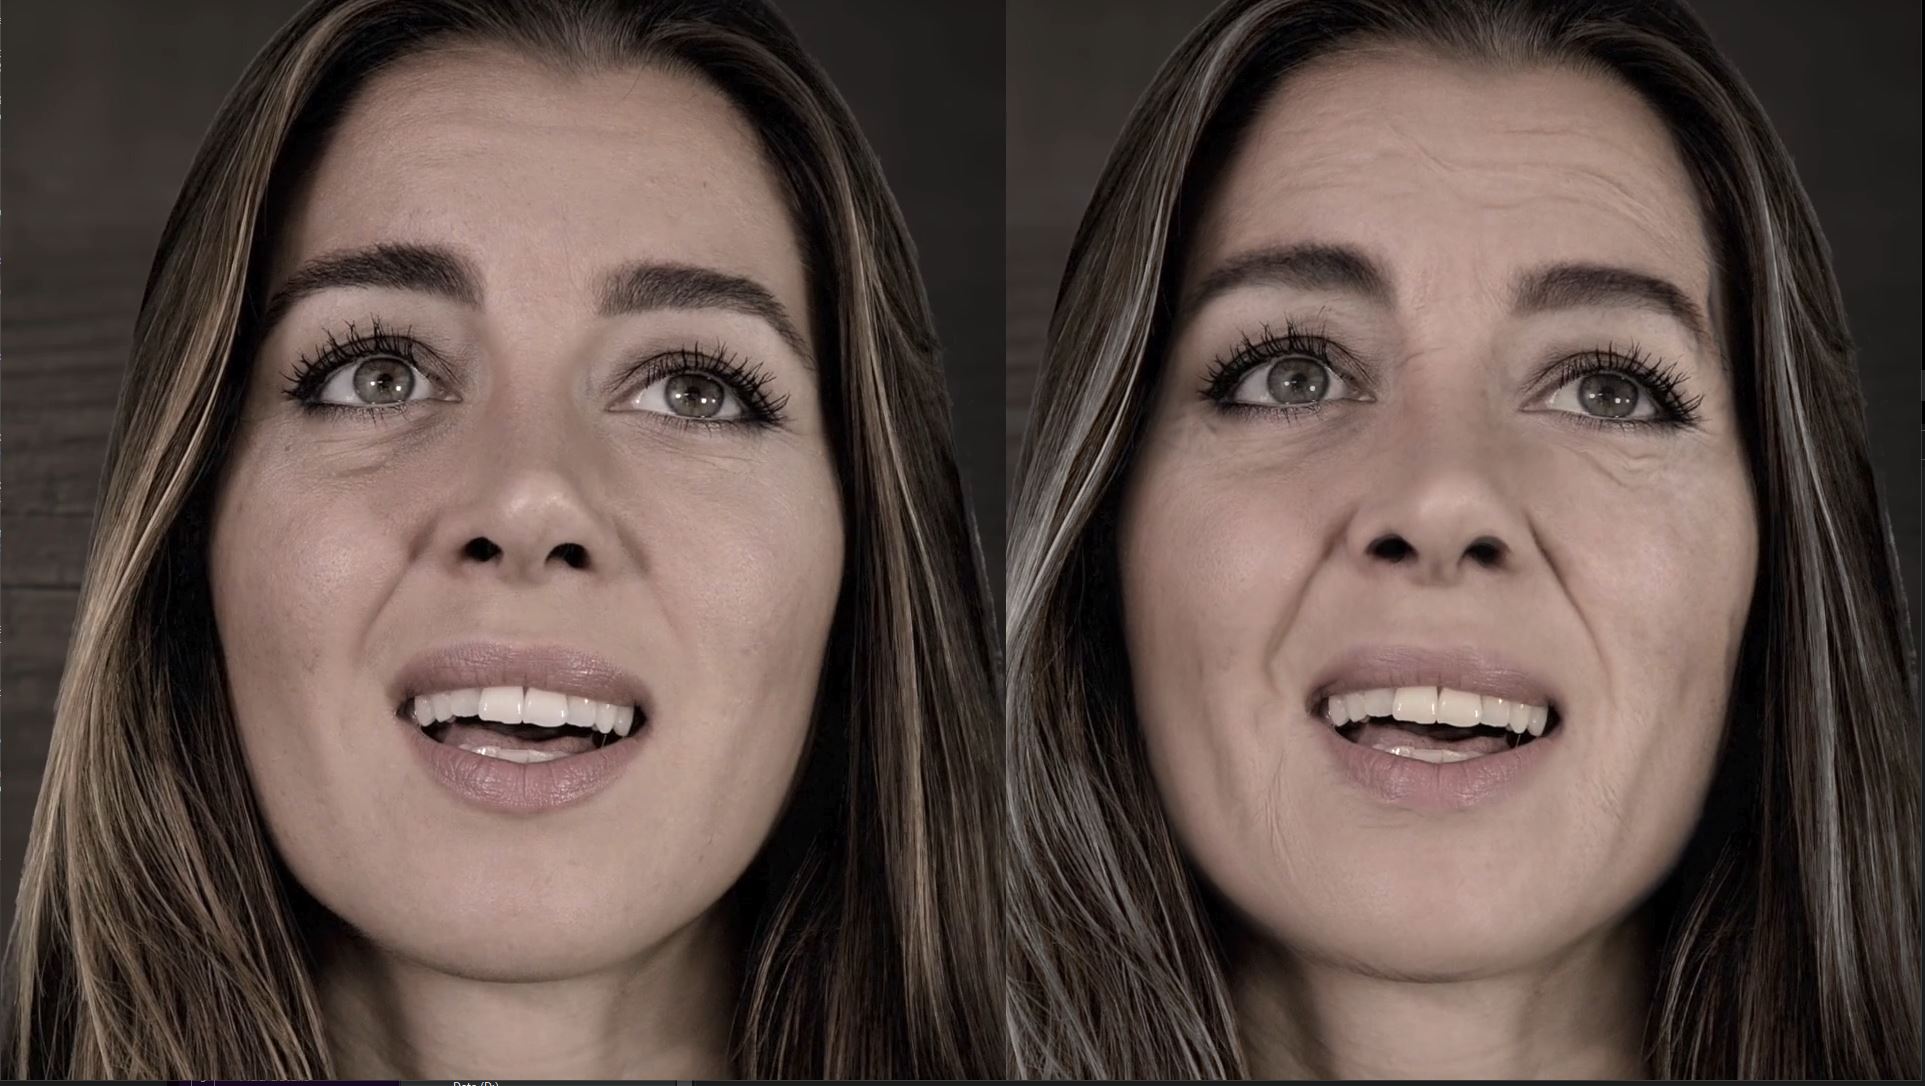
 In the age of 4K and beyond, it’s very hard to convincingly make an actor look old using practical prosthetics and make-up. When practical effects are used, they’re often erased and replaced in post because the defects show up on the 4K screen. The solution has been to turn to VFX wizardry made popular by studios like Lola Visual Effects. That’s been expensive…until now. Thanks to Adobe’s machine learning technology Sensei and the latest version of Boris FX’s Mocha Pro 2021, you can roll your own aging effect in about a half hour of setup time. Read on to find out how, or watch our free step-by-step guide video in moviola.com.
 This began as an exercise to see just how far I could push both the Adobe aging effect and the new Mocha Pro PowerMesh for production-level work. It ended with what I consider to be a viable recipe for realistic aging. Now there’s additional clean-up required to fully nail the shot (yellowing the teeth and eyes, dulling the irises, adding more creasing to the neck), but right out of the gate this method produced believable results.
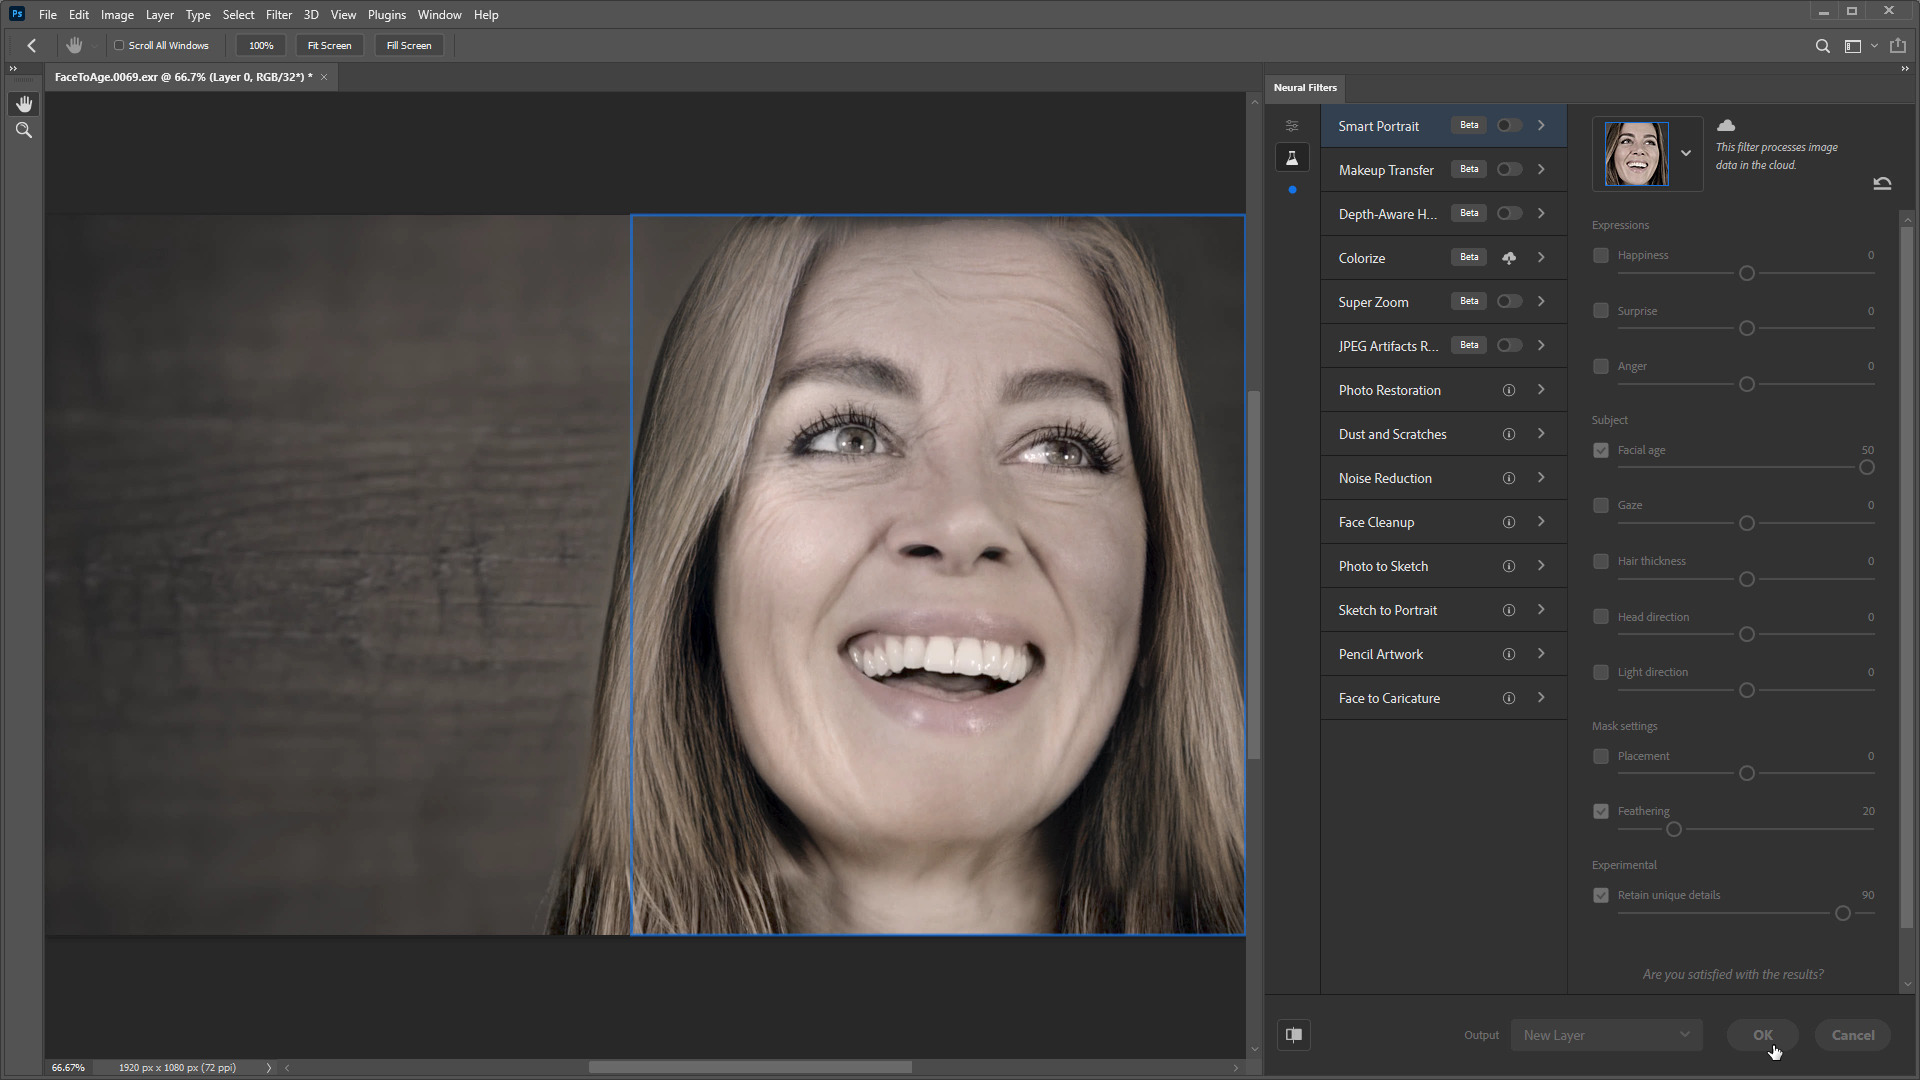
The first step is to use Adobe Photoshop’s new Neural Filter to age the actor. I loaded a representative frame from the shot sequence into Photoshop as an EXR. I simply cranked the aging slider up to 50, and…bam! My actor 30-ish years later. This isn’t some cheesy “add creases to forehead” approach. The filter has been trained (I’m guessing) on hundreds of actual photographs of the same people at different ages for ground truth. The details—creases along the jowls, puffiness in the eyes, fuller face—are representative of what might actually occur as someone ages.
I feel like I should write more about the process, but that’s really it. Photoshop detects the face and applies the aging. I don’t know if there’s any significance to the slide numbers or range, but cranking it to 50 worked well for my purposes. I’m guessing outlier ages wouldn’t work so well, since it’s unlikely that Adobe had a lot of centenarians with quality photos of their teenage selves to work with.
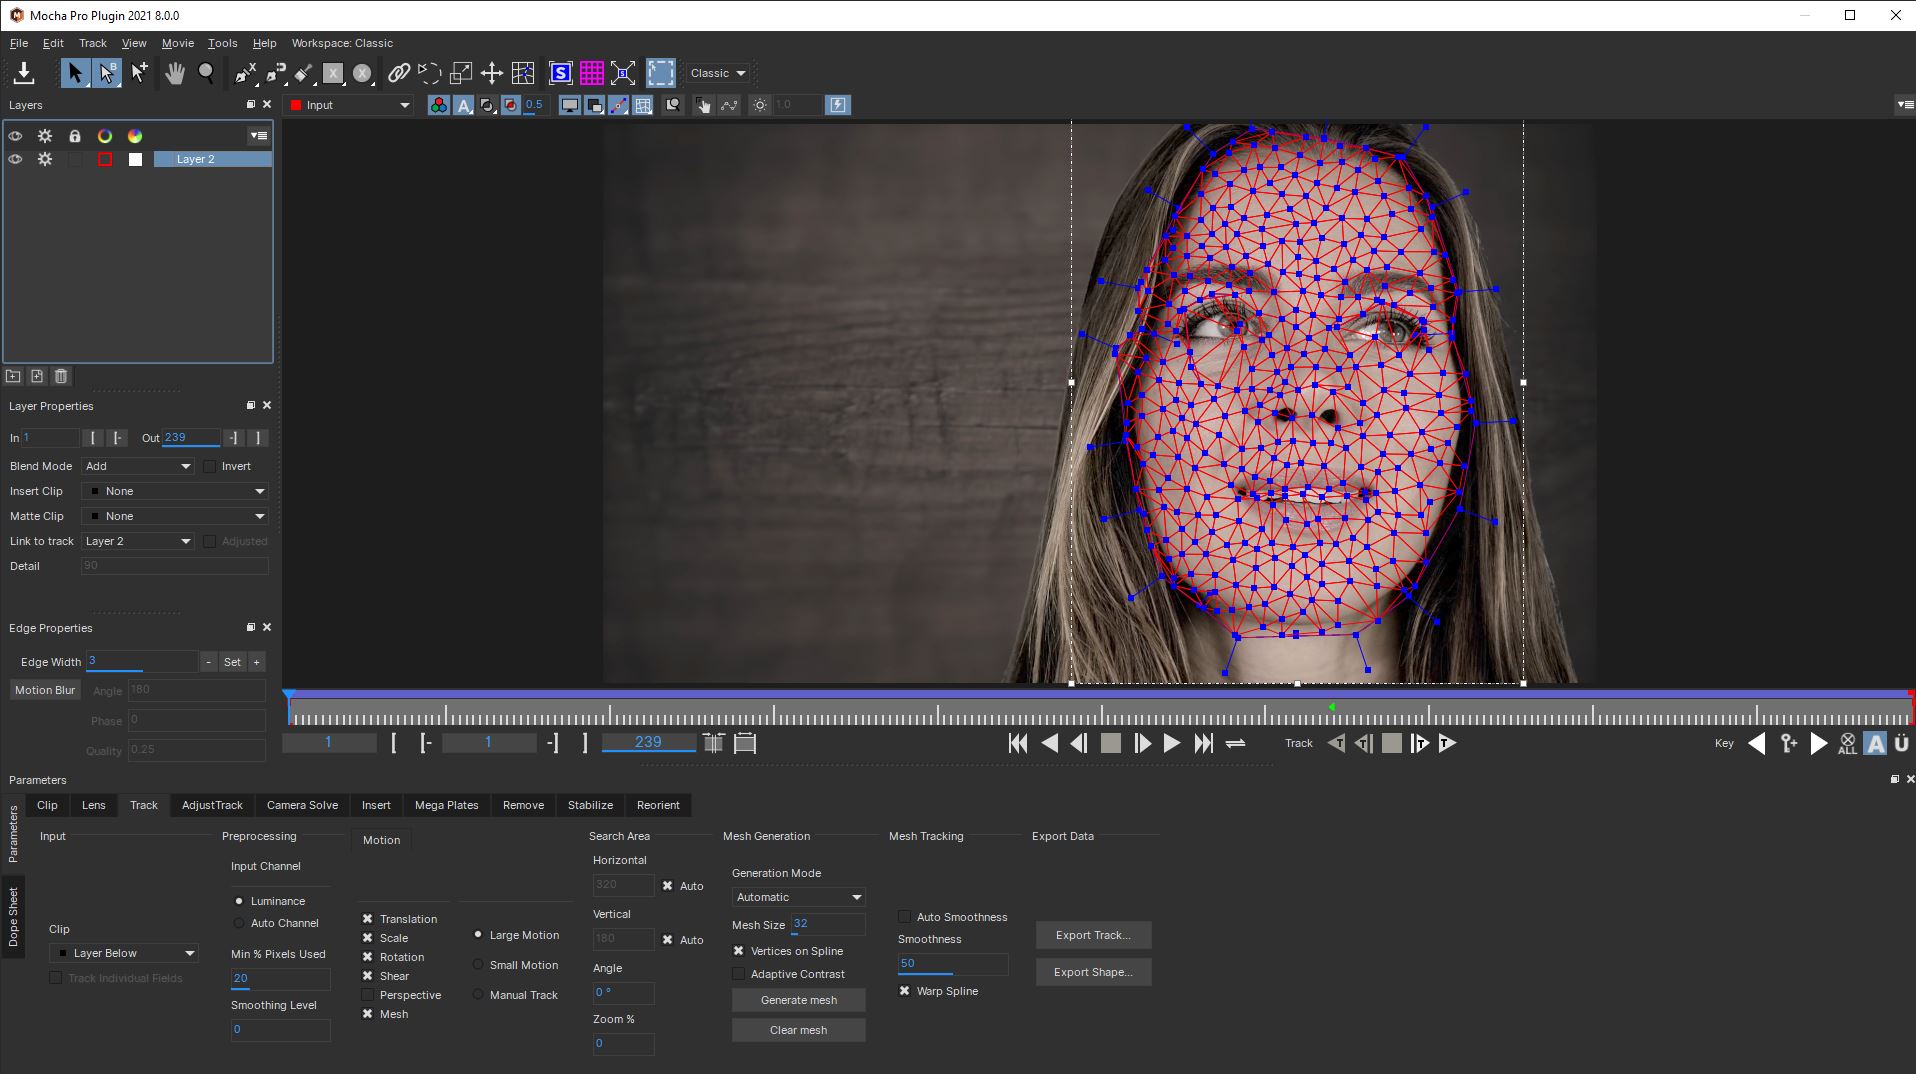 The next step was to take the source footage into Mocha Pro 2021 for tracking. Mocha has always been the “go to” tool for post-production cosmetic surgery (at least for 2D effects). It’s limitation was that each section of the face needed to have its own cornerpin track to account for the non-coplanar motion of the various facial muscles. Not anymore: Mocha Pro 2021 introduces a new tracking technology called PowerMesh. I’m usually not a fan of hyperbole in product names, but in this case I think they would have been justified in calling it SuperAwesomePowerMesh. This is the tool I didn’t know that I should have been dreaming about.
Other applications have had motion vector-based warping tools for a while now, but they always seem to struggle with drift after a few frames. At least on my initial tests (I reserve the right to change my opinion once I’m neck-deep in VFX shots on a feature) PowerMesh gets a solid lock on features and holds on to them. From what I understand PowerMesh uses a localized version of Mocha Pro’s planar tracking technology to track each polygonal region of the deforming mesh.
Mocha Pro has some simple tools for automatically generating a tracking mesh. You can customize the generated mesh by adding or deleting points (I didn’t, though on a high-quality production job I would probably fine-tune regions around the eyes and lips). PowerMesh seems to use some mix of feature detection and delaunay triangulation to auto generate the mesh; whatever the recipe, it creates solid results.
Tracking works just like “traditional” Mocha planar tracking, with the exception that you need to enable mesh tracking as an additional option in the track type. The documentation suggests sticking to “shear” tracking mode if there’s little perspective distortion. In the test shot there was a modest amount of perspective shifting due to the actor moving her head, but shear mode worked well.
My biggest concern when I first saw the marketing material for PowerMesh was that I would be forced to do the composite inside of Mocha Pro’s interface. I was pleasantly surprised to discover that Boris FX wisely added an Alembic export option to support Nuke, Fusion, Flame, and in fact any 3D application that supports Alembic (that means Cinema 4D and the free, open source Blender). It exports the warping as an animated mesh and camera. You choose the reference frame where you want the UV projection to be neutral (in other words, in my case, the frame I aged in Photoshop), then export the alembic.
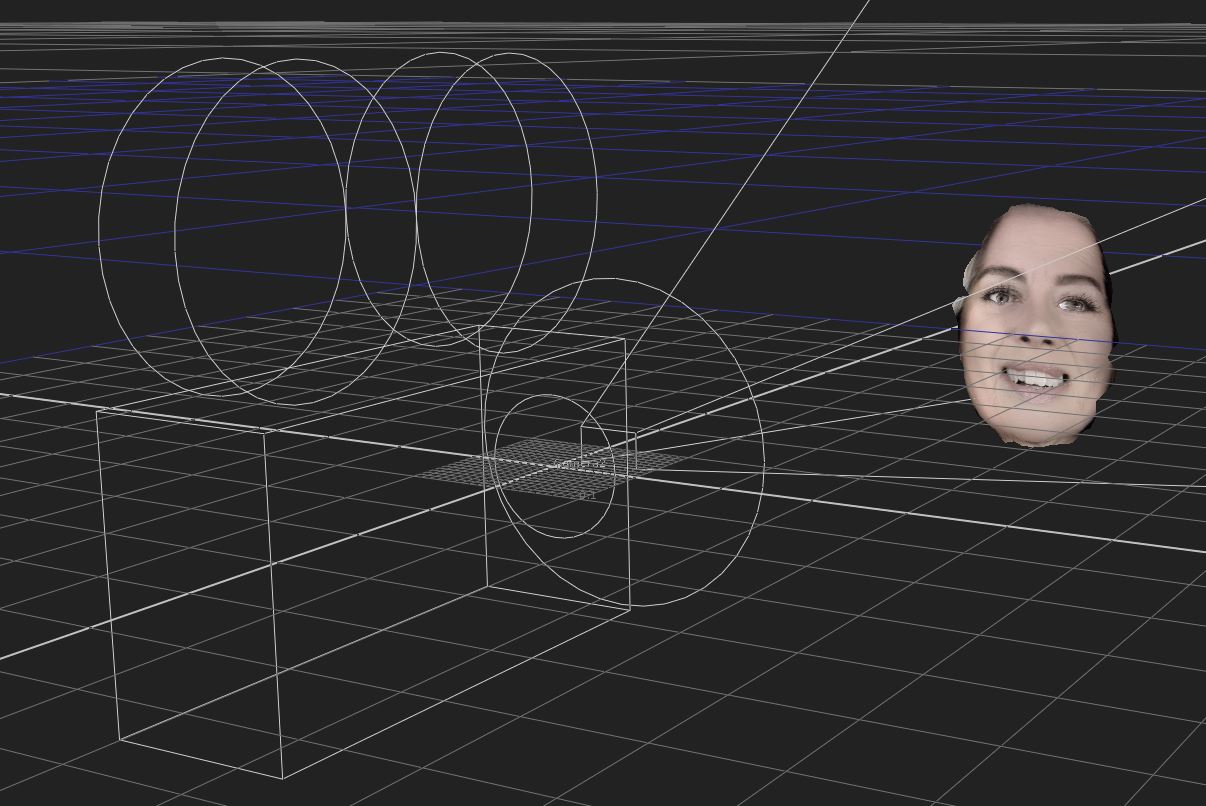 This convenience is also my one complaint so far about PowerMesh: the alembic export cuts the exported mesh right at the border of the auto-generated mesh. That means in your 3D renderer of choice (Nuke in my case), the warping simulation abruptly stops at the last polygon in the generated mesh. It would be great if there were an option to add a set of non-deforming boundary triangles around the outside edge of the mesh to give compositors a little bit of blend room when comping onto source footage.
Discussing this with the Mocha team, they inform me that they’re already considering just such a feature for a future release, but also offered a workaround for the current version: Create a larger-than-needed shape when generating the mesh, then scale the spline layer down before beginning the track.
While After Effects doesn’t support the Alembic import, in some ways working with PowerMesh in After Effects is even simpler. Just copy and paste the Mocha Pro plugin to the Photoshop-generated age layer, set the module option to Stabilize Warp, and enable the rendering option. Done. No messy export, no external files.
One thing I’ve yet to try is exporting shapes to Nuke’s spline warper. Mocha Pro can distort its boundary X-Splines to match the mesh deformation. This would theoretically allow individual features to be tracked and their outline shapes used to drive spline warps. I have a feeling you’d lose a lot of the PowerMesh’s tracking precision in the process, but it’s another possible workflow.
Hooking the Alembic camera and mesh up to a renderer and applying the Photoshop aged frame as a cleanplate, you have yourself a version of the aged face that deforms with facial movement. Now it’s not going to work for eyes and mouth, but with a little masking and light match, you can nicely blend the main facial structure over the original footage.
In the test footage the actor raises her eyebrows and smiles about halfway through the clip. This should produce forehead wrinkling that doesn’t get produced by Photoshop’s filter in frame 1. Typically in such cases we add a second key pose frame in the sequence and warp between them.
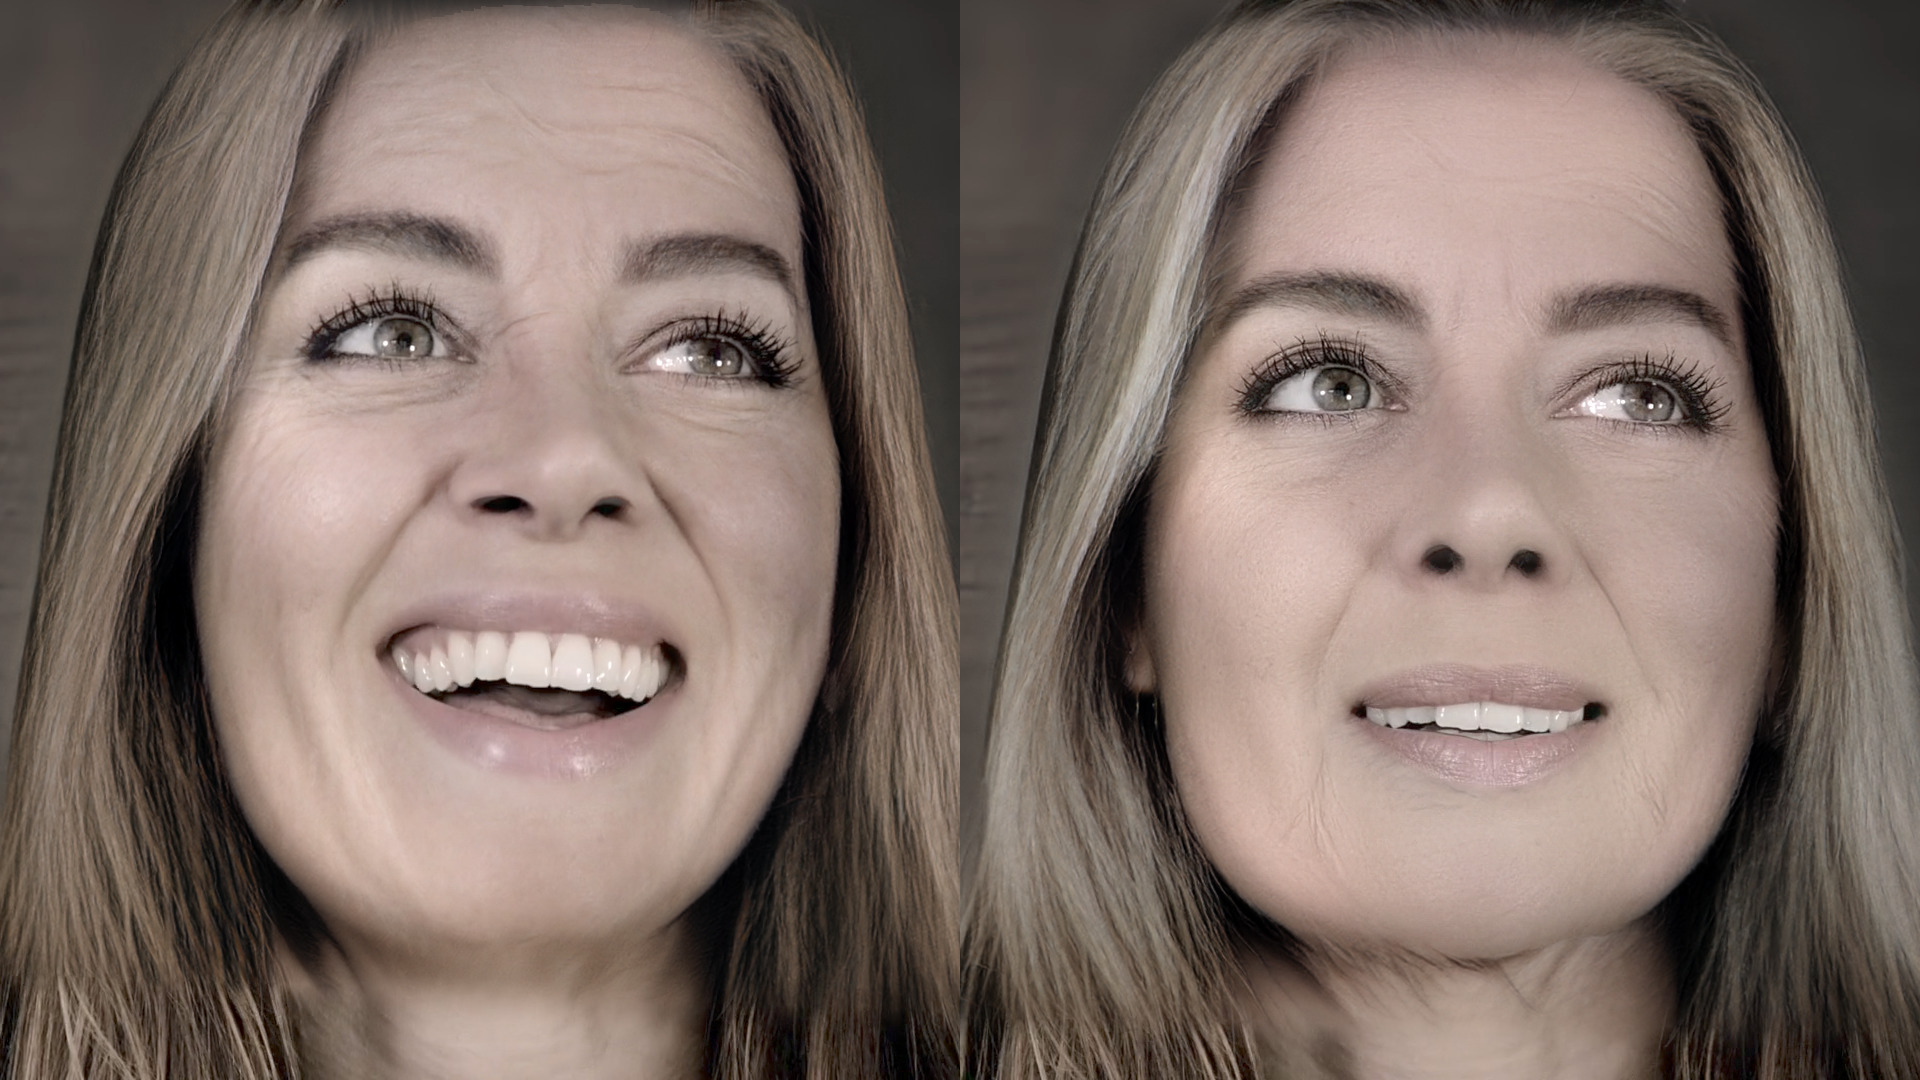 A unique problem arises when using machine learning models on animation: there’s no guarantee that the same face will produce the same outcome if the head position and lighting changes. The machine learning works its magic based on the library of faces it’s been trained on, and subtle changes in lighting can cause it to pull from a completely different set of facial creases. All that to say, you can’t smoothly blend between Photoshop-generated key frames of the aged face. My Photoshop-aged face at frame 69 of the sequence looked much older, even with the same setting.
I see this as being the biggest problem with this technique. It’s fine for a single shot, but in a sequence of dialogue, each shot could generate a different aged “look,” creating continuity issues. The solution would be to find two or three hero frames (straight on and three quarter profile), generate aging, then clone paint elements from one to the other until they all match. You could then use those as the sources for all shots in the sequence.
In the end I simply combined the two aged faces. I matchmoved the frame 69 face using the Mocha Pro Alembic data (I exported a second version with frame 69 set as the reference frame), then combined the resulting warped animations using a minimum blend mode. Using minimum meant that the darker age creases were nicely combined between the two aged shots for maximum “aginess.” I could of course dial back the intensity of either or both shots to adjust exactly how weathered the older version of the actor’s face should appear.
Finally, I added a little yellowing to the teeth and eyes, and desaturated the hair to add some gray. (That last part is probably unrealistic; the older version of the actor would probably dye her hair to hide the gray.) The solution is by no means perfect: as I mentioned at the start of the article, additional work should ideally be done on and around the eyes and lips. But for around 30 minutes of setup time the shot is pretty amazing.
For more information about Adobe Photoshop’s Neural Filters, follow this link.
Follow this link for more information about Mocha Pro.

Filmtools
Filmmakers go-to destination for pre-production, production & post production equipment!
Shop Now