Alpha channels are the basis of digital compositing, but there are two different types – straight and premultiplied. Understanding the difference can make or break your composites – if the alpha channel is wrong, your composition will look wrong.
This video is a refresher course on alpha channels that covers a broad range of topics. As well as visually demonstrating the difference between straight and premultiplied alpha channels, we look at the pros and cons of each, what colour matting is and how to avoid problems with it, and we also look at what the word “premultiplied” actually means.
The video also shows common problems caused by the incorrect interpretation of alpha channels- most commonly dark or light halos around the edge of layers, but also colour casts in semi-transparent areas.
While most visual fx software only allows alpha channels to be premultiplied with black or white, After Effects is unusual because it can premultiply alphas with any colour – whatever the background colour of your composition is set to. This can also lead to unexpected problems with importing clips rendered in After Effects into other applications.
Basically – alpha channels are important. It’s important to understand what they are and how they work. A tutorial on alpha channels may not be as much fun as one on particles or other cool looking visual fx, but taking the time to cover some of the basics can save you from producing work that looks wrong.
Since uploading the video yesterday, I’m adding two additional notes.
Firstly, although I mention that premultiplied alphas have a smaller file size than their straight-alpha equivalent, I decided not to show specific examples in the video, as it varies so much depending on the actual image itself and also the file format. But then I noticed that After Effects shows the file sizes in the project window, and the difference is so dramatic I thought I’d emphasise the point. For exactly the same clip, at the same resolution and duration and both rendered out as TIFF sequences, the straight alpha version clocks in at 210 meg, while the premultiplied version is about 25 meg. This is almost 1/10 of the size.

File size doesn’t just save disk space, it also has significant ramifications on network load – especially in larger studios with render farms. In the office where I’m currently working, the render farm can potentially have over 40 machines rendering simultaneously. The difference between 40 machines simultaneously reading a 210 meg file vs a 25 meg file is going to be very noticeable depending on network and server capacity. In many cases, especially on large scale projects, network and server speed can be a bigger rendering bottleneck than the raw computing power of the individual machines. So while premultiplied alphas can improve rendering speed because the multiply stage has already been done, they can also improve rendering speed by reducing network load.
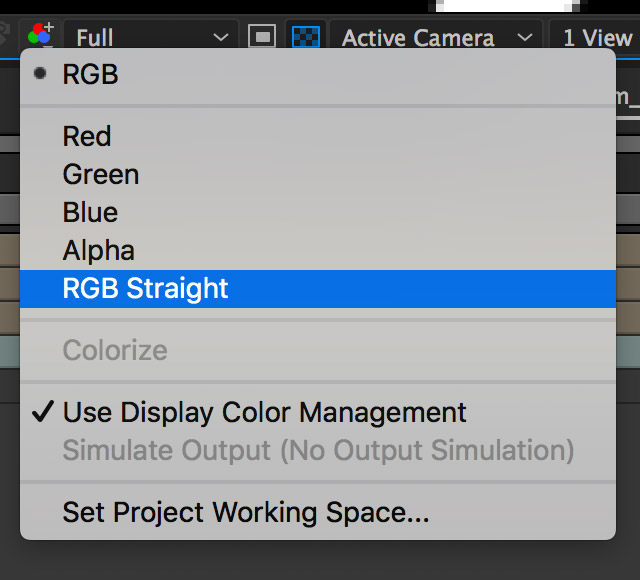
The second point that I realised I should clarify has to do with previewing channels in After Effects. There are several points throughout the video where I preview individual channels in the composition window, and hitting alt-1 / 2/ 3/ 4/ is one of those keyboard shortcuts that’s become a reflex action (option for the Mac people).
However what I didn’t clarify was that when you preview the colour channels, After Effects shows them premultiplied with the alpha channel. There’s also the option of viewing the colour channels without the alpha channel – and this is the option I’m using in the video to demonstrate the difference. This option is labelled “RGB Straight”, and the keyboard shortcut for this option is to hold down the shift-key as well as alt-4. This is effectively the same as viewing the footage clip with the alpha channel ignored, or set to full-on.


Filmtools
Filmmakers go-to destination for pre-production, production & post production equipment!
Shop Now


