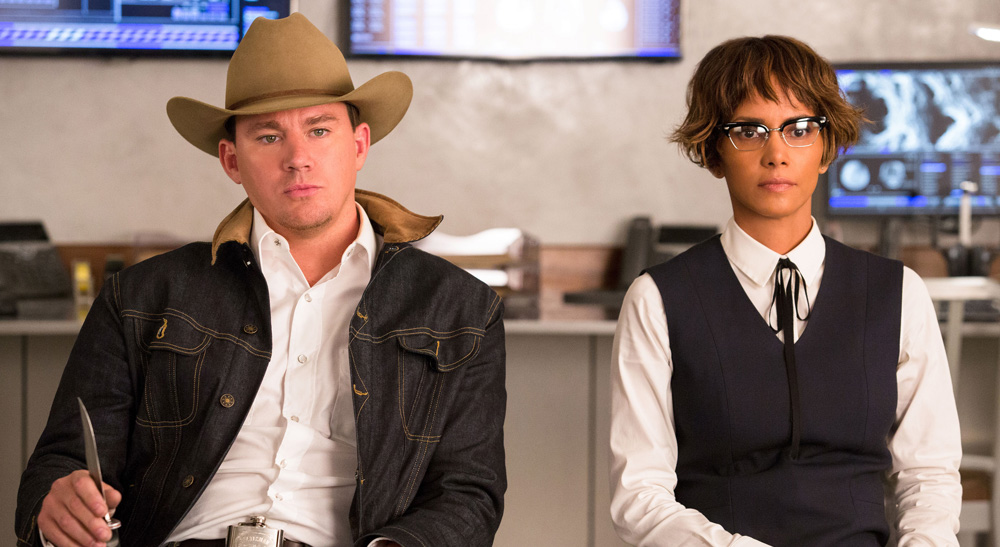
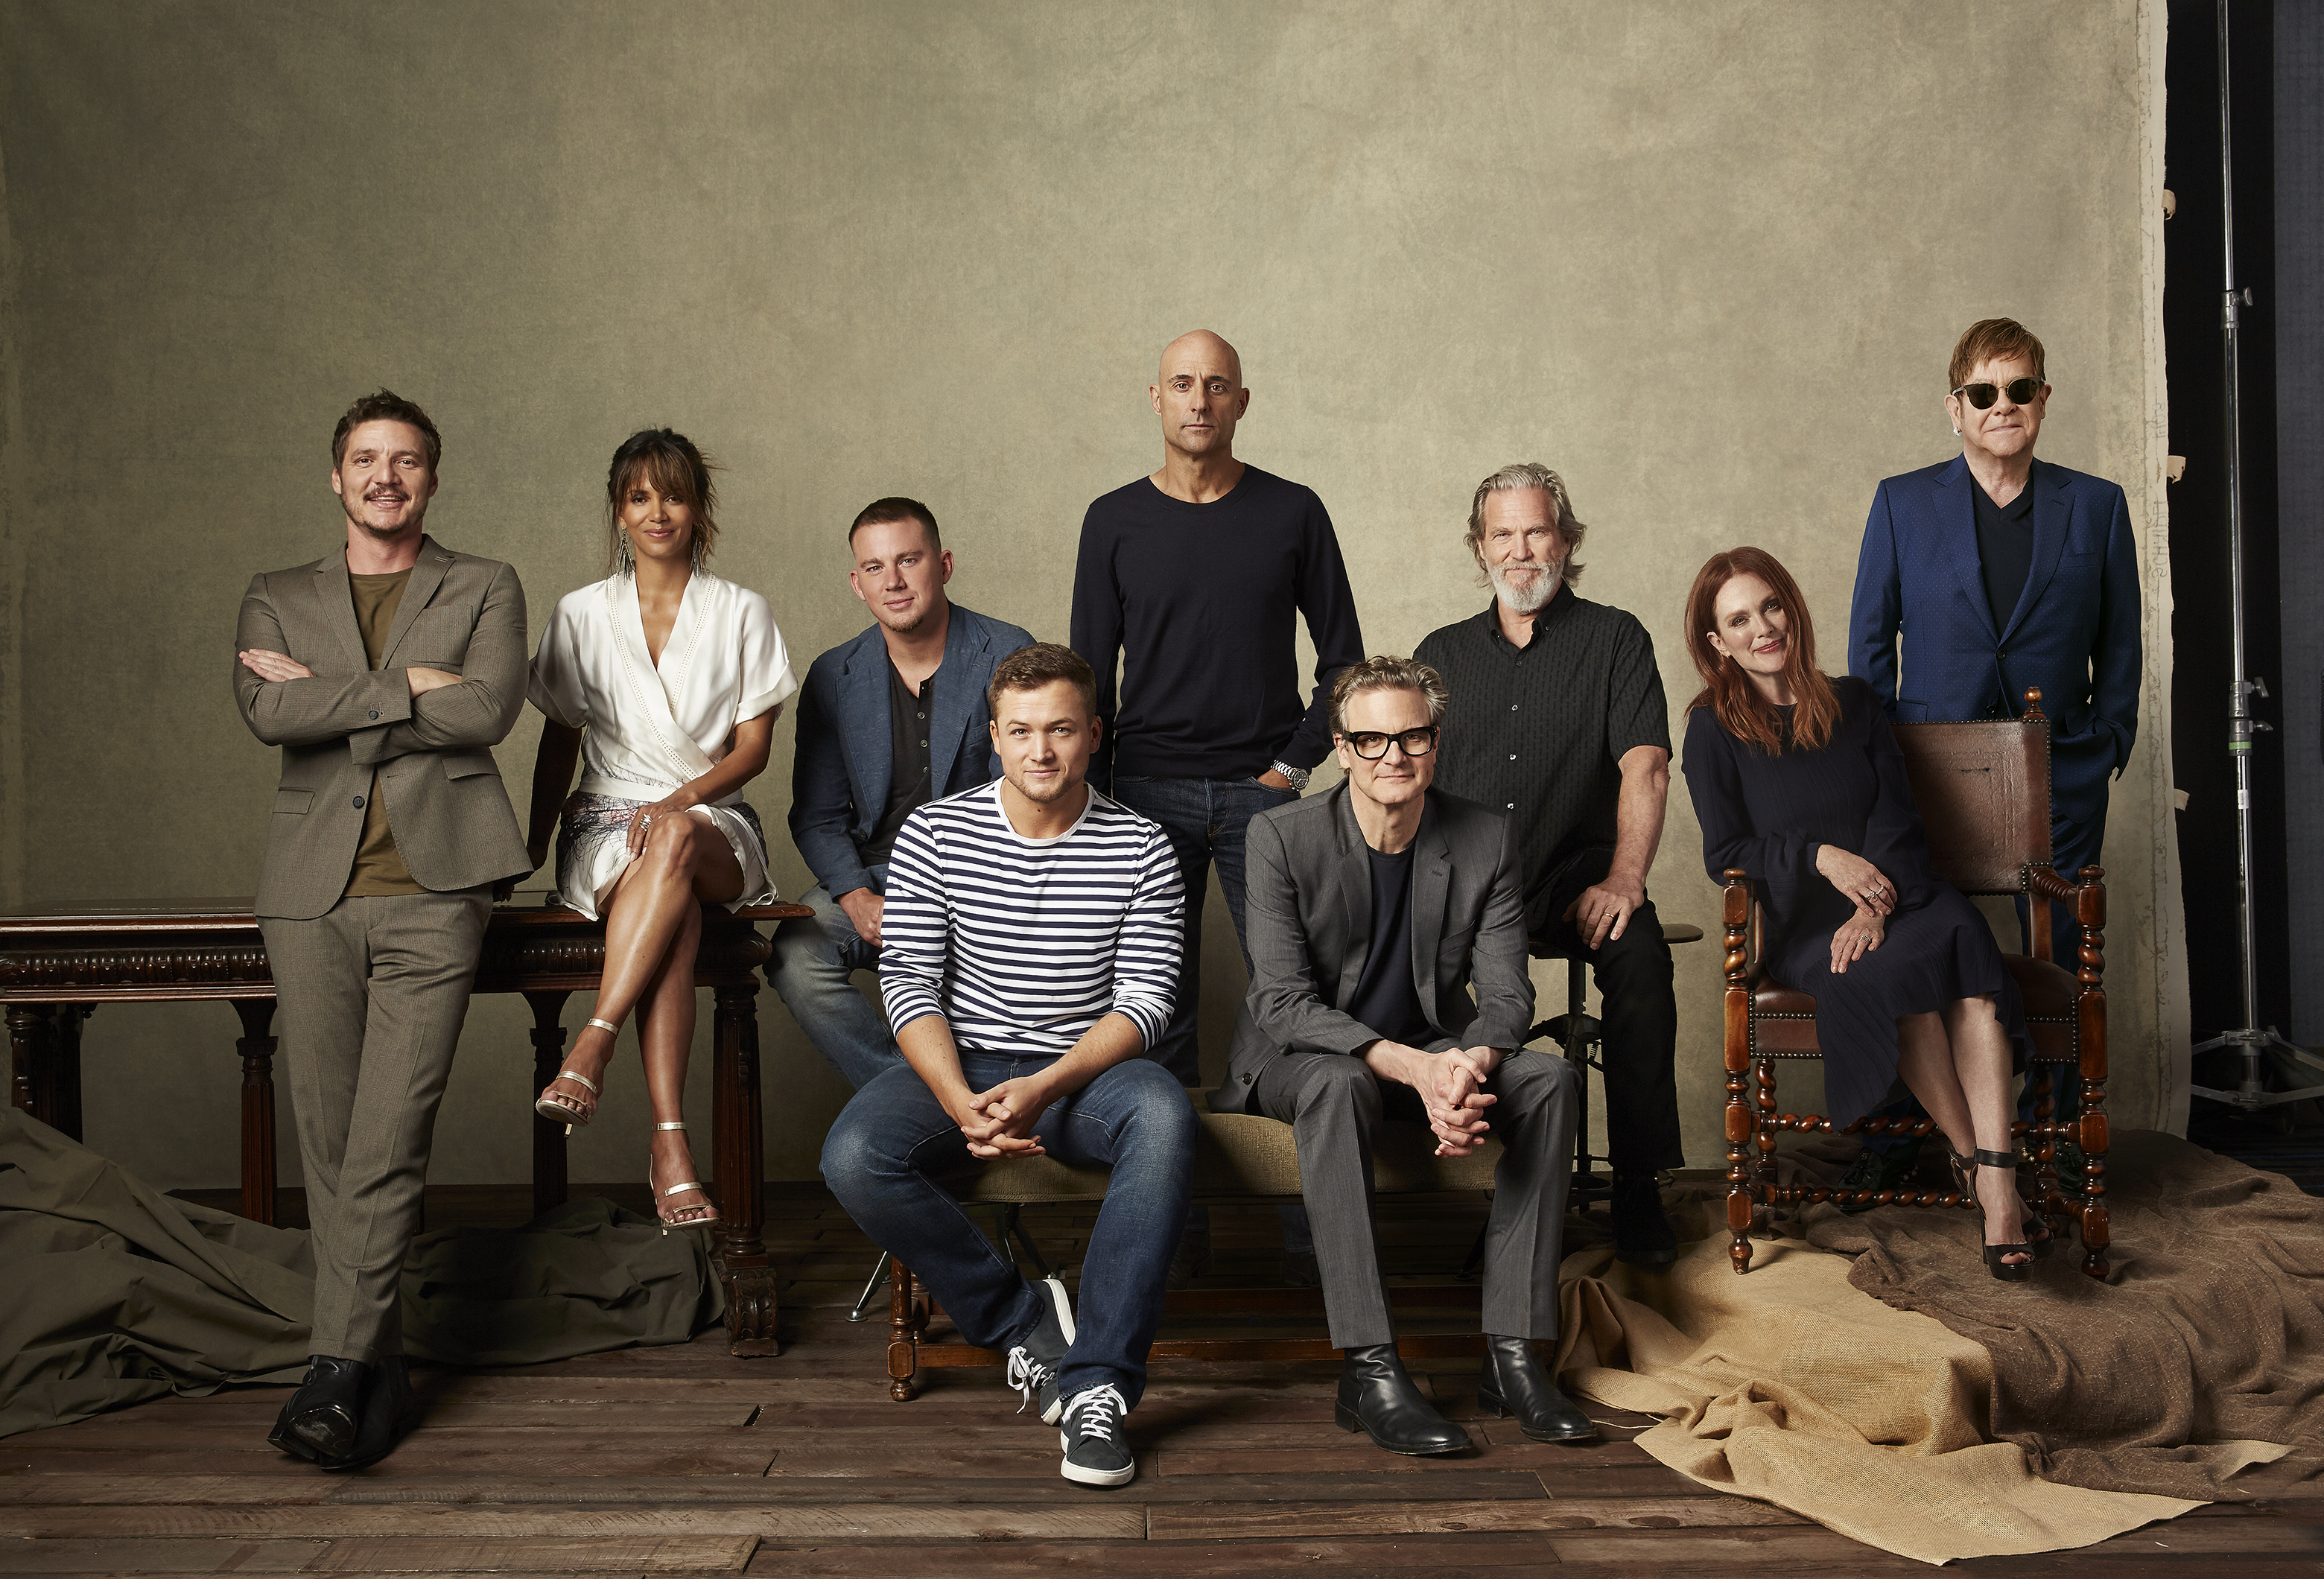
Occasionally, Art of the Cut features the assistant editors and others in the post-production team. These are some of the most popular interviews in Art of the Cut history – including Cheryl Potter, assistant to Pietro Scalia on The Martian, and John Lee on assisting Lee Smith on Dunkirk. As a follow up to our interview with Eddie Hamilton on cutting Kingsman: The Golden Circle, this installment of Art of the Cut features Riccardo Bacigalupo (first assistant editor), Tom Coope (first assistant editor), Chris Frith (assistant editor), Ben Mills (VFX editor), Robbie Gibbon (assistant VFX editor), and Ryan Axe (trainee assistant editor) on their roles in the post-production of the film. Most of this team has worked with Eddie Hamilton on his other films including the previous Kingsman and Mission: Impossible film and on the next Mission: Impossible which most of them are working on now. This is probably the most in-depth description of preparing and executing the post on a movie that you’ve ever read.
You can also read Eddie’s interview on cutting Kingsman: The Golden Circle here.
(This interview was transcribed with SpeedScriber. The entire interview was transcribed within 15 minutes of completing the Skype call. Thanks to Martin Baker at Digital Heaven)

HULLFISH: Let’s go through with the workflow a little bit if you would. Tell me about the system set up and what you guys had to get ready before the production started.
MILLS: The first person on board was Eddie and he started in October / November of 2015, working on previs and looking at hair and makeup and costume tests. We were both finishing off Eddie the Eagle and I was around, so I prepped a few bits for him on a 12TB G-Raid as we didn’t have an ISIS at that time. It was just to get him going. He’s quite self-sufficient so he was able to import whatever he needed and get started. We gave him a template project based on how the first Kingsman movie was laid out.
COOPE: Myself, Riccardo and Ben have all worked together previously, so we were talking about workflow over group iMessage chats and Skype conference calls for a couple of months beforehand, along with Josh Callis-Smith our DIT and Simon Chubbock our Lab Supervisor, both of whom also worked on the first Kingsman with us.
BACIGALUPO: Each of us were working on other projects prior to The Golden Circle, so we all had to finish those, and then stagger our way back onto TGC as we became available. So we made sure to lock down the workflow before we started and get it ironed out ahead of time.
I think the actual order was that Ryan came on to assist Eddie first in the trainee position and then Ben came in after that and even though he’s the VFX editor, he really was the 1st assistant at that point. I worked with Ben on Kick-Ass 2 and we firsted together, so we’re all very good at doing each other’s jobs and helping to cover for each other. Then once Tom became available to step in and First properly, Ben moved back into his VFX Editor role.
MILLS: It was quite useful because we had Simon and his team in the Lab just down the corridor from us. They transcoded, synced and archived all of our dailies for us, then we would prepare the bins how Eddie likes them laid out, including dailies viewing sequences and line strings. If anything was wrong we could just shout down to them and they’d be able to re-transcode, re-colour, update metadata or whatever the issue might be and send it through to us immediately.
 COOPE: We’d worked with them before on the first Kingsman and they were also the Lab on Eddie the Eagle. They’d done quite a few Matthew Vaughn films before. We all had a really good working shorthand with each other as a cutting room, but also the cutting room to the Lab, because we’d worked on so many projects together.
HULLFISH: Was the lab on the ISIS system?
COOPE: Yes they were. They had access to a limited section of it.
BACIGALUPO: They had their own partition on the ISIS so they would dump all the media in there. That was their workspace and then they would copy everything over to us.
COOPE: It was great. We could rely on them doing that side of it for us and we’d get a message saying, “Guys, the shoot day is ready” and we’d jump straight on it.
HULLFISH: So tell me exactly what they would put on the ISIS and what did you guys have to do to get that media to Eddie?
COOPE: They would generate the MXF files (Avid media) onto their partition on the ISIS, separated in folders by camera roll, and they would make bins per camera roll as well. We would copy all those bins across into our project and copy the MXF media onto the Audio and Video partitions into shoot day folders.

We’d trigger a scan to refresh the Avid media databases for that shoot day, then rename the folders back to the date of the shoot day in order to organise the ISIS at Finder level. Then we’d grab all of the separate sets of bins for Master Clips, Sync Clips and the Sound Roll and combine all of those into a shoot day Master clips bin, shoot day Sub-clips bin, and a Soundroll bin.
BACIGALUPO: And at the same time the Lab also made all of our PIX H.264 files (PIX is an on-line dailies distribution service) as well. That meant the dailies for the producers and studio executives were prepped and ready to go. Then the cutting room would be responsible for uploading them to the PIX service and putting together the “selects” playlist and the “all takes” playlist each day to send to Production and the Studio.
MILLS: All of the generation of the playlists is created from a Filemaker script thats part of our cutting room database. The guys at PIX created the script and helped to build it into my database, so it made it quite easy for us to just hit go and have the script use the metadata to build the playlists, add selects etc. It would create two play lists per shooting unit, one containing just the selects from that day and then another one with every take in from that shoot day.
COOPE: It’s a very automated system and so removed a lot of manual data entry and fiddling around in the PIX app.
MILLS: We’d get quite a bit of metadata from the Lab but then we’d have to add a few extra things ourselves like descriptions of shots, selected takes and anything that’s relates to the creative choice process rather than the technical side.
HULLFISH: So after uploading the PIX media, the playlists generated by your Filemaker program were organised and filtered so that the producers and execs didn’t have to watch everything if they didn’t want to — just selects or just alternate takes?
COOPE: Yes exactly right.
HULLFISH: What does Eddie like you to do to prep for him? How are the files named? And then scene bin organization and naming?

BACIGALUPO: It’s changed on every project. It’s one of the things that is really interesting about working with him in that he continually evolves his system. I was with him on X-Men:First Class and that was nearly eight years ago and it’s continually changed since then.
COOPE: The very first thing for Eddie is a viewing sequence. Once we’ve got the days subclips, we drag them all into a sequence for that shoot day, so he can see everything shot from the previous day’s dailies and can skim through, and if he gets a call from the director, he knows what’s been shot and can answer questions about it.
HULLFISH: And is that sequence just from action to cut, or is it literally every single frame that went through a camera for the day?
BACIGALUPO: The viewing sequence is every frame from every subclip.
COOPE: False starts, NGs (no good/bad takes), everything.
BACIGALUPO: We do chop it down later for him, but that’s in the scene bin specific daily sequence. That first viewing sequence has no marks, no nothing. It’s really just so he can quickly review everything that was shot the previous day and be confident if Production were asking him whether they could strike a set then he could say “yes do that, or no don’t.”
HULLFISH: Eddie has talked to me about his evolving sense of how he likes to do things. I love that idea because obviously you want to be open to new ideas. What are some of those things that you guys have sensed over the last two projects or more, that have changed in the process? Why did they change and how did that make things better?
BACIGALUPO: Firstly, just something small but effective, we didn’t use to put double spaces in our naming of scene bins, clips or cuts, but we do now because it’s easier for him to read. When we make a bin at the top of the project we start every bin with a date in reverse order. So if it was the 9th of October 2017 it would be military date (year, month, day) 171009 in order to get the bins to sort in date order. We used to just do one space after the date, before leading into the description of the bin. But he specifically asked for double spacing so it’s easier to read. That’s one little example of how it has evolved.
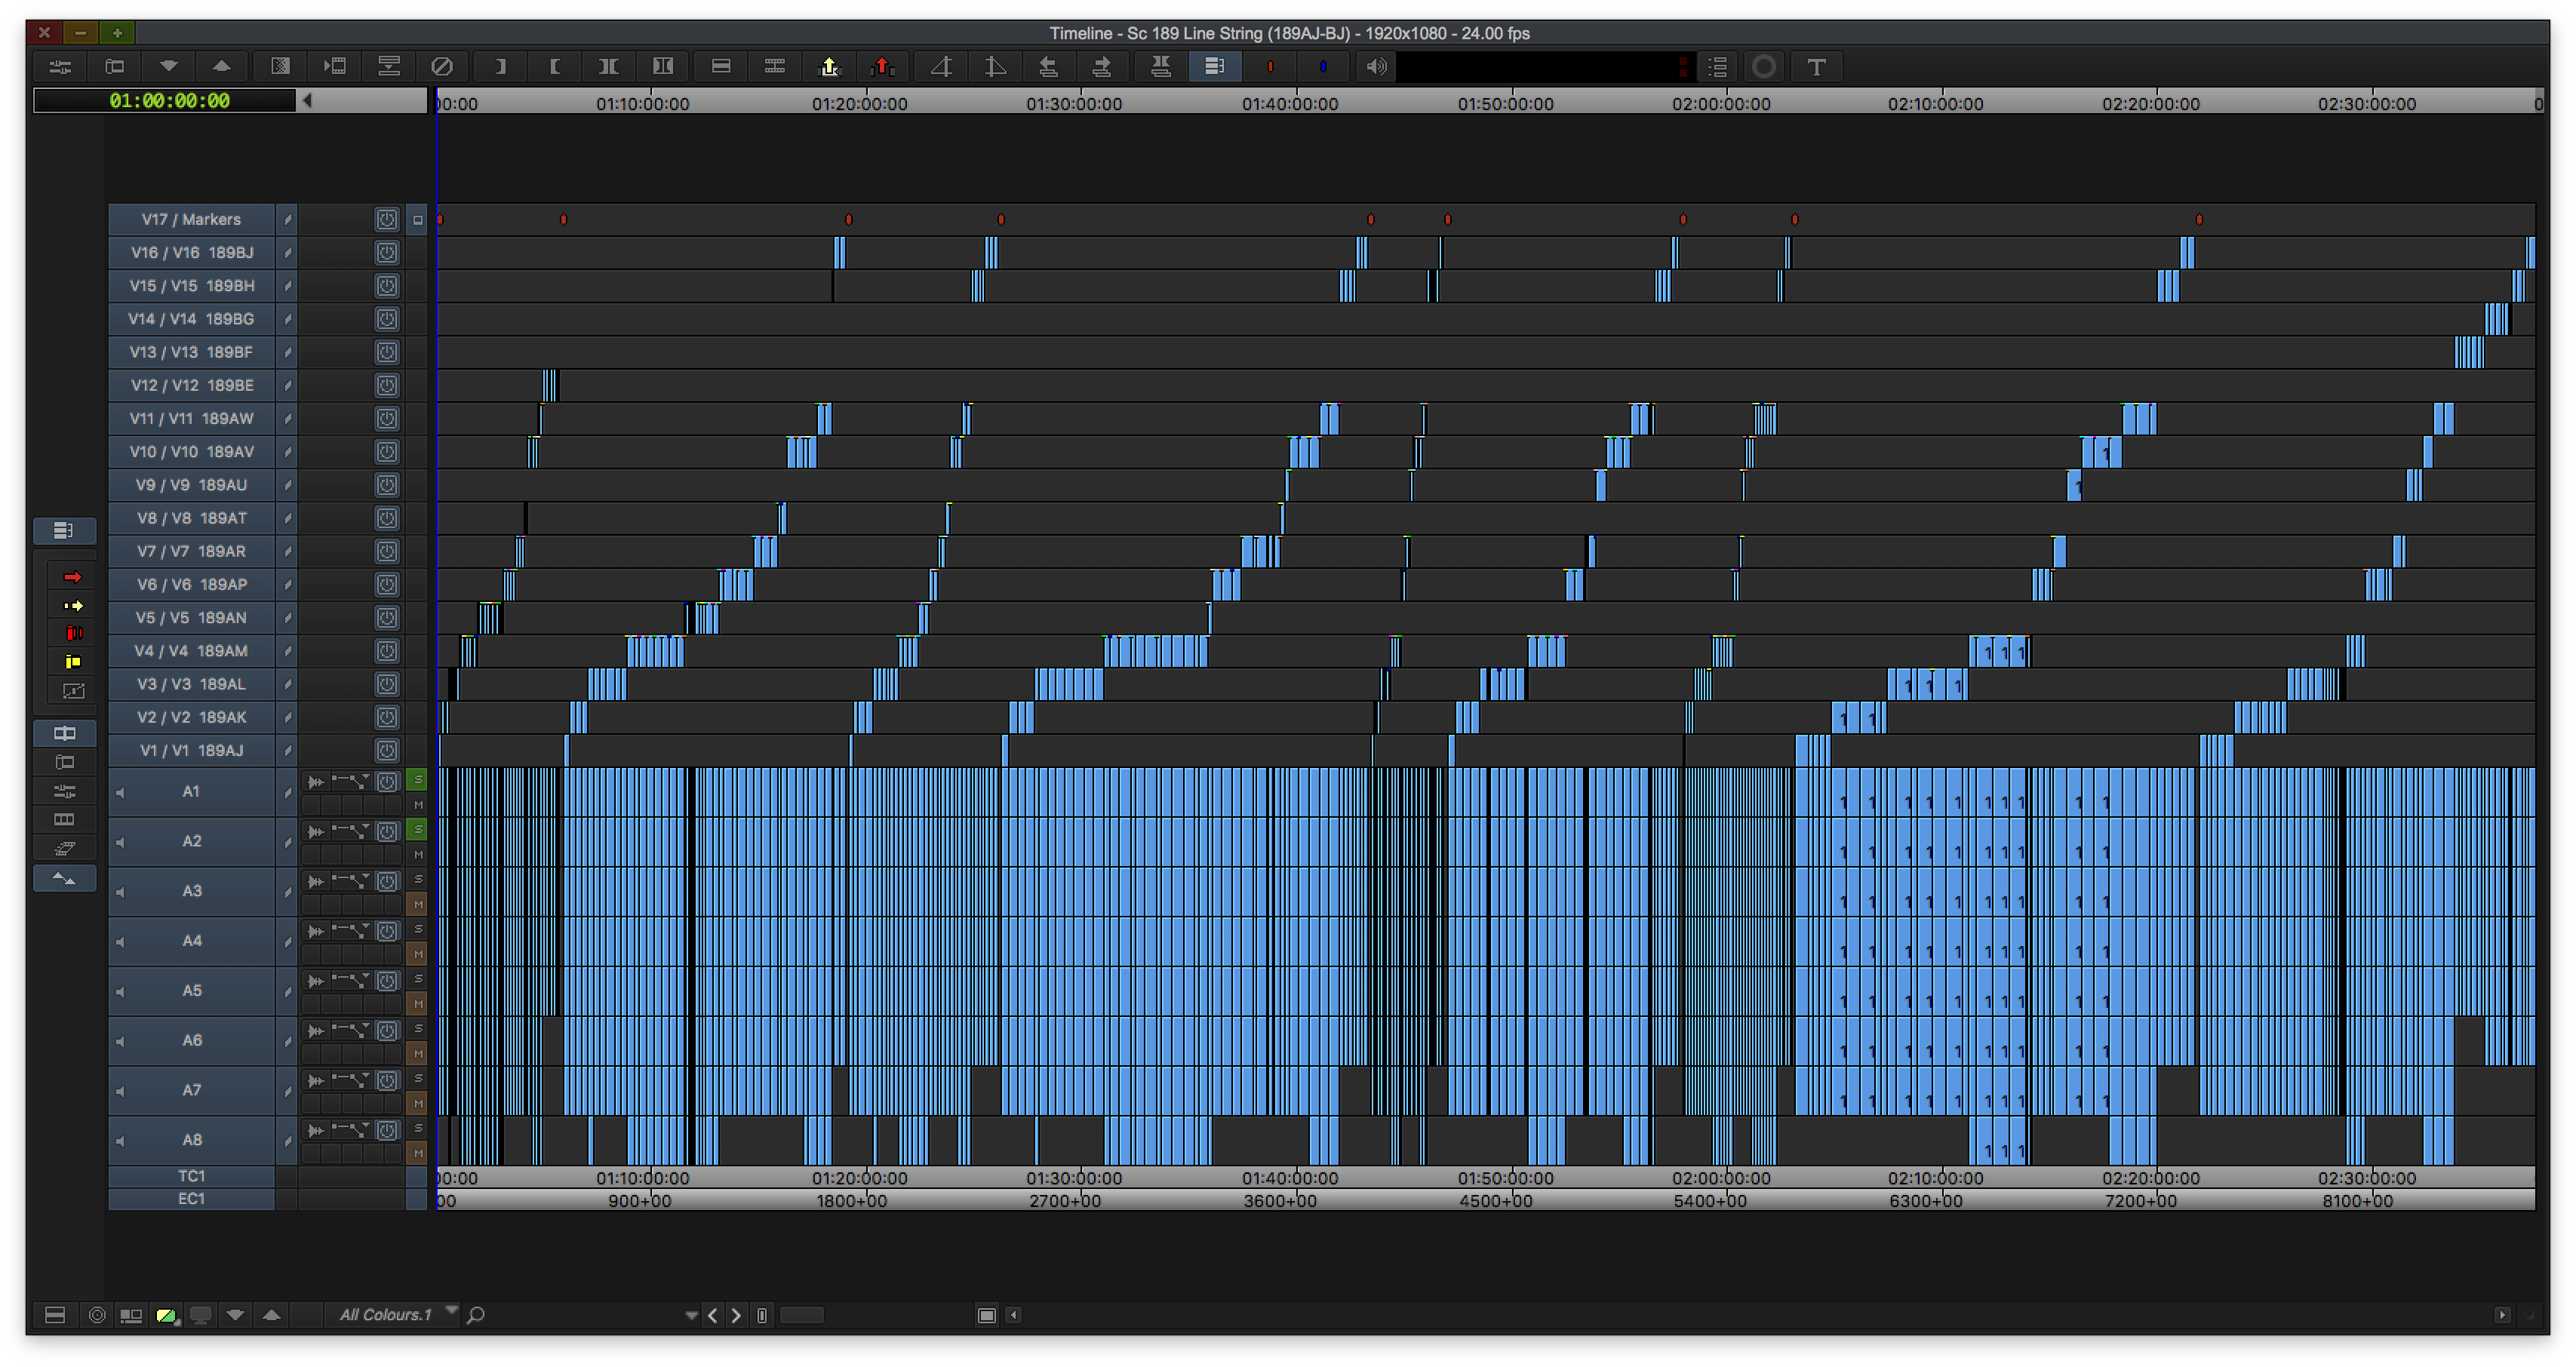
FRITH: Eddie was making these dialogue selects reels and sort of organising it all by himself. Then one day on Mission: Impossible Rogue Nation, the cutting room said “we can do this for you”, and then it became a much bigger project which we call Line strings.
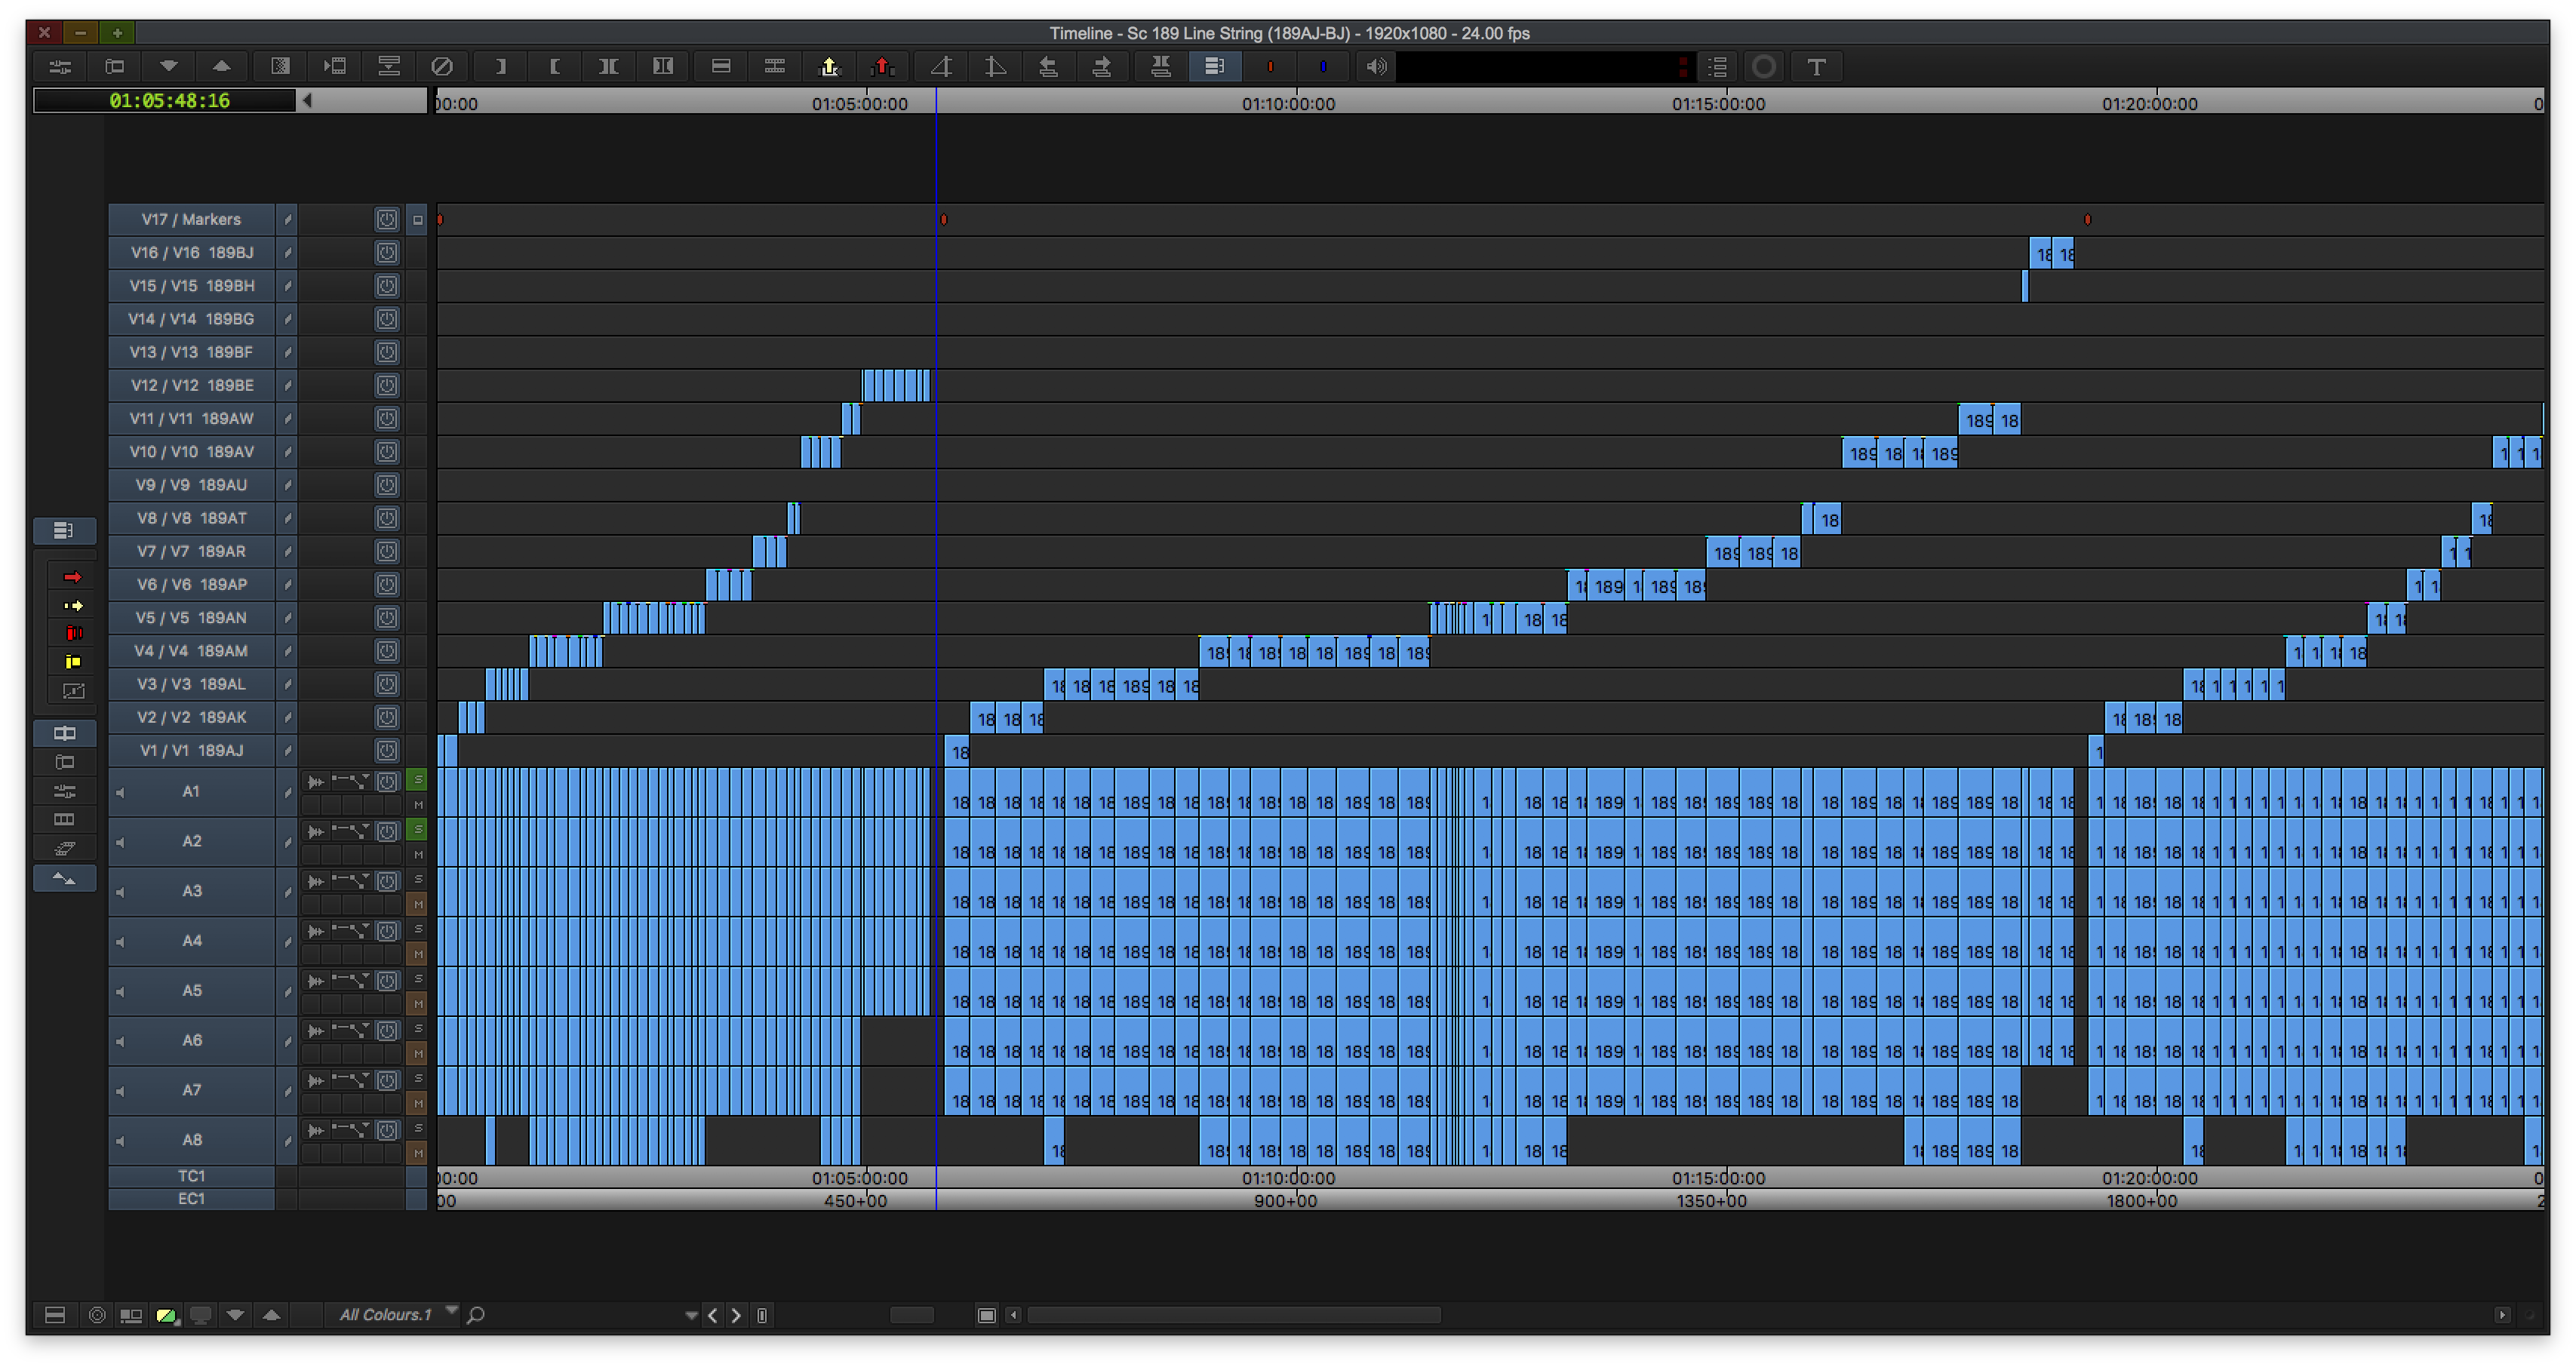
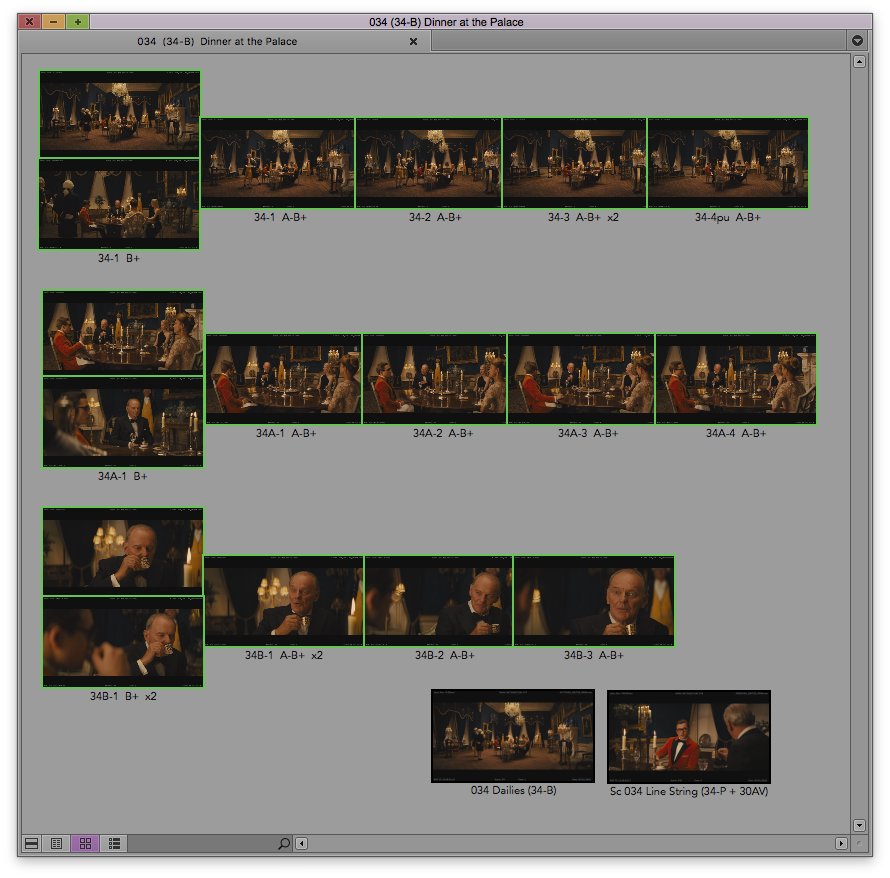
Basically the finished line string is: every camera setup has its own named track, so on a finished line string we’d have markers that transcribe line 1, the character’s initials, and the line. Then later down the sequence lines 2, 3, 4 etc… Then after the first marker on V1 would be all of the takes of the wide shot of line one and then on V2 would be all the mediums of line 1 and V3 would be all the close-ups of line one.
Then, dialogue line 2 again, with V1 always being the same camera and V2 will be the next camera setup. So it’s really easy for him to go to the line 3 closeup, and then watch all of the close-ups for that line, from that angle. That whole system has evolved a bit, including the part of moving each camera to a different track.
COOPE: Essentially like using ScriptSync by breaking down your footage into chunks of dialogue and the coverage for that piece of dialogue.
BACIGALUPO: Eddie tried ScriptSync before and didn’t roll with it. When you spend all your time as an editor just manipulating footage in a timeline, It kind of makes sense to have your line strings in the same format that you’re used to working with every day, rather than having a PDF in your software and navigating that. Everyone works differently, but his system makes sense to me.
FRITH: and the line strings are cut very tight. They’re not action to cut. It’s literally just the line itself with maybe a second or two on either side. If the line is just a standalone response like “Yes.” that’s all you’ll get for 4 or 5 takes in a CU, then a mid, then a wide.
 COOPE: So since we have a Lab that now does a lot of what we used to do such as syncing and even transcoding, now we’re freed up to get to know the rushes. I think that’s what the line string really helps with. It helps the whole editorial team really get to know the footage. So that if Eddie says, “I’m sure there’s a shot of this somewhere” everyone can help find it quickly.
BACIGALUPO: That’s another one of the things that’s evolved. On X-Men Eddie was very, very specific about having us sync in the cutting room rather than the Lab do it, and the same with Kick-Ass 2 if I remember right. We did that all in the cutting room — and for the first Kingsman as well.

As the projects have gone on, the scope and scale of the Production has changed, and the work requirements of the cutting room team have also changed. When you find a really good Lab team who look at it the same way you do and get it right the first time then it’s great because we can trust them to do that so we now become available to do tasks that help his creative process such as the line strings.
HULLFISH: How do you label clips in a bin and how are the clips organized within the bin?
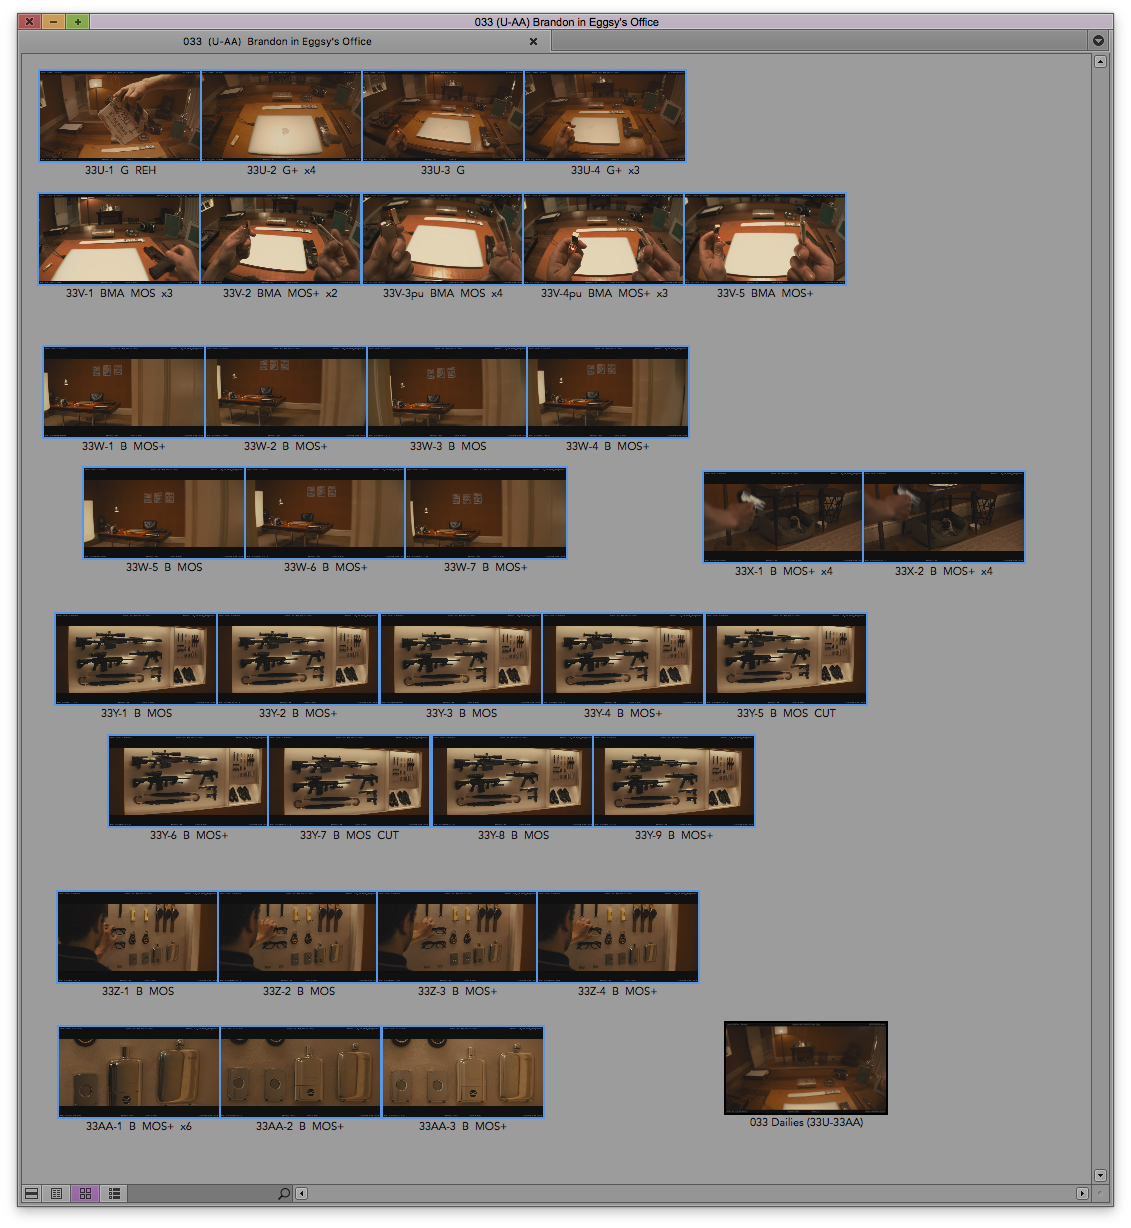
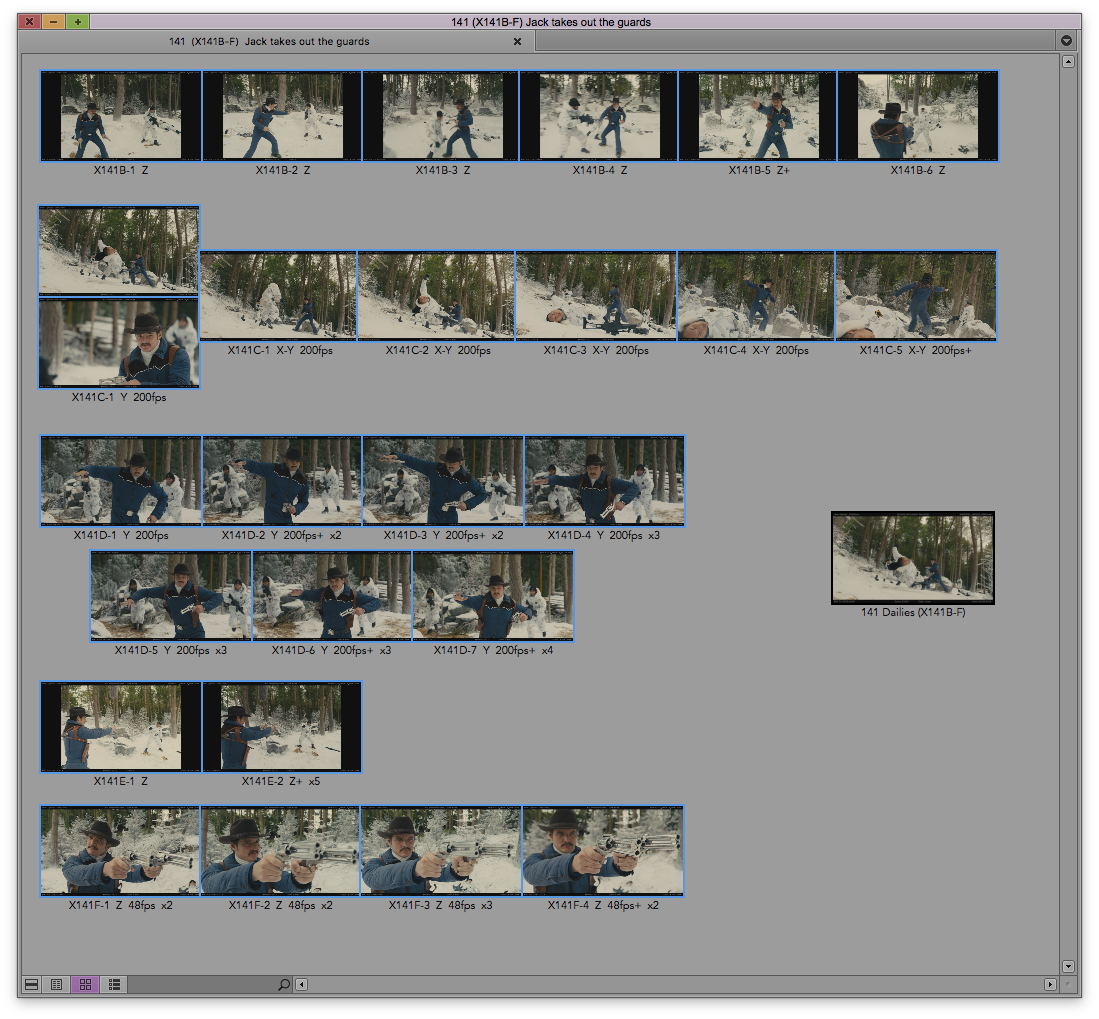 COOPE: We go off the continuity paperwork from the Script Supervisor as well as watching everything and we would add notes in the subclip name such as MOS. NS as “Not Shot.” And also the false starts. If it was something VFX related such as a plate, you’d add “PLATE” or “BALLS” if it was a VFX Ball pass. If they ran the scene a number of times in one take, we would put a marker on each call of “action” and when we got to the end, we would add those up and put x2 or x3 at the end of the subclip name depending on the number of re-starts within a take.
BACIGALUPO: We also use “+” at the end of the clip name in order to denote a selected (circled) take.
COOPE: That’s one of the great things about working with Eddie is that he is willing to adjust his system to help us with our workflow, its all a part of that evolving work environment ethos.
HULLFISH: Let’s talk a little more about the code book and what it does for you.
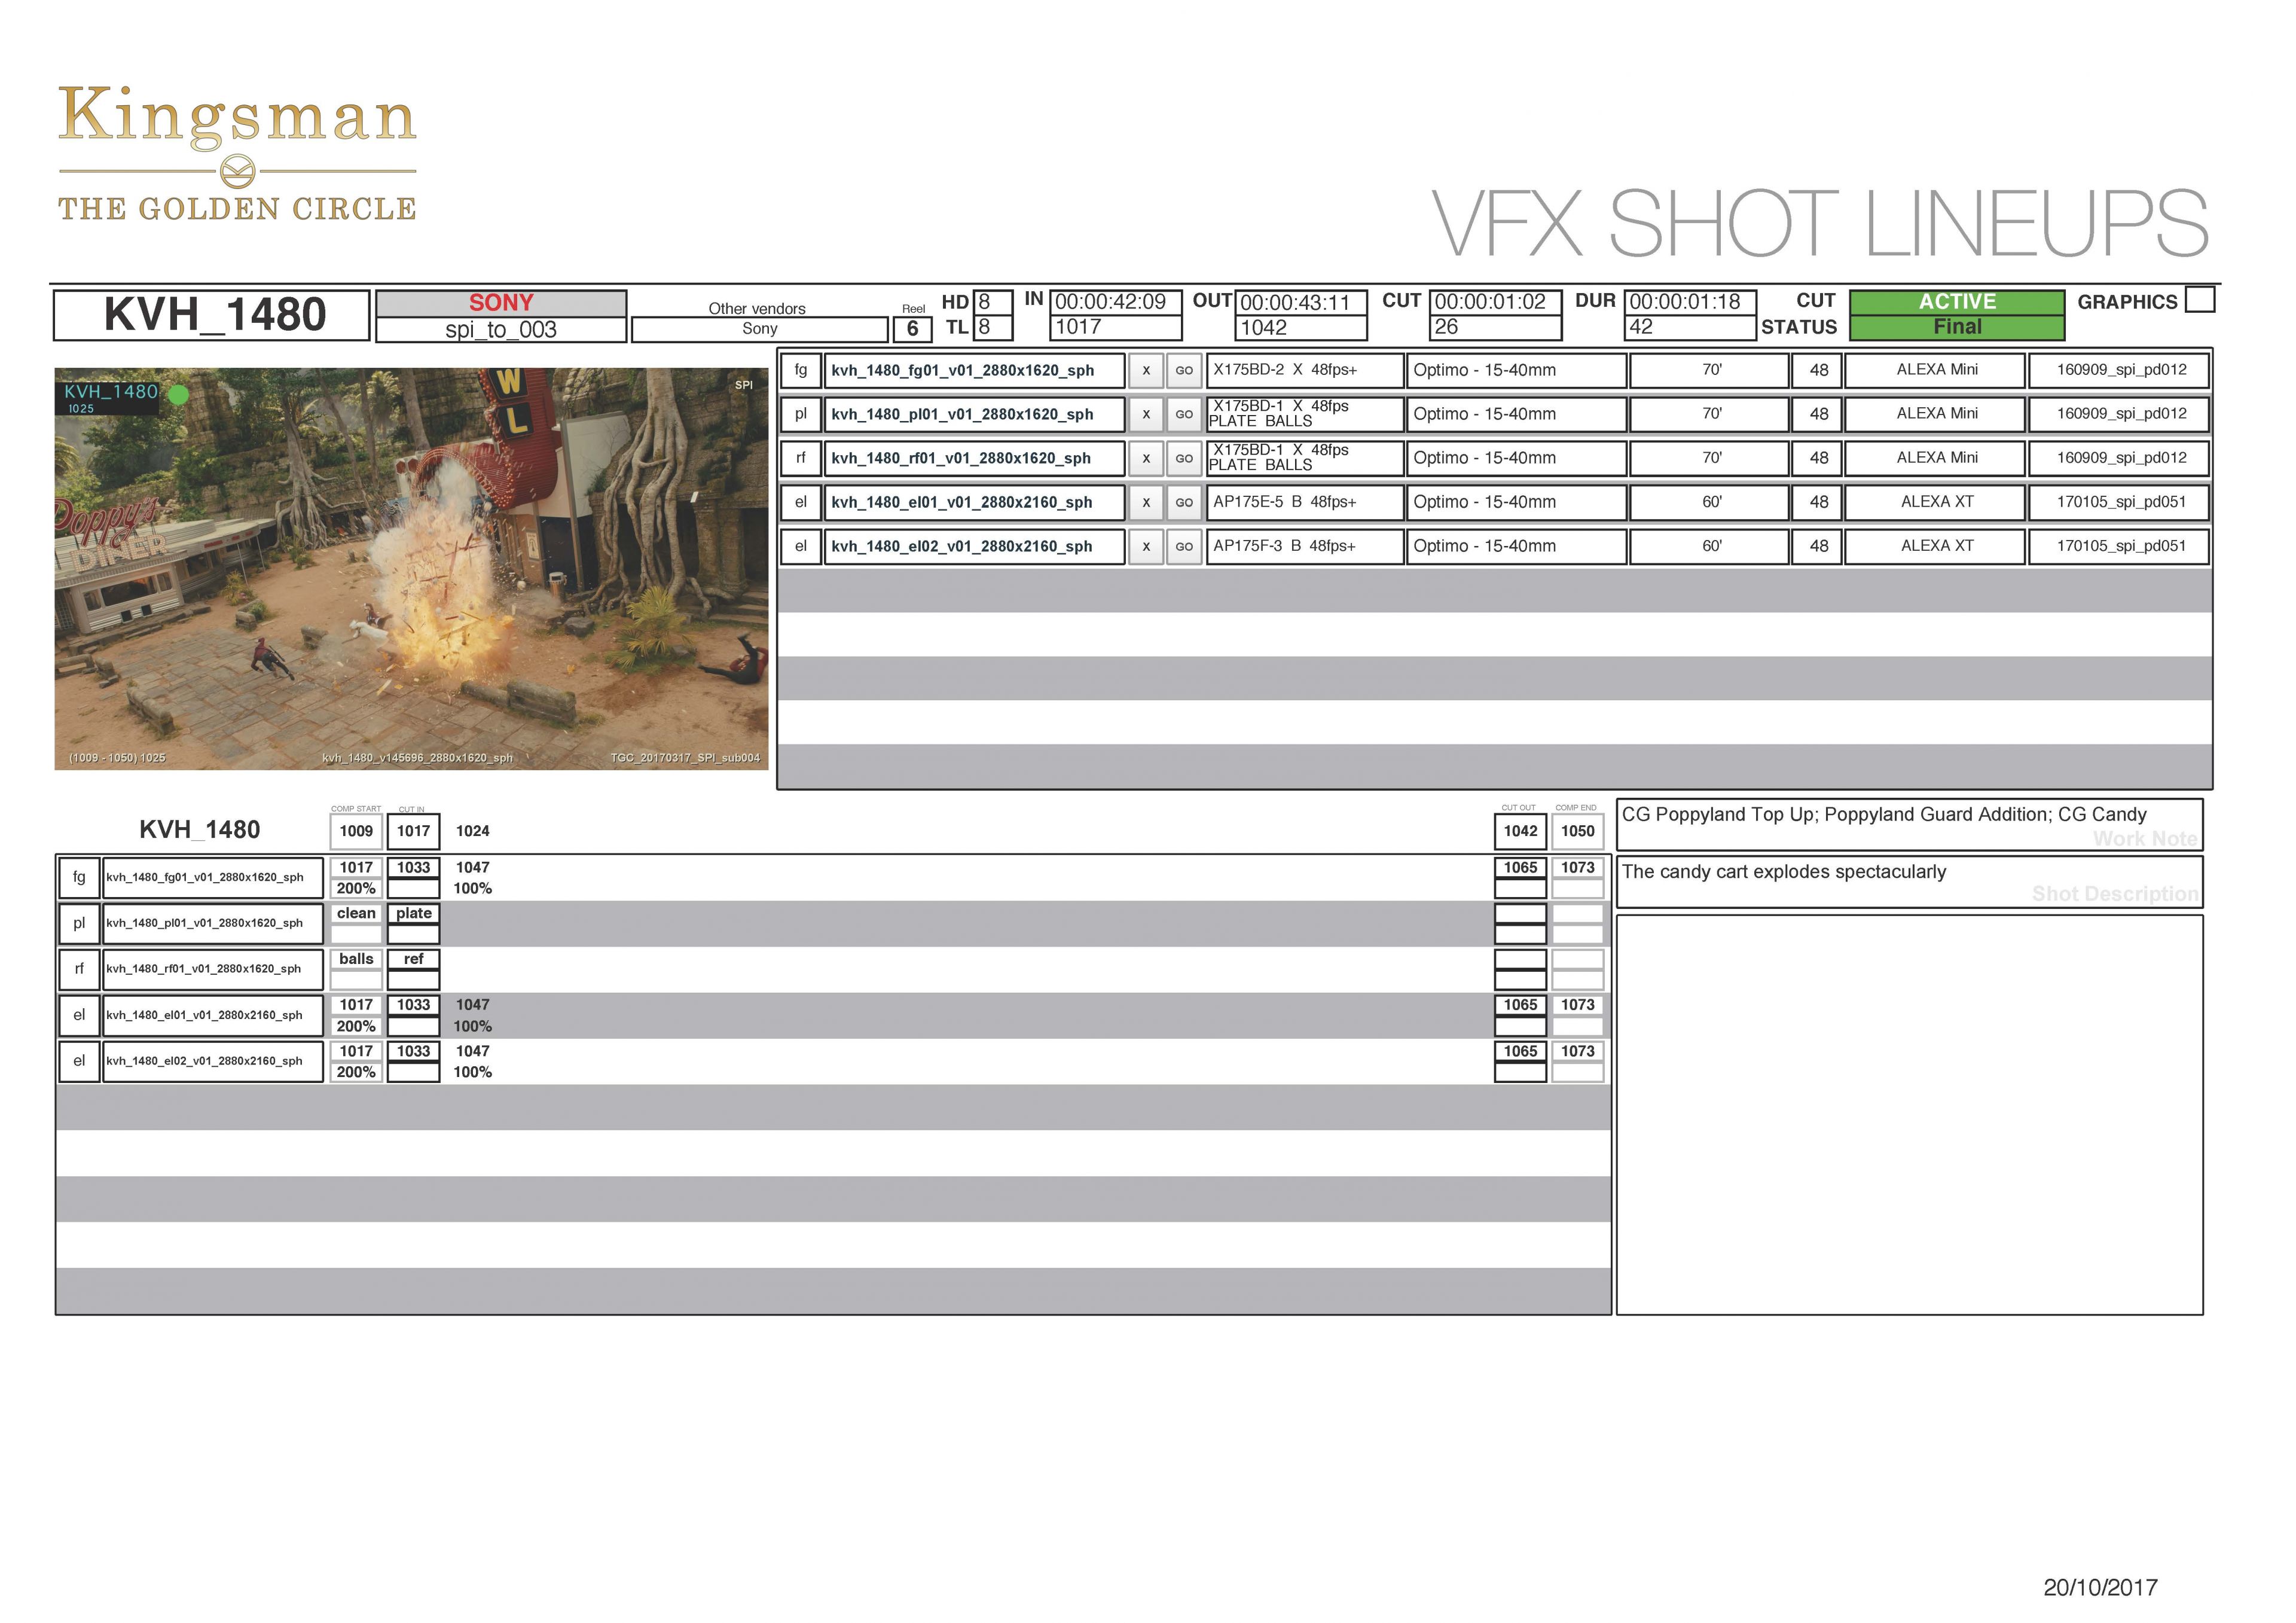
MILLS: We track a lot of data through the code book and it’s also the VFX Editorial database, so it pulls a lot of the metadata into plate turnovers and lineup sheets as well as helping assign VFX vendors and allowing us to dump raw complete data denoting the line up information so the vendor can just pull all this information in at their end. It’s even got a QuickTime log in it so we can track who we’ve sent files to. It’s got drive logs to see who we’ve sent drives to. Sorts out the PIX uploads and creates playlists, generates Studio Screening continuity documentation, creates scene cards and much much more. There’s a whole bunch of stuff in it I just built from the ground up since the first Kingsman. The guys just put in little feature requests and I update it as the requirements change and as the movie changes actually. I think the code book we’ve got for Mission 6 is probably the best one we’ve ever had.
BACIGALUPO: It’s really cool to have things completely automated that you were doing by hand just two films ago.
MILLS: It’s one that I built myself and it’s got a lot of useful stuff in it. I kind of built it out of the needs of becoming a VFX editor and needing to track the cut. I’ve had a multitude of different collaborators over the years who’ve helped suggest new features and help me build tricky scripts and workarounds, Barrie Hemsley (VFX Producer) was instrumental to this as is Robin Saxen (VFX Producer on Mission 6) who has helped no end.
Eddie lets us work quite happily in his reels, so when he is not working, we can go in and add shots, cut new submissions in and make sure that everything’s in line in order to track changes. What I try to do weekly is output an EDL of all the VFX titles that we have on the top couple of tracks, this is effectively our weekly audit. The shot titles have embedded timecode that corresponds to the submissions that come in, so it gives us a frame-range, and myself and Robbie Gibbon can track what was input previously and assess what’s changed, what’s extended, what’s been cut, what’s been reinstated – anything like that.
It’s basically like a change list, but more customized.
HULLFISH: Are you guys using the British slating system?
COOPE: No. Eddie insists on American and we all prefer that.
BACIGALUPO: Increasing your slate numerically so it has no link to the scene doesn’t make any sense.
HULLFISH: That’s my opinion, but I wasn’t going to question it to my British guests. I’ve talked to crews that are half British half American, and I think a lot of them switch to the American style. Anything else you want to say about the code book? Because those code books are like the beating heart of the editorial department.
BACIGALUPO: I think it’s the difference between a 10 hour shift and a 12 plus hour shift, because we’ve automated so much of it. When you’ve got a good team working together you can work a reasonable shift on a shoot day. They can be crazy long days because the amount of footage that they shoot nowadays… it can have a massive impact on your daily life.
COOPE: The code book generates screening notes as well for the studio. So when they receive their playlists for that day then we send an accompanying document which shows everything that’s been shot, but it’s really nicely laid out. Beautifully formatted. Each shot has a thumbnail and a description that was filled out in the Avid.
MILLS: It has everything the studio should need: In-point, out-point, clip name (slate, take, camera, select), start timecode, runtime. You can customize it however you want. Eddie would always have a few tweaks on it – mostly about how it actually looks – so it’s more aesthetically pleasing. I set it up so that as soon as you have created the screening notes it will generate a cover page, then it would export as a PDF.
BACIGALUPO: It was really a great evolution. We used to just put an Avid bin into Script view and export that as a PDF. We used to have to mess with print margins forever due to some of the limitations in AVID. It sounds trivial, but those are things that make a huge difference at the end of the day so that you’re not sitting there exporting a PDF eight times. You just hit export in the code book and in two seconds it’s done.

HULLFISH: And is there automation between the Avid and the code book? Are you using ALE? Or how do you get data from Avid to the code book?
COOPE: We do a tab delimited file. So it’s just a text file that comes out of the Avid and we have a specific bin view called “Code Book Export” and we save all of those TDL exports because they’re really tiny files.
FRITH: Ben’s code book also builds the PIX playlist. You just press “Make Playlist” and it pops up in PIX completely built.
MILLS: Back on About Time, I spoke to the guys, Lisa DiSanto at PIX and asked, “If I built the code book, can you give me the tools I need on this end?” And they figured out from the code book how to script the whole thing to talk to PIX and take out some of the heavy lifting for us.
FRITH: It makes a playlist of everything and also a playlist of just the selects which it gets from the Avid bin, so it’s pretty hands-off.
HULLFISH: OK, we’ve got the code book… what about prepping bins?
COOPE: Eddie’s very specific on how he wants those laid out, and they’ve changed quite a bit over the last few movies. On the first Kingsman, we would line up takes in a single row in Frame view. We’d auto-align those using the Avid function, which puts a gap between clips. But on this film, Eddie wanted us to butt the Frames up to each other, so they would create a kind of filmstrip. That’s not an automated thing and it has to be pixel perfect because if you line it up slightly wonky it can look very messy.
COOPE: Also, the image that is represented by the thumbnail in the bin, we would change those by marking an IN point on each clip and hitting “Go To In” and then setting the thumbnail to that image. On the first Kingsman we would set up the thumbnail on a common image for each set-up. But now, let’s say there are ten takes in a set up — he wants to see a progression of the shot through those thumbnails.
BACIGALUPO: So you can see the camera move if it’s tracking in on someone. So if it starts wide and moves in to a tight close-up, those 10 thumbnail actually show in still images the moving camera going from wide to close.
HULLFISH: One of the things that’s revealed across the breadth of these interviews is the different techniques that people prefer, like this film-strip approach versus every set-up represented by an identical frame. There are some in each camp and I think people learn the technique from working with each other.
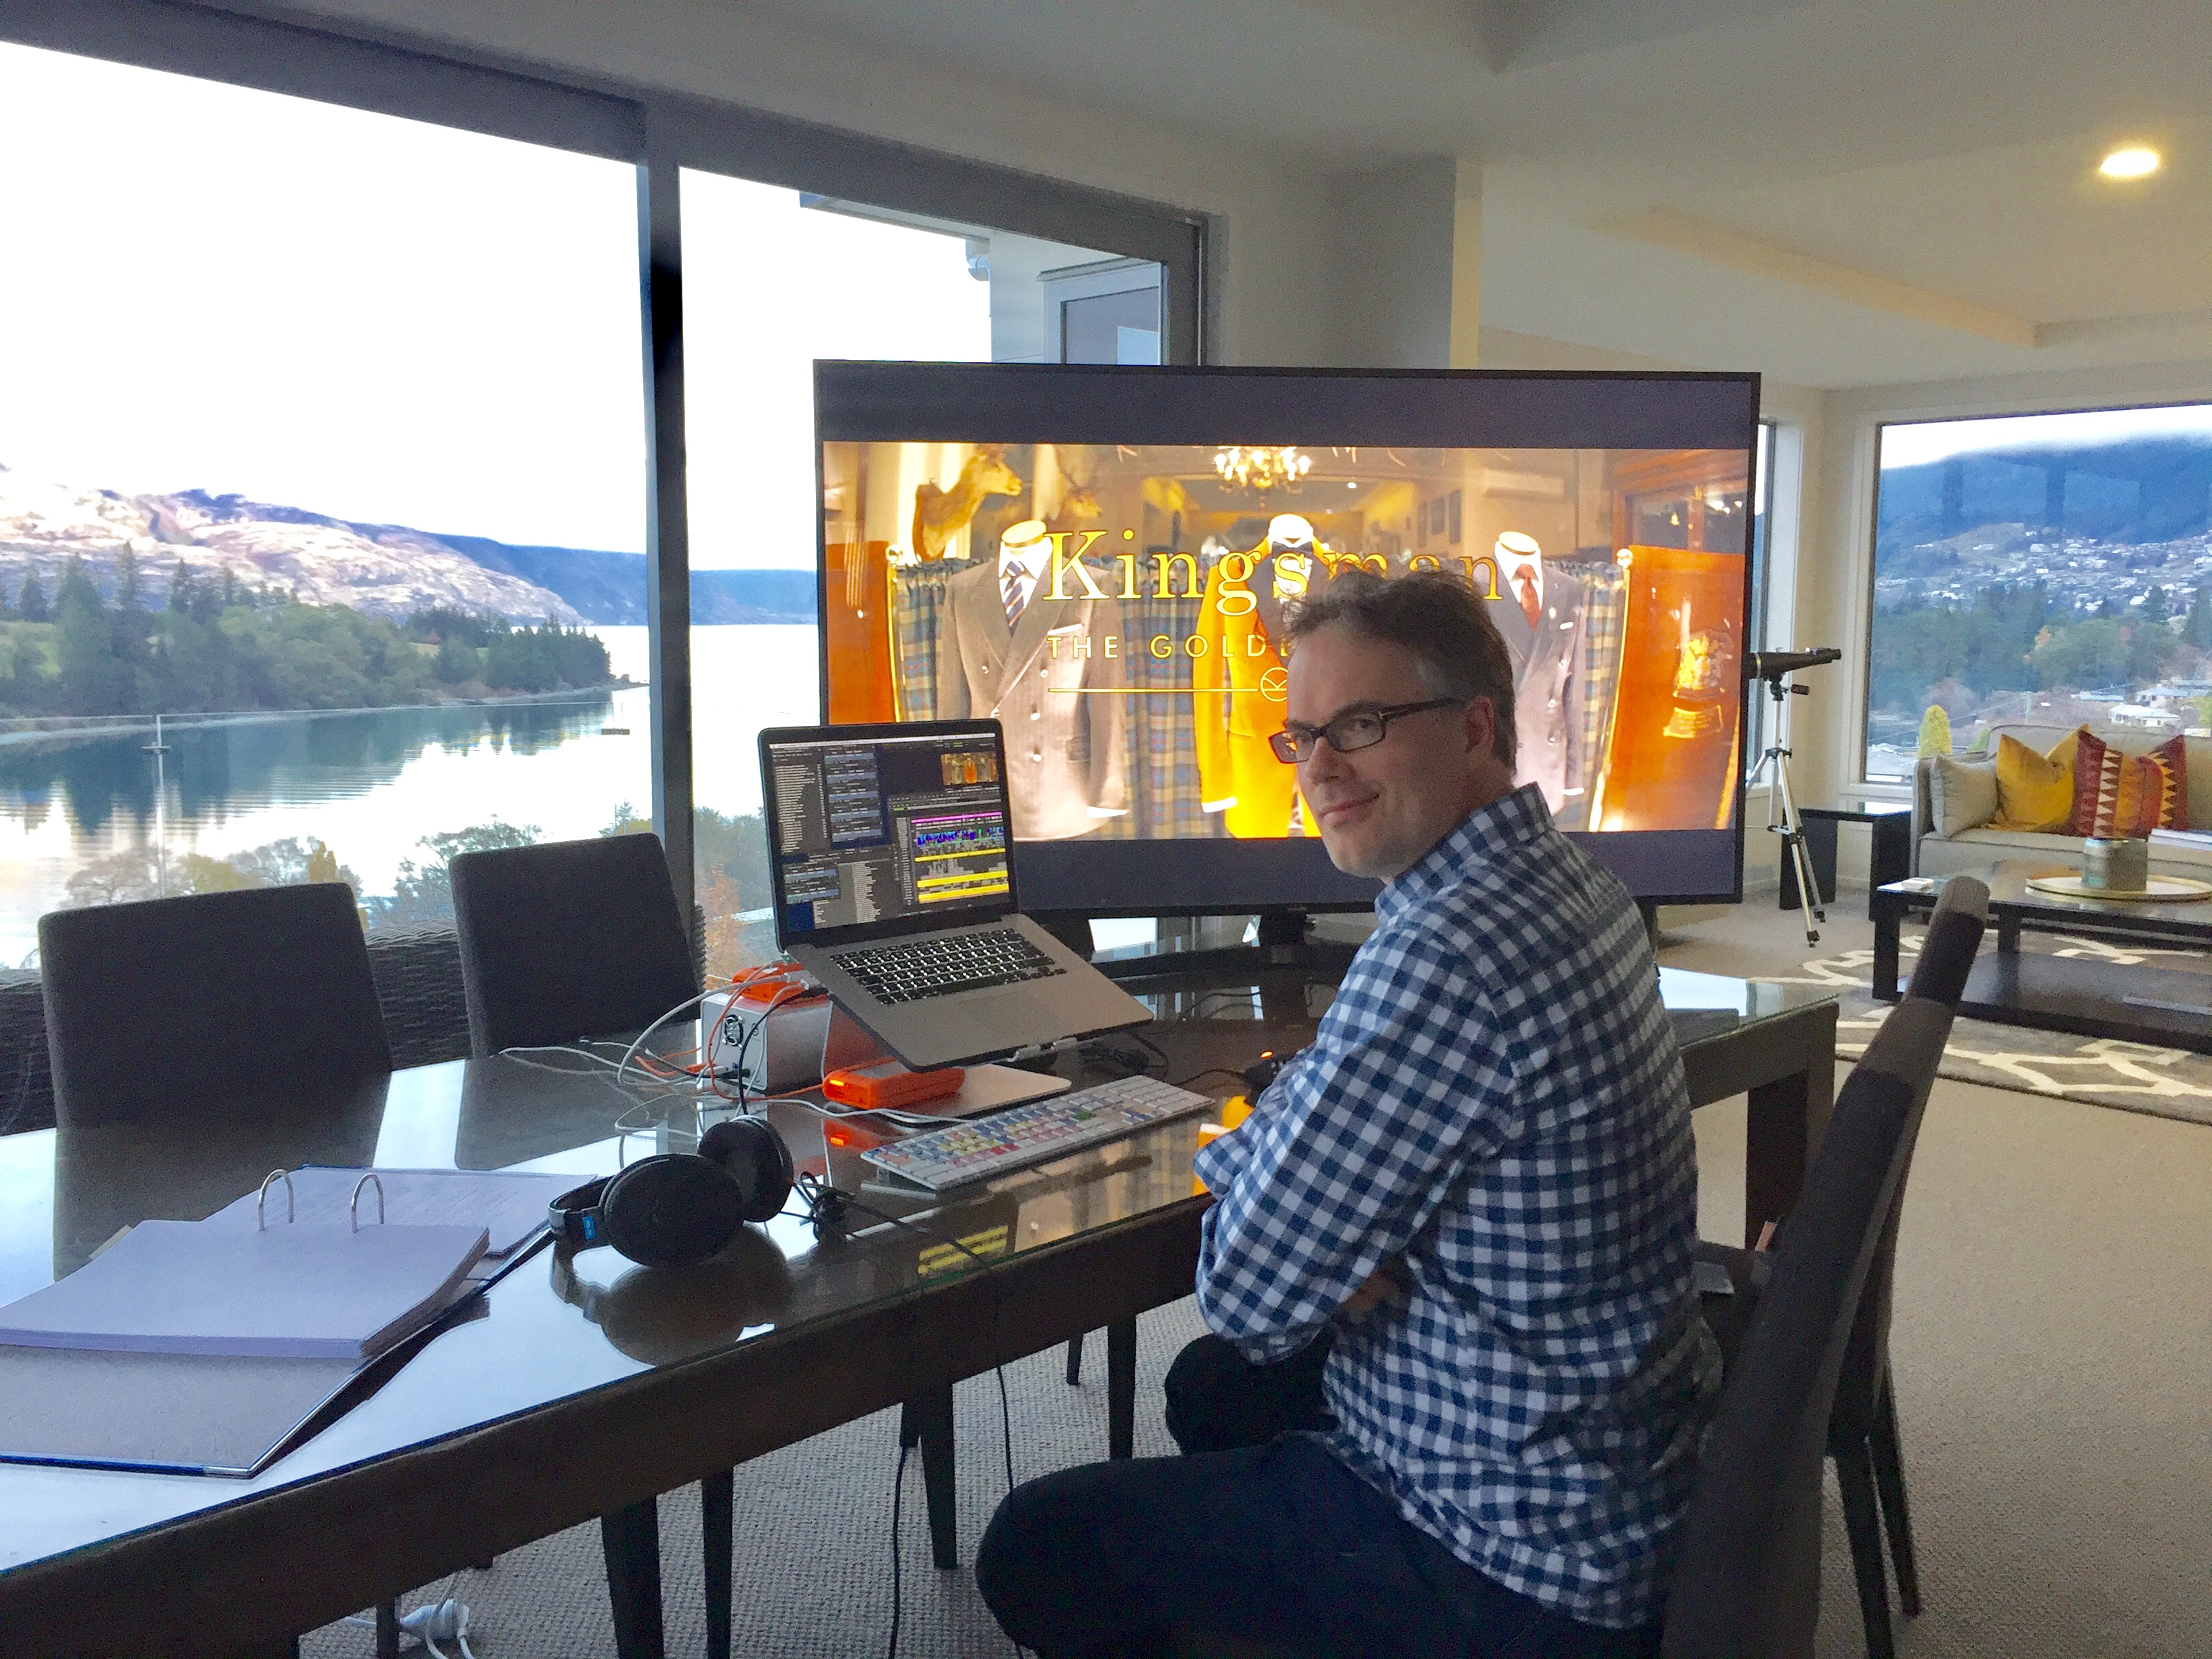 BACIGALUPO: Something else that shows how he thinks, because he’s so technically adept – is that he is fine moving from one environment to the next, and from one computer set-up to the next and adapting how he works to cater for it. So he’ll move from his main 5.1 cutting room with dual 30” monitors and 65” OLED to editing the movie on just his laptop on the stage or in the director’s hotel room, or wherever is needed if they’re on location.
When he moves to a smaller screen, the spacing of the clips in the bin changes slightly because he’ll shrink the size of the thumbnails so he can still see them all because he doesn’t like to have to scroll in his bin to see all of the setups.
HULLFISH: Lots of people are like that. So if there are too many shots in a bin to allow that, you go to a second part bin on that scene?
COOPE: Yeah. We label those bins by the letters in the set-up.
FRITH: That’s another evolution that happened on Rogue Nation.
BACIGALUPO: When we were doing Kick-Ass 2 and the first Kingsman, the bins were broken into parts but they used to be labelled: “081 Harry talks to Eggsy pt1”, “pt2” and so on, but then the Rogue Nation team suggested changing the naming to reflect the actual set-ups in the bin name so you could see at a glance what a bin contained.
HULLFISH: So in the bin did you lay out the set-ups in a row? Did you go strictly numerically top to bottom, or by shot size?
COOPE: Ascending numerical order.
BACIGALUPO: And if you’ve got five takes and all five are shot with multiple cameras then take one would have the single A cam and B cam subs sitting one on top of each other, and then the group clip would be on the right next to them, with no gap, so that take one looks like a triangle on it’s side.
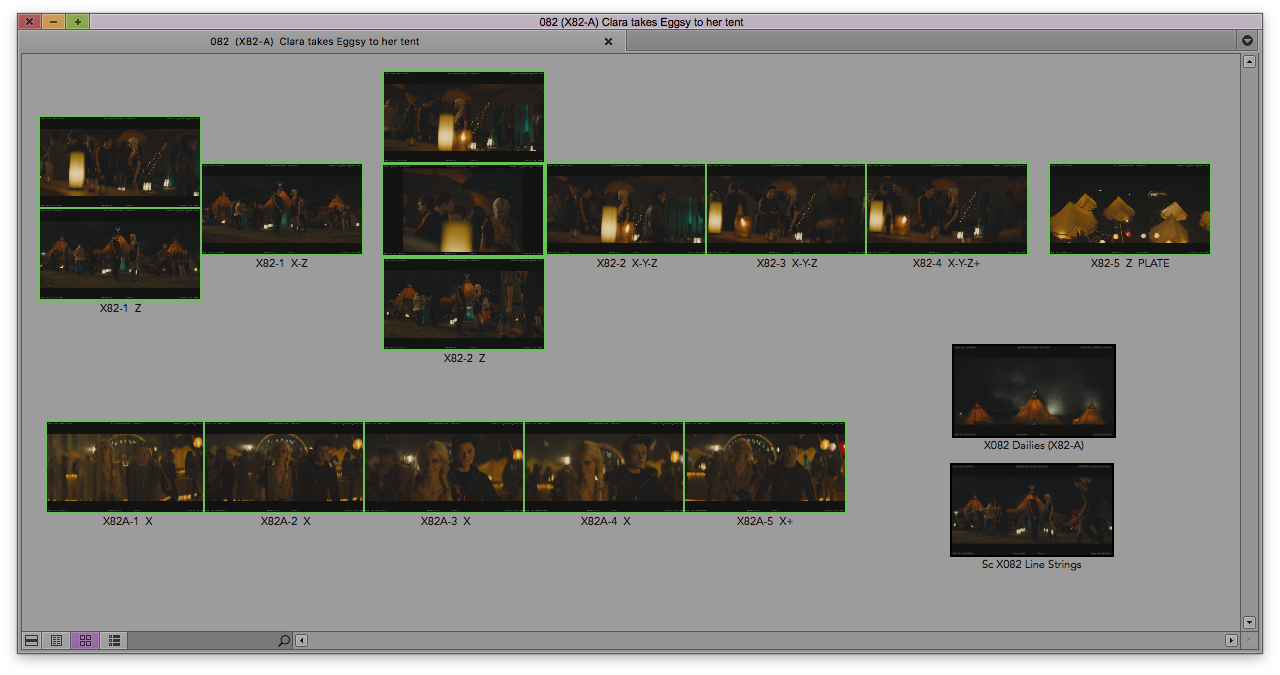 But then we don’t keep the A and B cam individual subclips for takes two through five in the scene bin. He only has the group clips for takes two to five in there and they sit next to each other in a line.
If it was a four camera group for example, take 1 would be a block of four cameras as a square with the groups sitting next to it in a line as well.
FRITH: We’ll also create a dailies sequence in each scene bin. And if there were multicam group clips, we’d cut them into the dailies sequence however many times there were cameras in the group, and then in the timeline, we’d swap each multicam clip so each one showed a different camera.
BACIGALUPO: And he wants to have all of the audio tracks available on that dailies sequence, but we’d solo the mix track. And then we’d top and tail, so on that sequence, it would just be “action” to “cut”.
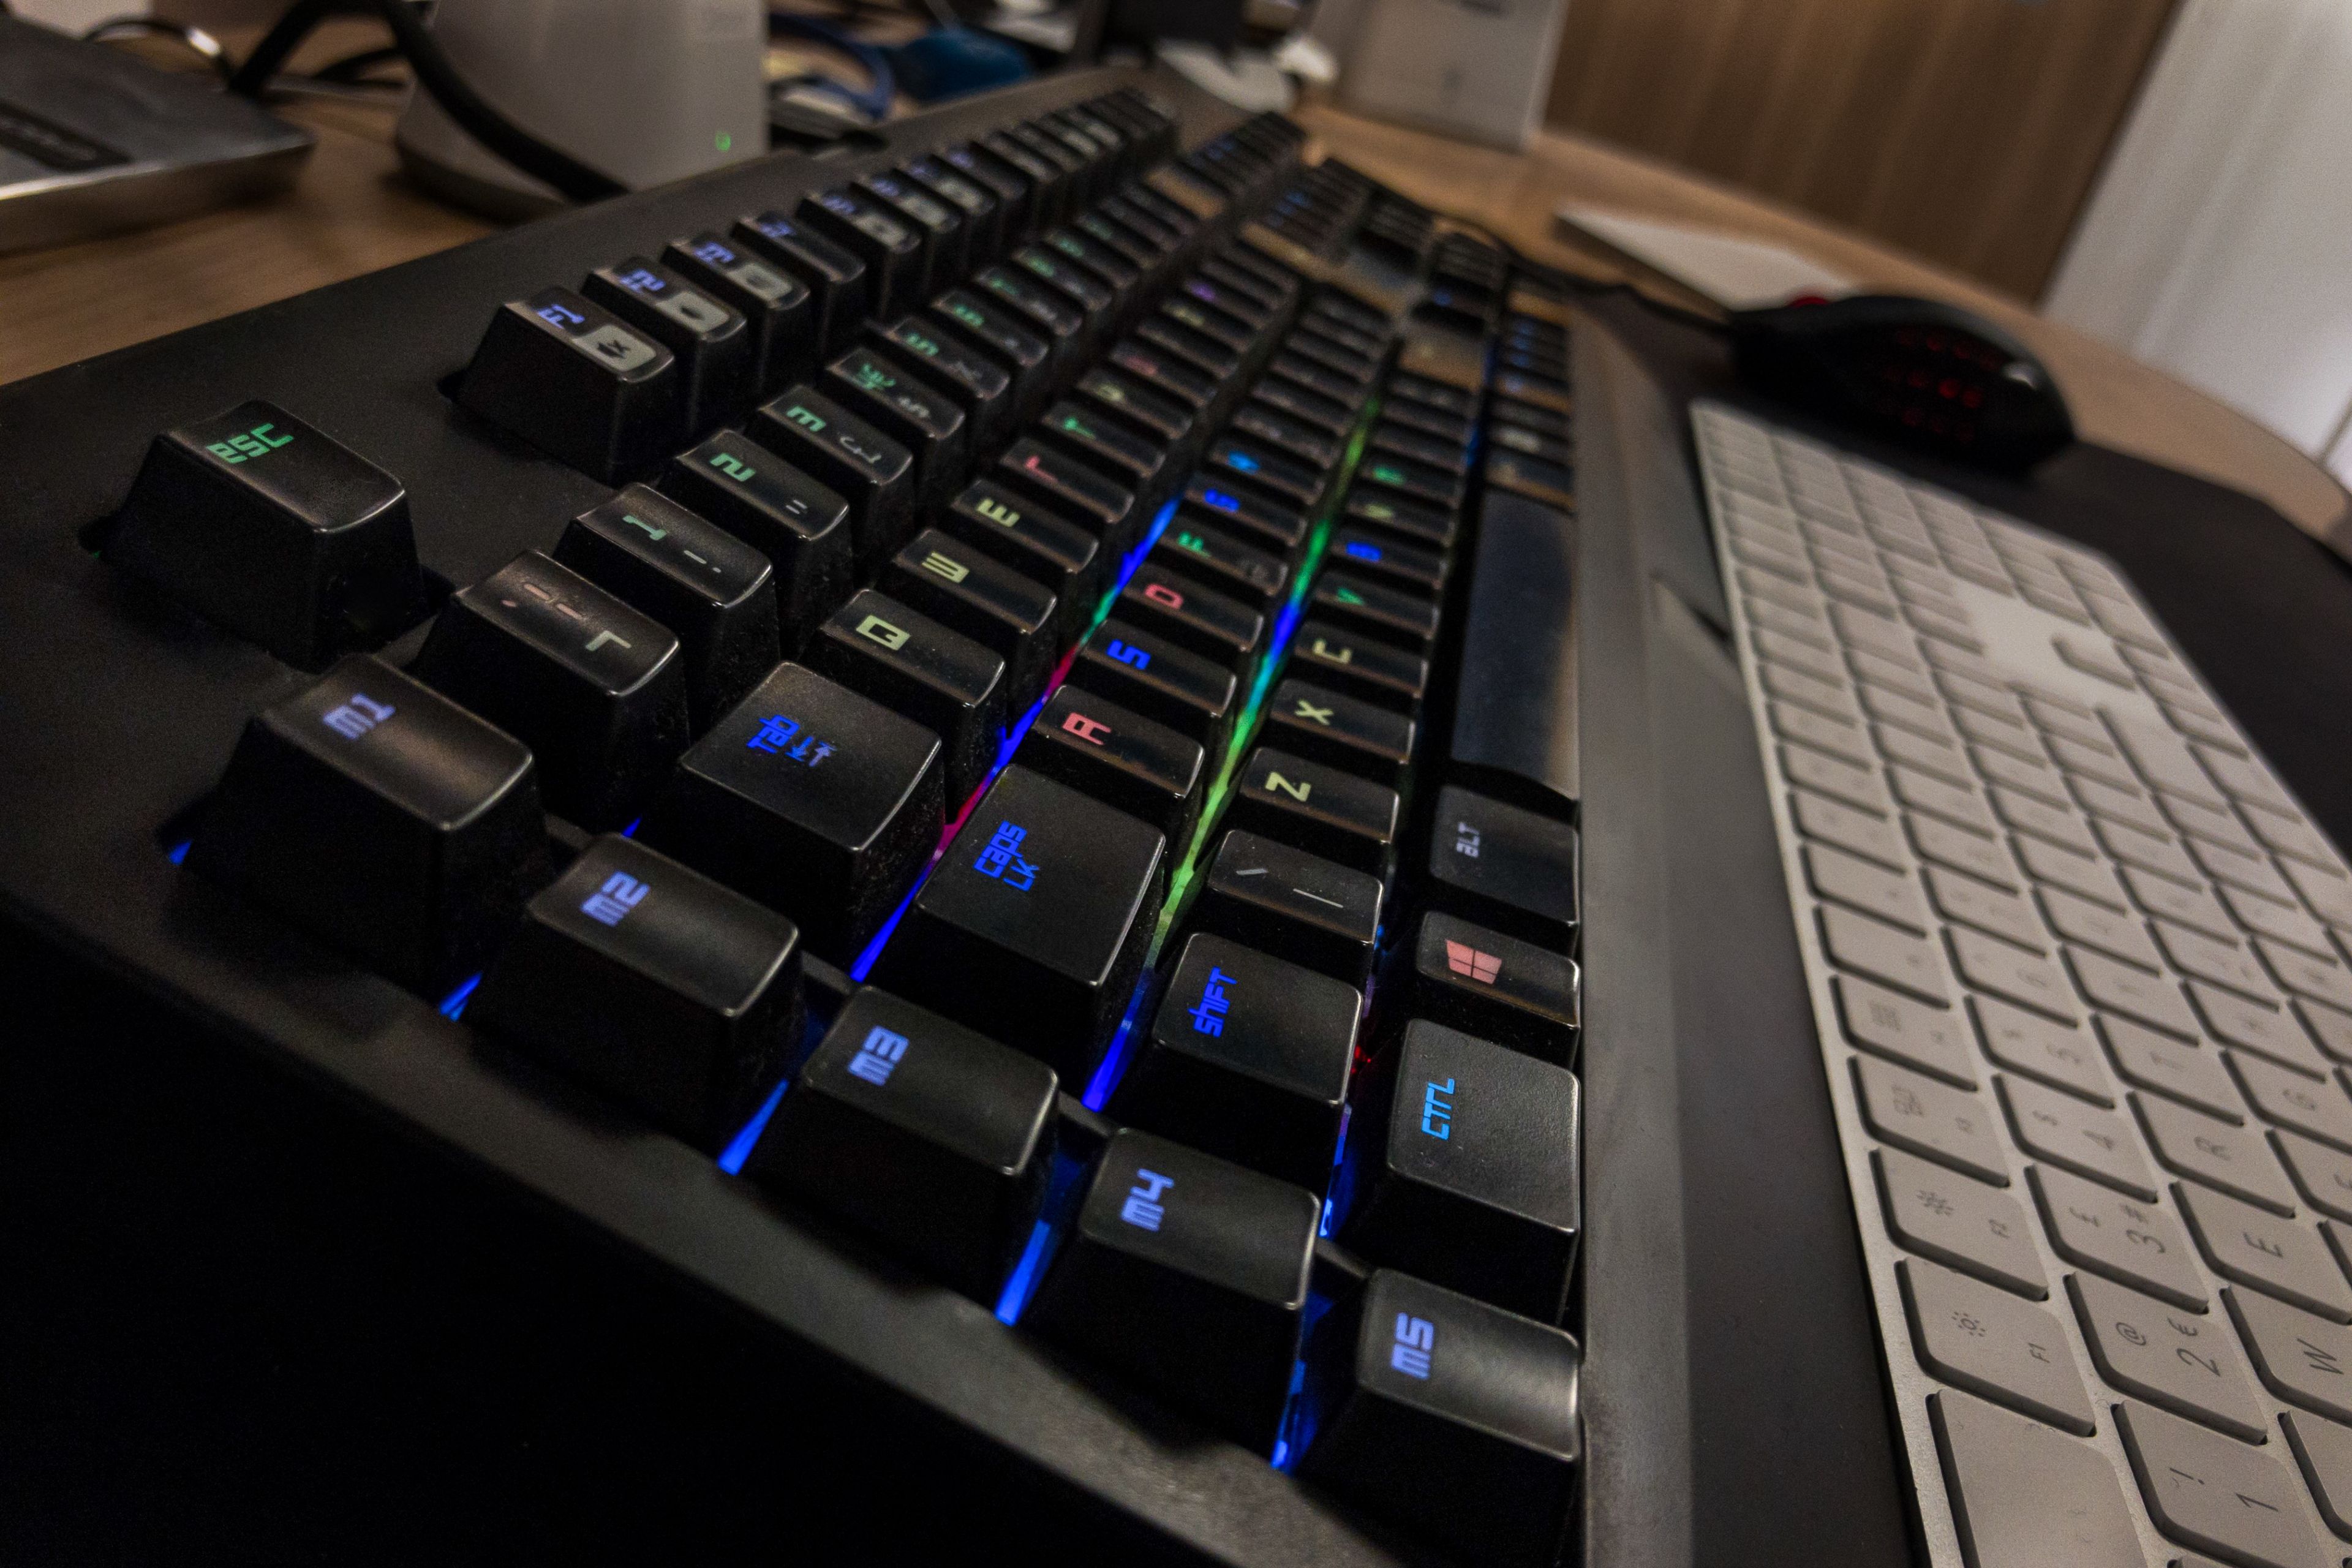
We all use a Razer Naga gaming mouse and that’s something we’d use a macro for where we need to chop the start and end off each sub-clip. So we have a macro which automatically jumps the playhead to the next marker which would be the call of action on the next sub-clip, then the playhead would automatically move back 12 frames and then top the sub-clip. So you’d just hit one button and it would just rip through the whole sequence, and then we repeat for the tail-ing.
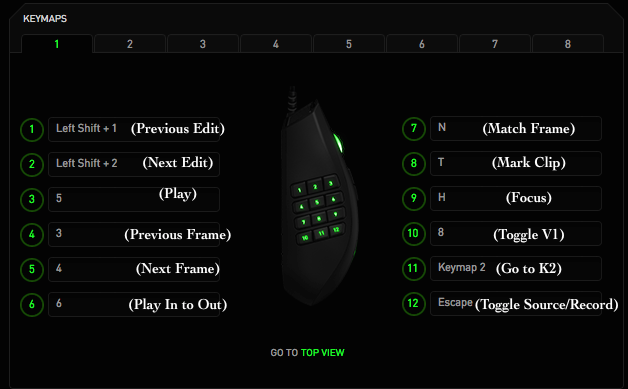
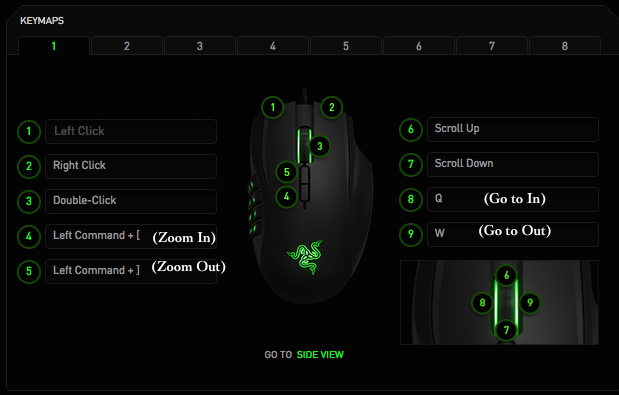 COOPE: It’s just the things that we do to try to make our work easier with the mouse and keyboard. There’s no point pressing the same buttons 200 times.
FRITH: We also have macros for renaming clips to get rid of Avid auto-naming things, like the “copy.01” or “.new” suffixes. We also have macros for over-cutting audio. If Eddie has cut something mute and we need to restore the sound to it for an export or something. We’ve each got loads of macros. I wouldn’t want to do a job without them.
HULLFISH: Are those macros in a macro program? Or are they macros that are tied to the Razer mouse?
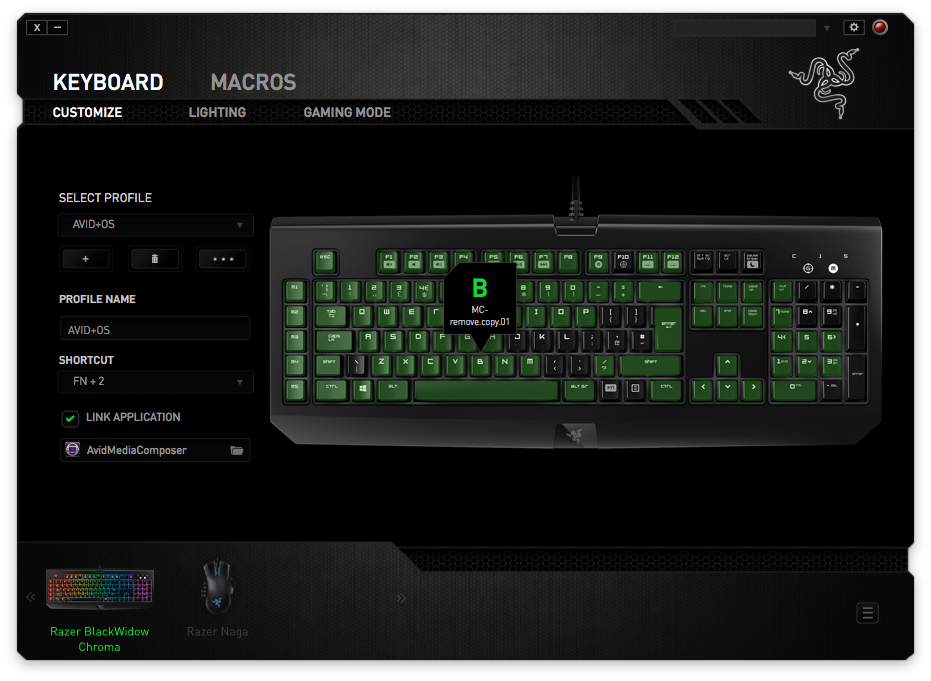 MILLS: The macros are tied to the mouse. Both myself and Riccardo also have the Razer gaming keyboard, so there are macros on both the mouse and the keyboard. The mice have 17 or 19 buttons depending on the model. So you can add macros to all of those. Even for getting into effects mode, you just have it as one click on your mouse.
BACIGALUPO: They are tied to the Razer hardware though. You can’t export them and use them with a different company’s product. We can share them between ourselves though. So if someone comes up with a cool way to do something you can just pop the macro on the ISIS in our shared work zone and people can import at their leisure. The Windows version of the macro program is super-stable because most gamers are Windows based and it’s really a gaming mouse, but the Mac version is lagging behind a bit in stability.
HULLFISH: What computers are you guys all working on?
MILLS: We are a mix of the older Mac Pro (5,1 model) and the newer Trashcan Mac Pros. (6,1 model) all varying specs with minimum being a 6 core.
HULLFISH: What happens after Eddie cuts a scene? What do you guys have to do at that point?
BACIGALUPO: Matthew wants to be up to date on the latest cut where ever he is, so the production hired Useful Companies, who are one of the big industry IT providers, and they set up a secure VPN-encrypted tunnel between the cutting room and an iMac that Matthew had in his office at his house. We used some software called File Sync to synchronize the ISIS media and all its partitions and files to a G-Speed Q (http://www.g-technology.com/products/g-speed-q) which had a capacity of thirty-two terabytes (Raided down to 24 for protection). That became an exact mirror of our ISIS and every day we automatically synced the day’s files to his secure workstation. Eddie requested the Lab transcode our drama dailies to DNxHD 36 for this purpose, so that we had less data to sync overnight. This way we could be confident the sync would always be complete by the morning.
HULLFISH: So Matthew had a full Avid at his house and you guys never had to export viewing sequences, because the stuff was just syncing from the cutting room.
BACIGALUPO: Yes the ISIS was considered “Master Source 1” and was never connected to the internet or any other networks at all, and we used the sync software to clone it to the internal RAID of a stand alone computer which in turn, only had a direct connection through the encrypted VPN to Matthew’s iMac.
When we needed to sync to Matthew, we would disconnect it from the ISIS and the Master Source then temporarily became the internal RAID. The sync software looks at the Destination (Matthew’s iMac) and whatever files the Destination doesn’t have, it just copies straight over from the Source, and it’s smart enough to look at a metadata in terms of modified date, creation date etc… and just update what is needed.
 COOPE: So if Eddie wanted to show Matthew the first cut of a scene, and we’d already synced the media over, we wouldn’t need to export a QuickTime. We would just put the scene in a bin for Matthew to view and he could see the cut in minutes via 2 stages of sync protocols.
BACIGALUPO: We could also control the sync, so if we just wanted to sync a few bins, but there were also 20GB of additional media, we could temporarily ignore that and just send the bins over immediately, then overnight send the media in the background.
It wasn’t just file movement, it was screen-sharing as well. There was a particularly cool moment where Eddie was in front of the stand alone system and he was screen sharing onto the Avid that Matthew was looking at and in real time doing edits and changes based on the phone call he was having. So he could show Matthew the changes that he was envisioning in his head at that moment.
HULLFISH: That’s awesome.
COOPE: Also, during the latter part of the shoot, Matthew wanted Eddie to be working on set. So in a collaboration between TransLux and Vivid Rental – who were providing the Avid equipment – they built a trailer which basically followed the main unit around and had a full Avid and 5.1 surround speakers. Eddie would be on location and we would have two high capacity Raided hard-drives that we would shuttle back and forth which were also exact mirrors of the ISIS. The drives were named after characters in the film.
BACIGALUPO: Whiskey, Ginger, Tequila and Merlin.
COOPE: The Lab was generating gigabytes of data, so during that period there were some early starts because we needed to get that media copying onto the drive that we had in the cutting room, and then that was driven by a unit driver to the set, which could be an hour away. Meanwhile, Eddie would be in the trailer working on the drive he had from the previous day. Then when the driver got there, they’d swap the drive out and he’d start working with the new material. And the old drive would be brought back to us so that we could update it for the next morning.
BACIGALUPO: And while that’s going on, we’re also working on scene bins for Eddie and using a secure file transfer, like Aspera, so once a scene bin is finished, each of us has an Aspera account and we’d Aspera it to Eddie.
HULLFISH: What was happening with turnovers and audio and anything else that you guys had to do as Eddie finished a scene?
 MILLS: We’d have regular conversations with Matthew, Eddie, VFX Supervisor, Angus Bickerton, VFX Producer, Barrie Hemsley and VFX Production Manager Nikeah Forde, just to determine where we were with certain sequences creatively and which scenes were to be prioritized in terms of difficulty and complexity. We would also discuss what was being done in terms of concept design and what we should be presenting to Matthew. It was an ongoing conversation that happened most days.
So, when Eddie was happy with a sequence, we could start to turn it over. We had sixteen tracks of video on the timeline in total, and six would be for visual effects editorial. There were two tracks for visual effects titles because some VFX shots have to transition from an A side to a B side, so we needed two title tracks to be able to track the full duration of each shot, and then the next two tracks above that are for plates.
So once we’ve created plates within the Avid, which we do by decomposing timelines and creating new sub clips in order to automatically add handles of varying length dependent on if they have a re-speed applied. We’ll cut those back into the time line, and we do this because it’s a good way to flag if a shot is being extended beyond its handles.
If Eddie can’t extend a cut beyond the handles, as he has the VFX Plates track locked to his video tracks when cutting, then he knows that this is what we turned over to VFX, and if he wants to extend the shot further, it will mean re-sending it to VFX and having them revise the work. That way he can assess it and make a call on the fly. All in all its incredibly collaborative and Eddie is so incredibly conscious of all the moving parts going on outside of the cutting room and this helps the post production process ten fold. If that’s a high priority shot, then we can quickly flag to VFX and then we can start pursuing sending the changes to the vendor.
Now on this show (Mission 6) one of the additional tracks we’re using is VFX Version, which is a collapsed clip of all the previous versions. We only keep the latest temp comps and the latest 2 or 3 versions from the vendors in the timeline itself, and all previous versions are now in a collapsed track at the top of the project.
Once we’re into reels that’s when we’d start auditing the cut and that would be based off of the VFX titles. I wrote a script in Filemaker in order to compare what the original in/out point, duration, reel or order of a shot was with the current cut. If any of this criteria has changed then it’ll flag it immediately. It helps us massively to be able to check what’s changed in a cut in only a matter of minutes, instead of manually going through shot by shot.
HULLFISH: For those who haven’t seen a timeline with these kinds of VFX in them, the VFX Titles you’re talking about is basically a layer — or two — which I’m assuming you’re creating in the Title Tool, that identifies, “Here’s the number and name of the VFX shot, so that when you’re having communications with the VFX vendors, you’re all communicating using the same names and reference frames.

MILLS: Spot on Steve, it actually also delivers the comp frame range, so it’s the frame number for the entire shot itself as it will come back finished to us. So if there’s an error in frame 1032 of an effect that they send back to us, that’s synced to our sequence. For each of these clips we have a bit of media which I created which is just a frame counter that counts from 0 up to 3,000, (more than 2 minutes) so that’s in there as well in addition to using the Title tool. So it’s really a collapsed clip that contains a bit of media — the counter with the frame numbers — and the title.
HULLFISH: So all of those VFX need to also be rolled into your Filemaker Pro codebook. And that needs to get fed to the vendors as well?
MILLS: Yes, everything is logged there before turnover and constantly as the cut evolves. The things that we issue for VFX shots varies from vendor to vendor. On Kingsman there were eight vendors. On Mission, we have one or two. It’s all vendor-specific as to what sort of media they want to receive. Some vendors use Avid, so they’ll happily receive a bin and a mixdown, which obviously contain watermarks for security and everything else and makes it easier to pass re-speeds and other shot information back and forth.
Other vendors would only receive a QuickTime of an edit and wouldn’t have an avid bin as they were using a different NLE. The bin is actually very useful with Eddie because he does a lot of frame-cutting and a lot of re-speeds so we generally think that if the vendor is on the same wavelength and uses Avid, then it’s easy for them to see what he’s doing and avoids them having to come back to us with any questions as all the information is there, not only logged in paperwork but also visible in a timeline for them.
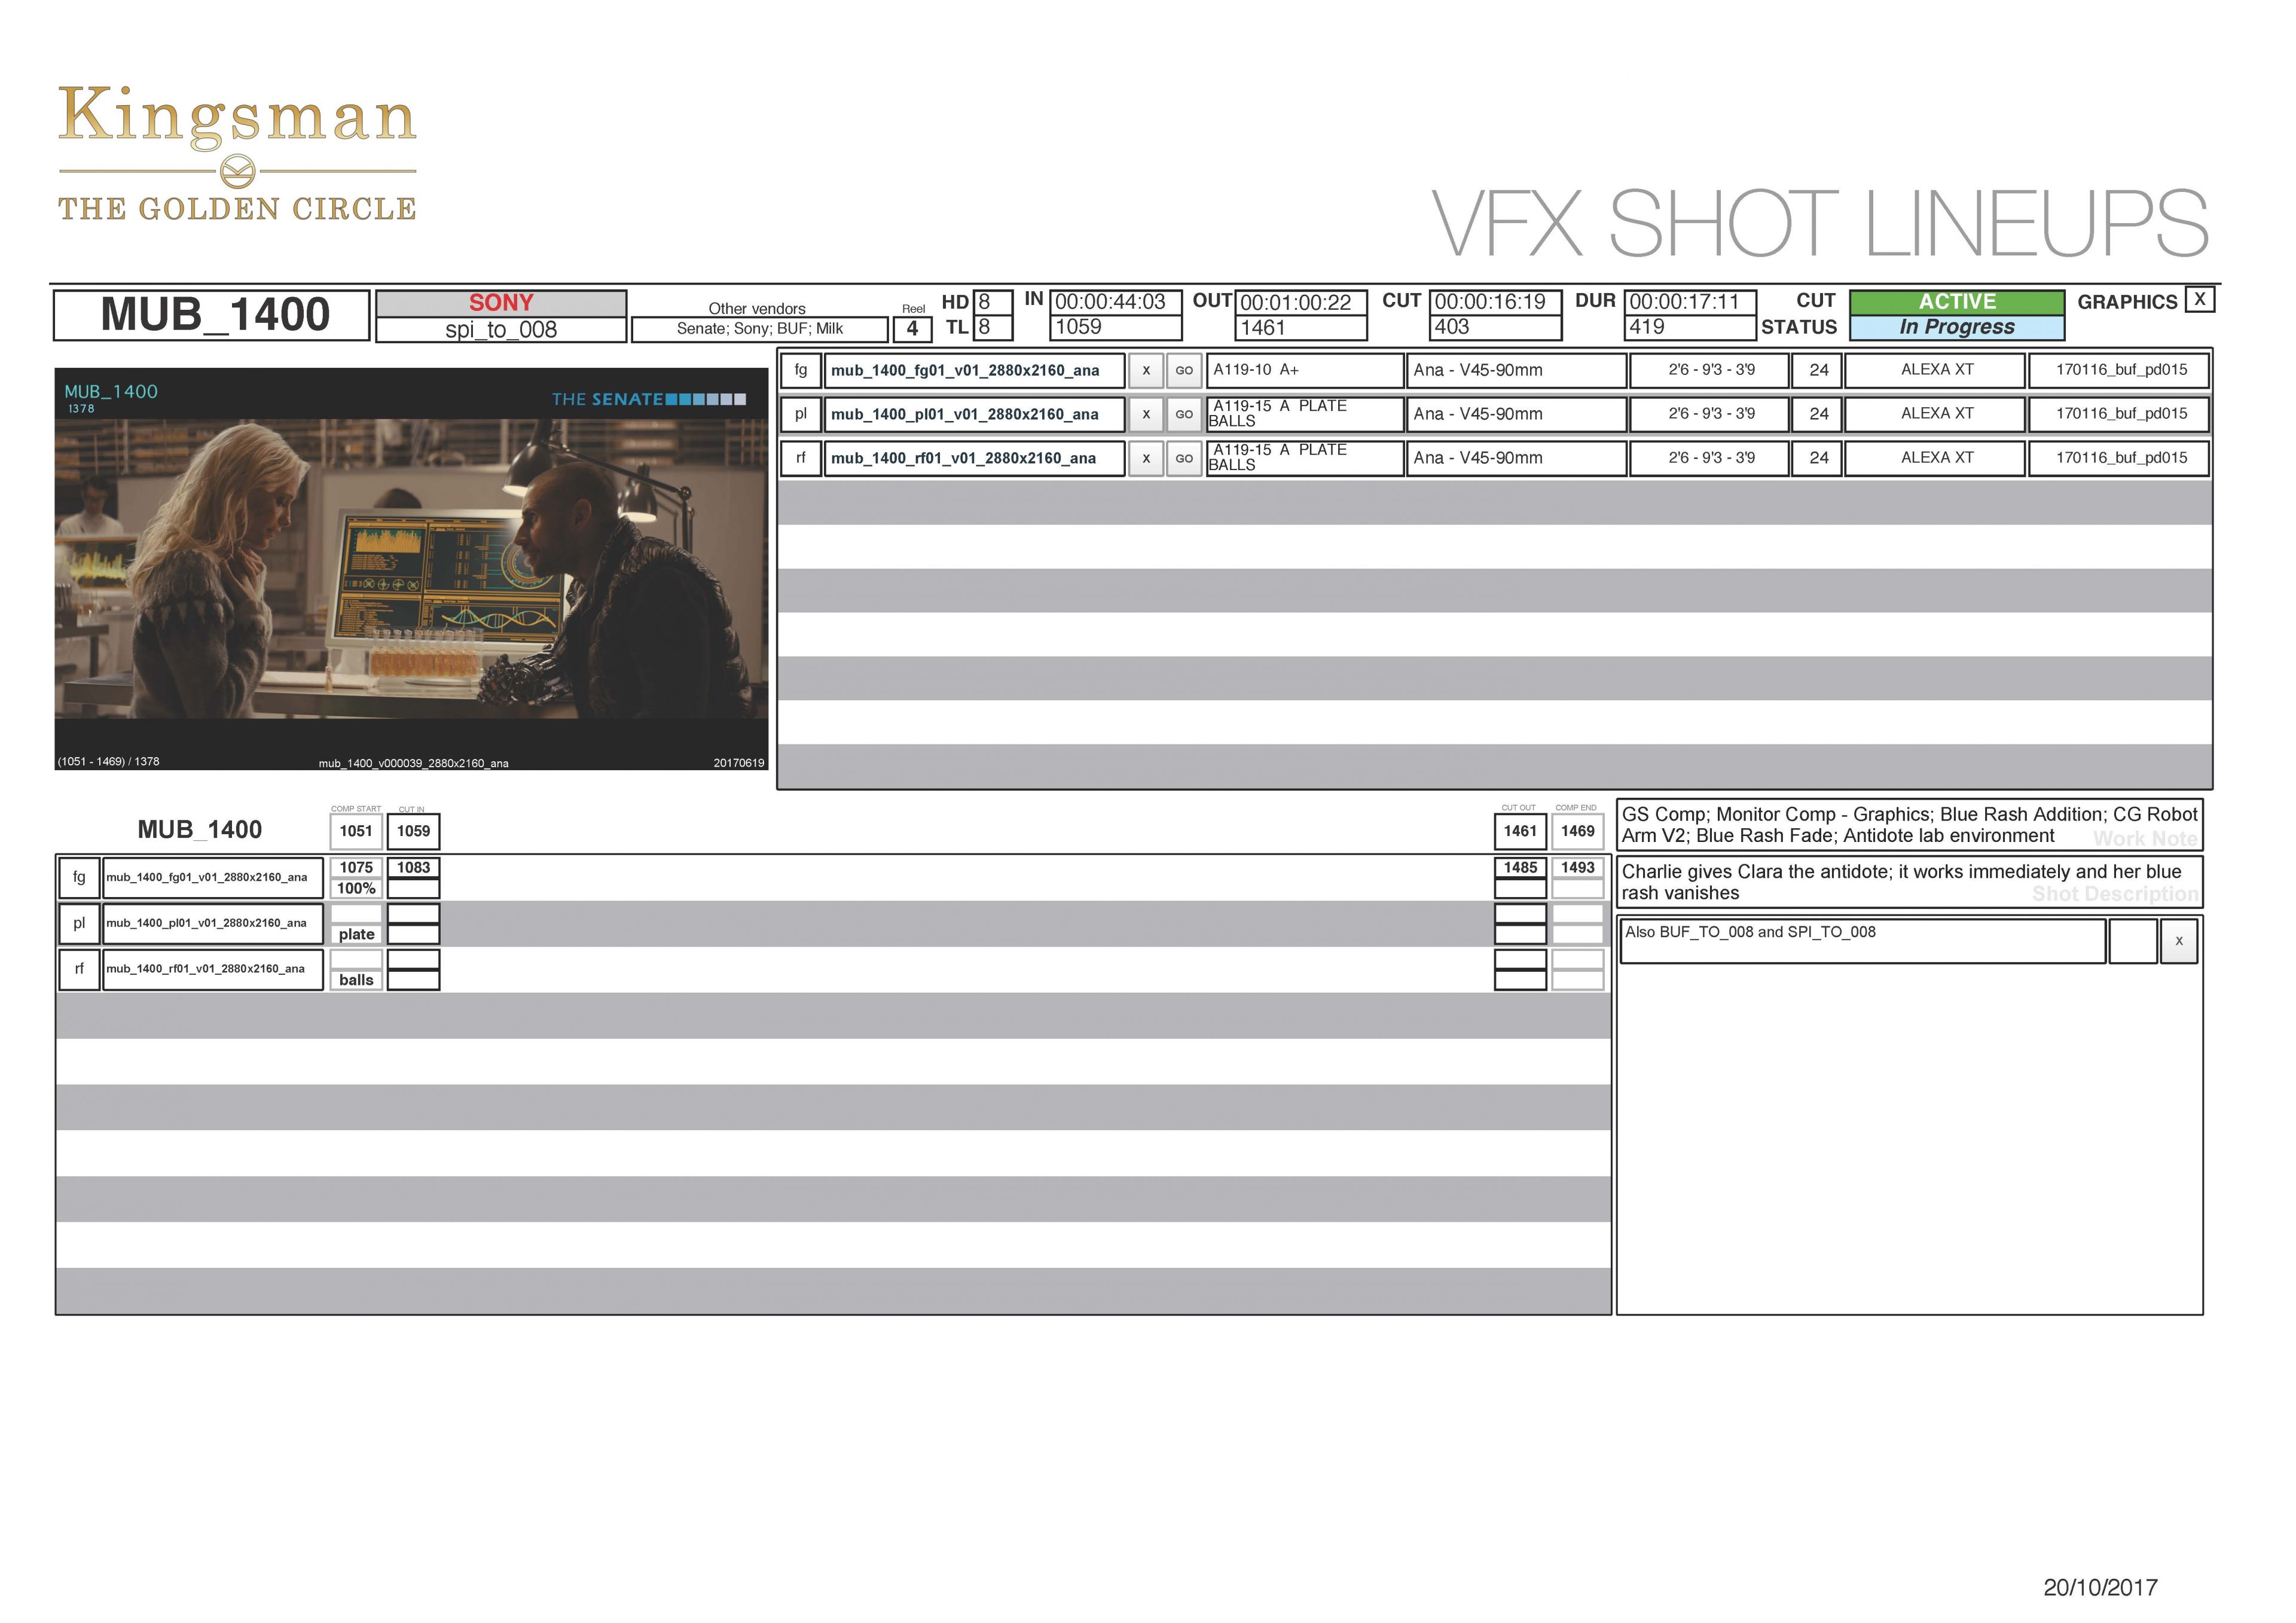
We also turn over to them PDF lineup sheets that outlines how the individual scans or plates stack up in the comp. We basically type out what the re-speed information would be and what points need to be in sync at certain moments throughout the shot.
GIBBON: Which plates are being used and how they’re being used essentially. That’s a paper document version for every single shot that the vendor will get along with either a QuickTime or an Avid bin and media. Then they get the plates as DPX / EXR or whatever workflow has been agreed. We send our requests for the plates through the Lab, ask them to pull certain shots and send them directly to the vendor. So the Lab is responsible for sending out the full rez media.
HULLFISH: On top of turnovers and getting the work back from the vendors into the timeline again, are you doing comping or temp VFX or pre-viz?
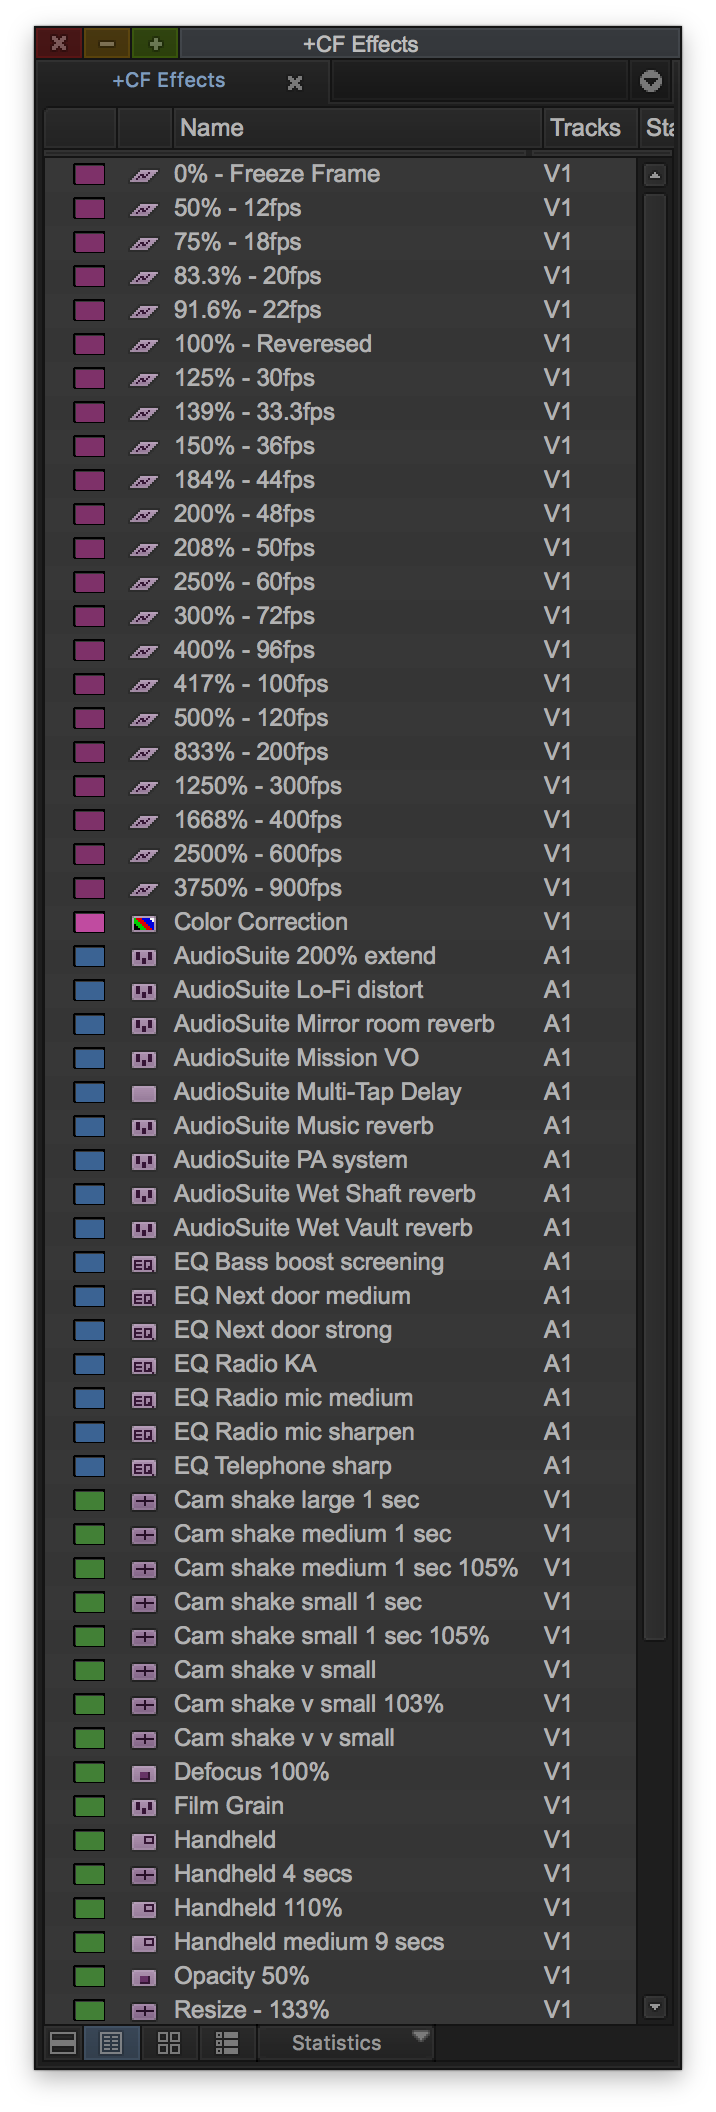 MILLS: Initially yes, Eddie’ll throw us a sequence to work on. That does come up quite a lot. And if it’s an entire sequence, we’ll break it down between all of us. We’ll kind of share the workload with whoever’s free. And we try to stay ahead of the game, so if we see an entire scene with green-screens, we’ll just go ahead and start keying in Avid, just doing temp comps. Eddie usually does a fair few himself too and if it becomes too complex will throw to us to refine.
If we want to do something a bit more complex, then we’ll jump into After Effects. We did do some pre-viz stuff, but the pre-viz was really happening when it was only Eddie on the show, so he cut a lot of pre-viz and we didn’t get much more of it after we came on the show full time.
GIBBON: A few sequences came in, but they just went straight to Eddie to re-work.
MILLS: Right, and Third Floor, the people doing our pre-viz, or Argon, nine times out of ten have an editor in house already. So their editor would cut it and if Eddie or Matthew thought it needed adjustment then Eddie would ask for the individual shots and tweak it himself.
HULLFISH: What about sound effects? Is Eddie pretty hands on with wanting to put those in himself, or does that often come back to you guys?
FRITH: He does a lot of that himself. It’s really only when the sound effects become too repetitive that he turns it over to us — like footsteps. Some sequences, like the taxi-cab sequence, he’d go to town with sound effects on that. For other sequences, if the workload was getting too much, he’d hand those off to a few of us, then when we were done, he’d rework them himself.
COOPE: Also, often he’d mock something up and then Matt Collinge (Supervising Sound Designer) and Danny Sheehan (Dialogue Supervisor) from Phaze UK, were involved very early on in the shoot in terms of sound design and dialogue. So because we had them on board Eddie had us turn that work over to them and then they were able finesse it and do a really nice first pass, send it back to us and we’d cut it in line with the turnover we sent them.
Eddie would bring that into the reels and it would live there and if it was good enough, then he muted his own work in the timeline but kept it in there. But what we’re listening to is really the first or second pass or what Matt or Danny had done.
HULLFISH: And with all this stuff that’s returning from sound and VFX, you guys are the ones returning this material to the timeline? What’s the process of making sure stuff goes in the right spot and telling Eddie that new stuff is in place?
MILLS: So the process of getting VFX back from the vendors is that they would first go to VFX production. They sit down with Angus and he approves each shot and says what can come through to the cutting room because he knows that as soon as it comes into the cutting room, it basically goes in front of the director.
So once they’re approved, myself and Robbie would bring them in and we would organize everything by the submission date and the vendor it had come from. Then we would cut them in to the top track we have called “New VFX”, so Eddie can see those as soon as they come in. For any reel that we add new VFX to, we would have a tag that we put on to the end of the bin name with double space and “VFX”, so Eddie knows which reels have new VFX. We also double check them after the VFX approvals because obviously they’re not able to approve them in context. So we’ll look at them contextually just to make sure they’re OK. And then we’ll close the bins.
We’ll tell Eddie the VFX are ready. He’ll do a quick pass to make sure everything is ready then he’ll drop down our new VFX from the top track into the lower tracks in the sequence, and then when he plays back the sequence for the director, the new VFX will be in. There’s also a very specific color coding for all the different types of clips, so any temp shots that we’ve made, or any from an in-house artist, are colored salmon, any work-in-progress shots are grape, any finals are sea foam. Sky blue means pending.
HULLFISH: So, to understand Eddie’s final move of the VFX: You guys place the VFX in the VFX track at the top, which is above anything that’s actually being monitored, and only Eddie can put the VFX shot onto the monitored track where it can be seen?
MILLS: Yes. It’s three stages of approval before the director sees it. First the VFX supervisor approves it creatively and contextually, then we’ve approved that it’s technically correct in terms of colour space, re-speeds and resizes, and then Eddie approves from a story telling aspect. That way, nothing untoward gets in front of the director.
HULLFISH: Do you guys bother to name the tracks themselves or are they just numbered?

BACIGALUPO: Yes all tracks are named:
V1 and V2 are drama plates.
V3 and V4 are Avid FX or temp effects.
V5 is VFX shots from outside vendors.
V6 was also VFX, because sometimes there’d be overlap.
V7 is color.
V8 is subtitles.
V9 is edit notes because Eddie has this little text preset, so if a shot has to be re-shot or we’re missing something, then that’s the track for text overlays that you see on-screen so that the viewer’s aware.
HULLFISH: Created with Title Tool?
BACIGALUPO: No. Subcap tool because it’s quicker and easier to modify and you don’t have to generate new media every time you make a change.
V10 and V11 are VFX titles.
V12 and V13 are the VFX plates.
V14 colour graded and finished material from the DI
V15 and v16 are for new VFX, where we put new shots that come in.
HULLFISH: So I’m a bit confused. If the VFX plates are above the VFX titles, then is Eddie muting or not viewing the tracks below a certain track?
COOPE: Typically, Eddie only views from V9 downwards, so from the Editing notes and below. VFX titles and VFX plates are not viewed.
MILLS: V10 and above are really only for us and for Eddie if he’s meeting with Angus. Then he’ll display the other tracks to discuss those VFX shots. In the AVID now, you can have a mask (letterboxing) generated automatically on output, so he doesn’t need that as a track anymore.
HULLFISH: Interesting. Wow that’s a lot of stuff.
MILLS: On the current show we have 18 tracks just for video and 19 for audio.
HULLFISH: Obviously, that’s a HUGE amount of work to try to manage as part of your day. Does Eddie let you cut a scene occasionally? What kind of creative input do you get to have with the actual editing? Does he ask for your feedback on scenes?
COOPE: Eddie is an absolute machine. He cuts everything. But he’s happy — if you have any free time — to have us sit down and cut a scene and he’ll look at how we cut it. It rarely happens, but he’s really receptive to anything that someone puts in front of him. And he’ll occasionally call us in and say, “What do you think of this scene?” and ask for notes. And if something’s particularly tricky, he’ll say, “I want you all to have a go at it.”
BACIGALUPO: He’s really enthusiastic about people trying to do it. The hardest part is just having the time to do it. Chris, you had a scene that was in the film for a while, didn’t you?

FRITH: Yeah. I had a scene that Eddie pretty much dropped into the reel. He made a few tweaks and dropped it in. But that whole scene got cut. But there’s a scene where Roxy, Merlin, Arthur and Eggsy are all talking the first time they go and see Arthur, that I cut that never changed.
GIBBON: Most of our creative input comes from doing the temp VFX, being the first person to kind of design a shot. The VFX supervisor has the final say, but we’re there mocking up the initial draft and initial ideas. The management of the cutting room is just such a huge amount of work that we don’t get a lot of opportunity to cut, but Eddie’s intention is always there. The media management is just so huge that there’s literally no time to get involved with that.
COOPE: I think he did say at the beginning of The Golden Circle that he’d love for us all to cut a scene a week. But that didn’t happen, unfortunately.
GIBBON: We all had a bash at the Elton performance scene.
MILLS: Quite a few of us, outside of our normal day job, cut shorts and music videos, so we try to keep our creative editing skills sharp. We’re quite an honest cutting room, so we always bring our own work to the table and show bits and we’ll always try to share work where we can. We all work with and for each other on outside projects. It’s a really nice, collaborative environment that we work in.
HULLFISH: It sounds like, from listening to you chat, that the politics are kept to a minimum and that you all get along nicely.
MILLS: It depends on if we’re playing poker or not. (group laughs)

BACIGALUPO: It’s true. Eddie’s always tried to instill an approach in the cutting room that in principle, everybody should be able to do everybody else’s job. So we have to get along. We have to share the workload. The system would just break down if we didn’t communicate with each other properly, and like each other. We all eat lunch together. We all go for a walk around the studio together. We’re all friends out of work. We go for drinks. It’s a good team. We wouldn’t come back for the next show if it wasn’t, because it’s too long a period of time to spend in the same environment. We just wouldn’t be working together if we didn’t want to.
COOPE: A few thoughts about sound and music. A few weeks before we go into reels Eddie would create some sequences which would just be called “First Assemblies” so the guys could have a first pass. So for the music department we would make a copy of Eddie’s reels and commit the multi-cam edits in that sequence, because we found that the multi-cam plays havoc with the AAF exports.
BACIGALUPO: Eddie has a very specific archiving and versioning system as well. Every time we would turnover, we would archive the reels and version up by dot one (.1) and then every time we did a screening, we’d version up by a whole number.
So if we were on version 3.2 and we turned something over, we’d version up to 3.3 and then if we did a screening we’d version up to 4. And every time we do that the reels get duplicated and archived into their own set of bins. They live in an archived cuts folder which is a subfolder of the reels folder, so Eddie can very quickly access those. And every set of reels goes into its own subfolder within the Archive cuts subfolder. It may sound confusing, but it’s just a logical folder hierarchy because Matthew will ask, “Where’s that scene with this and that change that we did three weeks ago?” And nine times out of ten, Eddie knows what he’s talking about and because of the archiving system can find it in about four clicks.

COOPE: Music Dept like their Quicktimes with the dialogue and effects hard panned left and music hard panned right. So we first do a mono audio mixdown of dialogue and effects and then a mono mixdown of all of the music so that we can have those on the bottom of the timeline and just export those audio tracks with the picture. Then we’d add a whole load of watermarks and burn-in information onto the picture. We’d have the recipient’s name across the middle and we also number ident every Quicktime that leaves the Avid. This is stored in the codebook in a QuickTime Log section.
For burn-ins for the sound FX guys, we would burn in the first four dialogue tracks with their clip name and their source timecode as well, so that the dialogue editors could see what Eddie’s been using. So we export that as a DNxHD36 QuickTime with stereo sound. And then we’d export some WAV files: a mono dialogue .wav of each reel, a stereo SFX .wav, and a stereo music .wav.
Then we export AAFs. We would export dialogue as a linking AAF because Danny would have an entire copy of all the production sound at his end so we didn’t need to generate any new media for him. He would just have a linking AAF which is really quick to export and doesn’t bring any media with it.
Matt would have a consolidated FX tracks AAF. (And then we’d also have a consolidated music AAF for music dept).
We also would create an EDL of V1 track from the AVID which would go to both sound and music.
BACIGALUPO: We basically made one turnover package for both sound and music. The good thing about working with the same teams of people from previous movies was that we were able to talk to them ahead of time and say “can we do it this way?”
So it just saves us time because then we only had to export each of the reels once as opposed to doing a set of reels with watermarks for the composer and a set of reels with watermarks for the sound and FX departments.

They all agreed to have their own requirements on the one QuickTime. And they all use the EDL for their automated Conformalizer. And then we also did change notes for those who needed them.
HULLFISH: I just used Conformalizer on my last project to get change notes to the sound mixer.
COOPE: Jack Dolman (Music Editor) was espousing how great it was as well.
HULLFISH: Tell me a little about the screening process. Obviously, those are a big deal and you talked about how you’d version up a full number after a screening.
BACIGALUPO: I think we had somewhere between 7 and 10 screenings, total. Three of those were actually focus-group screenings with members of the public, and the rest were friends and family screenings. And depending on how we screened, it would dictate the workflow. We were working with a mix of DNxHD36 and DNxHD115, so once we got the go-ahead from Eddie to start prepping the reels, (which he would do by adding the word MIXDOWN to the end of the reel name) that would be our trigger to archive it, duplicate it and prep it for screening.
This meant doing a video mixdown of the appropriate video tracks to DNxHD115. And then doing a 5.1 or 7.1 mixdown of all of the audio tracks depending on what stage of Production we were at. At the beginning, music we were sending 5.1 tracks, but then later we started getting 7.1 stuff as well.

So we prepped on a reel-by-reel basis and we had a staggered run at the reels. As Eddie finished reel 1 and moved into reel 2, we’d be prepping reel 1 for screening. Once it was mixed down then I would have somebody do a visual QC in real time. Eddie will do a pass through the reel himself to make sure it’s in screenable format, but as you can imagine he’s usually editing right down to the wire.
It was often nail-biting because we would get one chance to do the prep and Eddie and Matthew would edit right until the screening. The tightest one had me running to the screening room with the encrypted SSD in my hand, four minutes before we were going to start and the audience had already sat down and I was sprinting across Soho.
There were a couple of times where we had DCPs made for the focus groups but for most screenings we would just take a laptop with Avid running on it and use Eddie’s AJA T-Tap to output to HD-SDI or HDMI (with embedded 5.1 audio) straight into the projection room gear. Some screening rooms actually have a MacPro with Avid installed on them hooked up to the hardware, so all you have to do is plug in a drive and load the screening sequence.
BACIGALUPO: And if a screening was taking place at FOX in LA, then we would Aspera the MXF files and screening bin to them. We would build the packages for speed and efficiency with everything built into AVID MediaFiles organised folders, make the databases for them and have a bin with the screening sequence ready. So in three steps, they could plug in and be ready to go.
Often, while we’re prepping for a screening in the UK, we’d be shuttling the media over Aspera to the US, and they’re prepping for the screening that they’re going to be doing as well. So both sides of the Atlantic are working in tandem. Sometimes, we’d stagger the Aspera delivery as well rather than do one big package, because then they could be downloading at the same time as us uploading the next reel mixdown. It’s just about using the technology to make it happen as quickly as possible because you usually only get one shot.
 HULLFISH: You mentioned that some footage was DNxHD36 and some was 115. What was the difference between that media, other than the resolution?
COOPE: As mentioned by Riccardo earlier, the initial decision was to keep the drama dailies at DNxHD 36 to streamline the data syncing from the ISIS to the five cloned copies. However, when we first went into Post the amount of data we were syncing reduced substantially because we weren’t shooting anymore. Eddie reviewed some of his cuts — in particular everything that was filmed at Poppyland and felt the DNxHD36 wasn’t holding up in the big wide shots. He requested the Lab re-transcode a number of drama shots to DNxHD115. We archived the DNxHD36 version and replaced them with the DNxHD115 copy. The updated files were also synchronised onto our clones so everything was kept up to date.
GIBBON: We did the same for a lot of the VFX shots. It was just too difficult to comp with the DNxHD36. We used to get VFX submissions back at DNxHD36, but we started requesting them to come in at 115.
MILLS: So a large chunk of the film ended up as DNxHD115 due to the number of VFX Shots. But the formats played together nicely as you’d expect them to, but sometimes when a DNxHD36 shot would come on screen, you’d just cringe a little bit, because compared to the 115 the compression would just stand out. That’s why we’re working at DNxHR LB on Mission 6.
HULLFISH: Guys, it was so informative and interesting hearing about the process. Thanks for taking the time to chat.
GROUP: Thank you so much.
 To read more interviews in the Art of the Cut series, check out THIS LINK and follow me on Twitter @stevehullfish
The first 50 interviews in the series provided the material for the book, “Art of the Cut: Conversations with Film and TV Editors.” This is a unique book that breaks down interviews with many of the world’s best editors and organizes it into a virtual roundtable discussion centering on the topics editors care about. It is a powerful tool for experienced and aspiring editors alike. Cinemontage and CinemaEditor magazine both gave it rave reviews. No other book provides the breadth of opinion and experience. Combined, the editors featured in the book have edited for over 1,000 years on many of the most iconic, critically acclaimed and biggest box office hits in the history of cinema.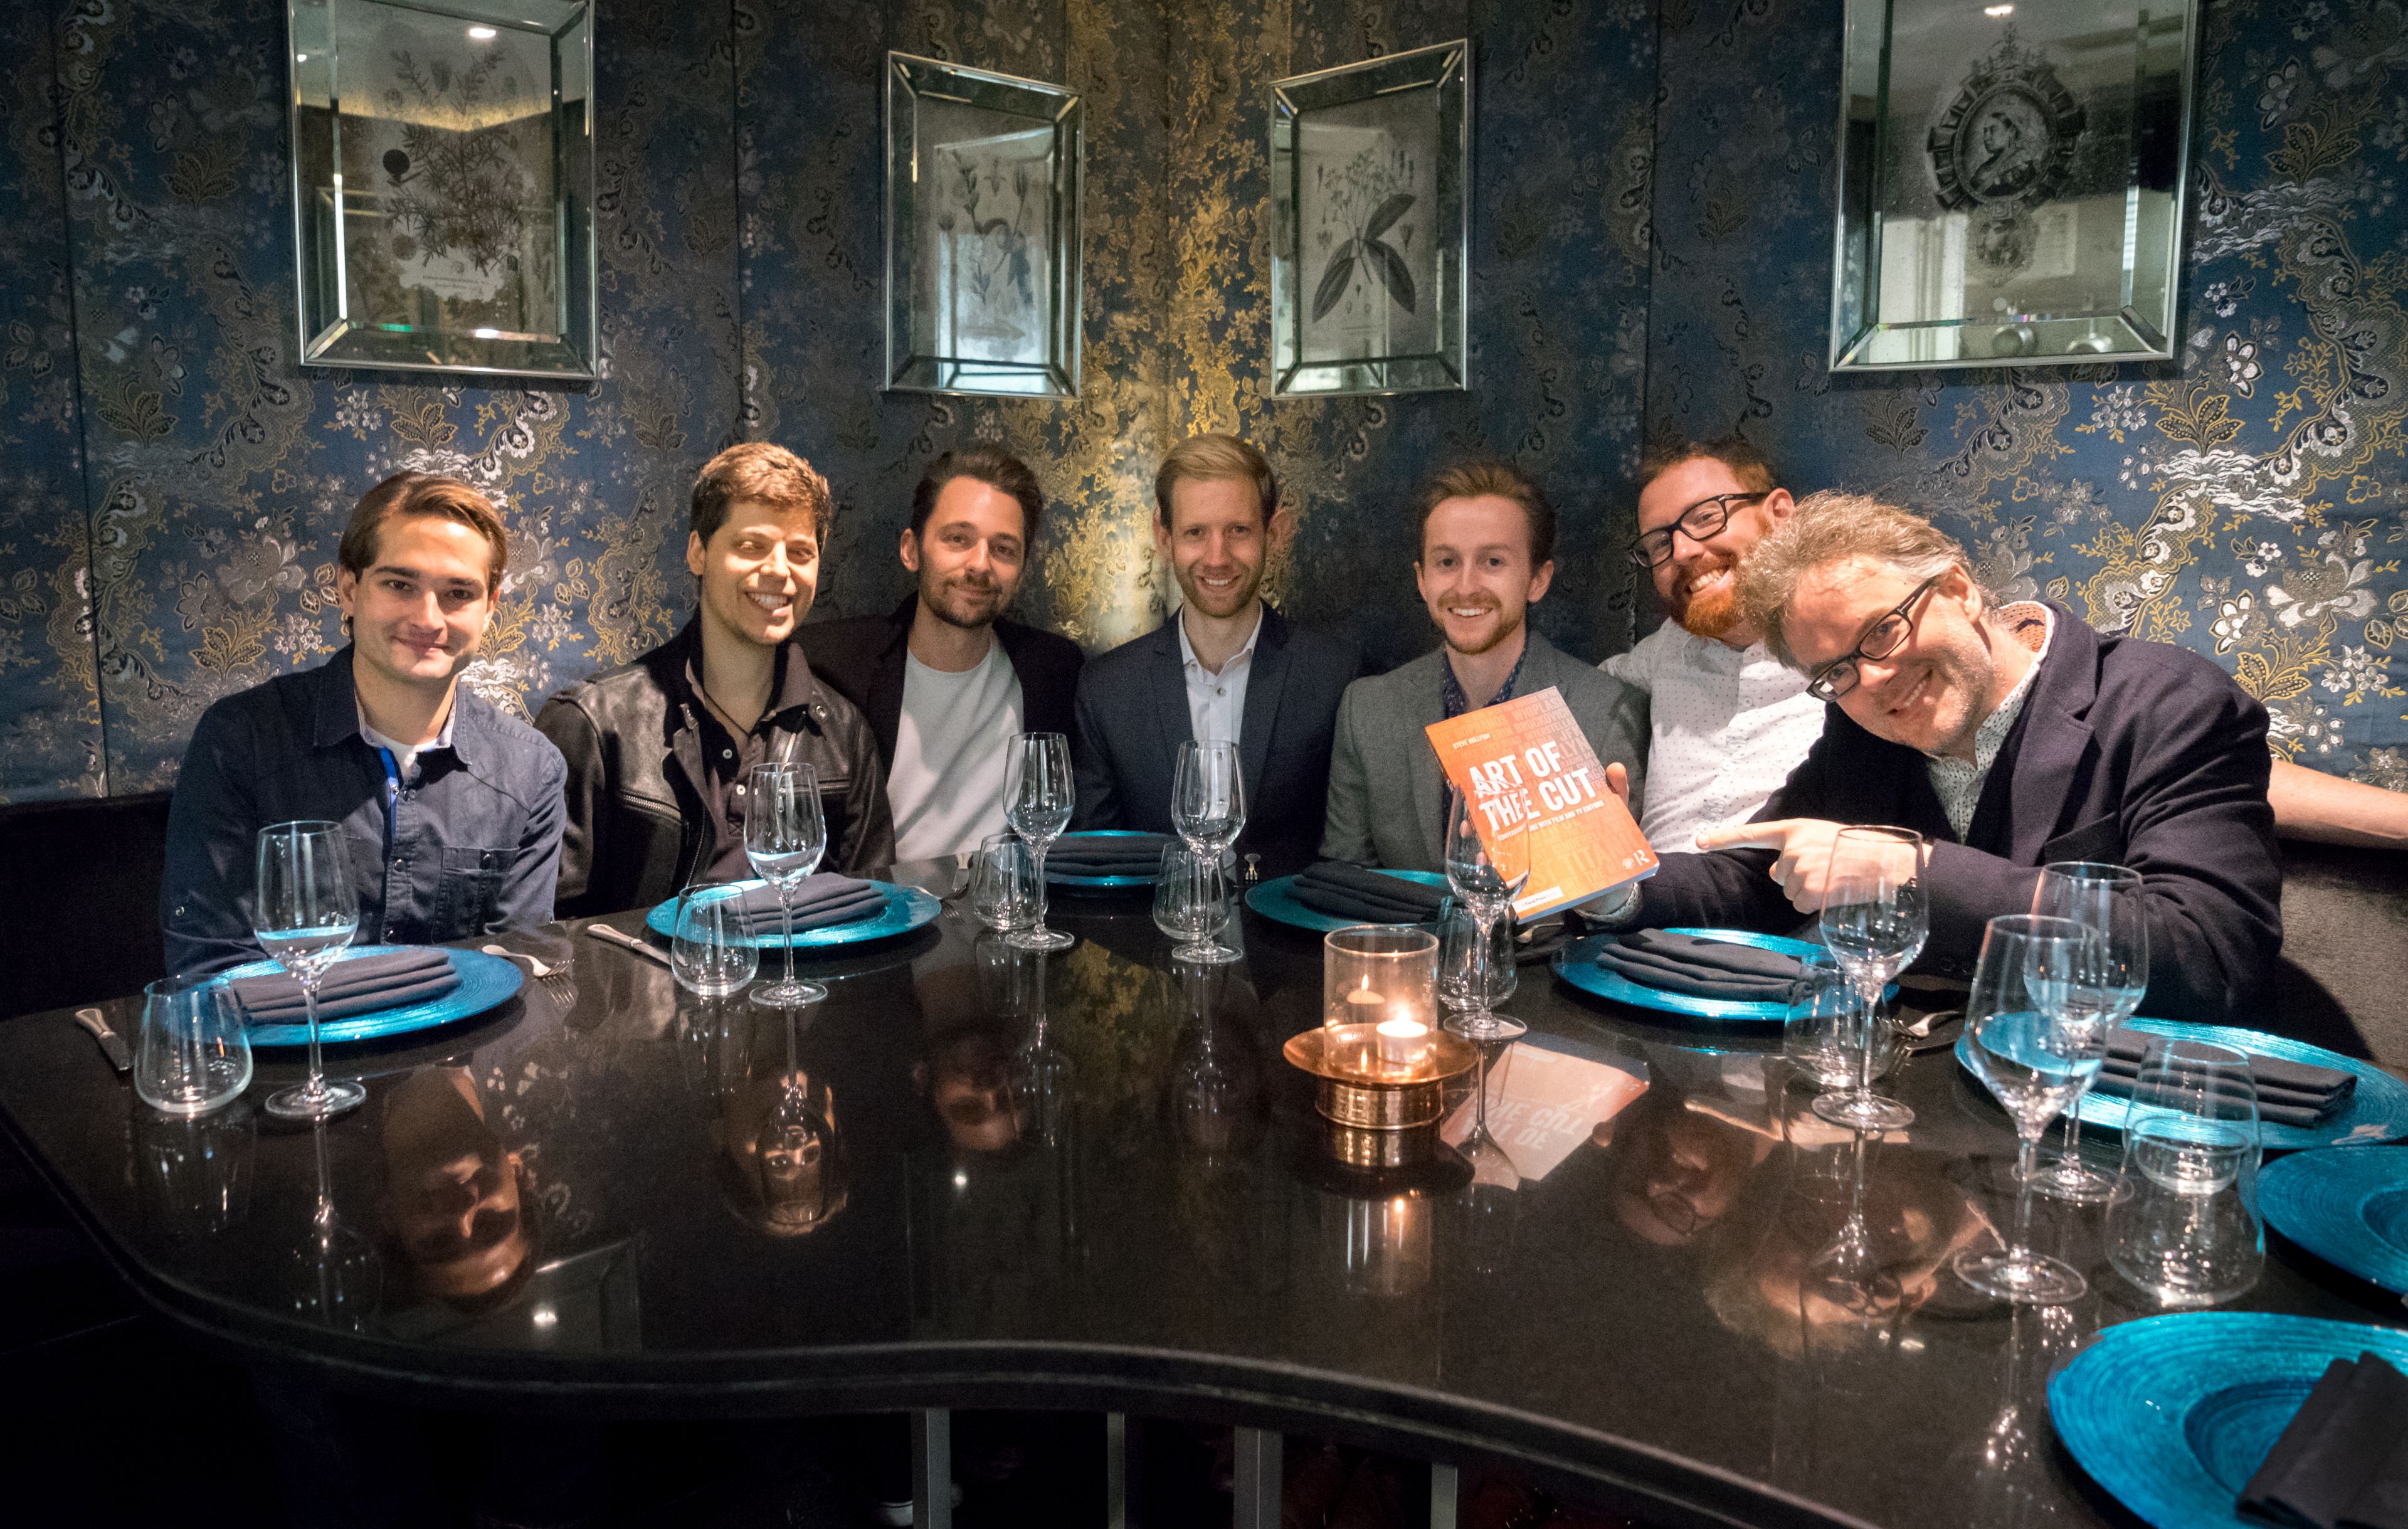

Filmtools
Filmmakers go-to destination for pre-production, production & post production equipment!
Shop Now


