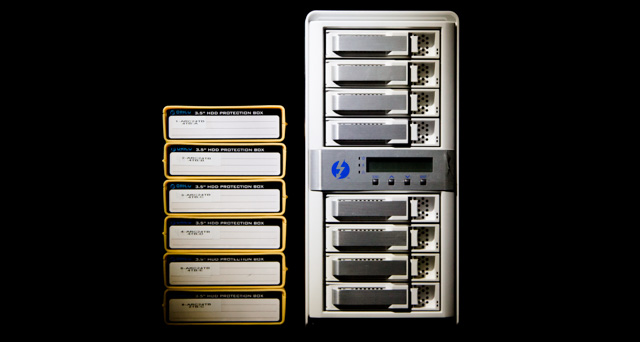
About six months ago, I had a 20 Terabyte problem. I had a shelf of external hard drives of all shapes, sizes, and interfaces, and weak, infrequent backup system. It was time to consolidate my media and fix this issue. After much research, I invested in a Areca Thunderbolt RAID and a reliable backup solution. Here are my adventures in building this complete system.
The Problem
I am not a post guy. But I have files, and lots of them. Over the years I’ve amassed an extensive archive of footage and archived projects. Disorganized files sneak up on you. You need a little space to store a few things, so you buy an external USB drive on the way home. Then you need some lightweight travel backup drives. Then you need more externals for backups. And on and on, until you look up and realize that along the way you’ve lost control. This is what happened to me. One day I realized that I had twenty-three hard drives of various size and vintage, containing about 18-20TB of information. USB2, USB3, Firewire, desktop externals, bus-powered 2.5″ drives, bare 3.5″ drives with a dock, etc. I carefully tracked all my files across multiple disks with Disk Catalog Maker, but ultimately it was a frustraing mess.
My backup solution was equally ugly; I was backing up some drives to other drives, and while I was careful to keep backups, it was very difficult to track what was backed up and where. Not only that, I didn’t have offsite backups of much of my data. In short, I had lost control of the situation, and I was beginning to worry that a drive failure or catastrophic event would wipe something important out. It was time to reboot my storage strategy.
The Solution
I looked at a number of options to solve my storage issues, and arrived on the conclusion that I needed a large multi-drive RAID system, preferably RAID level 5 or 6. Thunderbolt was the best solution for my needs, as I work from a Macbook Pro, and TB is the fastest way to move data in and out of my laptop. A few of the options I considered: OWC ThunderBay 4 ($2100 equipped with 24TB), Promise Pegasus2 R6 ($2900 equipped with 18TB), 4-bay Areca ARC-5026 ($900 sans drives), and finally the 8-bay Areca ARC-8050 ($1400 sans drives). I quickly ruled out the 4-bay systems, as they would not yield enough space when configured as a RAID 5 or 6 setup (space is “lost” due to parity storage, more on that later). The Pegasus R6 could have yielded enough space if equipped with 6TB drives, but the price was a bit steep in that configuration. From a bang for buck standpoint, the ARC-8050 was the standout. It also came with a 3-year warranty.
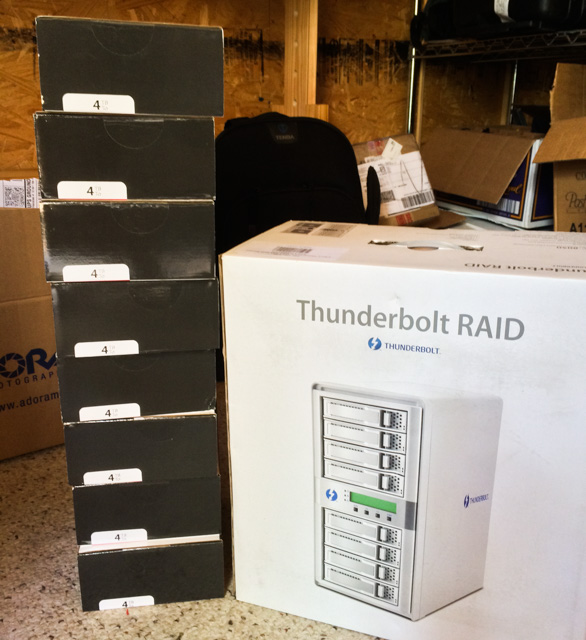
So after researching this for some time, I had pretty much landed on the Areca ARC-8050 as the answer…it was an affordable Thunderbolt system that could take up to eight 3.5″ hard drives and offered a ton of RAID options – levels 0, 1, 1E, 3, 5, 6, 10, 30, 50, 60, and JBOD. I could build it out with affordable 4TB drives now, and upgrade later as needed. As I was growing closer to a decision, I noticed that Areca had come out with a Thunderbolt 2 model of the 8050, and the original model was starting to be offered on sale. I found one on sale from NewEgg for $1200, and snagged a free shipping offer. At that price, it was too good to pass up. For hard drive media I went with (8) 4TB HGST 7200rpm drives. These were on sale at the time for $190/each, so I ended up with $1520 in drives. The ARC-8050 tower doesn’t come with a Thunderbolt cable, so that was another $40. So all-in, I invested $2760 total for the RAID tower and 32TB of storage. Not bad.
My primary interest in building a RAID system was for fault-tolerance and convenience. Putting all my data into one box that I can connect and mount with a single cable was incredibly attractive to me. If I was an editor by trade, I would probably care more about speed, but that wasn’t my first goal. I wanted to build a system that would have built-in fault tolerance, and RAID6 was the solution I landed on.
In a RAID5 configuration, data is striped across multiple drives, with one drive worth of space reserved for parity information. If a drive in the array fails, that lost data can be reconstructed from the parity data. In a RAID6 config, two drives are reserved for parity data, which means you can recover from two drives in the array going down. It’s not a backup (more on that later), but this level of fault-tolerance gives me peace of mind. A side benefit of RAID 5 and 6 is that performance is quite good, given that data is striped across multiple disks and you aren’t limited to the speed of a single disk’s spindle. For my setup, I chose 4TB drives because they were the largest I could afford at the time. With the RAID6 parity setup, my 32TB of drives would net 24TB of usable space.
Initial Impressions
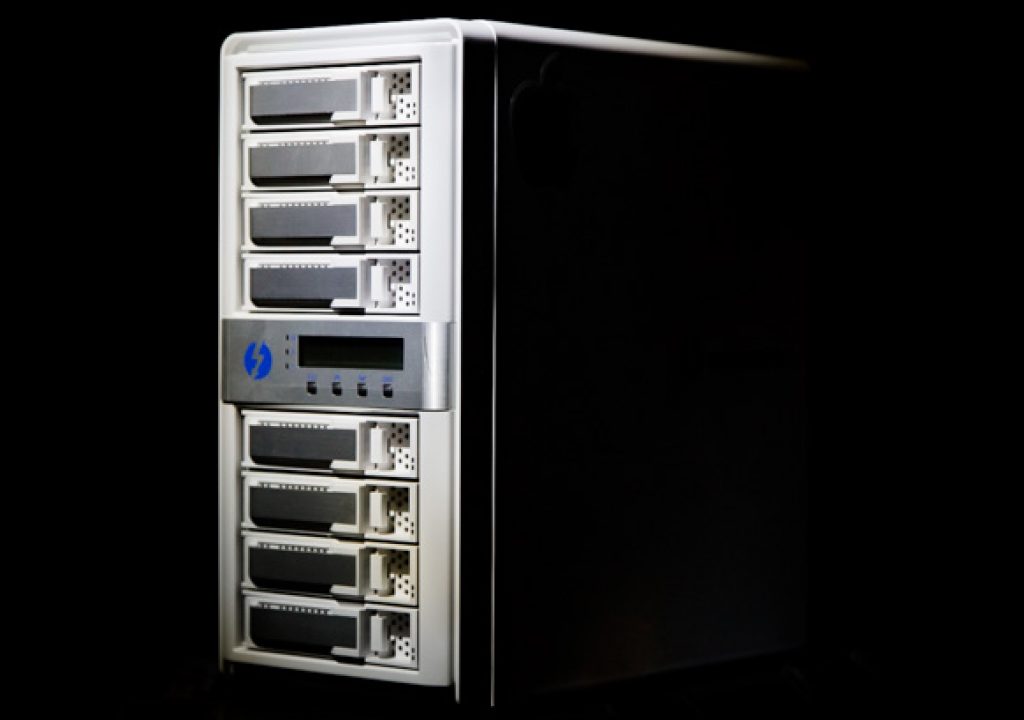
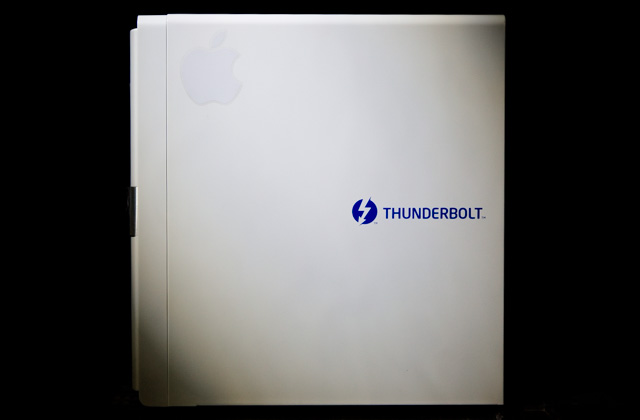
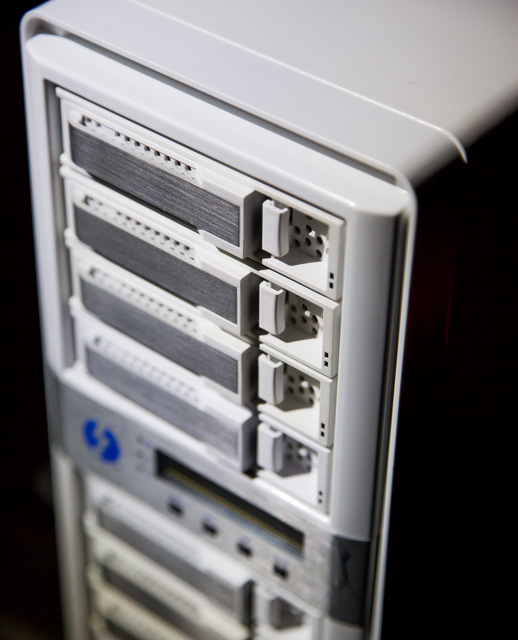
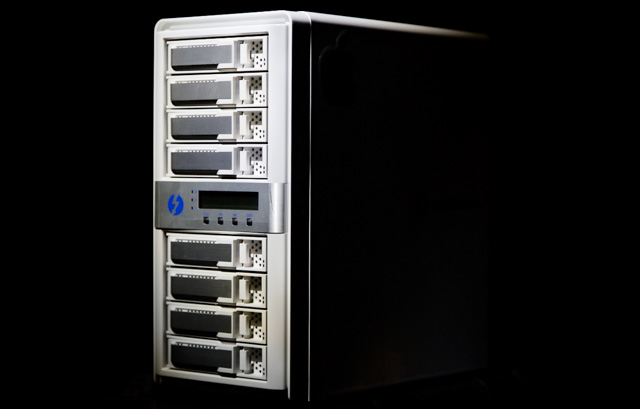
The Areca-8050 tower is well built and feels solid. The tower measures 5.75″ wide x 12.25″ tall x 11.5″ deep. Connections and tolerances are tight. It’s a chunk once you add hard drives…28lbs fully loaded with eight drives. It is packaged well, and includes an ethernet cable and a power cable in the box. The front has eight drive caddies that toollessly unlatch and slide out the front of the case. Drives are screwed into these caddies, and my unit came with exactly the right number of drive screws (thirty six, no spares).
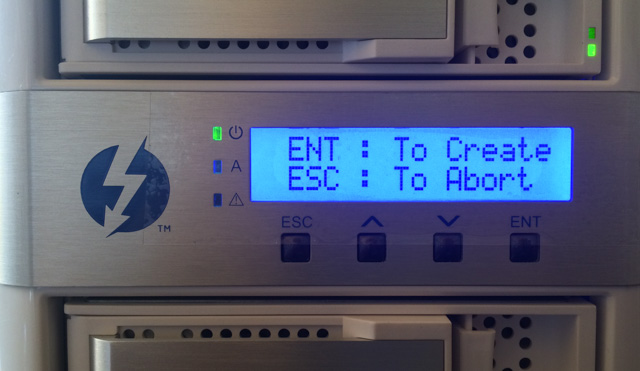
A front LCD display shows you status information, and there are also status lights for each drive bay. Buttons on the front of the unit allow you to configure and manage the array without installing software, though it is simpler to manage the unit with Areca’s MRAID software. The back features two Thunderbolt ports (for daisy-chaining Thunderbolt devices) and a power plug. Internally, two fans keep your drives cool, pulling air from the front vents to rear vents. There is no Thunderbolt cable included, so that is additional cost to consider. It’s also worth noting that the unit will not turn on without a Thunderbolt connection to your computer. So there is no way to start pre-building the array without first connecting to your computer.
The ARC-8050 has two internal fans to cool the drive stack, and that creates some noise. Using the UE SPL app on my iPhone, I measured the steady hum of the fans from 3′ away at around 43dB. The office ambient noise itself was 37dB. If you moved in close to the unit, noise measures around 54dB at the front. My conclusion is that tower fan noise is certainly present, but not objectionable for the average user. And it would certainly be quieter if you put it under your desk.
Building The RAID
After you have physically installed the hard drives in the tower, it’s time to configure your RAID settings. There are three ways to connect and configure the ARC 8050. You can use a browser and connect over ethernet (192.168.001.100 is the default IP), you can do the same over the Thunderbolt interface using the MRAID app, and you can also use the front panel and buttons. Connecting over Thunderbolt with the MRAID software is probably the simplest for most…just download the software from Areca, follow the steps for install in the Quick Start Guide, and run the MRAID app. That’s how I manage the system now.
However, I wanted to see how simple it was to do the initial setup from the front panel. And I found it to be surprisingly easy! The hardest part was inputting the default password when prompted. The trick is to use the arrow keys and the the Ent key to select “0000” (the default password) and then hit “Ent” for blanks until it fills the screen and submits the password. Beyond that one confusing step, everything else is fairly straightforward and simple to navigate.
I don’t built RAID arrays every day, so the most time-consuming part of my setup was researching the different options and what they meant. The user manual was slim in this area, not offering a lot of guidance, so I had to go hit video user forums. For the “Greater than 2TB volume support” submenu , I had 3 choices: “No” (obviously not), “Use 64bit LBA”, or “Use 4K Block”. I chose 64 Bit LBA, as I understand that to be necessary to support large volumes (up to 512TB). I also found an obscure reference on a forum that 4K Block limits your volume size to 16TB.
For Stripe Size, I chose 128KB. It’s my understanding that stripe size needs to be optimized to the type of data you’ll primarily be using. When writing large files, the recommendation was to use a 64KB or larger stripe size for better performance. Conversely, for an array with a lot of small I/O operations, a small to medium stripe size might be a better choice. This fall, Areca released a firmware update that enables a 1MB stripe size, which might be helpful for some scenarios. Check out this related reading at Tom’s Hardware on stripe sizes if you want to dig deeper.
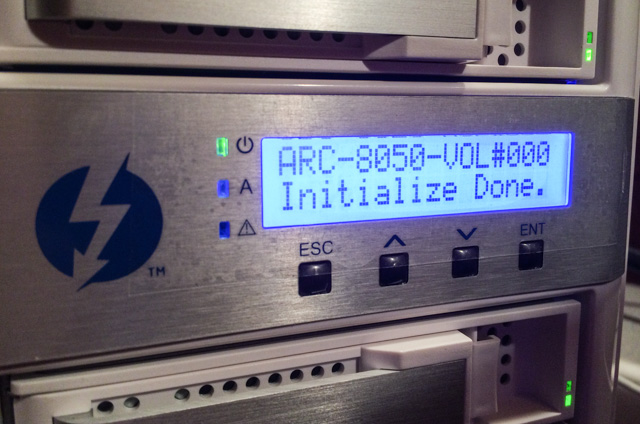
Once I had configured the array settings, it was time to initialize the RAID array. Initialization is a bit like formatting all the free space. The RAID controller has to write to EVERY block on every disk to confirm parity information. Initialization is a one-time process, and it takes some time if you have a lot of storage space. With eight drives, my initialization took about ten hours to complete. When that was finished, I was able to format the space using Disk Utility as Mac OS Extended (like any other external drive), and then mount the array as a hard drive. A biiiiiiiiiiig hard drive.
Migrating Data
Now that I had a drive I could mount on my MacBook, I began the long process of migrating all my data from myriad drives to the ARC tower. Because I had multiple copies of files scattered across my various hard drives, I decided that the safest way to handle duplicate files was to simply copy everything over to the new array, and then sort through it and throw out the dupes and old files. Having everything on one system made it much easier to sort through and compare timestamps and filesizes, confirming I had the right version of a project folder. By the way, I used MacPaw Gemini to help sort through dupes…pretty slick little app that works a treat.
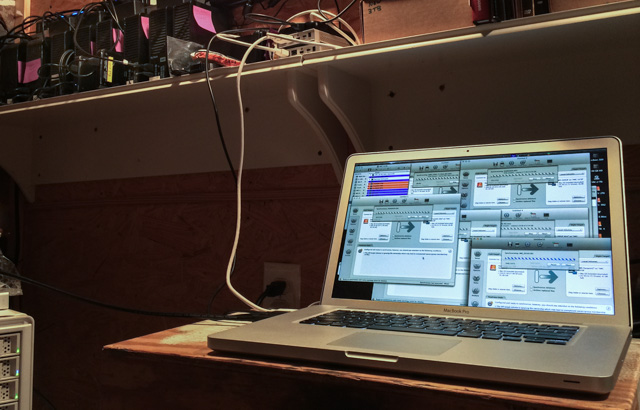
For the Great Migration, I used ChronoSync to copy the data from my drives…that software can intelligently work around errors and resume interrupted jobs if a copy fails or a file kicks back an error. It also allows you to run multiple concurrent copy/sync jobs, so I was able to copy from several drives at a time to the ARC-8050 array. ChronoSync is an awesome tool, and it worked perfectly here. At one point I was copying 6 different daisy-chained drives from USB2, USB3, and Firewire sources…all to the ARC at the same time. Shockingly, this ran smoothly, even with all busses maxed out. Once all my files were moved over to the new system (days later), I put the old external drives on the shelf for safe keeping until I had time to sort out any duplicate files and create a backup of the new system.
Continue reading on Page 2 for Performance notes, Creating a Backup System, and my Conclusions.
Creating a Backup System
Now that I had all my eggs in one basket, it was time to come up with a 24TB backup solution. There’s an old phrase, “RAID Is Not A Backup.” It’s easy to fall into a false sense of security with a RAID5 or 6 system, thinking that the built-in fault-tolerance in the system is your answer for redundancy. Here be dragons…you absolutely need a proper backup. RAID controller boards can fail and screw up your data. Multiple hard drives can crash at the same time…in a RAID 5 config, two drives failing before you can do a new drive rebuild will end you. In a RAID 6, three drives failed is death. Not only that, something physically catastrophic can happen to your tower…fire damage, water damage, tornados, theft. It is essential to consider your RAID tower only as a very reliable hard drive, and always keep a backup offsite.
In a best case scenario, you would have the RAID as your primary, as well as a local backup onsite, AND an offsite backup. In my case that would mean 24TB x 3. Currently I’m working with the RAID as my primary, and an offsite backup. That’s what I can afford at present, and I’ve decided that it is acceptable risk. I bring my offsite backups onsite for a monthly full backup pass, and anything mission-critical that has changed in between those full backups gets its own individual backup job in the interim.
When deciding on a backup solution, I had to weigh spinning disk drives vs an LTO tape solution. The advantage of LTO is that it has a very long shelf life, and is very stable. However, there are a number of reasons why I found that I couldn’t justify going LTO in my situation…and price was a major factor. The most affordable LTO 6 tape drive I could find was listed at $2300. It requires an SAS connection to the computer, which required me to purchase a Thunderbolt to SAS solution like the ThunderLink SH 1068, to the tune of $895. At that point, it’s worth looking at the mLogic mTape with built-in Thunderbolt ($3600) and skip the annoyance of an external SAS box.
Another thing that made me reconsider going LTO was the relatively small tape sizes. With an LTO6 solution, each tape yields 2.5TB of uncompressed storage. I would need 10 LTO tapes to backup the entire array, at a cost of around $40/tape. There is no way I could afford an auto-loading LTO tape system, so I knew I would have to change those LTO backup tapes ten times for each full backup. Given that current solutions can only write at 150 MB/s, I’d be tending to the LTO backup for several days. All told, LTO drive, adapter box, and tapes would have cost me around $3600 at minimum. Coupling that cost with the annoyance of all the manual tape changes, and I decided against LTO in favor of spinning disk. That said, what I may do for long term archives is to periodically send certain finished projects off to a backup service and have them laid onto LTO tape. I can keep those tapes on the shelf, and know I have a long-life archival solution that doesn’t require the maintanence (and risk) of a spinning disk backup.
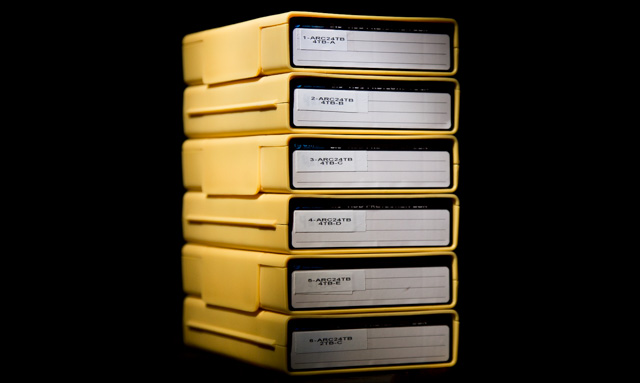
Ultimately I decided to go with (6) 4TB backup hard drives, and a USB3 drive dock. I’m using Retrospect backup software, as it was the only solution I could find that cleanly and automatically spans the 20TB+ array across multiple hard drives. A license of Retrospect is $120, and I went with WD 4TB 5400rpm drives at $130/each. So I have about $900 in my backup solution. I will upgrade these drives to larger 8TB drives when those become available (and affordable), saving me some time and disk change annoyance when running backups.
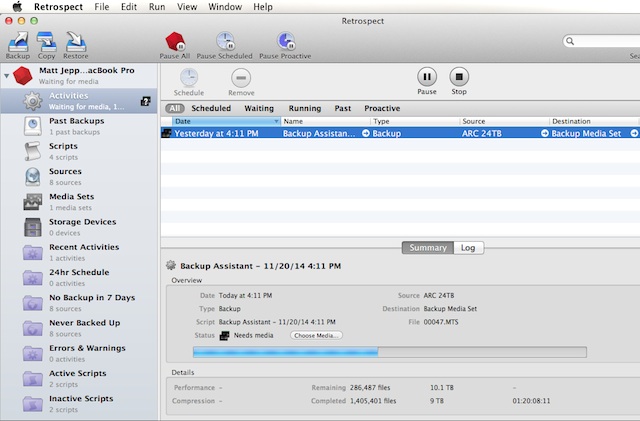
The first backup of the 20+TB array took a few days to finish. The way Retrospect works is to write the backups inside Retrospect container files, split into regular chunks. These are simply written in sequence to the Media pool disks that are defined in Retrospect. I can add or remove whatever disks I want to the pool, with no concern about their size, make, or model. You can pause the backup job (and even disconnect your source and destination media without any issues), and resume the job later…with no ill effects. As the backup job runs, Retrospect writes these container chunks of data to drives in the media pool, and simply asks for more media when it needs additional space. You can define the media pool in advance, or you can do it on the fly with your first backup job…either way works fine. The most important thing is to label each drive with the sequential number assigned by Retrospect. 1, 2, 3, 4, etc. That way you know what disk(s) to insert when it asks for them on subsequent backups or restores.
On subsequent backups, only data that has changed is written to the backup. Versioning is built in, and Retrospect keeps a catalog and is smart enough to know what files are on what drives…when you do a restore, you can choose individual files you may need, and it simply prompts you for the hard drive number it needs as it completes the restore. You can restore a few KB, or you can restore the whole thing…it’s your choice. At first I found the Retrospect software a little arcane and confusing to use, but it works well once you figure out the right buttons to push. Review the manual, and take your time, and it will start to make sense. Ultimately, I’ve found it to be a powerful application that has been very solid. And like I mentioned earlier, it’s the only software that I could find that cleanly handles spanned disk backups.
As a side note, Imagine Products has an app called PreRollPost that does spanned backups to LTO tape. The cool thing about PreRollPost is that it knows not to split a reel across multiple backup tapes…the contents of an AVCHD folder, for instance, would never be spanned between two tapes. That is a VERY cool feature…it reduces your risk of data loss, and it would be far simpler to do restores. Unfortunately, PreRollPost does not support spanned backups to hard disk, only LTO tape. I contacted Imagine Products and suggested they add that feature, perhaps they’ll consider it in the future. So for now, Retrospect was what I landed on…but if you are an LTO user, check out PreRollPos. It looks really slick. And if you think they should add the ability to write to spanned disk backups, please drop them a line.
Performance
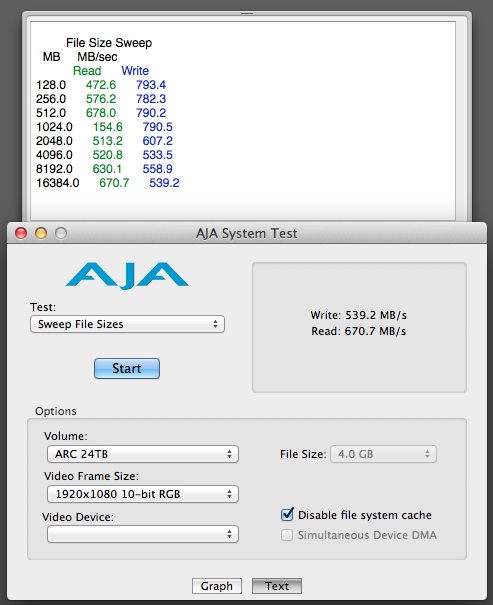
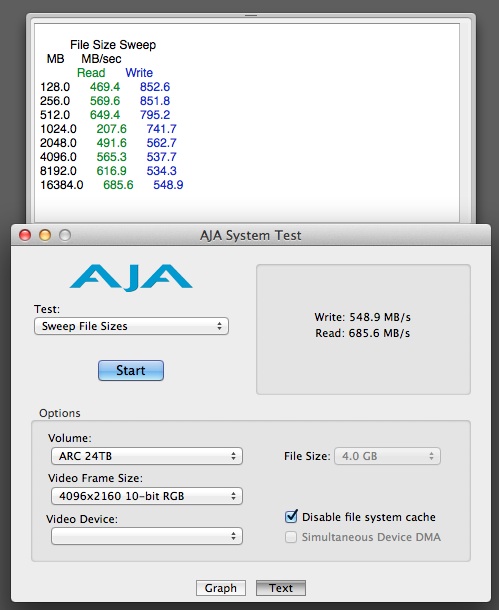
Bare Feats tested the ARC-8050 in RAID 0 and RAID 5 configurations and got nearly 900 MB/second performance from the tower. However, I chose to configure my setup as RAID 6, knowing speed was not my primary concern at this time. And with the redundancy overhead of RAID 6 comes a slight speed reduction vs RAID 5. On my mostly-full array (21TB used), AJA System Test is showing me around 500 MB/s Read and 650 MB/s Write speeds. I’ve been happy with this level of performance, and it is fast enough for most codecs and formats I use in post. On a tower that wasn’t as filled up as this one, you would see a slight speed increase over my numbers.
The one odd blip I am seeing in performance is with the AJA 1GB filesize Read speed test. For some reason, that option does not test well on this system. You can see it in both the 1080 and 4K options on the charts below. Here are all the filesize sweeps at 1080 and 4K resolutions.
Conclusions
The Areca ARC-8050 is a reliable, cost-effective RAID solution. All told, I spent $3,660 for 24TB of dual-redundant storage along with a full backup solution. For Thunderbolt users, this makes a lot of sense. Performance is quite good when equipped with fast drives, and setup is fairly straightforward for the average user. For the money, I’ve been very pleased with this system…it solves my needs at present, and gives me room to grow. I highly recommend the 8050 for small shops like mine that need general purpose editing and storage use. For those who need higher performance, consider this ARC-8050 or the smaller ARC-5026 unit in a RAID 0 configuration…you won’t have any data redudancy with RAID 0, but read & write performance is very, very good per Bare Feats testing.
A small side note…given that the Thunderbolt 1 standard is limited to 1350 MB/s on a channel, daisy-chaining multiple high-throughput devices can potentially max that out. So if that may be the case in your scenario, consider the Areca TB2 version of this 8050 system. The TB2 version doubles the throughput on each Thunderbolt channel, so you’ve got plenty of room for other peripherals to transfer data across the bus. But for users on a budget who just want a fast chunk of storage attached to a Macbook, this TB1 model will do the trick.
Matt Jeppsen is a working DP with over a decade of experience in commercials, music videos, and documentary films. His editorial ethics statement can be found here, and cinematography reel and contact info at www.mattjeppsen.com

Filmtools
Filmmakers go-to destination for pre-production, production & post production equipment!
Shop Now