We recently purchased a Canon 5D MarkII at WTHR-TV. Our photographer wanted to do some cool timelapes of the Indianapolis, but wanted to make them more dynamic and generate some large camera moves. He wanted more than the standard DSLR sliders and discovered this example on the web.
Now the Russian threw us a bit, but luckily the video is clear and shows that these large sweeping timelapses were made simply by moving the tripod and camera a foot or so at a time between exposures. The video shows the stills were then image sequenced into After Effects and through some manual tracking, and a lot of work, the images were stabilized. Now it was time to try it for ourselves.
On a clear night, our photographer Kyle Duell, took his 5D down to banks of the White River in Indianapolis, and set 5 sec exposures for each frame every 30 sec. and moved the camera 6 inches in between clicks. This gave him time to roughly reframe the shot. We were also shooting for 30 frames per sec for HD broadcast.
One hour and 155 frames later, he packed up and left it for me to work my magic in Smoke. The tracking tools in Autodesk Smoke have always been top of the line. 1 point, 2 point, 4 point perspectives… pick a point on the screen and Smoke can track it. Smoke also has an Autostabilize tool in FlameFX that was perfect for this task. It is the perfect tool to analyze multiple points on the video and stabilize the motion.
The 5D images for 5616×3744 and were imported into Smoke at that resolution as an image sequence. I would eventually resize this clip into an 1080 HD frame, but it was great to be able to stabilize the full 5K plate to give me lots of room to scale the clip later to get the best composition. I loaded the clip into the AutoStabilize tool, pressed ‘analyse’ and in 15-20 seconds it was done. The default settings on the AutoStabilize tool are set to stabilize the video horizontally, vertically and for rotation.
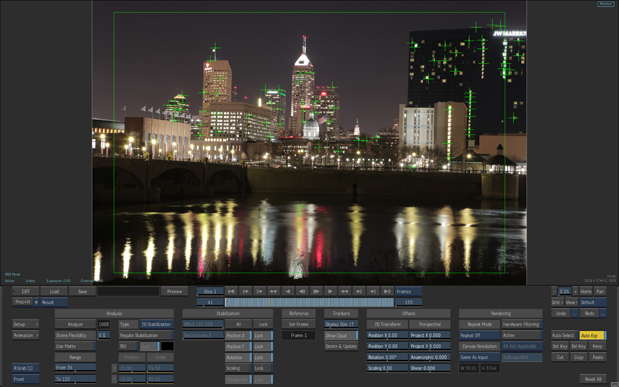
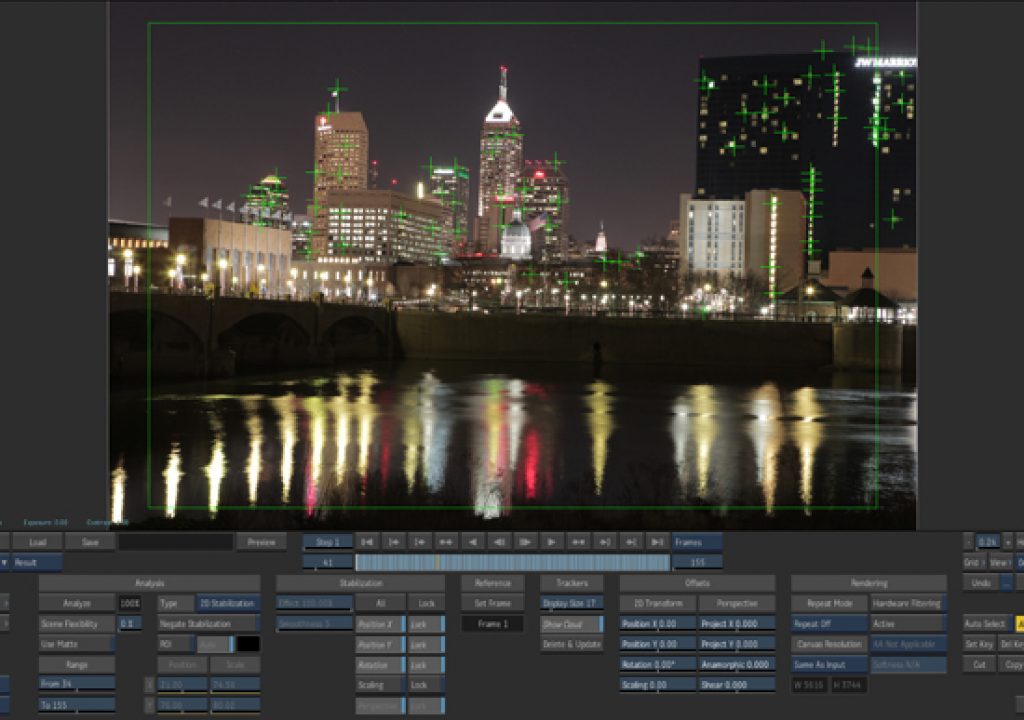
You can see by the image that Smoke tracks multiple points to get the most tracking data possible to generate the best stabilization and therefore the best image result.
It will pick up new points as they come into view and drop others that are no longer of value to the analysis.

There are also some other options you can do with the tool once the analization is complete. You can choose to just stablize just the X or Y axis, or you can deactivate the LOCK controls in the stabilization menu area which will open up the Effect Percentage and the Smoothness value. With these values unlocked, you can smooth out the motion of the camera instead of locking it down like a traditional stabilization.
So if your hand-held shaky cam is a bit too shaky, then you can use Smoke’s Autostabilize tool to simply smooth out your hand held shakes and still retain the hand-held look. You can also do the offsets and repositions to the stabilized clip right from this tool, as well as the resize to 1080HD.
The tools goes a step further by allowing you create a huge stabilization plate to contain the entire stabilized movement and locking down the shot. You can then paint, effect or composite on to this shot, then invert the stabilization data and put the natural movement back in to the shot. It’s this technique that really makes that special effect you create believable.
I choose to go into to the resize tool in Smoke, just because it gave me a better view to crop in and choose the best compositon for the final shot in HD.
We experimented with several shots around the city and they really turned out well. Shooting a timelapse takes time, but cleaning up those frames and making the camera move dynamic only took a few minutes when using Autodesk Smoke for Mac. Check out the breakdown before/after video.


