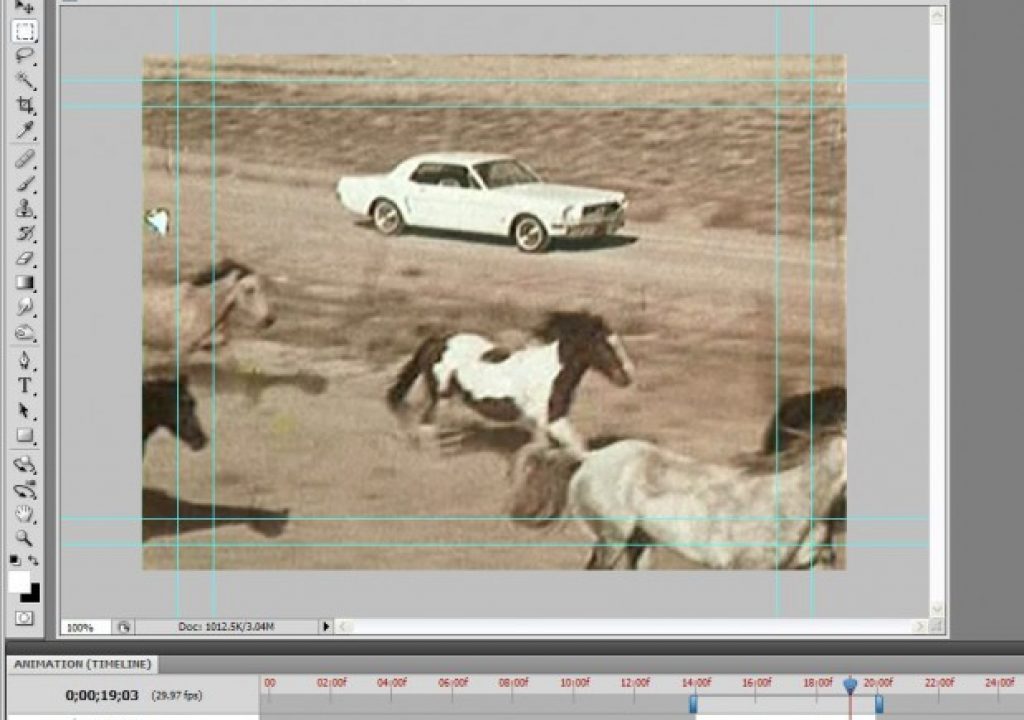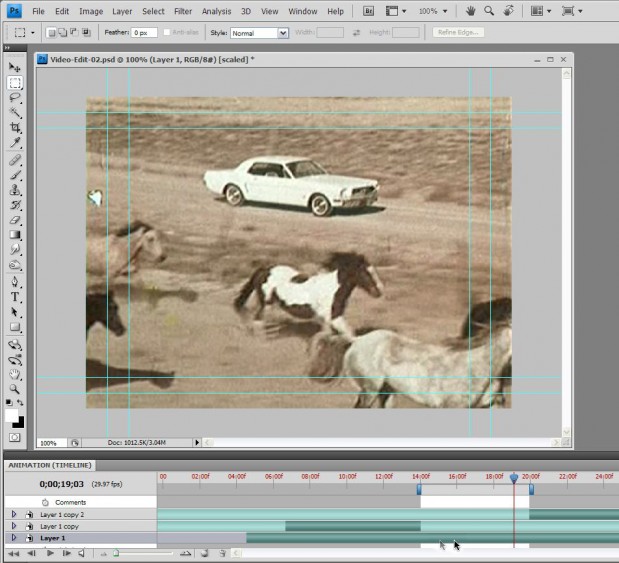
Are you a photographer that is just starting to discover the world of video with a new HD DSLR? Do you have video clips that just needs some basic editing but haven’t yet sprung for the high-priced video editing suites like Final Cut, Premiere Pro or Avid Xpress? You can do some basic video editing right inside Photoshop CS4 and CS5 Extended and retain all the resolution of your original footage. Unlike using a consumer utility like iMovie or Movie Maker, you will have total control over color correction, video layer modifications and even plug-in effects that you’re already familiar with.
Getting Started
The easiest way to get your video clips into Photoshop is to import them as video layers. You may wish to also wish to import video frames to layers if you’re going to do some frame animation or rotoscoping work on the individual layers (we’ll get into that more in another tutorial). But it’s important to be sure you have the correct file size, resolution and pixel aspect ratio in your main project file before importing your video.??
Create new project files with the correct size and aspect ratio by selecting one of the default Photoshop presets, or create one of your own and save for subsequent projects.
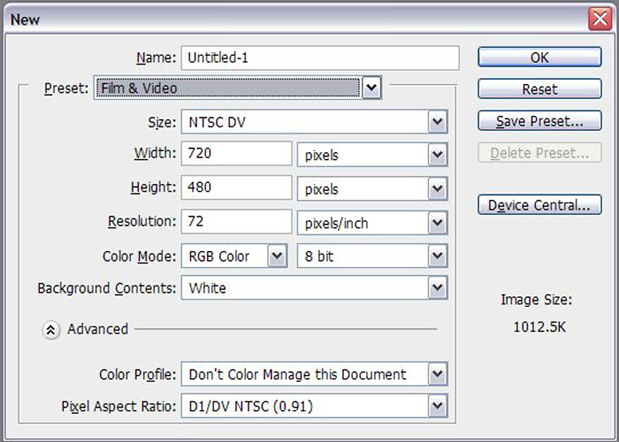
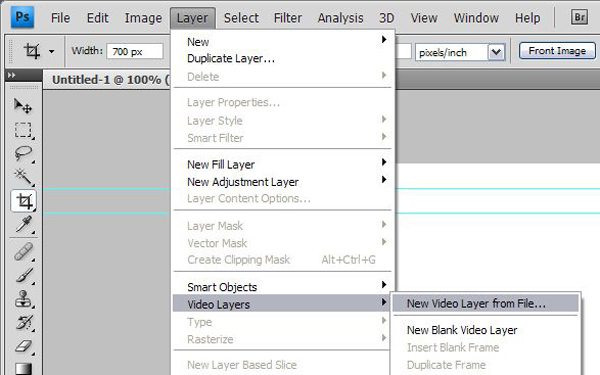
Import your video clips as video layers by selecting the menu item Layer>Video Layers>New Layer from File… then select your desired video from your hard drive.
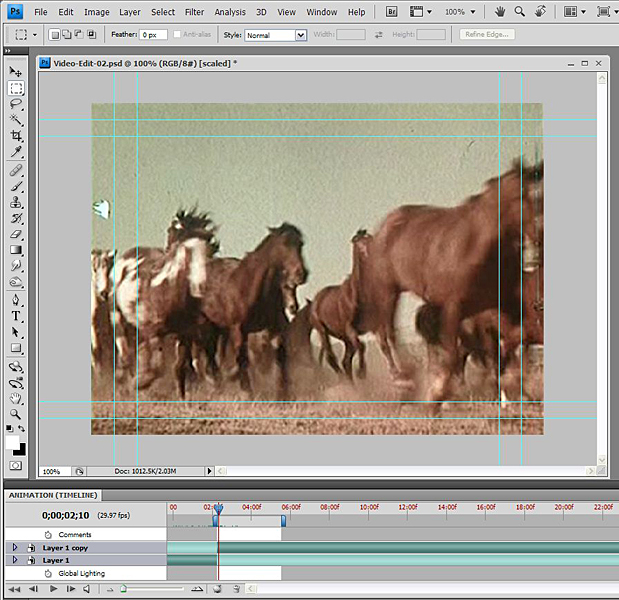
Your video is automatically added to your Layers palette as a video layer. You will need to be sure the Animation palette is open (choose Window>Animation and it will appear along the bottom of your screen with a Timeline). You can now play your video with the controls on the bottom of the Animation palette, or use the blue Time Indicator on the Timeline to scrub back and forth along the length of the video.
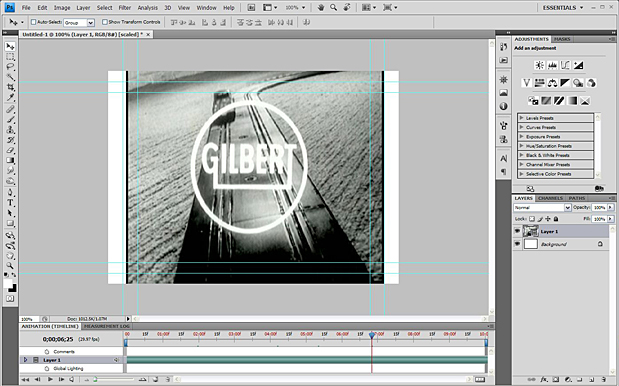
Before doing any editing, scaling or anything else to the video layer, you must be sure that the video is the correct frame rate for your project. This is especially important when importing footage from HD DSLRs that need to be adjusted for the desired effect – such as slow-motion clips that were shot at a higher speed (we’ll get into speed effects more in another tutorial).
To check or adjust your video clip frame rate, you’ll need to open the Interpret Footage dialog (Layer>Video Layers>Interpret Footage…) and make necessary adjustments for your project.
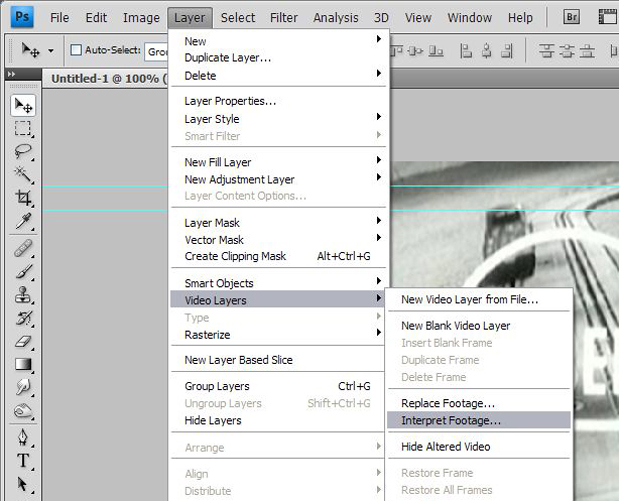
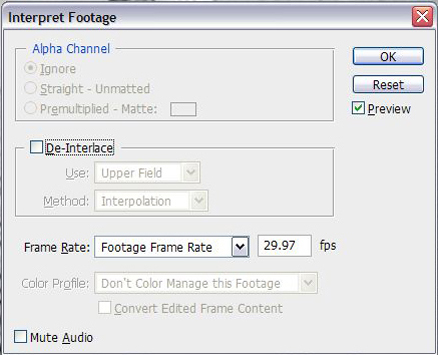
Make any necessary Frame Rate adjustments to your Video Layer prior to editing.
Now, when doing any editing or other functions such as Transforming or adding Effects, Photoshop will require you to convert the Video Layer to a Smart Object. Once you’ve converted your video, you will not be able to make any further adjustments to the frame rate.
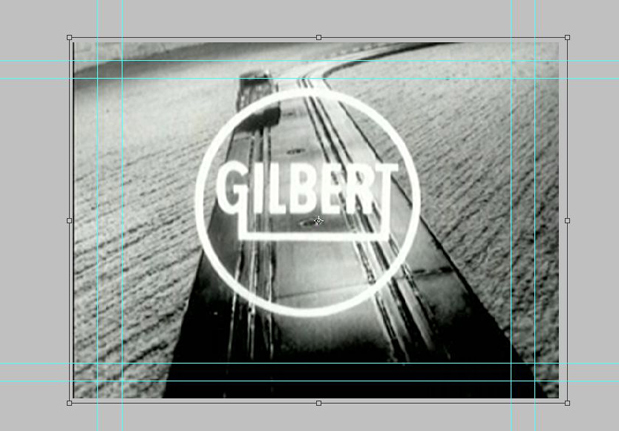
In this case, the footage clip that I imported was a different aspect ratio than my project file, So I will need to adjust the horizontal dimension of the Video Layer with the Free Transform function (CMD+T/Ctrl+T). This will give me a pop-up warning telling me that Photoshop will need to convert it to a Smart Object.
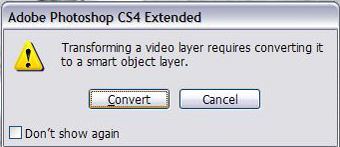
Warning for converting the Video Layer to a Smart Object.
I can now freely transform my Video Layer like I would a static image layer. However, you cannot animate Scaling of layers over time in the Timeline, but I will show you in subsequent tutorials how to work around this and other perceived limitations in Photoshop.
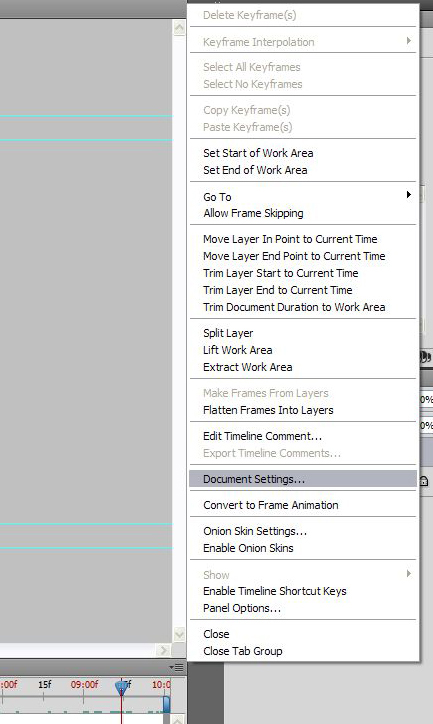
Now it’s important that the project file is the correct length to accommodate your video project. Like most palettes in Photoshop, you have a small palette menu button at the top-right corner of the palette that gives you options. When you select the palette menu for the Animation palette, click on Document Settings… and change the Duration to your desired length. You can also adjust the frame rate at this point, should you rather change the project rather than the footage you import.

Making Simple Edits
Unlike traditional video editing software, there are no real “slice & splice” tools in Photoshop, so the workflow is handled a bit differently.
Check out the various editing methods directly on the Timeline:

To crop to an in-point on a video layer, click the left end of the green bar on the video layer on the Timeline and drag to the right. This will reveal a light green bar underneath. To set the end point of the clip, click-drag the right end of the green bar to your desired point on the Timeline.
To create a “Slip-Edit”, click on the light green bar and drag to the left or right. This allows you to keep your cropping in the proper place on the Timeline, but move the video “underneath”.
You can also move the entire clip along the Timeline by click-dragging the dark green bar in either direction. Any cropped points or slip-edits will remain intact with the video layer as you move it along time.
If you duplicate your video layers, you can make several of these crops and edits stacked in the order you wish to play back and create your edited project very quickly.
Palette Menu Editing Tools with the Work Area
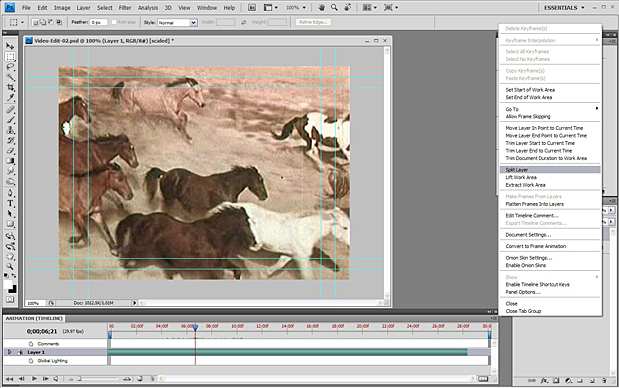
Split Layer:
Position your Time Indicator head anywhere along the Timeline and select this palette menu option to slice the video layer at that point. This will create an end point on the current video layer and create a second layer with the in point set in exact same position.

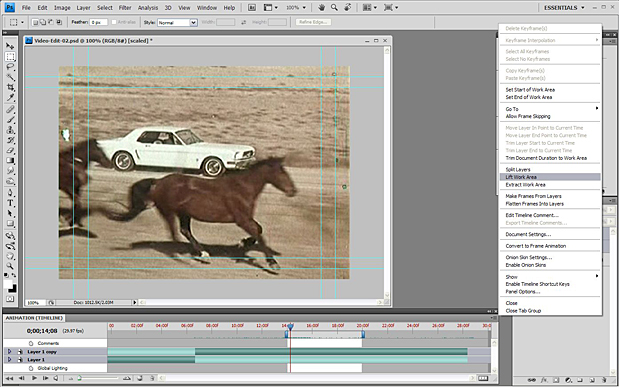
Lift Work Area:
Use the Work Area handles (blue tabs at either end) to position a section of video you wish to “punch out” and leave a blank edit in the video clip layer. This actually sets the end point of the current video layer at the beginning of the adjusted work area, then duplicates the video layer and sets the in point at the end of the work area.
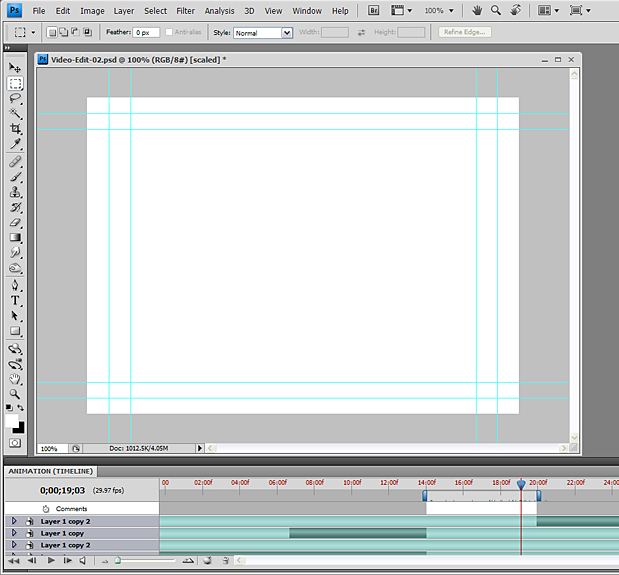
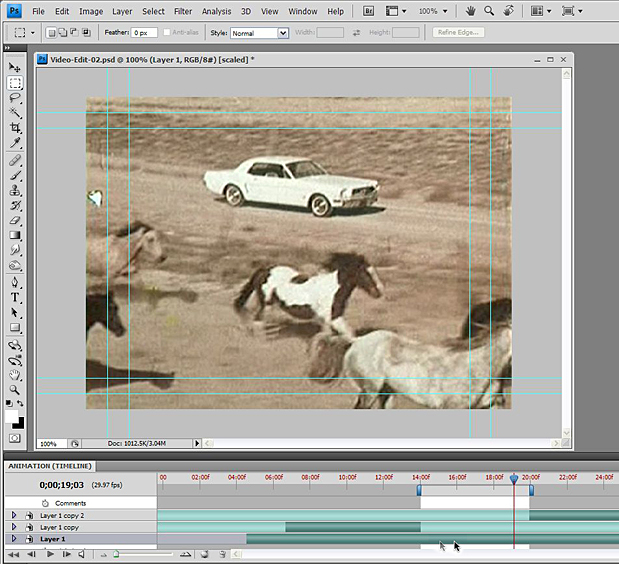
You can now slide another video layer beneath on the Timeline to fill this newly-created void. This comes in handy when you don’t wish to change the timing of your edited clip but wish to replace a section of footage in-between.
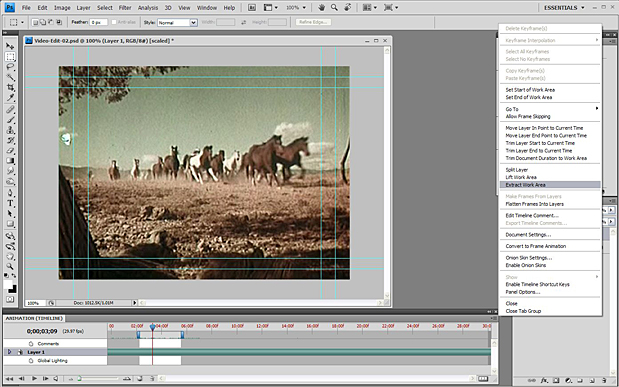
Extract Work Area:
Using the Work Area, select a segment of the video layer you wish to remove and choose this option to make a clean cut and pull the rest of the clip up to match. This is also called a “ripple delete edit”. This option sets the end point of the current video layer and extras the length of video denoted by the Work Area, while duplicating the video layer and creating a new in point. The edit is seamless during playback.
Trim Document Duration to Work Area:
Set the Work Area to the desired segment you wish to make your entire movie project length and choose this option. It will now trim the document length to only the selected Work Area. This is best done after you’ve completed all your video layer edits and cleans up the Animation Palette Timeline.
Jeff Foster is a published author of several how-to books and training videos in the motion graphics, animation and video production industries and is an award-winning video producer and artist. Visit his web site to learn more about his training methods, tips & tricks at PixelPainter.com

Filmtools
Filmmakers go-to destination for pre-production, production & post production equipment!
Shop Now