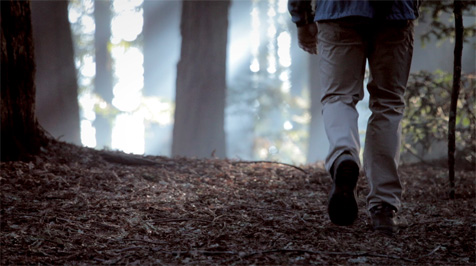
When production companies ask me to shoot spots on the Canon 5D MkII I don’t flinch anymore. Sure, it’s not the most user friendly camera in the world, but I can’t complain about the images I can make with it. And no one else does, either.
In this case, half the battle was putting the camera in the right place at the right time–and quickly. It was the perfect camera for a small, fast-moving project.
NOTE: PVC is having some server issues that we hope will be fixed shortly. If this page doesn’t load completely and you see a lot of broken links, please do try again later. I’ve swapped out the PVC video feed with the Youtube feed until this issue is resolved as our video server is also affected. Sorry about this. (April 11, 2012)
I’m always excited to work with my friends at Teak Digital. Director Greg Rowan is one of the most pleasant kinds of directors: he has a vision of what he wants but he’s confident enough to let me run with it if I see a shot that might fit. Most of us got into this business to create, and it’s nice to work with people who encourage us to be creative in our jobs. Collaboration makes us all look better
Here’s the spot:
We shot this spot at Roberts Regional Recreation Area, a park in the hills above Oakland, CA. During the scout we shot a number of stills and I was immediately captivated by the quality of light. The forest itself was fairly dark, and while the low winter sun occasionally punched through the leaves and branches and lit the ground the more interesting shots looked directly into the sun itself.
Long ago I noticed that sunlight through layers of branches creates some of the more fascinating shadows I’ve seen in nature: the lower leaves interweave and become little apertures, projecting an image onto the ground of the sun coming through leaves higher up. This creates a combination of hard and soft overlapping shadows that’s very complex and interesting.
The shadows weren’t sharp enough or vertical enough to see that effect here, but what can be equally fascinating is looking back at the sun through the leaves and seeing how that effect is created. As the camera moves in relation to the trees the leaf “apertures” open and close, causing the sun to flare and diminish in a seemingly random pattern. The multiple layers of branches interact with each other and create something much more interesting than one layer alone ever could.
This is why I almost never use one “cookie” at a time: I stack them, with a fair distance between them. The shapes are much more random and full of both soft and hard edges.
We see a little sun flicker in the opening shot:
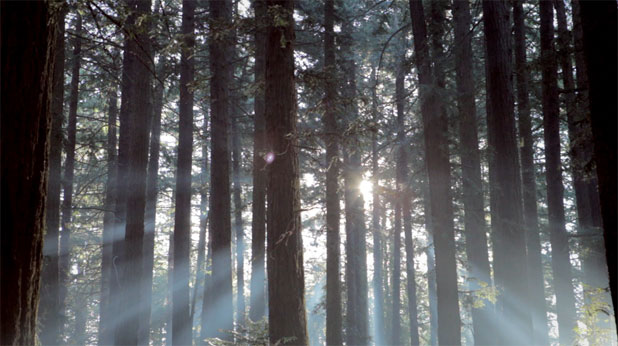
I love that shot, and it was really simple to create. You may have noticed a bit of smoke in the air; we added that with an industrial-strength fogger placed about 150′ upwind. The forest is beautiful on its own but a bit of atmosphere creates spectacular shafts of light that add a tremendous sense of depth to the shot.
It was a real pain to lay 50′ of dolly track and shoot that shot on the longest lens possible… so instead we used a 5′ camera slider. No camera move in this piece was longer than 5′, and most were a lot less. This is one of many “grab” shots that I captured on a whim just because I thought it would look good.
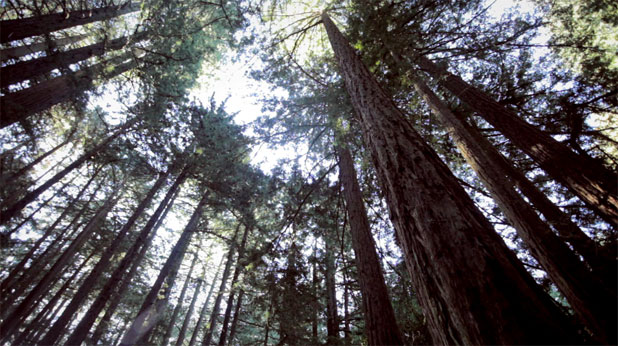
This was a grab shot at the end of the day, just after the sun disappeared over the distant hills. I forget which lens this was but I want to say it was the wide end of a very wide Canon zoom, probably 16mm. Whenever possible I like to “work” a camera position and grab as many shots as I can to give the director and editor lots of little “moments” in post. I’d just finished shooting another grab shot sliding past some bushes when I realized I could point the camera straight up and get another one without physically moving the slider to a different position.
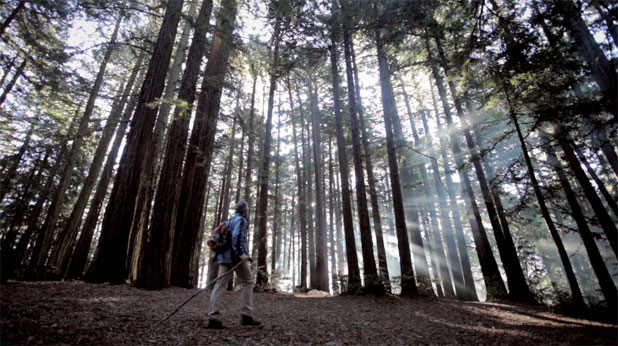
We worked this particular valley for a while. We had the actor walk left to right, right to left, to and from camera, and switched up the lenses for a lot of variety. The tripod head we used wasn’t the greatest (also owned by the production company–we used all their camera gear to make non-profit money go farther), and long lens slider shots can be hard to operate. Also, focus is almost impossible to pull on Canon glass. I picked a sweet spot for the action, locked off the camera on the head, and timed my slides so that the actor landed in focus at the sweet spot of the move.
Everyone has to compromise on equipment on occasion. The trick is figuring out what can be done with what you have and stick to that. If I’d tried to operate the head and follow focus during one of these shots we’d have walked away with a lot of useless footage. Instead I locked off the head and the focus and concentrated on taking advantage of the one real piece of camera equipment we had: the slider.
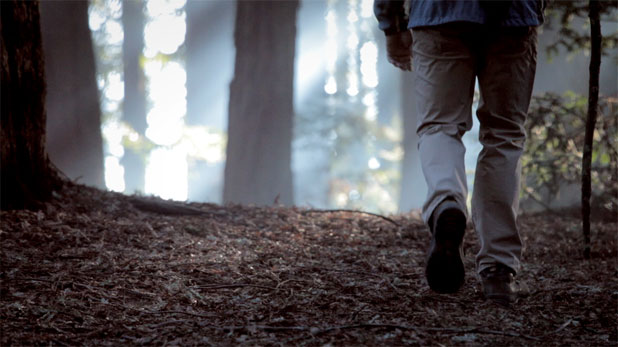
Look familiar? That’s because this shot is pointing the same direction as the shot above, just on a longer lens and with the actor walking away from camera instead of across the frame. The background for this shot is nearly in the middle of the background of the previous shot. Cheats like this are extremely common and save a lot of time. This is an example of milking a single setup for maybe ten shots, two of which were used. If nothing has to change but the action it’s very quick to get variations on a theme.
This is also an example of the strategy I outlined above: lock off the head, focus on a sweet spot, and concentrate on getting the camera to the right place at the right time at the right speed.
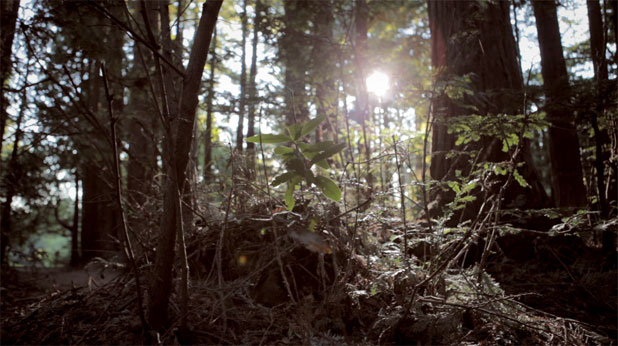
Remember the shot looking straight up into the canopy? This is the shot I grabbed immediately before that one, using the same slider position. This is at the end of the day and the sun has set. The light you see is a 1200w HMI PAR aimed at the lens from about 30′ away.
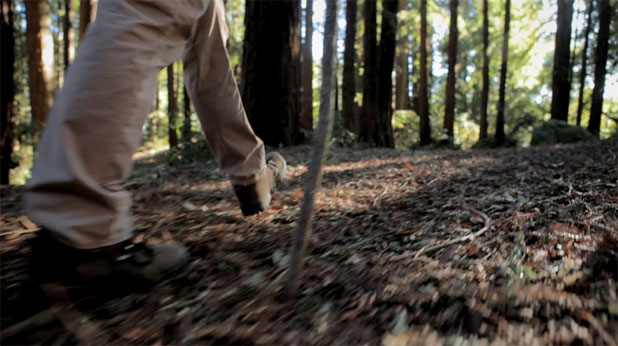
This is one of those shots that you just have to “feel.” I had a TV Logic on-board monitor that I was able to glance at occasionally but for the most part I held the camera at ground level and, without looking continuously at the monitor, walked along with the actor. I’ve developed a knack for framing wide shots without having to look through the viewfinder, and that comes in handy for awesome shots like this one. That’s one thing I like about the size of the Canon 5D: it’s easy to hold the camera a few inches above the ground, roll, tell the actor to walk, and see what happens.
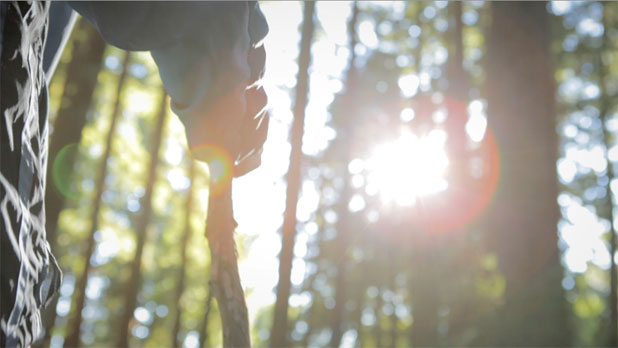
This is the same setup as the previous shot, but with the camera looking up instead of low across the ground. The most interesting thing in a dark forest is the sun moving through the leaves, so I tried to include it in as many shots as I could.
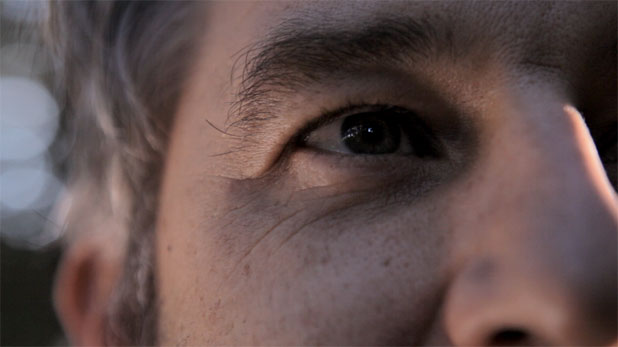
I think the light in his eye is a very distant 1200w HMI PAR, and I believe I had a bounce card somewhere off to the left. This shot is a bit grittier than I normally shoot–more often than not I like to make people look good–but the mood was perfect for this piece. It feels very raw and real but beautiful at the same time.
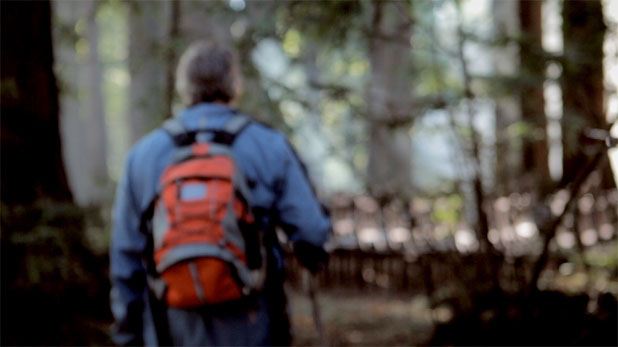
Focus is a pain on the Canon 5D: Canon still lenses don’t allow for decent focus pulling and it’s almost impossible to judge focus on objects in motion as the monitor output drops to SD quality while the camera is rolling. My solution: just go with it. It’s interesting to have the actor start in focus and walk out. Leaving the background out of focus when there’s obviously something interesting there draws the audience a little deeper into the story. Sometimes the best frames both show and hide things at the same time: you know something’s there but you can’t quite make it out, and that engages your imagination.
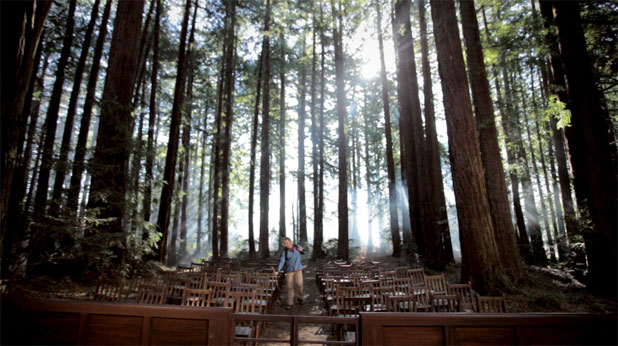
Yes, we built a courtroom in the forest. It was a pain to get it level, and we didn’t have the budget to build a raised platform above the forest floor, so we did the best we could. I looked at leveling the camera to the set but the trees looked like they were about to fall over and crush it, so I leveled the camera to the trees instead.
This shot faces due south. I wanted the sun in the shot for as long as possible to backlight our smoke. By this time the wind had picked up and we had a hard time getting the smoke to hang. For this shot we just smoked the hell out of the background and waited for it to settle to the point where it didn’t look like a forest fire.
What I really liked about this setup is that I got to light an exterior, something I hadn’t done in a while. (Budgets being what they are I’ve used a lot of bounces and reflectors over the last couple of years. But you can’t use a bounce where there’s no sunlight, so…)
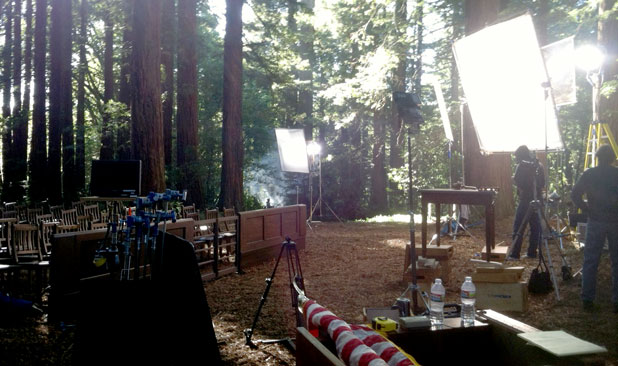
That’s a 4K PAR on the right, through 6’x6′ full grid, and a 1200w PAR on the left, through 4’x4′ Lee 250. Both lights are gelled with 1/4 CTO.
At this point in the story the look had to change a bit from natural and gritty to warm and friendly. The 4K punched enough fill into the set to eliminate the “top-lit by blue sky” look. It also allowed me to stop down a bit so the background didn’t blow out quite as much.
Sometimes a big soft source at a distance doesn’t create a lot of modeling so I added the 1200w PAR as sidelight to try to create a little more interest.
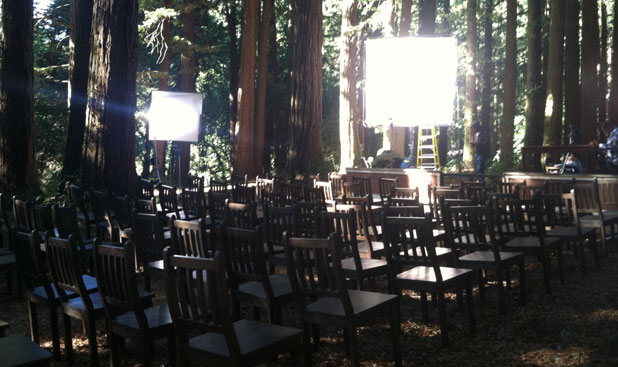
Reverse view, looking back towards the camera.
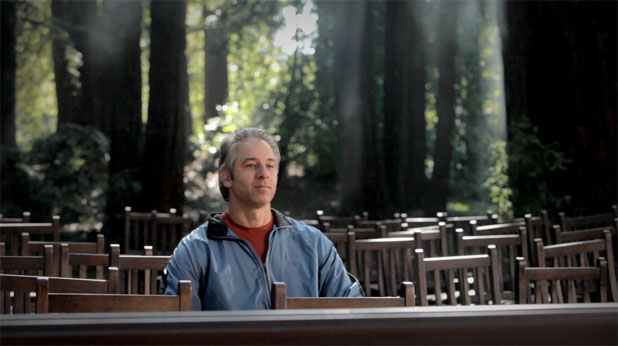
The 4K creates the soft overall wrap from the right while the 1200w PAR adds a little more heat to the camera right side of the actor’s face. The two lights blend nicely even though one is big and soft and the other is little and hard. I frequently keep most or all of my lighting to one side of the set: I can have different lights doing different things and they blend together into a very natural unlit look.
I framed this shot so I didn’t have to tilt, as the head I was using was not the greatest. Even with a decent head, though, I would have gone for a composition like this. In film school we’re taught that headroom is always “this much” below the top of the frame, and some people never unlearn that lesson. Head room is whatever works for the shot, and some of the most interesting compositions use a lot of it. Painters composed this way for centuries: most landscapes show the center of interest at the bottom of the frame and fill the top with structures or sky and clouds, as that’s roughly the way we see things anyway. When we’re standing at ground level looking at something else on the ground there’s typically an awful lot overhead to look at, particularly if we’re outside.
Rules are meant to be broken. Understand them, use them when appropriate, and then toss them as soon as an opportunity presents itself.
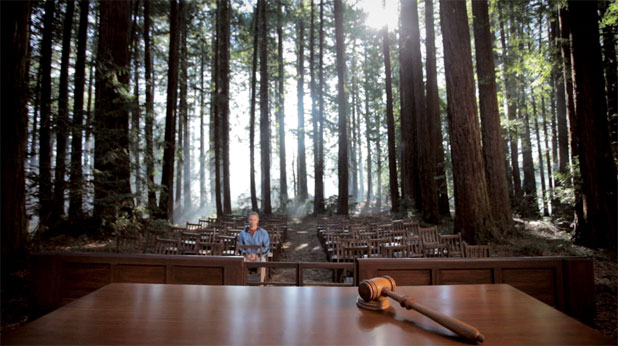
This is the final shot of the spot, although we did this around noon, in the middle of our shoot day, to make sure the sun was opposite the camera to maximize our shafts of light. The foreground is lit by spill from the 4K PAR, but the left side of the bar went a little dark as it wasn’t getting enough light from the 4K. We added a 1’x1′ tungsten LitePanel to bring it up a bit.
Why a tungsten LitePanel for a day exterior? Partly because that was what we had handy; partly because lighting warm wood with warm light allowed us to make the left side of the bar look brighter with less light. If we’d used a daylight unit we’d have required more light because half of it, the cool half, would have been absorbed by the warm wood. Using warm light made the wood appear brighter with less light, as much more of the warm light is reflected by the warm wood surface.
The “dolly” is simply a pull back on the 5′ slider to the point where it almost entered the frame.
This is probably a good time to mention there’s no color correction on this spot other than a vignette on the wide courtroom shot. This is pretty much the way I shot it. As always, I used Light Illusion’s excellent custom gamma curves.
This spot is currently on Youtube, and I believe Earth Justice is fundraising to put the spot on the air. If you’d like to contribute you can do so by going here.
Art Adams is a DP who loves to smoke (sets). His website is at www.artadamsdp.com.

Filmtools
Filmmakers go-to destination for pre-production, production & post production equipment!
Shop Now