Motion Tracking – After Effects CS4 with Mocha from Jeff Foster on Vimeo.
One of the best additions to After Effects CS4 is the inclusion of a stand-alone application called Mocha for AE from Imagineer Systems. This is a powerful planar motion tracker and stabilizer that does an amazing job of tracking all kinds of elements in motion or to stabilize a character or a scene with shaky footage. Many of the example movies you may have seen demonstrating Mocha with After Effects CS4 (including some of my own) have been inserting something into the screen of a portable device or a TV. But what if the object you are tracking goes off the screen? What if you want to track something in motion but want to retain the realism of the hand-held camera shake? Even though Mocha does a remarkable job of stabilizing footage I thought I’d put Mocha to the test with some hand-held footage from a compact DV cam and track the footage, shaking and all!
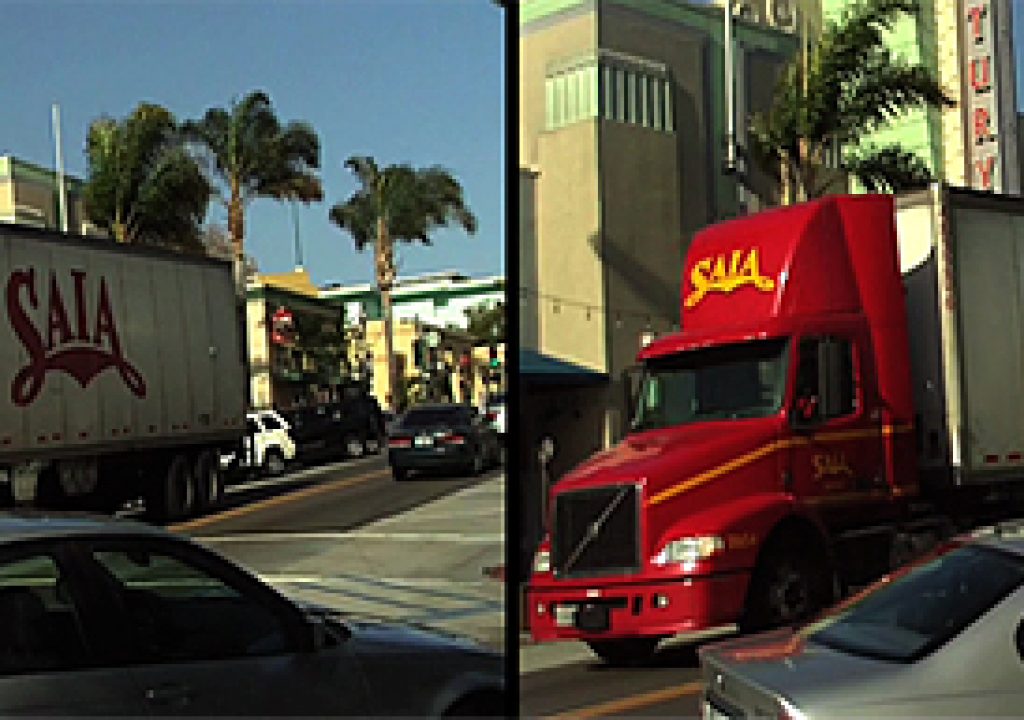
In this project, I captured a semi truck rolling through town with a small portable DV cam. Windy day. Camera shake. Poor quality camera with lens distortion. You name it… this footage has it. What I wanted to do was replace the side of the truck for an ad for the NAB Conference, but make it look believable, like someone captured this NAB truck rolling through their town with their hand-held camera.
![]()
Creating the Insert Image
I started by opening up a single frame of the footage in Photoshop, so I could clean up the side of the truck and incorporate my graphics. Using the Clone Stamp and the Healing Brush tools, I carefully eliminated the existing logo on the side the the truck’s trailer.
![]()
I then applied the NAB logo to the side of the truck from another layer and adjusted the transparency and set the Layer Blend Mode to Overlay to produce a more believable effect. Since the file I was working on was created from a single frame of the original footage, I knew the dimensions were correct for resizing the panel on the side of the truck’s trailer. Using the Distort Transform tool, I stretched out the four corners of the trailer’s side panel to fill the entire file dimensions. This is necessary to work correctly with the Corner Pinning produced by Mocha when applied to the layers in After Effects.
![]()
Next, I open up After Effects and create a new Comp that I import and place the original footage file, plus the cleaned up and modified trailer side panel image, positioned on top of the footage layer. I keep the Current Time Indicator (CTI) at frame 0 so it’s ready to apply the tracking data from Mocha when I return to After Effects.
![]()
Motion Tracking in Mocha for AE
I now launch Mocha for AE and create a new project, selecting the original footage file to obtain the tracking data I need for my composite in After Effects. Most of the default settings are fine so I click Finish. The project opens up and I make sure the proper PAR settings are correct in the Clip panel on the bottom of the screen. I select the Film tab on the bottom right and verify that I’m using the standard HD format. (It’s important to know your video format and preview aspect ratios prior to creating your project in Mocha).
![]()
![]()
I first scrub down the timeline to a good visible area of the side panel of the trailer to define my starting point. I then select the Spline Tool from the toolbar and start to create an outline outside of the edges of the truck’s trailer side panel. Once you’ve gone around the entire area, I right-click the mouse to close the spline. You can move the spline points around to your satisfaction and this creates the first key frame in the tracking project.
![]()
Next, I select the Track Forward button and start the tracking process. In most cases, this goes pretty smoothly (provided you have clean footage from a decent camera) but with the shakiness and poor quality from the cheap camera I used, it has to really think on every frame, so this process takes awhile. But don’t just walk away and let it run unattended – you’ll want to stop the process should it start going awry (as it did in this case).
![]()
In the case of this footage, there were a lot of vertical surfaces and objects to confuse the tracker as the trailer moves down the street, such as palm trees, buildings and signs. I had to stop the tracking process and re-align my spline as close to the original position as possible; then resume the Track Forward process.
![]()
![]()
continues/…
In this video, the truck drives off the left side of the screen, which would be the death of the built in trackers in After Effects, but the planar tracker in Mocha adjusts for this motion and automatically retains its current path of motion. It does eventually get a bit confused and you have to stop it and make some minor corrections to the spline points.
![]()
Once I completed the tracking to the point where the truck was off the screen, I returned to the first keyframe and then selected the Track Backward button to complete the first frames of the footage from where I started.
![]()
Defining the Corner Pin (Surface) Region
The next step was to create the corner pin region inside the tracked spline. To start this process, I select the Surface button on the right side panel. This will reveal a blue square box in the center of the tracked spline. I then click and drag the corners to the outside corners of the trailer’s side panel. Each move of the corner point shows a live detail inset in the upper left corner of the view window so you can see a magnified view of the area you are moving the points to.
![]()
![]()
To set this point of the track as the master keyframe, I open the Adjust Track tab at the bottom and select the Set Master button in the panel.
![]()
As I travel down the timeline, I can see where the surface corners may wander off alignment a bit so I can select a corner and manually re-align it with the mouse, or if it’s off just slightly, I can click the Auto button to see if it will snap back into alignment, or use the Nudge Up, Down, Left or Right buttons to reposition each corner. The zoomed detail inset window will show you the original (from the Master keyframe) and the current positioning of the selected corner point.
![]()
To help me make the proper adjustments to the surface data, I can select the Grid button to see an expanded visible grid that tells you immediately if your track is off in any direction in 3D space. With this grid, it’s easy to see if you’re off in your alignment – even just a few pixels. Play back in real time to see if the grid moves off the directional plane you intended and make adjustments to the surface corner points accordingly.
![]()
Exporting the Tracking Data
Once I’m satisfied with my track and surface path, I need to export this data to use in After Effects. I select the Export Tracking Data button in the bottom right of the Adjust Track panel and choose the After Effects CS4 corner pin data option in the pull-down menu in the dialog. I can then either save the data as a text doc (.txt) or Copy to Clipboard. I chose Copy to Clipboard the return to my open project in After Effects. (sometimes I chose both options in case my computer crashes jumping between apps – just as a safeguard).
![]()
Applying the Tracking Data to the After Effects Project
Once I’ve returned to my open project in After Effects, I make sure that my CTI is at frame 0 and I’ve selected the layer with my full-frame side panel artwork is on (which could also be a full-frame video if I chose) and then simply Paste the data from the clipboard to this layer. The artwork layer is now positioned correctly onto the side of the truck and you can see the path of motion indicated by the keyframes it created. Note the keyframes for not only the corner pin data on this layer, but also for Position, Rotation and Scale.
![]()
![]()
NOTE: If your inserted image or video appears to be slightly off-alignment from it’s intended destination, then you can slightly move it into position with the Anchor point. All of the tracking Position and Scale information will remain intact.
Creating a “Reflection Map” for the Truck
Now that I have the side on my truck, I can play it back in RAM preview and make sure that it aligns perfectly with the shot – including the camera shake and distortions. But to increase believability in this shot, I need to add some slight reflections onto the side panel surface as the truck moves down the street. Since the truck is in motion and the reflections are minimal (mostly light/color) I only need something that represent the environment in this location, so I use a single frame of the original video footage without the truck in it to create my “reflection map” – cropping and blurring the image and darkening the bottom section. If I had wanted to simulate a real mirror-like reflection, I would have planned ahead and recorded video from that side of the street, using a tripod at the correct angle, then inverted that footage so it would be reversed, then continue with the following steps).
![]()
![]()
I then import the “reflection map” file into my project in After Effects and place it on top of the tracked side panel layer in my Comp. I lower the transparency so I can see through it enough to reposition it, scale and rotate the layer until it looks like it will create the reflections I want along the entire path of the moving truck. I then set the Layer Blend Mode to Overlay (Layer>Blend Mode>Overlay).
![]()
I need to now mask the reflection map to only the side panel on the truck, so I then duplicate the tracked side-panel layer (containing the corner pin tracking data) and move it on top of the reflection map layer in the Comp Timeline. I then select the reflection map layer and chose Layer>Track Matte>Alpha Matte to mask out all of the image surrounding the side panel on the truck. Next I set the reflection map layer’s transparency to 10% so that it’s barely visible on a single frame but when you play it back in real time RAM preview, you can see the light and color reflections – which really sells the effect!
![]()
Here’s the final video comparison between the original and the tracked project:
Motion Tracking – After Effects CS4 with Mocha from Jeff Foster on Vimeo.

Filmtools
Filmmakers go-to destination for pre-production, production & post production equipment!
Shop Now