Blackmagic Design released DaVinci Resolve 18.6 today. It is out in full, without a beta period, and it doesn’t appear to update your existing database. That hasn’t happened in awhile and my first thought was that it must be because this was a relatively minor update. Which is unusual for Blackmagic as their trade show Resolve updates are usually quite full featured.
It looks like a relatively minor update for @Blackmagic_News Resolve 18.6 as far as editing features go. The cloud stuff is big but basically editorial features doesn’t get much. And 18.6 doesn’t appear to be a beta.
— Scott Simmons (@editblog) September 14, 2023
In fact, looking at the what’s new bullet points, there isn’t as much in the Edit page as we’ve had in previous versions.
Cut and Edit
- Selected sync bin clips can now be edited in the inspector.
- Ability to trim gaps in edit with the Speed Editor and Editor Keyboard.
- Interlace project and timeline option to edit at frame or field boundaries.
- Support for font case on subtitles.
- Support for outer text stroke in titles and subtitles.
- Ability to copy and paste markers in the source viewer and timeline.
- Change speed for multiple selected clips from dialog and inspector.
- Adding an effect to a clip switches the inspector to the effects tab.
- Support for a source resolution option when performing render in place.
- The playhead position is restored when undoing edit actions.
- Option to show timecode toolbar on edit viewers.
- Source viewer displays marker clip extents.
- Configurable actions to switch recently viewed clips or timelines in viewers.
- Keyboard customization support for multiple track context actions.
- Ability to reconform multiple selected timelines.
- Ability to assign and apply favorite keywords to clips and markers.
- Retime curve context menu now displays both curves.
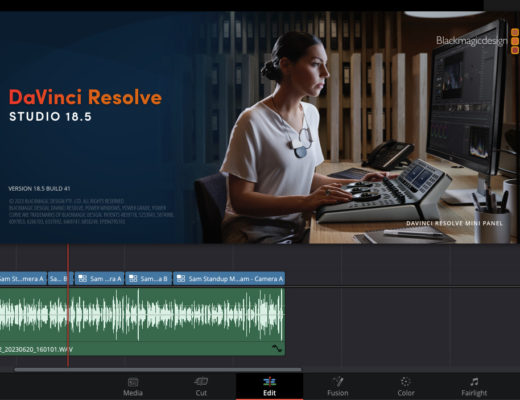
But then look at the splash page when you launch Resolve 18.6.
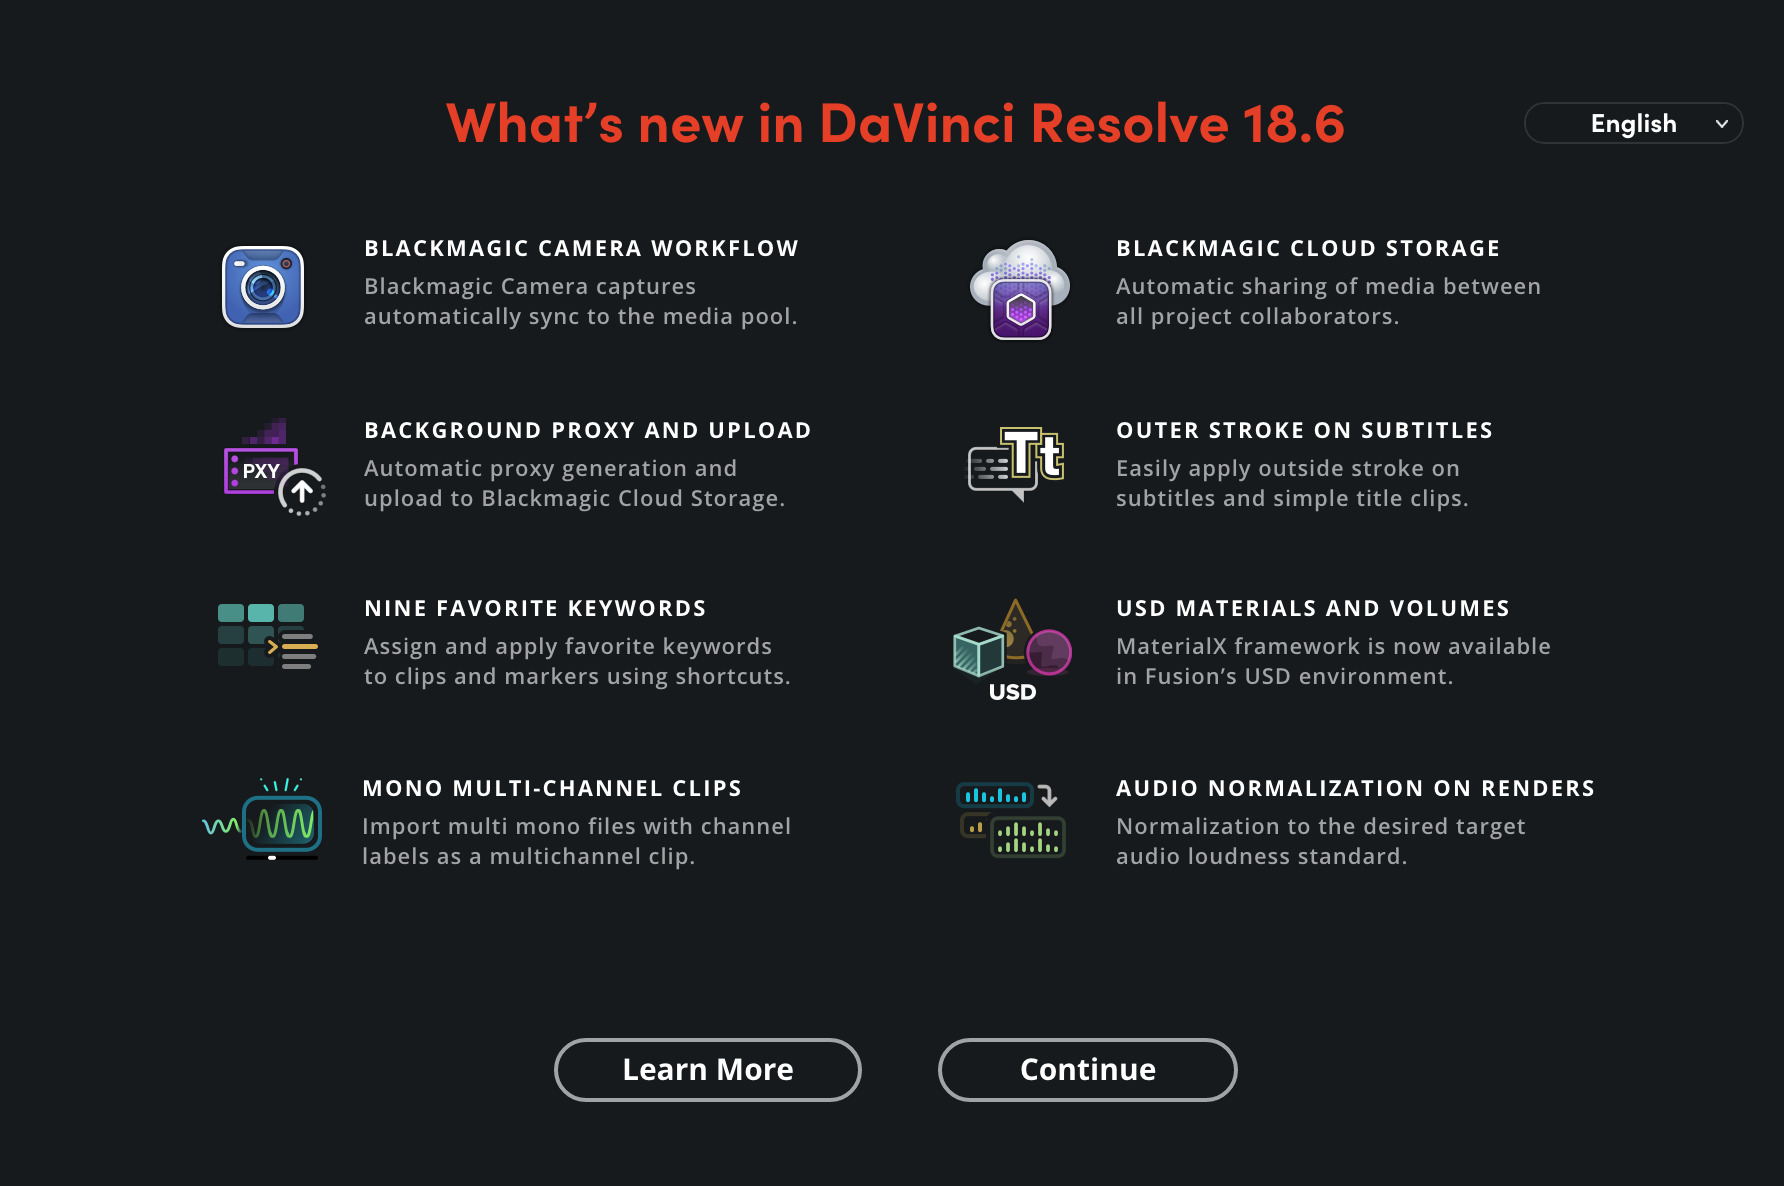
And then key in on this little item from that list:

If that sounds very Final Cut Pro like, you’re not wrong. In fact, Keywords have existed in Resolve for a long time. They weren’t the most useful thing and didn’t really provide many advantages over traditional logging with subclips, selects sequences, comments and things like that.
4 years ago I made this video speculating on how Resolve was dangerously close to Final Cut Pro’s signature feature: range-based keywording.
Resolve was close but it wasn’t there. 4 years later we finally have Final Cut Pro-style keywording via Resolve’s … uhh … unique … implementation of keywords. It isn’t quite as fast and elegant but it will work and gives another tool in the editor’s arsenal of how to make sense of mountains of media.
The Resolve manual hasn’t been updated just yet but from playing around with 18.6 this is how I can see implementing range-based keywording in DaVinci Resolve.
Notice under the Mark menu, there is a new submenu for Favorite Keywords. And there are 9 of them. Sound familiar?
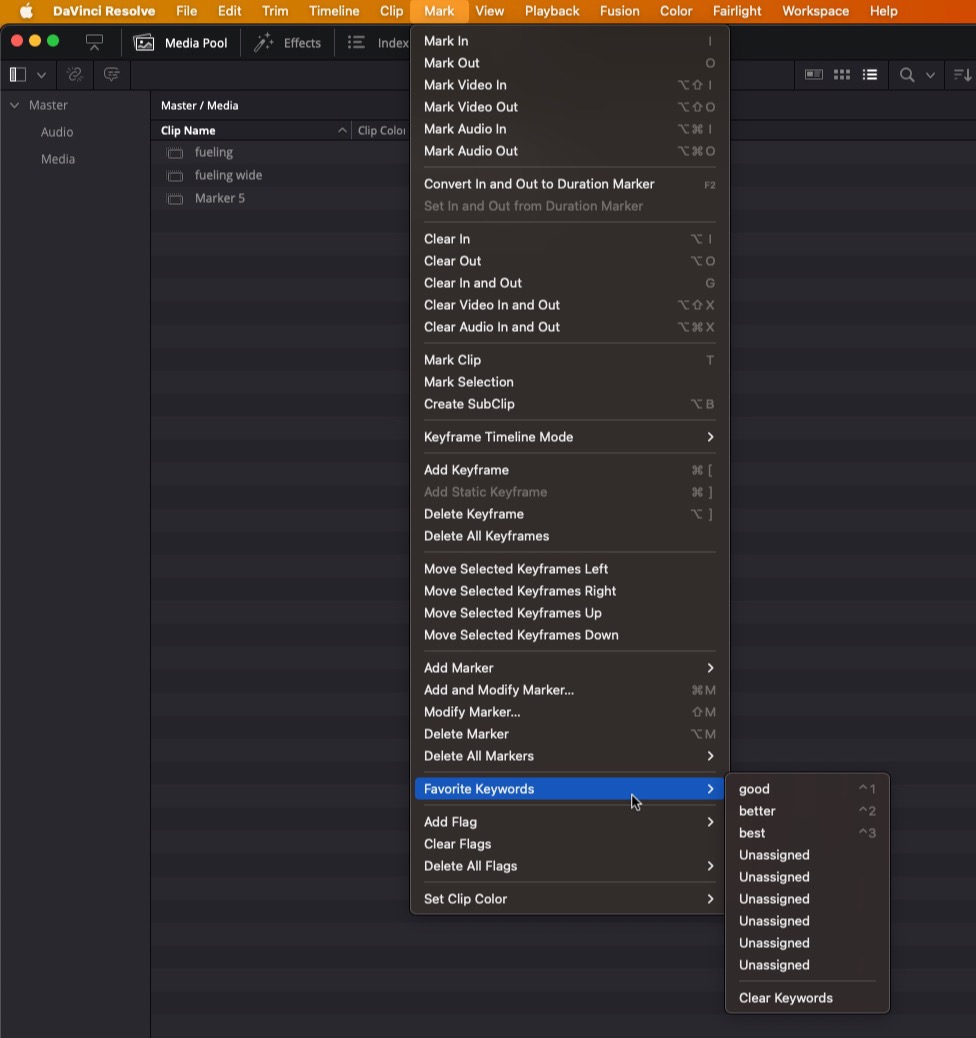
But Scott … how did you get here?
The joy or range-based keywording is you are able to mark a specific duration range in a clip, somehow, someway, and get only that marked duration quickly collected into its own space, complete with some kind of data to make it useful. It’s getting only that marked duration Resolve had been missing for so long since adding keywords.
Let’s break down how to make this work. You don’t have to follow this order exactly but this is what worked for me.
First, decide on what keywords you want to use
Resolve has a Keyword Manager that is a place to manager keywords. There are many of them pre-populated for you but you can also add your own custom keywords.
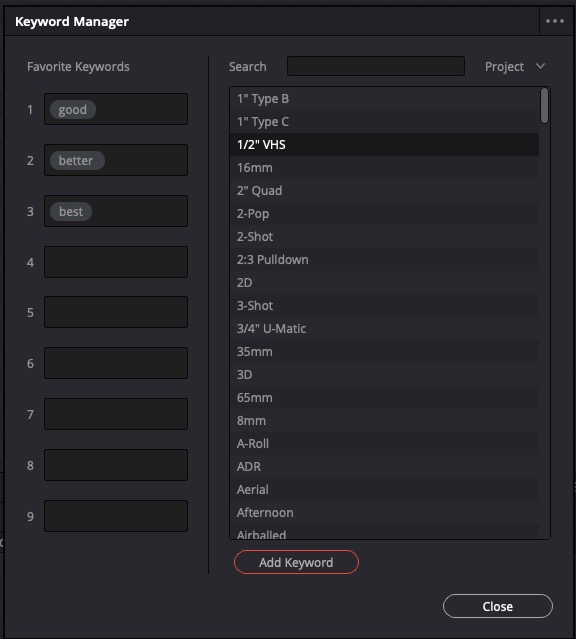
The Favorite Keywords column on the left is new in Resolve 18.6. This is where you can populate with custom keywords than you find under the Mark menu.
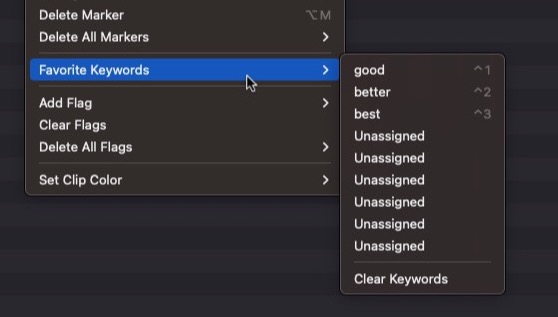
Nest, get those keywords assigned to a keyboard shortcut so they are faster to use
But notice those keyboard shortcuts? Those are new and custom assigned be me.
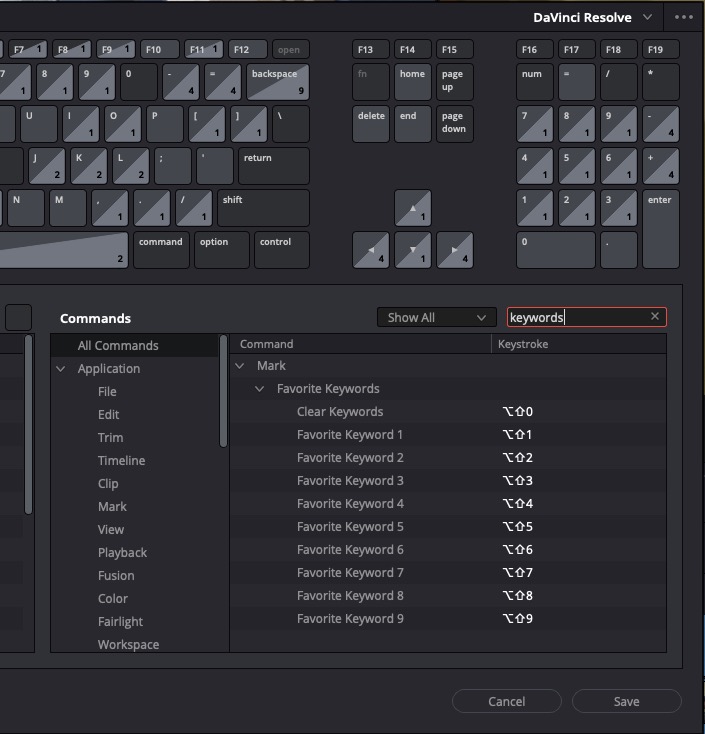
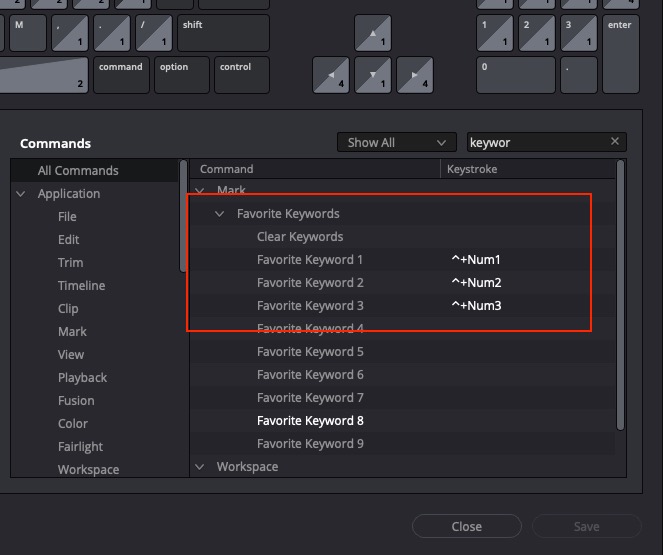
Third, get to know Duration Markers
The key to range-based keywording comes when you assign such a keyword to a shorter range within a longer clip. You can do this by using Convert In and Out to Duration Marker. I have assigned this to F2 on my keyboard.
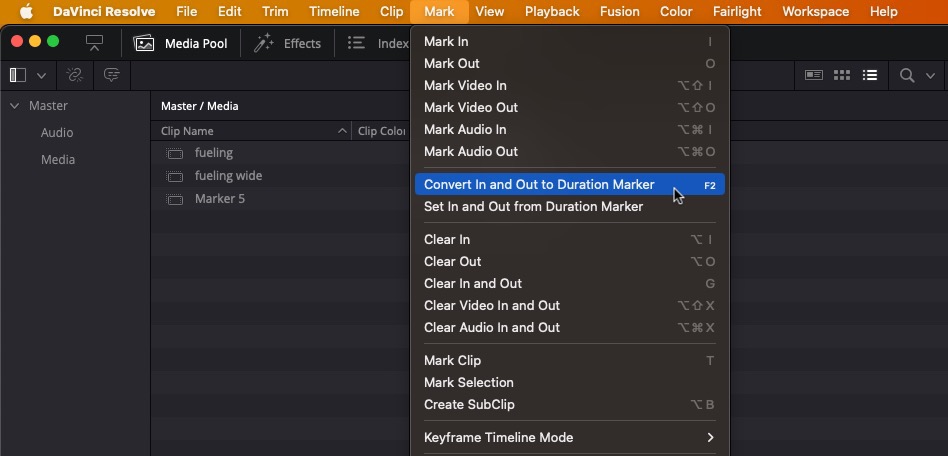
Next, mark an IN to OUT on a key part of a clip loaded in the Source Monitor and hit Convert In and Out to Duration Marker.
But nothing happens other than getting an extended duration marker on a clip.
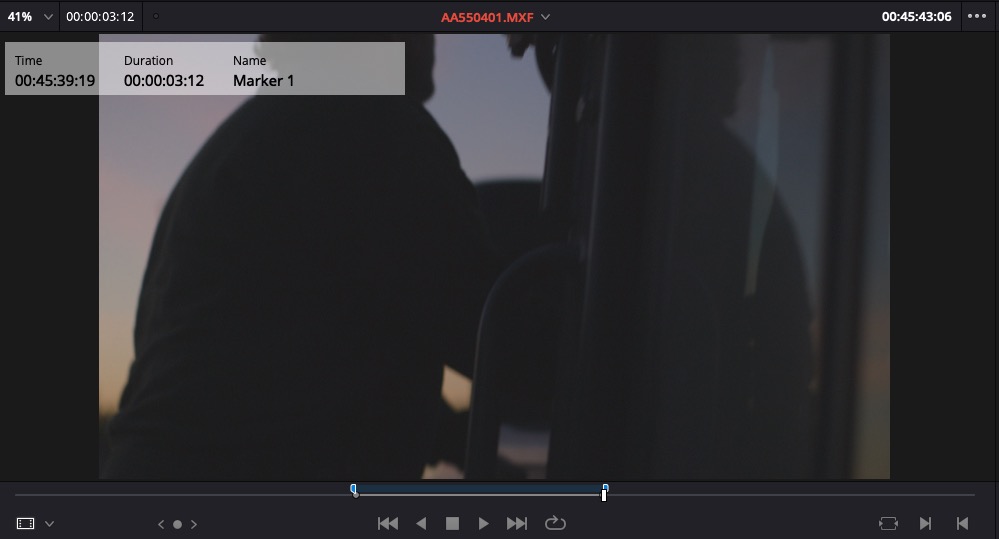
To get to the joy of range-based keywording you have to modify the marker and add a keyword. You can always double-click a marker to open the marker dialog box thing but that is slow.
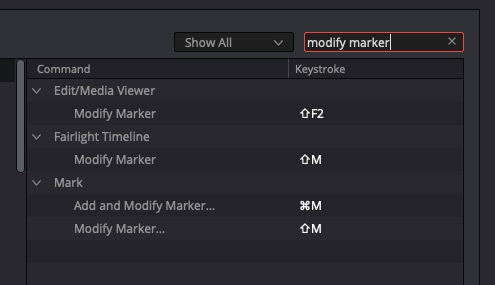
I have added Modify Marker to SHIFT+F2. That way it’s a pretty quick add and modify. These will probably change but that’s what it is for now.
Once you Modify Marker, tab down to the Keyword field and either type your keyword or better yet, use your new Favorite Keywords shortcut
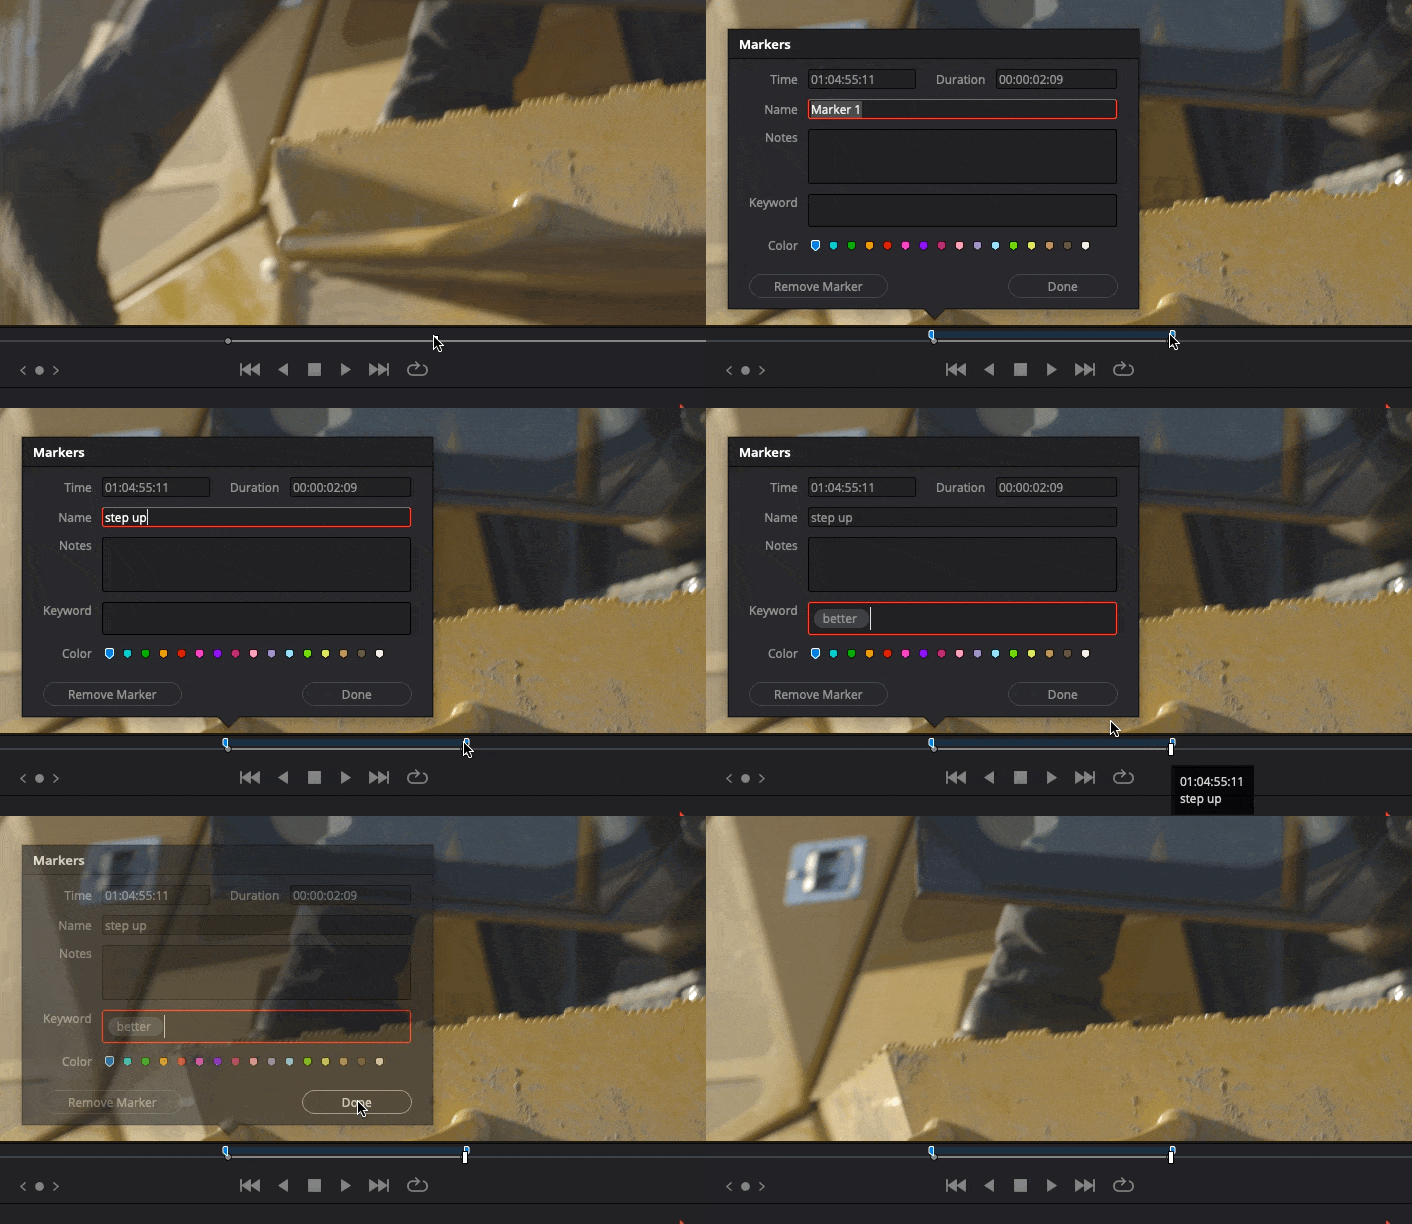
The Modify Marker box is a useful place where you can both add a name to your marker as well as assign the keyword. You don’t have to name the marker but it’s useful to know what you’ve tagged. But the keyword is vital to make this work.
Check your preferences right and Smart Bins will automatically get created whever you add a new keyword.
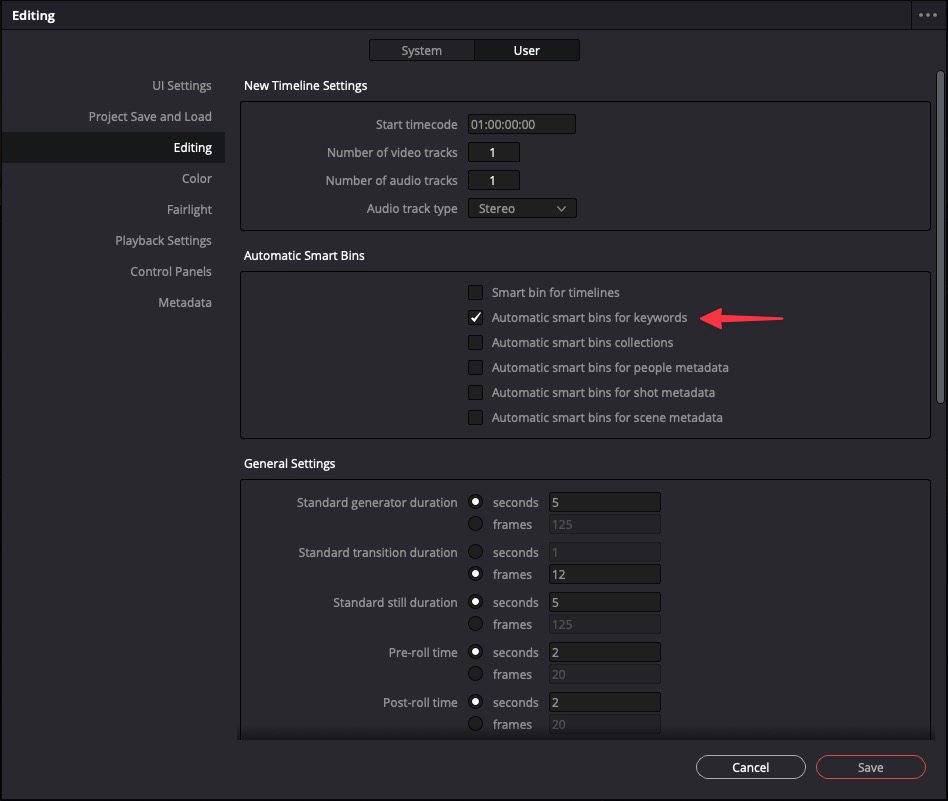
Smart Bins are some very powerful metadata orgazinational tools within Resolve that deserves exploring.
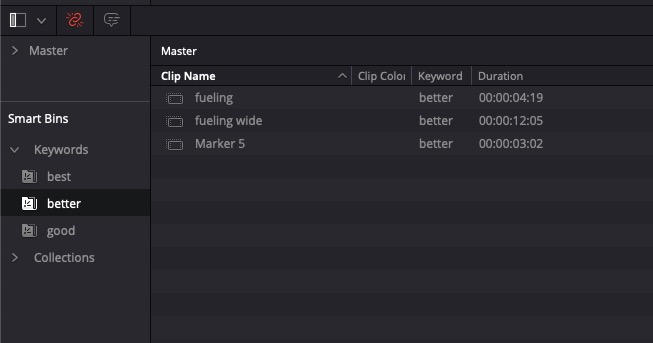
Find your new Smart Bins with custom keywords near the bottom of the Media Pool. And your keyworded clips automatically populated in the Smart Bins.
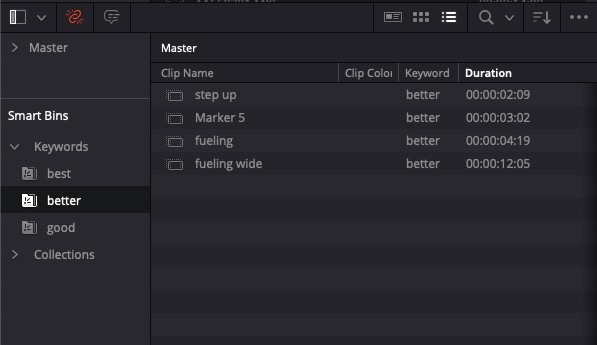
Now, what makes this really nice is that keyworded clips in the Smart Bins are only the media when you used Convert In and Out to Duration Marker. If you only marked 5 seconds out of a 30 minute clip that clip in your Smart Bin under your custom keyword will only be those marked 5 seconds. Hence a range-based keyword.
In previous versions of Resolve it didn’t work this way and the entire clip was populated into the Smart Bin so range-baed keywording didn’t really work. Resolve 15.8 fixes this, or really just makes it work properly.
But don’t take my word for it, compare the durations yourself.
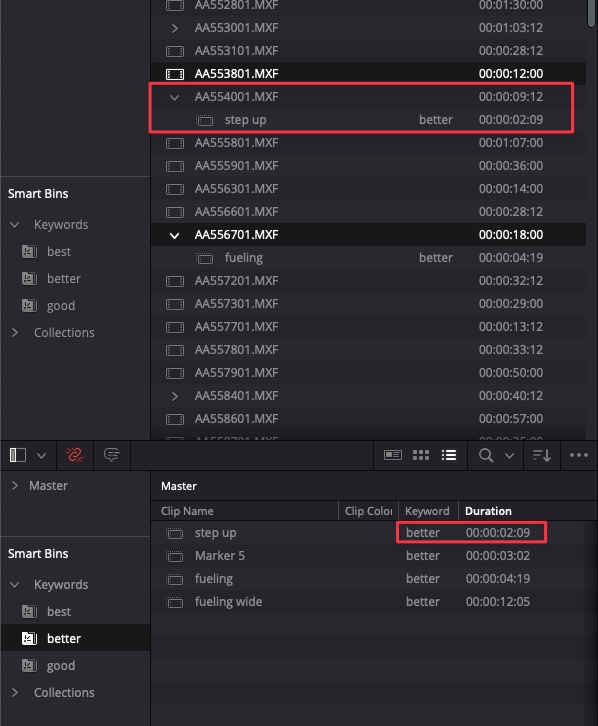
You can see in the image above these “subclips” are indeed range-based subs of the longer clips. True, range-based keywording.
And when you double-click and load these range-based subclips in the Source Viewer it’s only what was marked in the range-based keyword. In previous versions of Resolve tis would load the entire clip and place the playhead at that marker.
And you can get range-based keywording via skimming, live media previewing.
This techinque also works on clips when you’re in Thumb view in the bin with Live Media Preview enabled in the Source Viewer. Skim over a clip in the bin mark an IN to OUT and hit the same key combo to get a duration marker from that IN to OUT, and modify that marker. As long as you’ve got the preview happening in the source you’ll see it works the same.
But boy wouldn’t it be nice to be able to just hit that Favorite Keywords keyboard shortcut while skimming over clips in the Thumb view to quickly create these subsclips.
So there you have it, Final Cut Pro-style range-based keywording.
But it’s not perfect.
There is no Favorites by default but you can easily add Favorites as one of your Favorite Keywords.
It takes a few steps to get your range-based keyword vs marking an IN to OUT and hitting a single keystroke to assign the keyword. And for some reason, Live Media Preview doesn’t work on your Keywords Smart Bin while in icon view, but that seems like a bug. Metadata view doesn’t work either.
I’ll take this though as it’s really nice and it’s another option to organize your media in DaVinci Resolve. And I’m sure there’s more to keywording that just what I’ve outlined here. But true range-based keywording has been elusive in Resolve even though all the parts were there. Now, they are finally, almost, working.

Filmtools
Filmmakers go-to destination for pre-production, production & post production equipment!
Shop Now


