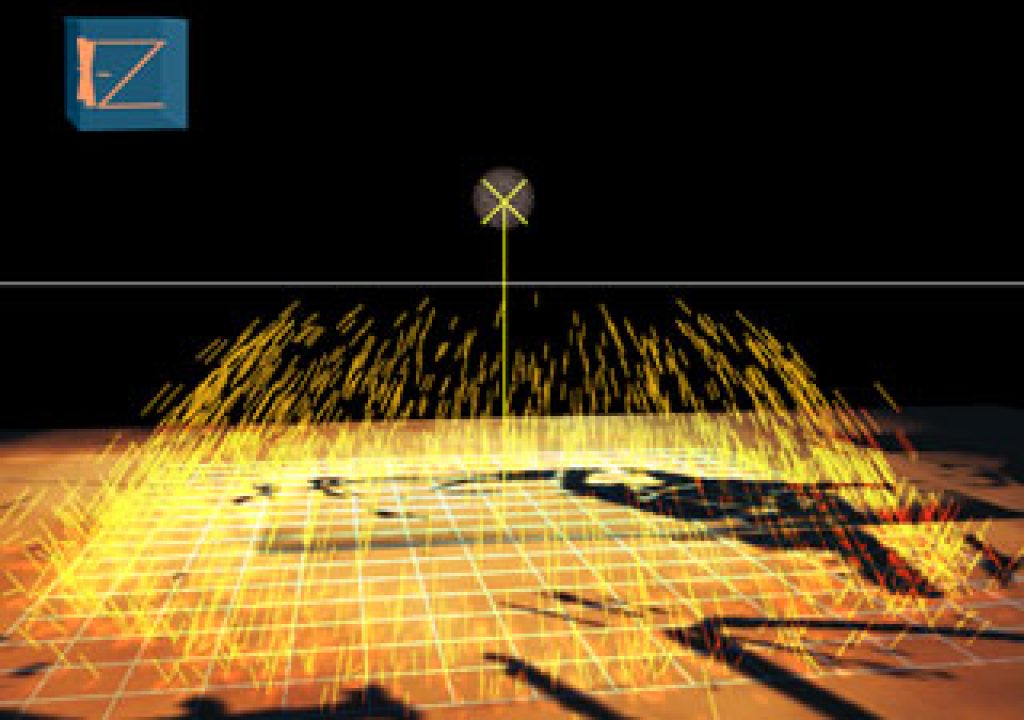
One of the stars of the Cycore FX set is CC Particle World, a 3D particle system that includes features such as bouncing off an imaginary floor.
When you install Adobe After Effects 6.5 or later, it’s easy to miss all the goodies it comes bundled with, such as Color Finesse from Synthetic Aperture and the world-class keyer Keylight from The Foundry. But the inner child in many of us is perhaps most excited by the inclusion of Cycore FX.
For those relatively new to After Effects, Cycore FX features 61 plug-ins ranging from simple color manipulation to a 3D particle system. For the old-timers, this is essentially Final Effects Complete (“FEC” for short), updated with multiprocessor support and ability for many of its 3D effects to follow a composition’s camera, but with the limitation of being limited to 8 bits per channel color depth (we’ll get to that later). FEC grew out of some of the first third-party plug-ins written for After Effects; it was later passed around between various companies and occasionally endured periods of neglect. A 100+ plug-in version of FEC which includes software versions of IceFX is still available from BorisFX for $895.
For those either new to FEC/Cycore FX or who haven’t used them for awhile, we’ll go over some of our favorites, divided by effects category.
Blur & Sharpen
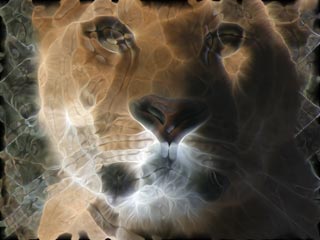 If you like radial blur effects, but have been discouraged by the slow rendering speed and funky user interface of the stock Radial Blur plug-in, check out CC Radial Blur and Radial Fast Blur (all Cycore FX start with the prefix “CC”). CC Radial Blur offers spin and zoom options, while CC Radial Fast Blur offers “lighter” and “darker” options which changes how the images smear in pleasing ways. Both provide a poor man’s light rays effect. Particularly interesting is CC Vector Blur (pictured right), which blurs according to luminance patterns in the underlying footage or a separate reference layer.
Distort
Seemingly simple gags such as making a light pole bend are surprisingly tricky with the standard array of Distort effects. CC Bend It and Bender make both much easier. Unfortunately, both effects easily clip off the distorted image; precede them with the Grow Bounds effect to help reduce the clipping problem.
While on the subject of animating inanimate objects, check out CC Split and Split 2: They open a gap between two user-define effect points, creating a mouth which you can make open and close. Drive them with Animation > Keyframe Assistants > Convert Audio to Keyframes (or for more power, Trapcode’s SoundKeys) to quickly make an item talk.
CC Corner Pin is an improvement over the stock Corner Pin effect in that it allows you to scale and slide the pinned layer after you’ve set its corners. This is but one of many cases where Cycore FX improves open stock effects you might use regularly, and why you should set some time aside to explore them.
Image Control
If you’ve been using the stock Tint effect to colorize an image, you’ve probably been frustrated with washed-out results. The trick to getting a nice tint is to leave black as black, white as white (or a subtly tinted shade of white), and then change the midtone colors. CC Toner allows you to do just this with a minimum of fuss, and has been a favorite for years; After Effects finally added their own 32-bit Tritone plug-in in recent versions. If you want more power, use BCC Tritone or Multitone in the Boris Continuum Complete collection, or the stock Colorama effect.
Perspective
 An old favorite of this set is certainly CC Sphere, which can take another layer and wrap into a ball. For best results, create a layer that has a 2:1 aspect ratio (twice as wide as is tall), preferably seamless at its left and right edges. You may find it easier to do these in a nested composition, then apply CC Sphere to this comp. CC Sphere honors the alpha channel of the layer, which means you can create holes that you can see through to reveal the back side of the sphere. To place another object “inside” the sphere (as we have in the figure at right), duplicate the layer that has CC Sphere applied, and drag one copy in front of and the other behind your middle layer. In CC Sphere’s Effect Controls window, set the Render popup to Outside for the copy in front, and to Inside for the copy behind. CC Sphere also features lighting effects, as well as a Shading section which allows you to apply another layer as a reflection map.
CC Cylinder is similar to CC Sphere, with three exceptions: it creates a cylinder instead of a sphere, it does not support a reflection map, and it does react to a composition’s camera, which means it automatically follows 3D camera moves (an unfortunate oversight for CC Sphere).
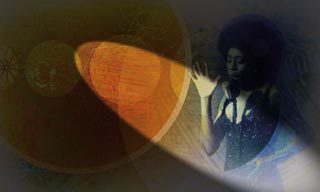 Another nice, simple effect is CC Spotlight, which can create artistic slashes of light and shadow (as seen at left) without the need to explore 3D space. Another layer can be used as a “gel” to project its colors and patterns onto another layer, although in practice this is a bit tricky to use; it is helpful if the gel layer has a 1:1 (square) aspect ratio.
Render
There was a time when Cycore’s Light Burst (now known as CC Light Burst 2.5) was the reason you bought this package; the rest of the plug-ins were a bonus. It has since been largely replace by Trapcode’s excellent Shine. For alternative lighting effects, explore CC Light Rays: This causes a cone or square of light to be projected, based on the colors in the underlying image. Play with its Radius and Warp Softness parameters to vary this effect from simple rays to a slitscan effect.
Simulation
The other reason people used to buy FEC was for its particle effects. If you are new to particle systems, Cycore’s offerings are a great place to start to get a handle on this important set of tools. We suggest you work through them in the following order:

- CC PS Classic creates particles that emerge from a layer’s alpha channel, including any masks applied to the layer. Simple to use; great for generating pixie dust (set Animation to Star Light), as seen at the right.
- CS PS LE Classic creates particles that emerge from a Producer point, rather than a layer’s alpha. You have control over the size of the Producer, and can animate it. A fun trick is creating an interesting path by copying a mask shape or using Motion Sketch, and pasting it into the Producer.
- CC Particle Systems II is like CS PS LE Classic, with a lot more parametric control over the particles, including the Direction in which they are originally shot out at, Air Resistance, Birth and Death Size of the particles, and more control over how their color and opacity change over their life span.
- CC Particle World (featured at the top of the first page) is the big daddy of the set, which includes the ability to react to a comp’s camera so you can fly around and through the particles. To uncover the power of this plug-in, click on the word Options along the top of its Effect Controls: This reveals a second user interface which access to detailed control over the particles (including Opacity and Color maps), gravity, lighting, and how the particles bounce off an imaginary floor, among other tricks.
Almost all particles look better by applying a blur effect and (in the case of CC Particle Systems II and Particle World) enabling their Motion Blur switch. This is what merges spheres into smoke and colored lines into fire.
(Unfortunately, later versions of CC Effects have retired the simpler particle systems, trying to migrate users to CC Particle World. However, at least as of After Effects CS3, “obsolete” versions are still lurking under the hood – just open an old project that used them, save those effects as Animation Presets, and then you can re-use them in other projects. We’ve done this in the effects projects that come with our books. No guarantee how long this will work, though…)
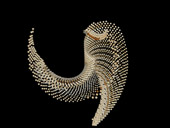
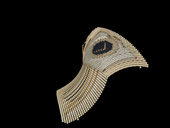
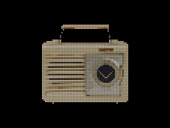
The fun “sleeper” of the bunch is CC Ball Action, which breaks a layer into a sheet of small colored balls which can then be warped and whizzed about in a number of ways (see the series of images below). CC Ball Action also reacts to the comp’s camera, adding to the fun. Now if we could just find a project where we could use this effect…
Stylize
Another gem of this set is CC Kaleida, which creates kaleidoscopic patterns. We created a good portion of the classic Simptopia promo using this effect. There are two distinctly different ways to create animate the patterns: keyframe its Rotation and Center parameters, or place the underlying image in a precomp and animate the original image there.
Transition
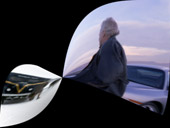
But wait – there’s more! If you find yourself looking for more interesting ways to transition between layers, then you have to spend some time checking out CC Glass Wipe, Grid Wipe, Image Wipe, Light Wipe, Radial Scale Wipe, and Twister (all shown below, in that order). CC Image Wipe in particular improves upon the oft-used stock Gradient Wipe effect by allowing you to pick a specific color channel (to get different wipe patterns that are still related to the underlying image), plus it has the ability to pre-blur the image for smoother wipes.





Alternate Versions
So, where’s the catch? For one, Cycore FX only work with After Effects, and old projects that used FEC will not recognize and re-link to them. If either is a problem for you, then you still need the BorisFX version of FEC, which is also compatible with Final Cut Pro, Boris RED, and Boris FX.
Second, the free version only supports 8-bit per color channel processing, and does not take differing pixel aspect ratios into account. Fortunately, Cycore has introduced an upgraded version called Cycore FX HD that includes 16-bit processing as well as the ability for many of the plug-ins to recognize pixel aspect ratios (so spheres always look like spheres and so forth). The upgrade to Cycore FX HD 1.0 is $299 (with volume discounts).
In this upgraded package, CC PS Classic and CC PS LE Classic have been obsoleted; in their place, CC Particle Systems II features numerous improvements, including the ability to emit particles from a layer’s alpha. CC Particle World has also received an extensive overhaul, including new texture and shading options.
Three new effects have been added, including CC Environment to render a spherical panorama (such as those from dvGarage’s Reflection Toolkit) onto 3D layers, CC Plastic which provides considerable control over the surface texture of a 3D layer, and CC Warpomatic to create even more twisted (pun intended) transition effects.
The content contained in our books, videos, blogs, and articles for other sites are all copyright Crish Design, except where otherwise attributed.

Filmtools
Filmmakers go-to destination for pre-production, production & post production equipment!
Shop Now