As you are aware by now, we're going through our book Creating Motion Graphics with After Effects 5th Edition (“CMG5” for short) and pulling out a few “hidden gems” from each chapter. These will include both essential tips for new users, as well as timesaving gems that experienced users may not be aware existed.
Chapter 15 covers lighting 3D layers in After Effects. It discusses the different types of lights and their parameters, how lights interact with layers and their Material Options, the many secrets of shadows, creating gels and gobos, faking reflections, adjustment lights, projection lights, and using 3D lights to re-illuminate already-shot 2D footage.
This is the third chapter in Part 4 – Cameras! Lights! Action!. The next chapter in this series will cover tips for combining different types of “3D” layers.
How Lights and Layers Interact

Shine versus Glare
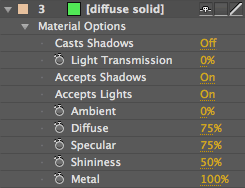
A 3D layer's Metal parameter determines if the specular highlight is based on a layer's color (the default of Metal = 100%), or the light's color (Metal = 0%). This is then added to the layer's underlying color values. The default of Metal = 100% has the apparent effect of both brightening and increasing the saturation of the image around the specular highlight, which is usually aesthetically pleasing.
However, if the underlying layer was dark – such as black text, or a predominantly black illustration – adding a color value of 0 to 0 still results in 0 (black), meaning you won't see the specular highlight. In this case, you will need to decrease a layer's Metal value to see the specular highlight as a glare (the same color as the light) on darker layers; this is particularly useful for adding a slight glare to black text layers.
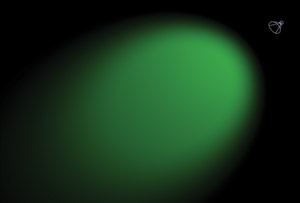
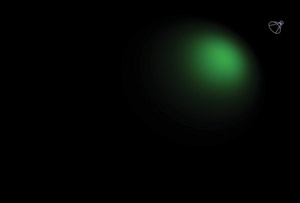
Lights normally interact with a layer's surface color – and black doesn't leave much to interact with (left). Decrease the layer's Metal parameter, and the light becomes visible as a glare – even in black areas (right). image courtesy Getty Images/Discovery
Colored Lights to Change Temperature
We tend to use white lights as our starting point; deeply saturated colored lights rarely look as nice as you might expect. However, a very slight colored tint (20% or less Saturation) for the light's color can be used to warm up or cool down a scene:
image courtesy Digital Vision/Beauty
If you want to perform a similar trick on 2D layers, you can use the Photo Filter effect. Below is a quick video we created awhile back on Photo Filter, but never got around to releasing:
Adjustment Lights
Knowing this, you rearrange the stacking order of your layers to focus attention on only a few select objects: Move them to the bottom of the stack, underneath the “adjustment light.” As long as you leave their Position values alone (and don't put 2D layers or other rendering breaks between them – a subject we discuss at length in Chapters 13 and 16 of CMG5), you won't change what layer appears in front of the others in the Composition panel.
Quick Lighting Parameter Tips
Here's a quick list of other tips that might not be immediately obvious; all are demonstrated in more detail in the book:
- New lights almost always default to being too close to layers (especially those placed at Z=0). One of the first things we do after creating a light is either scrub its Z Position value to back it up, or hover the cursor over the light's icon in the Composition panel until a small Z appears next to the cursor, and then drag down or to the right.
- Intensity can go greater than 100 to over-illuminate a scene. It can also go below 0 to remove light from an over-lit scene (this is also useful in conjunction with Adjustment Lights, discussed above). The Intensity can of course be animated, creating some interesting transition possibilities.
- Ambient lights are a useful cheat to add (or subtract) illumination evenly across an entire 3D scene, without worrying about which light is illuminating which layer.
- If a shadow is too sharp, increase the light's Shadow Diffusion value. If a shadow is too soft, open the Composition > Composition Settings, click on the Advanced Tab, click on the Options button to the right of the words “Rendering Plug-in”, and increase the Shadow Map Resolution setting. (For those who are trying to learn all of After Effects' secrets just by poking around, you should get to this by year five…)
- Shadow Darkness can be set to greater than 100% to help force the casting of shadows in otherwise over-lit scenes.
- Casts Shadows can be toggled to Only, meaning the original layer disappears and only its shadow remains.
- Shadows default to being black. Increasing a layer's Light Transmission parameter changes it to be the layer's color, yielding gel, stained glass, and video projection effects:
Setting the Light Transmission value of the video to 100% allows it to project onto the floor (left). However, you will need to balance the other light and material parameters against each other to get more sophisticated effects, such as blurry reflections and not seeing an illumination cone from the projection light (right). footage courtesy Artbeats/Animal Safari and Exteriors
Note again that the last two are controlled by an individual layer's Material Options – not the light's own parameters. Mastering Material Options will put you well ahead of many After Effects users.
Trish and Chris Meyer share seventeen-plus years of real-world film and video production experience inside their now-classic book Creating Motion Graphics with After Effects (CMG). The 5th edition has been thoroughly revised to reflect the new features introduced in both After Effects CS4 and CS5. New chapters cover the new Roto Brush feature, as well as mocha and mocha shape. The 3D section has been expanded to include working with 3D effects such as Digieffects FreeForm plus workflows including Adobe Repouss©, Vanishing Point Exchange, and 3D model import using Adobe Photoshop Extended. The print version is also accompanied by a DVD that contains project files (CS5-only) and source materials for all the techniques demonstrated in the book, as well as over 160 pages of bonus chapters on subjects such as expressions, scripting, and effects.
We will be pulling a few “hidden gems” out of each chapter to share on ProVideoCoalition.com roughly every week. These will give you a taste for the multitude of time-saving tips, not-obvious features, little gotchas, and other insider knowledge you will find in CMG.
The content contained in Creating Motion Graphics with After Effects – as well as the CMG Blogs and CMG Keyframes posts on ProVideoCoalition – are copyright Crish Design, except where otherwise attributed.


