As you are probably aware by now, we’re going through our book Creating Motion Graphics with After Effects 5th Edition (“CMG5” for short) and pulling out a few “hidden gems” from each chapter. These will include both essential tips for new users, as well as timesaving gems that experienced users may not be aware existed.
Chapter 9 of CMG5 contains an exhaustive discussion of Blending Modes, including numerous figures and examples plus explanations of the math behind the modes. Therefore, in this Hidden Gems installment we’re going to focus on some of the less obvious tips, plus throw in a video on an alternative approach to tinting or colorizing footage:
Having Your Cake and Eating It Too
You’re probably used to the idea that you can toggle the Timeline panel between displaying the Switches or Modes column by clicking the similarly-named switch at the bottom of the panel, or pressing F4. But did you know you don’t have to choose, and can have them both open at the same time? Just right-click on any column header in the Timeline panel, and select any additional columns you would like to open:

Quickly Scrolling Through Modes
To quickly try out different modes – especially ones that are adjacent to each other on the Modes popup menu list – select a layer, hold down Shift, and press the + and – keys along the top of the keyboard to move up and down the list.
Fade To Gray
Overlay plus Soft, Hard, Linear, Vivid, and Pin Light modes all change how they process images depending on whether a pixel is above or below 50% gray. If one of the images in the composite has an area that is 50% gray, the other image will be composited unaltered. You can use this little fact to your advantage when you need to composite a new layer in After Effects on top of a 3D render or even live action, and want the result to look more realistic.
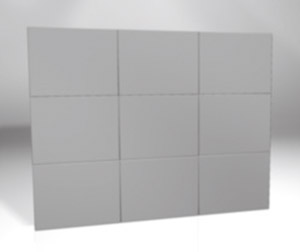
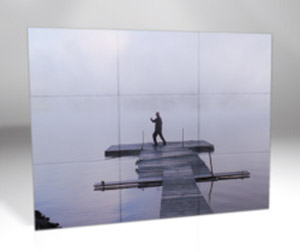
Real surfaces (including those synthesized in 3D) are rarely perfect; they will feature highlights, shadows, falloffs, and other anomalies, such as the creases in the blank videowall below (left). By making the surface of that blank wall average 50% gray, and then using a mode such as Overlay or Hard Light to composite footage on top of it (below right), those distinctions and imperfections – such as the creases – are kept rather than pasted over. The result is much more realistic than merely cutting out the new layer and slapping it on top of the layer underneath using Normal mode:


Footage courtesy Artbeats/Lifestyles Mixed Cuts 1
Classic Coke versus New Coke
Some modes appear in two versions, such as Classic Color Burn and Color Burn. This is usually because the older “classic” version has problems at extreme colors. For example, if a layer has a drop shadow and you choose Classic Color Burn, the drop shadow will disappear; it will be retained with Color Burn.
On the other hand, Color Burn, Color Dodge, and Difference all exhibit some artifacts where areas of a composite may lose their color if you fade out the layer with these mode applied; the Classic versions usually keep interesting color across the entire image during fades:
You usually want to use the updated version of a mode instead of the Classic version. The major exception is is if you’re altering the Opacity of the layer with the mode: the Classic version (Classic Difference is used at right) often looks much better than the newer version (Difference, left) in these cases.
Divide and Conquer (color casts, that is)
After Effects CS5 gained two new modes: Subtract and Divide. Divide has a suprising use: It can be used to remove the color cast from an image, just like any number divided by itself always results in a value of 1 (white). In the example below, the image on the left is the original footage, which has a strong blue cast. Create a new solid or shape layer, and for its color, eyedropper an area in the underlying footage that should be pure white. Make sure this solid or shape is on top, set its mode to Divide, and boom – the color cast is removed. Alter the opacity of this new layer to control how much cast is removed (the image below at right).
image from Artbeats Alien Atmospheres
(We didn’t have space for that last Hidden Gem in the book; it’s included in our video series on the new features in After Effects CS5.)
Adding Color Casts
If you want to add (rather than remove) a color cast to footage – for example, to unify a series of shots with the same tone or to given the impression they were all lit with the same color gel – place a full-frame solid or shape layer on top, set its color to match your desired tint, and set its Blending Mode to Color. Alter its opacity to control the depth of the tint. If you like, create a gradient rather than use a solid color. To see this last trick in action, click here to watch a video we created on this tinting trick:
Click the figure above to watch a video on using solids or shape layers with modes to colorize footage. Footage courtesy Creative License
Trish and Chris Meyer share seventeen-plus years of real-world film and video production experience inside their now-classic book Creating Motion Graphics with After Effects (CMG). The 5th edition has been thoroughly revised to reflect the new features introduced in both After Effects CS4 and CS5. New chapters cover the new Roto Brush feature, as well as mocha and mocha shape. The 3D section has been expanded to include working with 3D effects such as Digieffects FreeForm plus workflows including Adobe Repouss©, Vanishing Point Exchange, and 3D model import using Adobe Photoshop Extended. The print version is also accompanied by a DVD that contains project files and source materials for all the techniques demonstrated in the book, as well as over 160 pages of bonus chapters on subjects such as expressions, scripting, and effects.
We will be pulling a few “hidden gems” out of each chapter to share on ProVideoCoalition.com roughly every week. These will give you a taste for the multitude of time-saving tips, not-obvious features, little gotchas, and other insider knowledge you will find in CMG.
The content contained in Creating Motion Graphics with After Effects – as well as the CMG Blogs and CMG Keyframes posts on ProVideoCoalition – are copyright Crish Design, except where otherwise attributed.


