As we mentioned last week, we’re going to go through our book Creating Motion Graphics with After Effects 5th Edition (“CMG5” for short) and pulling out a few “hidden gems” from each chapter. These will include both essential tips for new users, as well as timesaving gems that experienced users may not be aware existed.
The second chapter in CMG5 covers the layout of the Composition, Timeline and Layer panels, creating Solid layers, RAM Previewing, and shortcuts for navigating in time and space:
Get Snappy

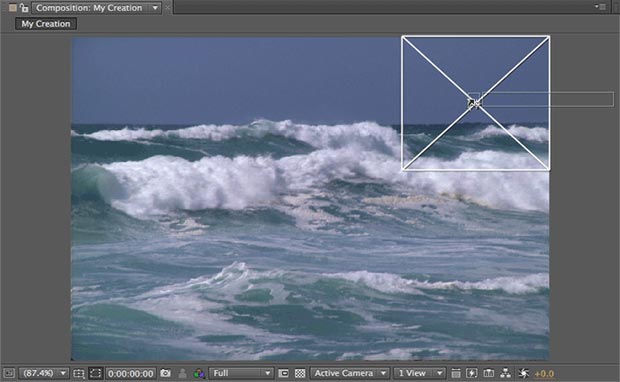
When you add a new layer by drag-and-dropping it to the Composition panel, it will initially try to snap to the comp’s edges and center. To make an already-placed layer snap to the edges of a comp or its center, press Command+Shift on Mac (Control+Shift on Windows) after you start dragging it around in the Comp panel. New in CS5: The Align panel has added Align to Composition options to help you snap layers to the center and sides.
Add Layer Power Drag
You can drag footage from the Project panel to the left side of the Timeline panel; this allows you to place it anywhere in the layer stack. What’s not so obvious is that if you drag it to the timeline area under the ruler (see figure below), you can also choose to start it at any point in time by dragging it left and right. If you are adding a source that has a fixed duration (such as a movie or a precomp), the Info panel will update in real time showing the in point and duration. (Still images, solids, shape layers, and text layers have infinite duration by default.)

When dragging a new source to the Timeline panel, you can decide where it starts in time by carefully placing it along the timeline in the right side of the panel. You can also place it between existing layers: Note the black horizontal line, which indicates where the new source will be added in the stack. A second yellow time marker (circled in red) follows you as you drag, and the time display (also circled) updates to show the new layer’s in point.
Side-by-Side View

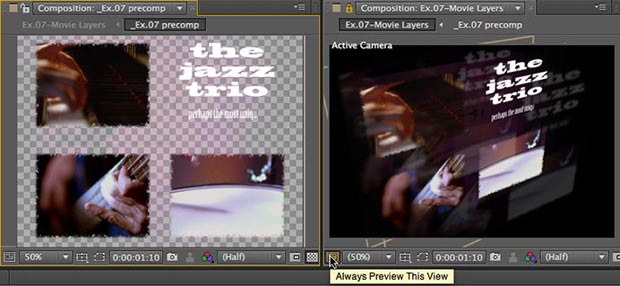
When you have multiple comps open and want to see them side by side, you can use this handy shortcut: Select the Comp panel and press Command+Option+Shift+N on Mac (Control+Alt+Shift+N on Windows). This splits the frame containing the active viewer and creates a new viewer on the right that is locked. Selecting a different tab in the Timeline panel will load that comp into the unlocked left viewer. This is particularly handy when working with a chain of nested comps, but you can also use the left viewer to display the Layer or Footage panels. The Always Preview This View button (where the cursor is pointing in the figure above) determines which comp renders when you RAM Preview.
 RAM Preview Options
To initiate a RAM Preview, press 0 on the extended keypad or click on the RAM Preview button in the Preview panel. RAM Preview defaults to playing every frame at the comp’s frame rate, at its current resolution.
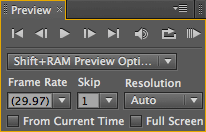
There is a second set of RAM Preview options available: Click on the RAM Preview Options popup menu and select Shift+RAM Preview Options to reveal them (see figure at above right). Hold down Shift when you press 0 or click on the RAM Preview button, and these alternate parameters will be used. It’s common to set up the Shift+RAM Preview Options for faster processing – for example, setting Skip to 1, which means After Effects will calculate and play back only every other frame, cutting your waiting time in half.
After Effects CS5 has added an Alternate Preview option. Pressing Option (Alt) when initiating a RAM?Preview will play just the five frames before the current time indicator. This is handy if you just want to check “edge chatter” while keying or using the new Roto Brush, for example. The number of frames may be edited in Preferences > Previews.
Mac laptop users have recently been thwarted from taking advantage of these shortcuts, as newer laptops don’t have function key equivalents for the numeric keypad. CS5 fixed that too: You can now hold down Control (Mac only) and press 0 to initial a RAM preview. The Control key works for some other useful numeric keypad equivalents too – for example, Control+8 will place a marker (8 and * sharing the same key); Control + period will start an audio-only preview.
 Option/Alt Button Clicks
Along the bottom of the Composition and Layer panels are buttons with drop-down menus offering various options. A couple of them have handy shortcuts:
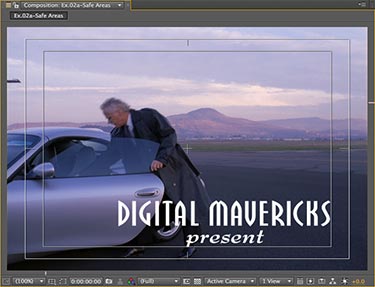
For instance, you can Option+click (Alt+click) on the Choose Grid and Guide Options button to toggle the Title/Action Safe areas on/off (see figure at right).
Similarly, you can Option+click (Alt+click) on the Show Channel & Color Management button to toggle on/off the Alpha channel display.
Trish and Chris Meyer share seventeen-plus years of real-world film and video production experience inside their now-classic book Creating Motion Graphics with After Effects.
The 5th edition has been thoroughly revised to reflect the new features introduced in both After Effects CS4 and CS5. New chapters cover the revolutionary new Roto Brush feature, as well as mocha and mocha shape. The 3D section has been expanded to include working with 3D effects such as Digieffects FreeForm plus workflows including Adobe Repouss©, Vanishing Point Exchange, and 3D model import using Adobe Photoshop Extended. The print version is also accompanied by a DVD that contains project files and source materials for all the techniques demonstrated in the book, as well as over 160 pages of bonus chapters on subjects such as expressions, scripting, and effects.
We will be pulling a few “hidden gems” out of each chapter to share on ProVideoCoalition.com roughly every week.
The content contained in Creating Motion Graphics with After Effects – as well as the CMG Blogs and CMG Keyframes posts on ProVideoCoalition – are copyright Crish Design, except where otherwise attributed.

Filmtools
Filmmakers go-to destination for pre-production, production & post production equipment!
Shop Now


