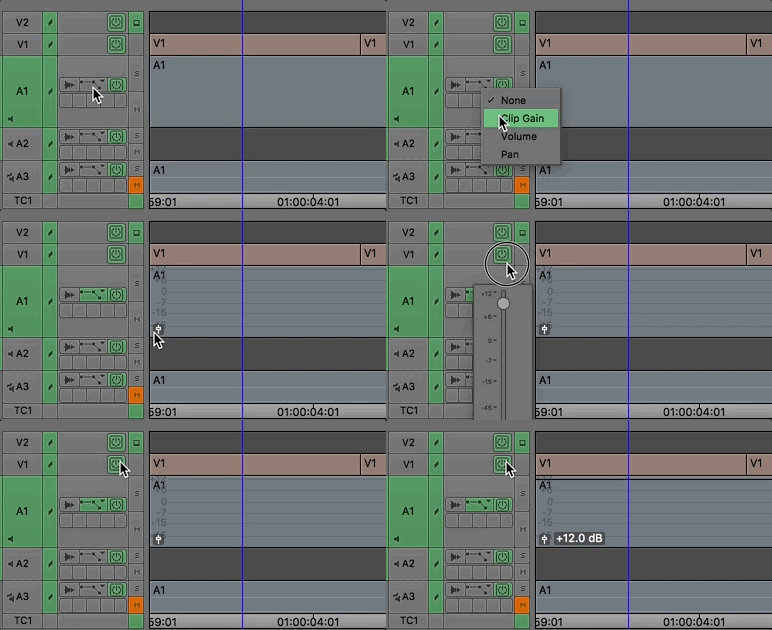
This is kind of two Avid Media Composer audio tips in one. When you raise the audio level on a clip in Avid Media Composer via Clip Gain you can raise it 12 db. That is achieved by either the Audio Mixer Clip mode or by turning on Clip Gain in the timeline Fast/Hamburger menu or the track control panel.

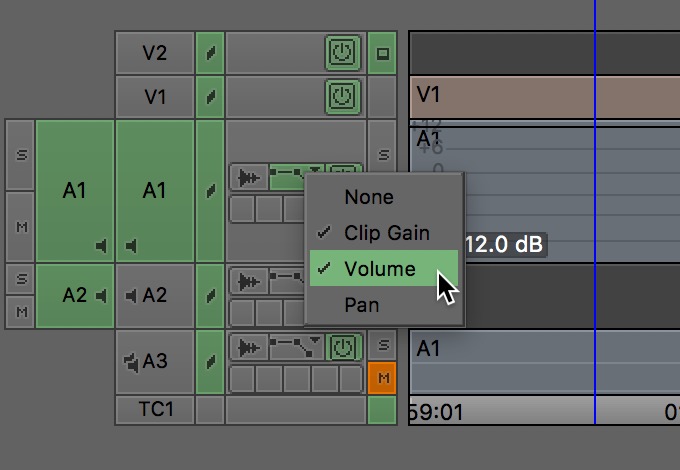
There is another 12 db of increased audio level to be had via the Volume setting in the timeline too.

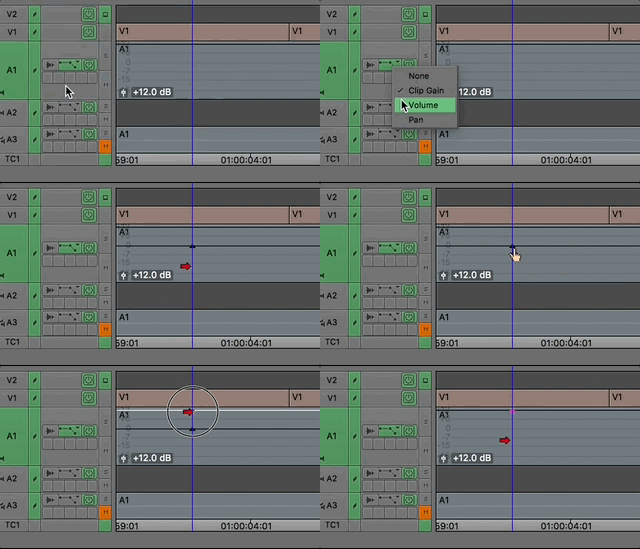
I find that some newer Avid editors don’t know about or don’t make much use of raising the actual Volume parameter as they mainly just use the Audio Mixer which is Clip Gain. Since the Media Composer Volume is keyframable (it’s what you might call rubber banding) one common way to quickly add another 12bd is to add a keyframe on the Volume and drag that volume rubber band up.

Check your keyboard mapping for Add Keyframe as that’s a quick way to add the volume keyframe.
Here’s tip two (and full credit to editor Job ter Burg as he busted this out in a Facebook group) … if you don’t like the click and drag aspect of adding the Volume db keyframe and adjustment in the timeline then change your Audio Mixer Mode from Clip to Auto.

In Auto (or Automation) mode this mixer reflects the Volume rubber banding on the timeline. By using Auto Audio Mixer Mode you don’t have to add a keyframe as Media Composer does it automatically when the playhead is parked and you change a fader in Auto. The above image shows the Volume of A1 at +12 after I raised it with the keyframe in the timeline. 12 +12 = 24 dbs raised without rendering any audio plug-ins or doubling any audio onto two tracks. Hopefully your audio isn’t bad enough where you need to add 24 db of gain/volume. And if you do get ready to do some audio repair to possibly make that usable. But it’s there if you need it.
Never used the Auto automation mode in the mixer? That’s another tip and here’s an old but still relevant video on that technique.
https://youtu.be/t_Dx_KNQA6Y

