Today’s QuickTip is one of those I can’t believe I’ve never discovered that QuickTips. Whenever I learn something from these QuickTips I consider my time well spent.
This little feature was sent over by Andy Mees after a colleague of his pointed this tip out after seeing the reader QuickTip earlier this month on modifying audio channels. Here’s the tip:
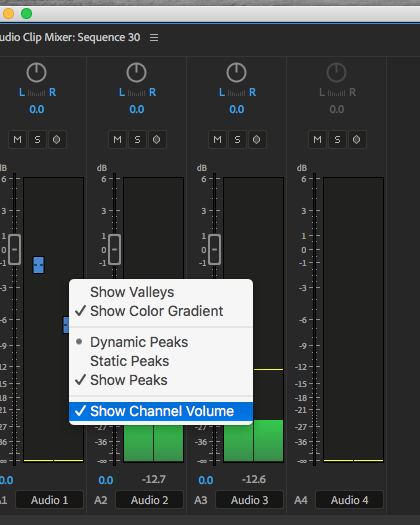
There is a mixer available for the stereo tracks hidden in the stereo track itself – in the Audio Clip Mixer if you right click in a stereo track’s meters, you get the option for Show Channel Volume.

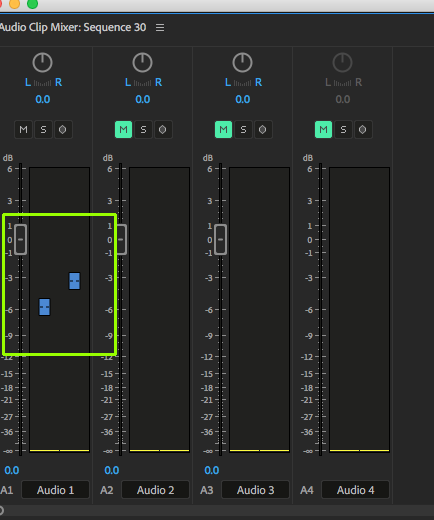
If you check Show Channel Volume, you get two faders in the meter that you can adjust the left/right output from the stereo track.

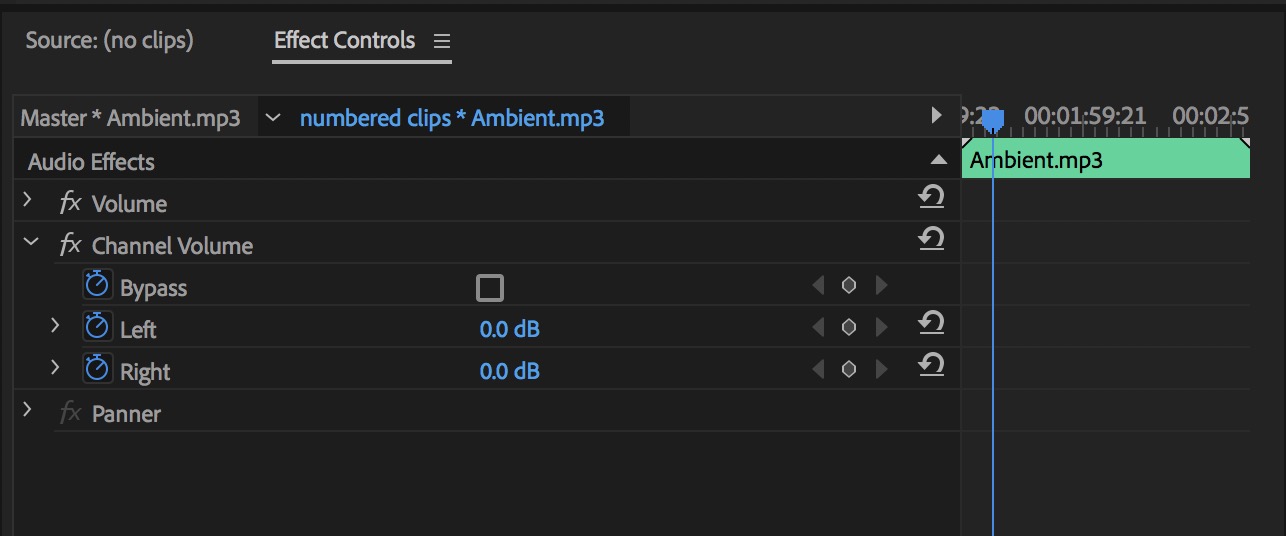
I never knew this option was there to separately change the audio channels of an audio clip with the Clip Mixer. It’s not something that I would do very often, in fact I can only think of needed to do this a couple of times in my whole career. Then I used the Effect Controls > Channel Volume as that was the only place I knew where you could change the level of the individual channels.

A couple of things I noticed while playing around with this new found Channel Volume via Clip Mixer control:
- Channel Volume is pre-mixer Volume so if you turn the channels all the way down and crank up the Volume slider/rubber band you won’t hear anything
- The Write Keyframes button in the Clip Mixer doesn’t affect keyframe automation writing on the individual channels, you have to go to the Effect Controls to keyframe the individual channel automation
- A 5.1 audio clip will give you 6 individual faders when Show Channel Volume is checked so this works on more than just stereo clips
- By default Show Channel Volume is off but when enabled it stays on until you turn it off as it isn’t clip based

