This article covers the steps required to deinterlace and upscale legacy NTSC/PAL/SECAM to HD1080 progressive at 50p/59.94p to conserve smoothness, or 25p/29.97p for a more dramatic final look. Almost anything that was originally PAL or SECAM would be 25 interlaced frames per second, i.e. 50 fields per second. Nearly anything that was originally NTSC (or Brazilian PAL-M) would be 29.97 interlaced frames per second, i.e. 59.94 fields per second. Unless you (or your client) wants to add a more dramatic look, then you will likely prefer to conserve all of the original smoothness as previously seen by watching the original interlaced material on a CRT (cathode ray tube) display at 50i or 59.94i. In those cases, nearly anything that was PAL/SECAM should have a target of 50p (50 progressive frames per second), and anything that was NTSC (or Brazilian PAL-M) should have a target of 59.94p (59.94 progressive frames per second), unless a more dramatic look is desired.
Differences between DaVinci Resolve (free) and DaVinci Resolve Studio (paid or bundled with certain Blackmagic hardware devices, including some cameras and keyboards)
Although there is a complete list of differences between these two versions on the Blackmagic Design website, for the purpose of this guide, I will only cover the differences in deinterlacing and upscaling algorithms and mention them when appropriate. Spoiler: There are more sophisticated and superior deinterlacing and upscaling options in DaVinci Resolve Studio (currently US$299), although the free version can also deinterlace and upscale, with less quality than the Studio version.
Prerequisites
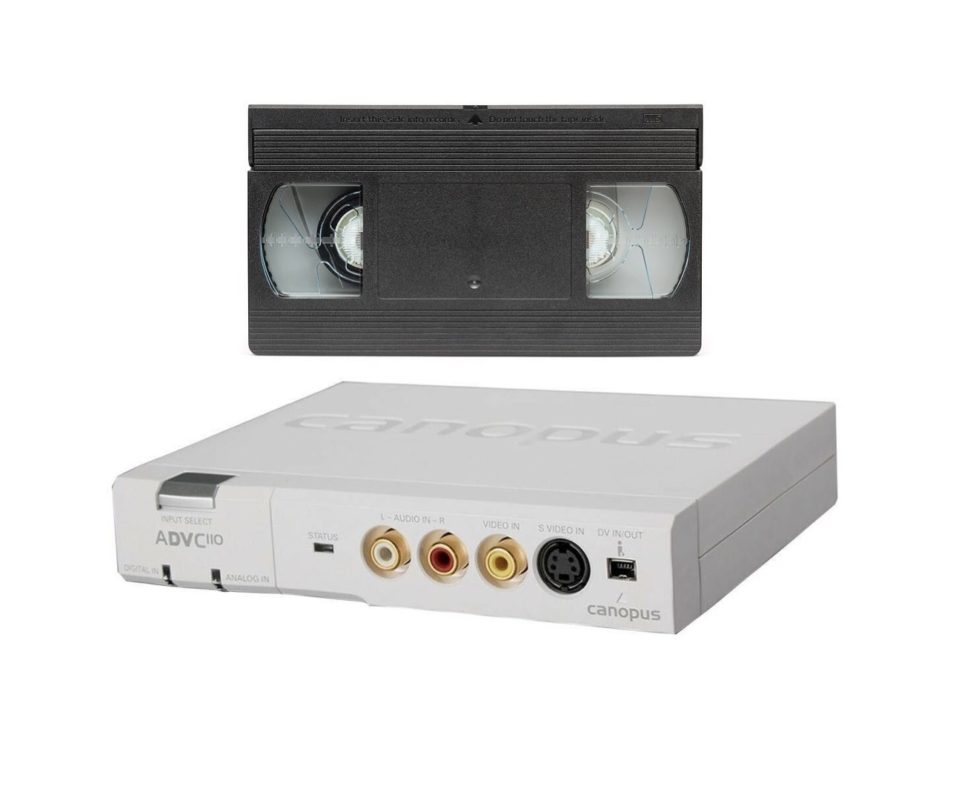
This guide assumes that you have already captured the original material to an SSD (solid state drive) or spinning magnetic disk drive as a proper PAL 50i or proper NTSC 59.94i file, retaining the original fields of the interlaced material. One of the recommended ways to do that is what I covered in detail in:

or by using a D8 (Digital 8) camcorder or deck as covered in:

Review: Sony DCR-TRV460 + other D8 camcorders for digital capture of Hi8 and 8mm analog tapes
Of course, this can also be accomplished with other capture methods for both macOS and Windows, as long as they capture the original interlaced footage with both fields included. (Sadly, many inexpensive solutions available on Amazon either skip a field or force another very poor deinterlacing to half of the desired framerate for most cases, which is kryptonite for the process covered in this guide.)
DaVinci Resolve (Studio) and its compatibility with DV25 material
Although to my knowledge, DaVinci Resolve (Studio) has never incorporated the capability of capturing DV25 over IEEE 1394 (FireWire) as recommended and documented in detail in the aforementioned article, in my experience, the current versions of DaVinci Resolve (Studio) fortunately can import those native DV25 files from your drive, recognize their specific characteristics and ascertain their field priority automatically and correctly, which is a major relief for the user. (Some other software programs unfortunately force the user to set the field priority manually.)
Even if you have chosen to capture your legacy material through some other means than the one I covered in that article, even though it may not be DV25 but another códec, as long as it is PAL or NTSC interlaced (retaining the original two fields), the rest of this guide will still work for you.
Create your DaVinci Resolve (Studio) new project
As I covered in:

4:3 programs upscaled to HD or 4K: technical & aesthetic decisions
upscaling to 1080p allows us to choose between the native 4:3 version of 1080p, which is 1440×1080… or the second option, which is an upscaled 1440×1080 placed on a 1920×1080 canvas, with or without overscanning or cropping to eliminate headswitching noise or to make it wider than the original 4:3 aspect ratio.
This means that our first step is to create a new DaVinci Resolve (Studio) project, with one of the following basic settings:
- 1440×1080 at 50p (from a PAL or SECAM original, where we want the complete original smoothness, with a native 4:3 canvas)
- 1440×1080 at 25p (from a PAL or SECAM original, where we want a more dramatic look, with a native 4:3 canvas)
- 1920×1080 at 59.94p (from an NTSC or Brazilian PAL-M original, where we want the complete original smoothness, over a 1920×1080 16:9 canvas, for any of the reasons explained in this article)
- 1920×1080 at 29.97p (from an NTSC or Brazilian PAL-M original, where we want a more dramatic look, over a 1920×1080 16:9 canvas, for any of the reasons explained in this article)
So please pick one of the above four options, depending upon the type of source material and desired end result.
Recommended settings in DaVinci Resolve (Studio) before importing the legacy file(s)
Please do the following before importing any of the legacy file(s) into the project:
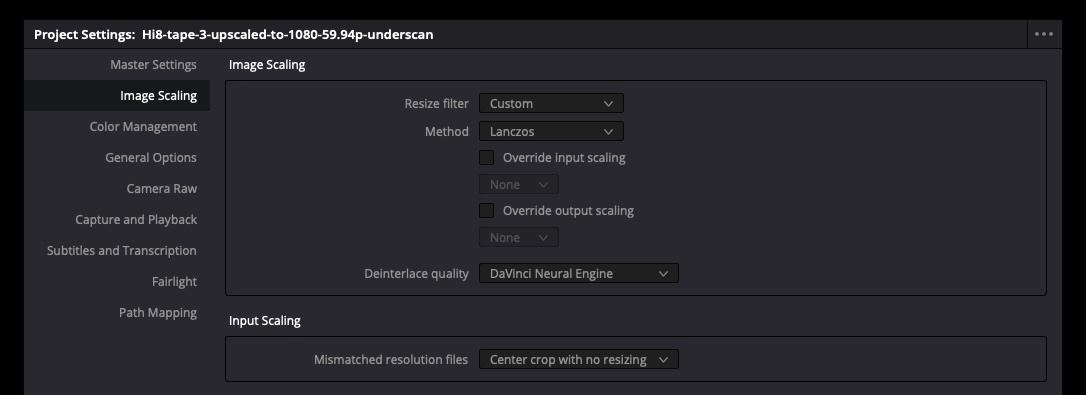
- Go to Project Settings>Image Scaling>Crop with no resizing. (This allows us to scale it later, as desired, with fewer total steps.)
- Go to Project Settings:>Image Scaling>Custom>Lanzos. (This is the algorithm determined by the community to offer the best quality for upscaling.)
- Go to Project Settings>Deinterlacing quality>DaVinci Neural Engine for the best deinterlacing quality. (If you are using the free DaVinci Resolve, you won’t have this option and you will only have Normal., which is less sharp and refined as what is offered by the DaVinci Neural Engine.)

Import legacy material onto timeline and adjust
Since you set step 1 above to Crop with no resizing, your legacy material will be floating in the middle of the new canvas, be it 1440×1080 or 1920×1080. Now you are ready to use the Transform tool in the DaVinci Resolve (Studio) Edit section.
- Go ahead and use the Inspector> Zoom tool (under Transform) to upscale allowing for visible underscanning (to leave the headswitching noise, if you or your client wants it visible) or zoom in a bit more so that the headswitching noise will be invisible. If desired (on a 1920×1080 canvas), you can zoom in even more if you want the image to me wider or even completely 16:9).
- If appropriate (i.e. with Hi8 or 8mm) use the Position tool (under Transform) to compensate for footage that has a wider black vertical bar on either side, i.e. to center it better.
- If desired, use the Cropping tool to eliminate black vertical bars from certain legacy formats (i.e. with Hi8 or 8mm), especially on a 1920×1080 canvas where the background is a color other than black.
- If using the paid DaVinci Resolve Studio, as your last step before leaving the Edit section to the Deliver section, go to Inspector>Super Scale, set Super Scale to 4x, Sharpness to Medium and Noise Reduction to Medium. (Feel free to change these last two if you think it looks better with your specific material.)
- Go to the Deliver section, matching the project settings for spatial resolution (1440×1080 or 1920×1080) and the temporal resolution (framerate), i.e. 59.94p, 50p, 29.97p or 25p). After you execute it, go take a long walk, since the rendering will take several hours for each original hour, but the quality will justify the time.
Conclusions
In my experience so far, DaVinci Resolve Studio (paid) and DaVinci Resolve (free) are among the most user-friendly and highest quality software tools for allowing us to deinterlace and upscale legacy material to 1080p, while giving us the freedom to choose the final delivery progressive framerate, whether or not to include headswitching noise and the final aspect ratio and canvas. I have found other software to be either too restrictive (they don’t give us the freedom to choose how to handle those aesthetic options) or require command line commands and setting the field priority of the source material manually.
Soon, I will be reviewing hardware tools which allow doing the above process in real time, rather than with a rendering process. Some of those hardware tools will be from Blackmagic Design, although in a surprising way. Please subscribe via one of the options listed below to be notified.
(Re-)Subscribe for upcoming articles, reviews, radio shows, books and seminars/webinars
Stand by for upcoming articles, reviews, books and courses by subscribing to my bulletins.
In English:
- Email bulletins, bulletins.AllanTepper.com
- In Telegram, t.me/TecnoTurBulletins
- Twitter (bilingual), AllanLTepper
En castellano:
- Boletines por correo electrónico, boletines.AllanTepper.com
- En Telegram, t.me/boletinesdeAllan
- Twitter (bilingüe), AllanLTepper
Most of my current books are at books.AllanTepper.com, and also visit AllanTepper.com and radio.AllanTepper.com.
FTC disclosure
Blackmagic Design has not paid for this article. Blackmagic has sent Allan Tépper units for review. Some of the manufacturers listed above have contracted Tépper and/or TecnoTur LLC to carry out consulting and/or translations/localizations/transcreations. So far, none of the manufacturers listed above is/are sponsors of the TecnoTur, BeyondPodcasting, CapicúaFM or TuSaludSecreta programs, although they are welcome to do so, and some are, may be (or may have been) sponsors of ProVideo Coalition magazine. Some links to third parties listed in this article and/or on this web page may indirectly benefit TecnoTur LLC via affiliate programs. Allan Tépper’s opinions are his own. Allan Tépper is not liable for misuse or misunderstanding of information he shares.

Filmtools
Filmmakers go-to destination for pre-production, production & post production equipment!
Shop Now


