The Blackmagic Cinema Camera can put out some sharp footage. 2.5K to 1080. Raw to ProRes… Even DNxHD. It all can have that “I can see all the way down to the pores” look to the footage. This is great for many different situations, but trying to make your on-air talent look fantastic… not so much.
In this article I test ten filters that are known to take the edge off the sharpness. Why these specific ten filters? These filters can be found anywhere… From North Dakota to Texas. Just about every rental house has these filters in stock. The newer Digi-Con, or Gold Diffusion, might be a bit hard to come by the further one is from the left or right coast.
SHARPNESS
Blackmagic has three cameras: two are out in the wild and the 4K Production Camera will soon be in many operator's hands. If the 4K BMPC is similar to the Cinema Camera then it will not have an Optical Low Pass Filter. And, lets talk about the Cinema Camera. When I shoot on certain lenses with this camera I feel like I can see each and every pore of those in front of the camera. Sometimes I like the sharpness, but there are times when it can be a bit unforgiving.
Then there are times when one wants to create a “look.” I am talking about creating a scene where you want the highlights to blow out, but not just blow out… but bloom too. Of course, there will be those who say “why not create this look in post?” As a cameraman, I like to keep as much control over the image as possible, and there is that subtlety of using lens diffusion that is difficult to replicate in post.
THE FILTERS:
These are listed in the order they were shot for each scene.
1. Ultra Contrast 1/4
2. Pro Mist 1/2
3. Pro Mist 1
4. Black Pro Mist 1/2
5. Black Pro Mist 1
6. Double Fog 1/2
7. Double Fog 1
8. Double Fog 2
9. Warm Black Pro Mist 1/2
10. Warm Black Pro Mist 1
THE TEST SCENES
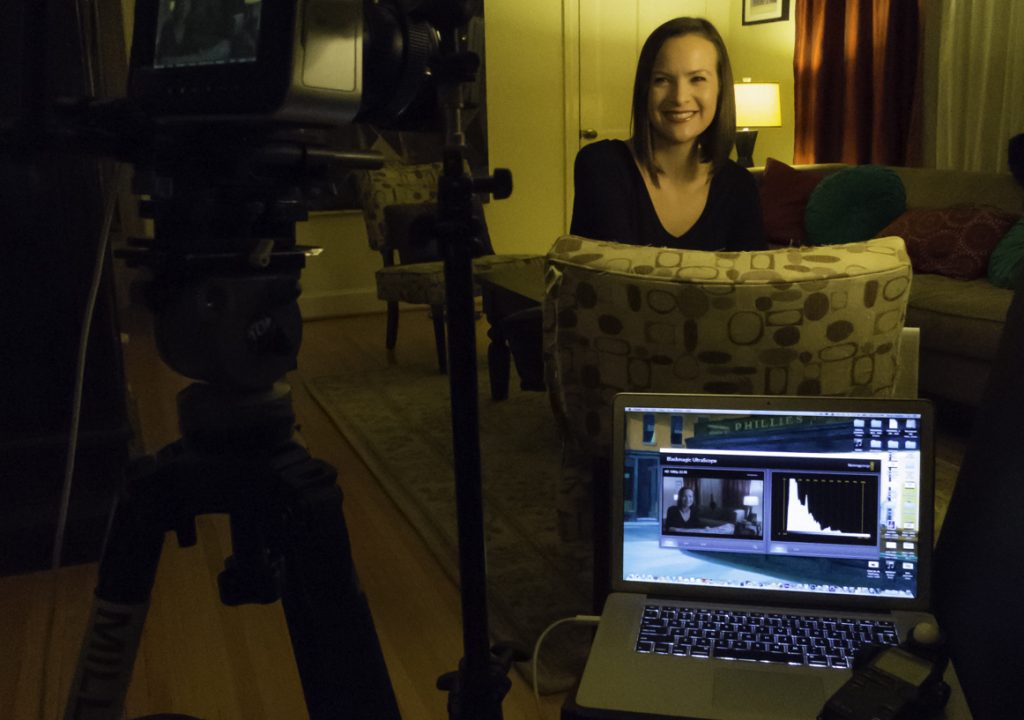
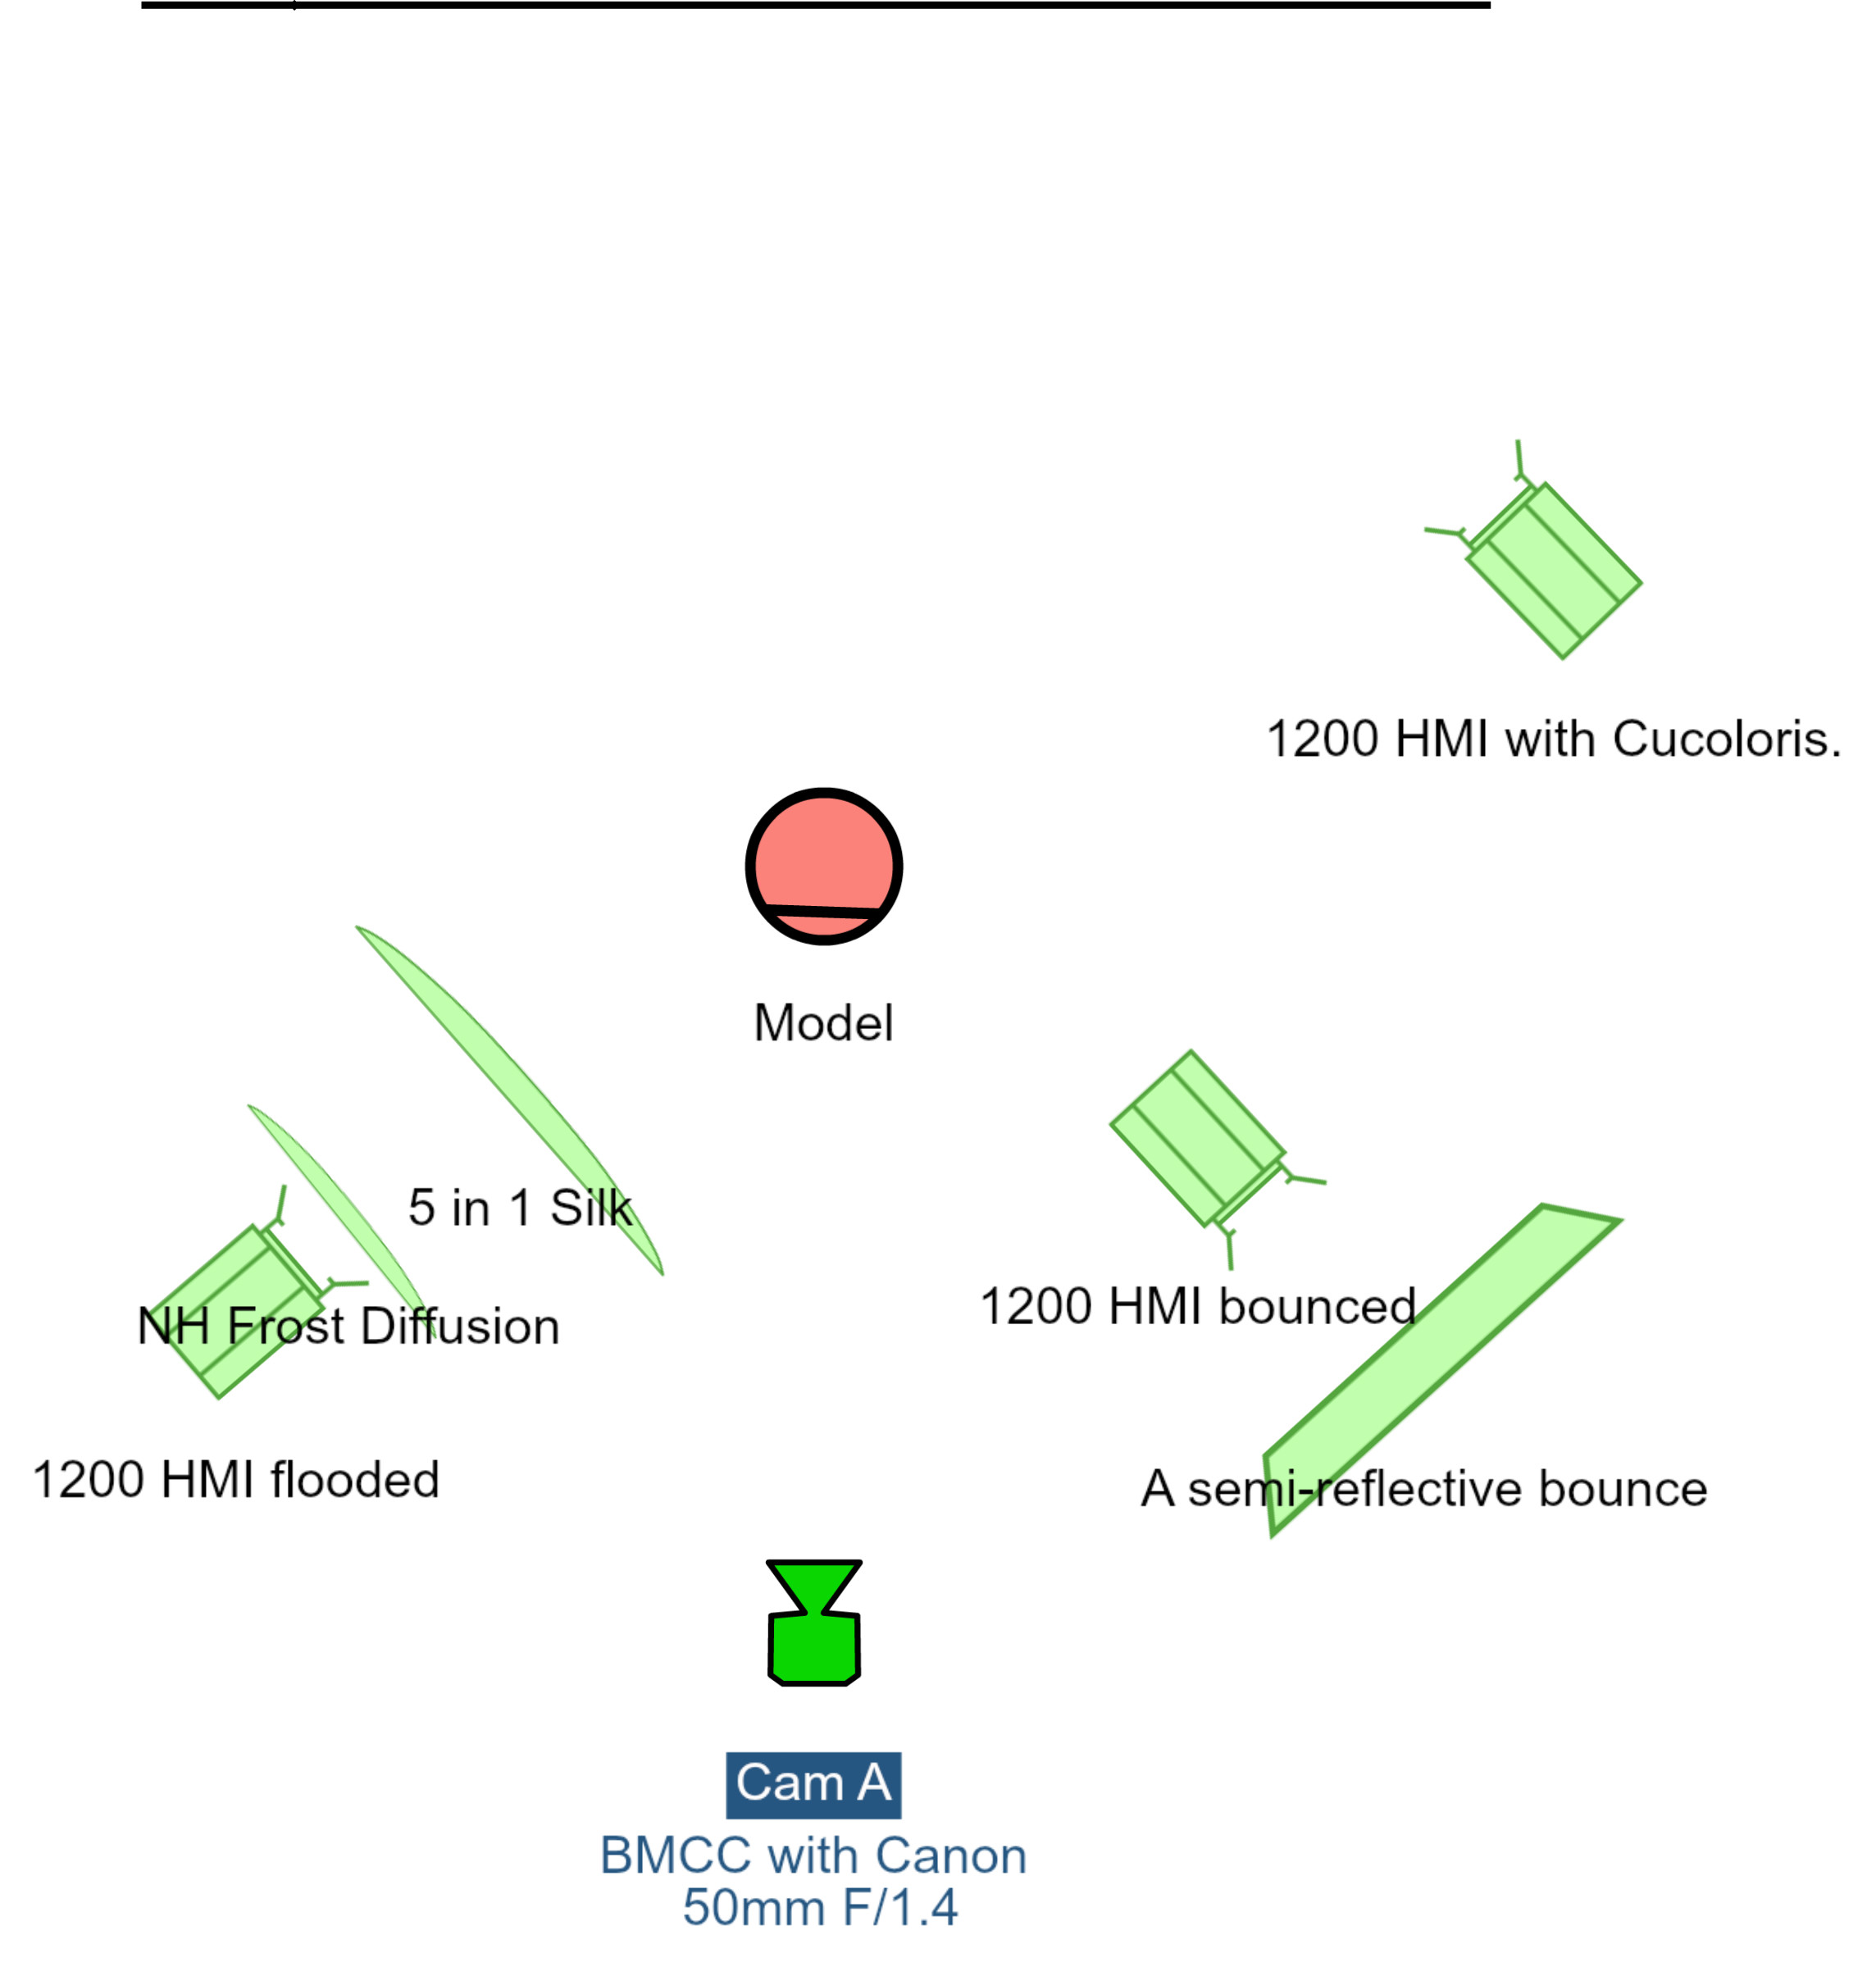
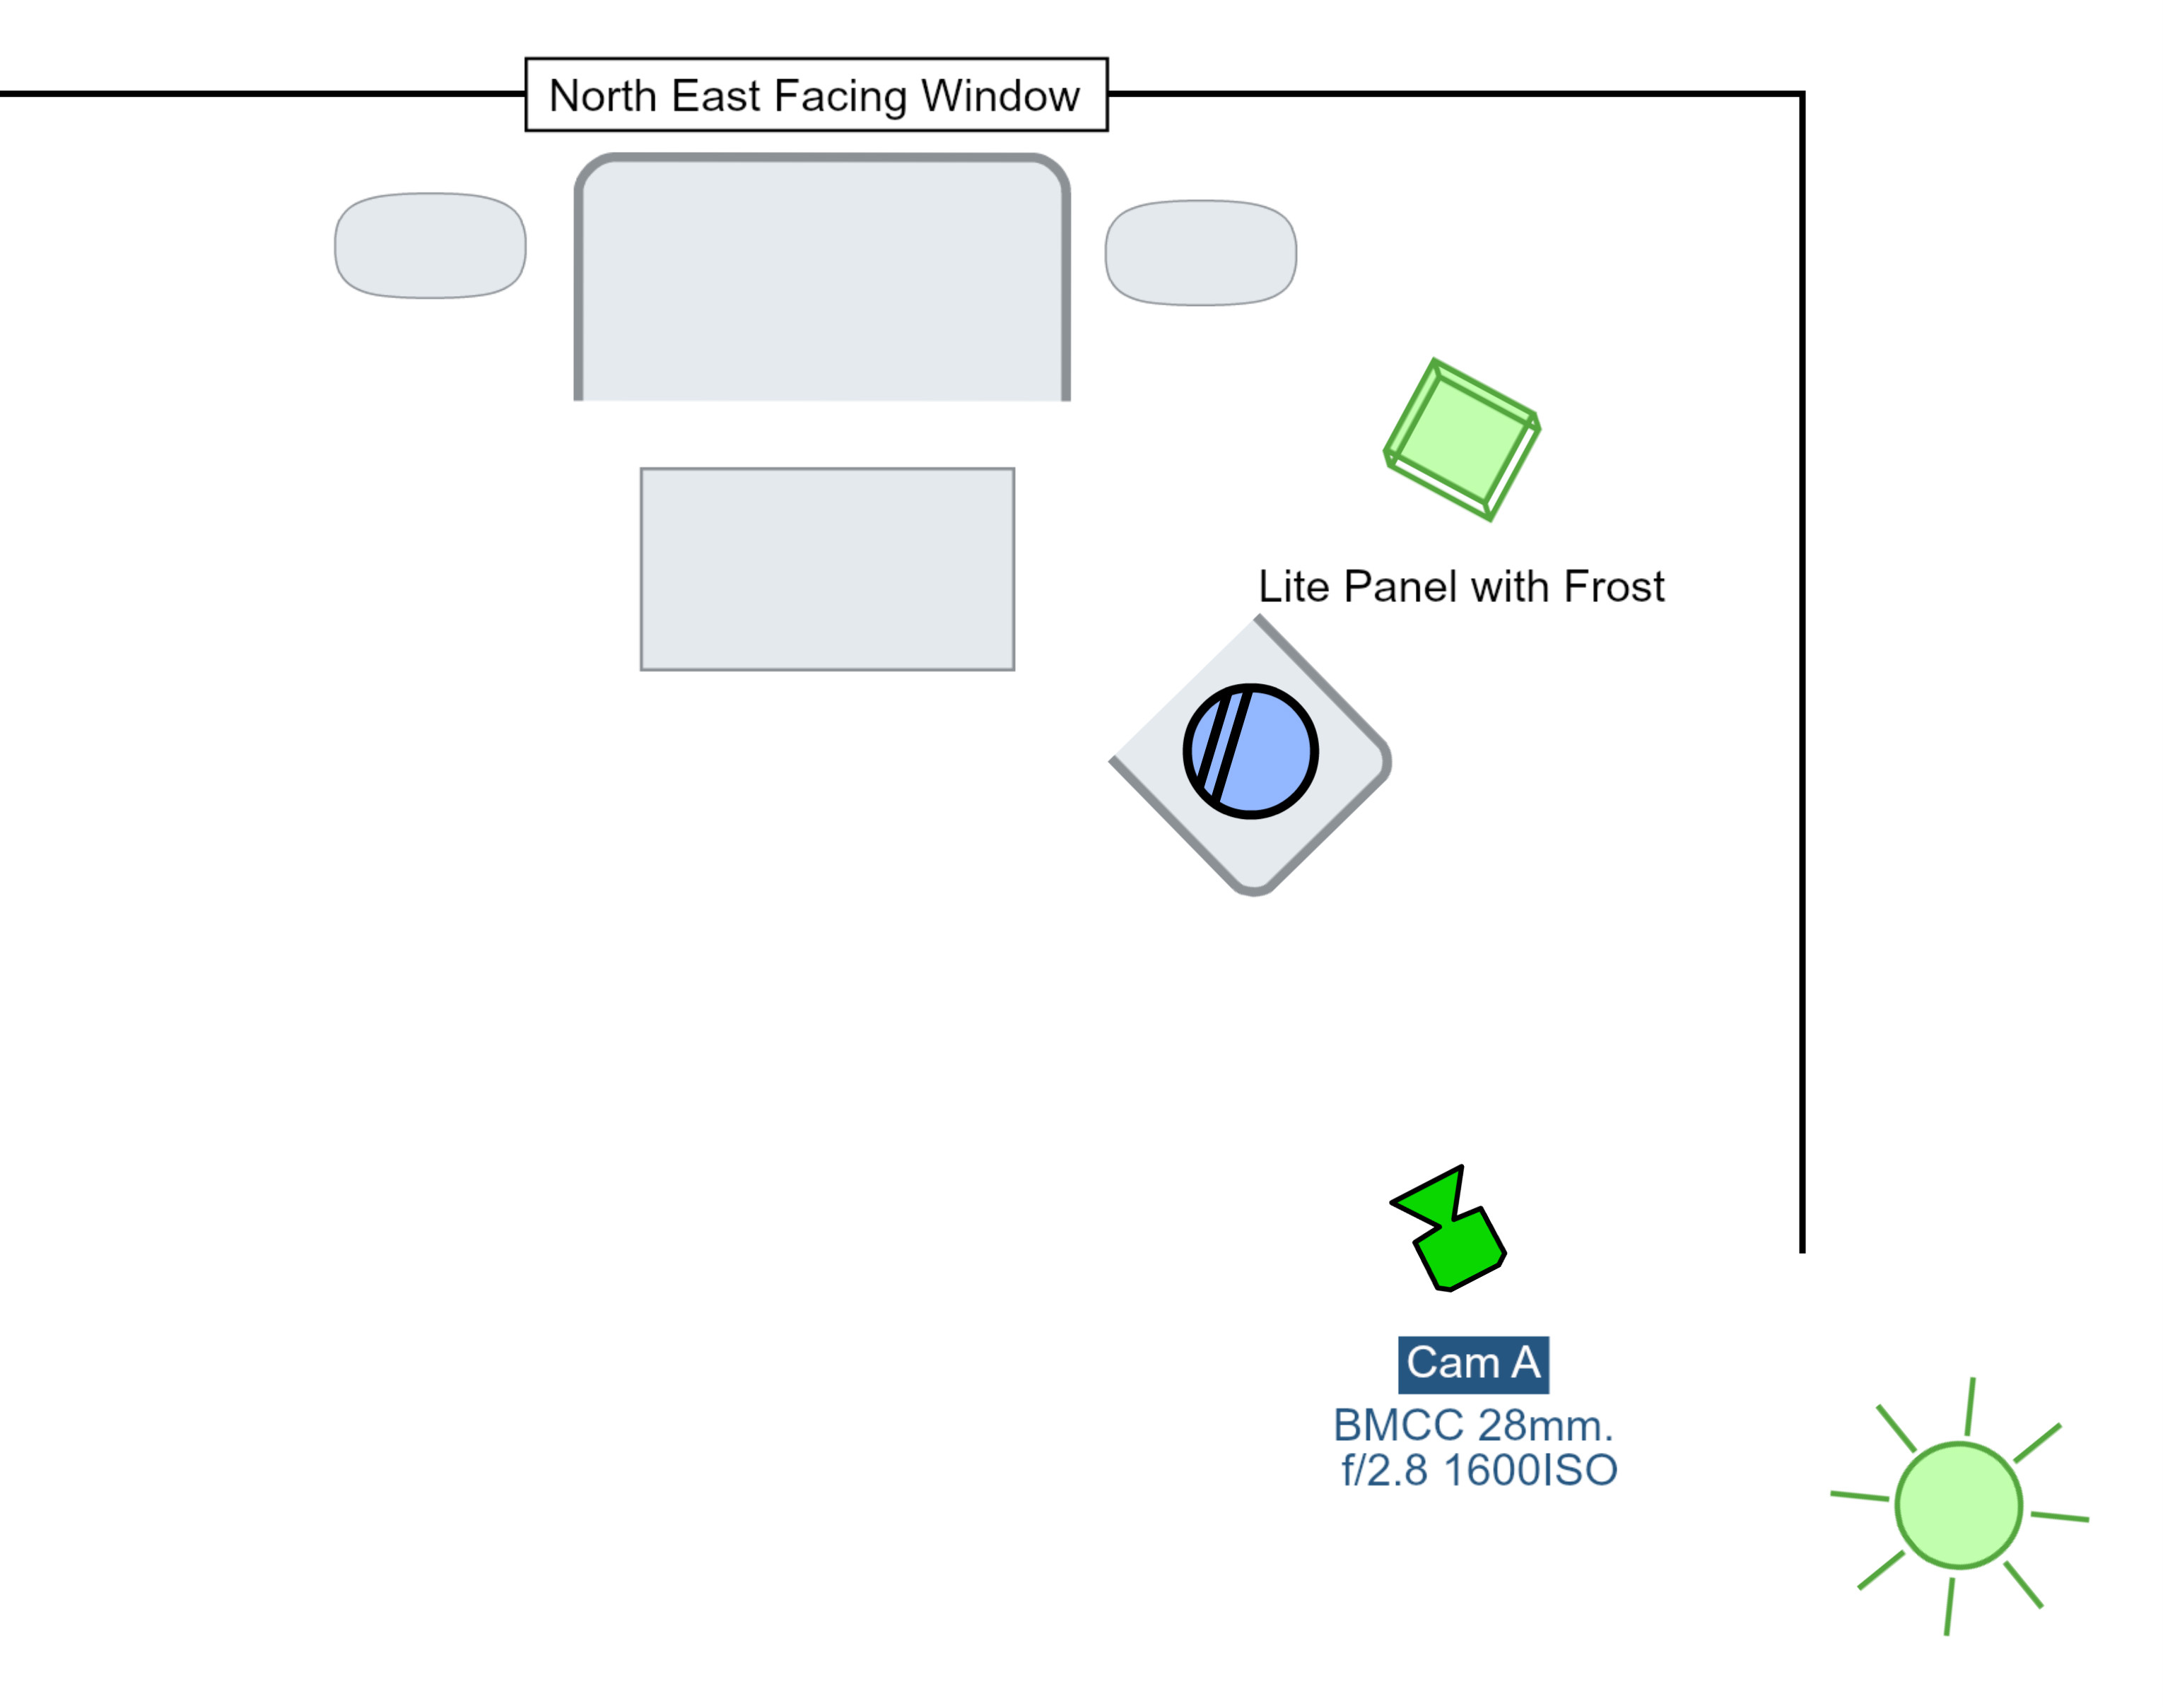
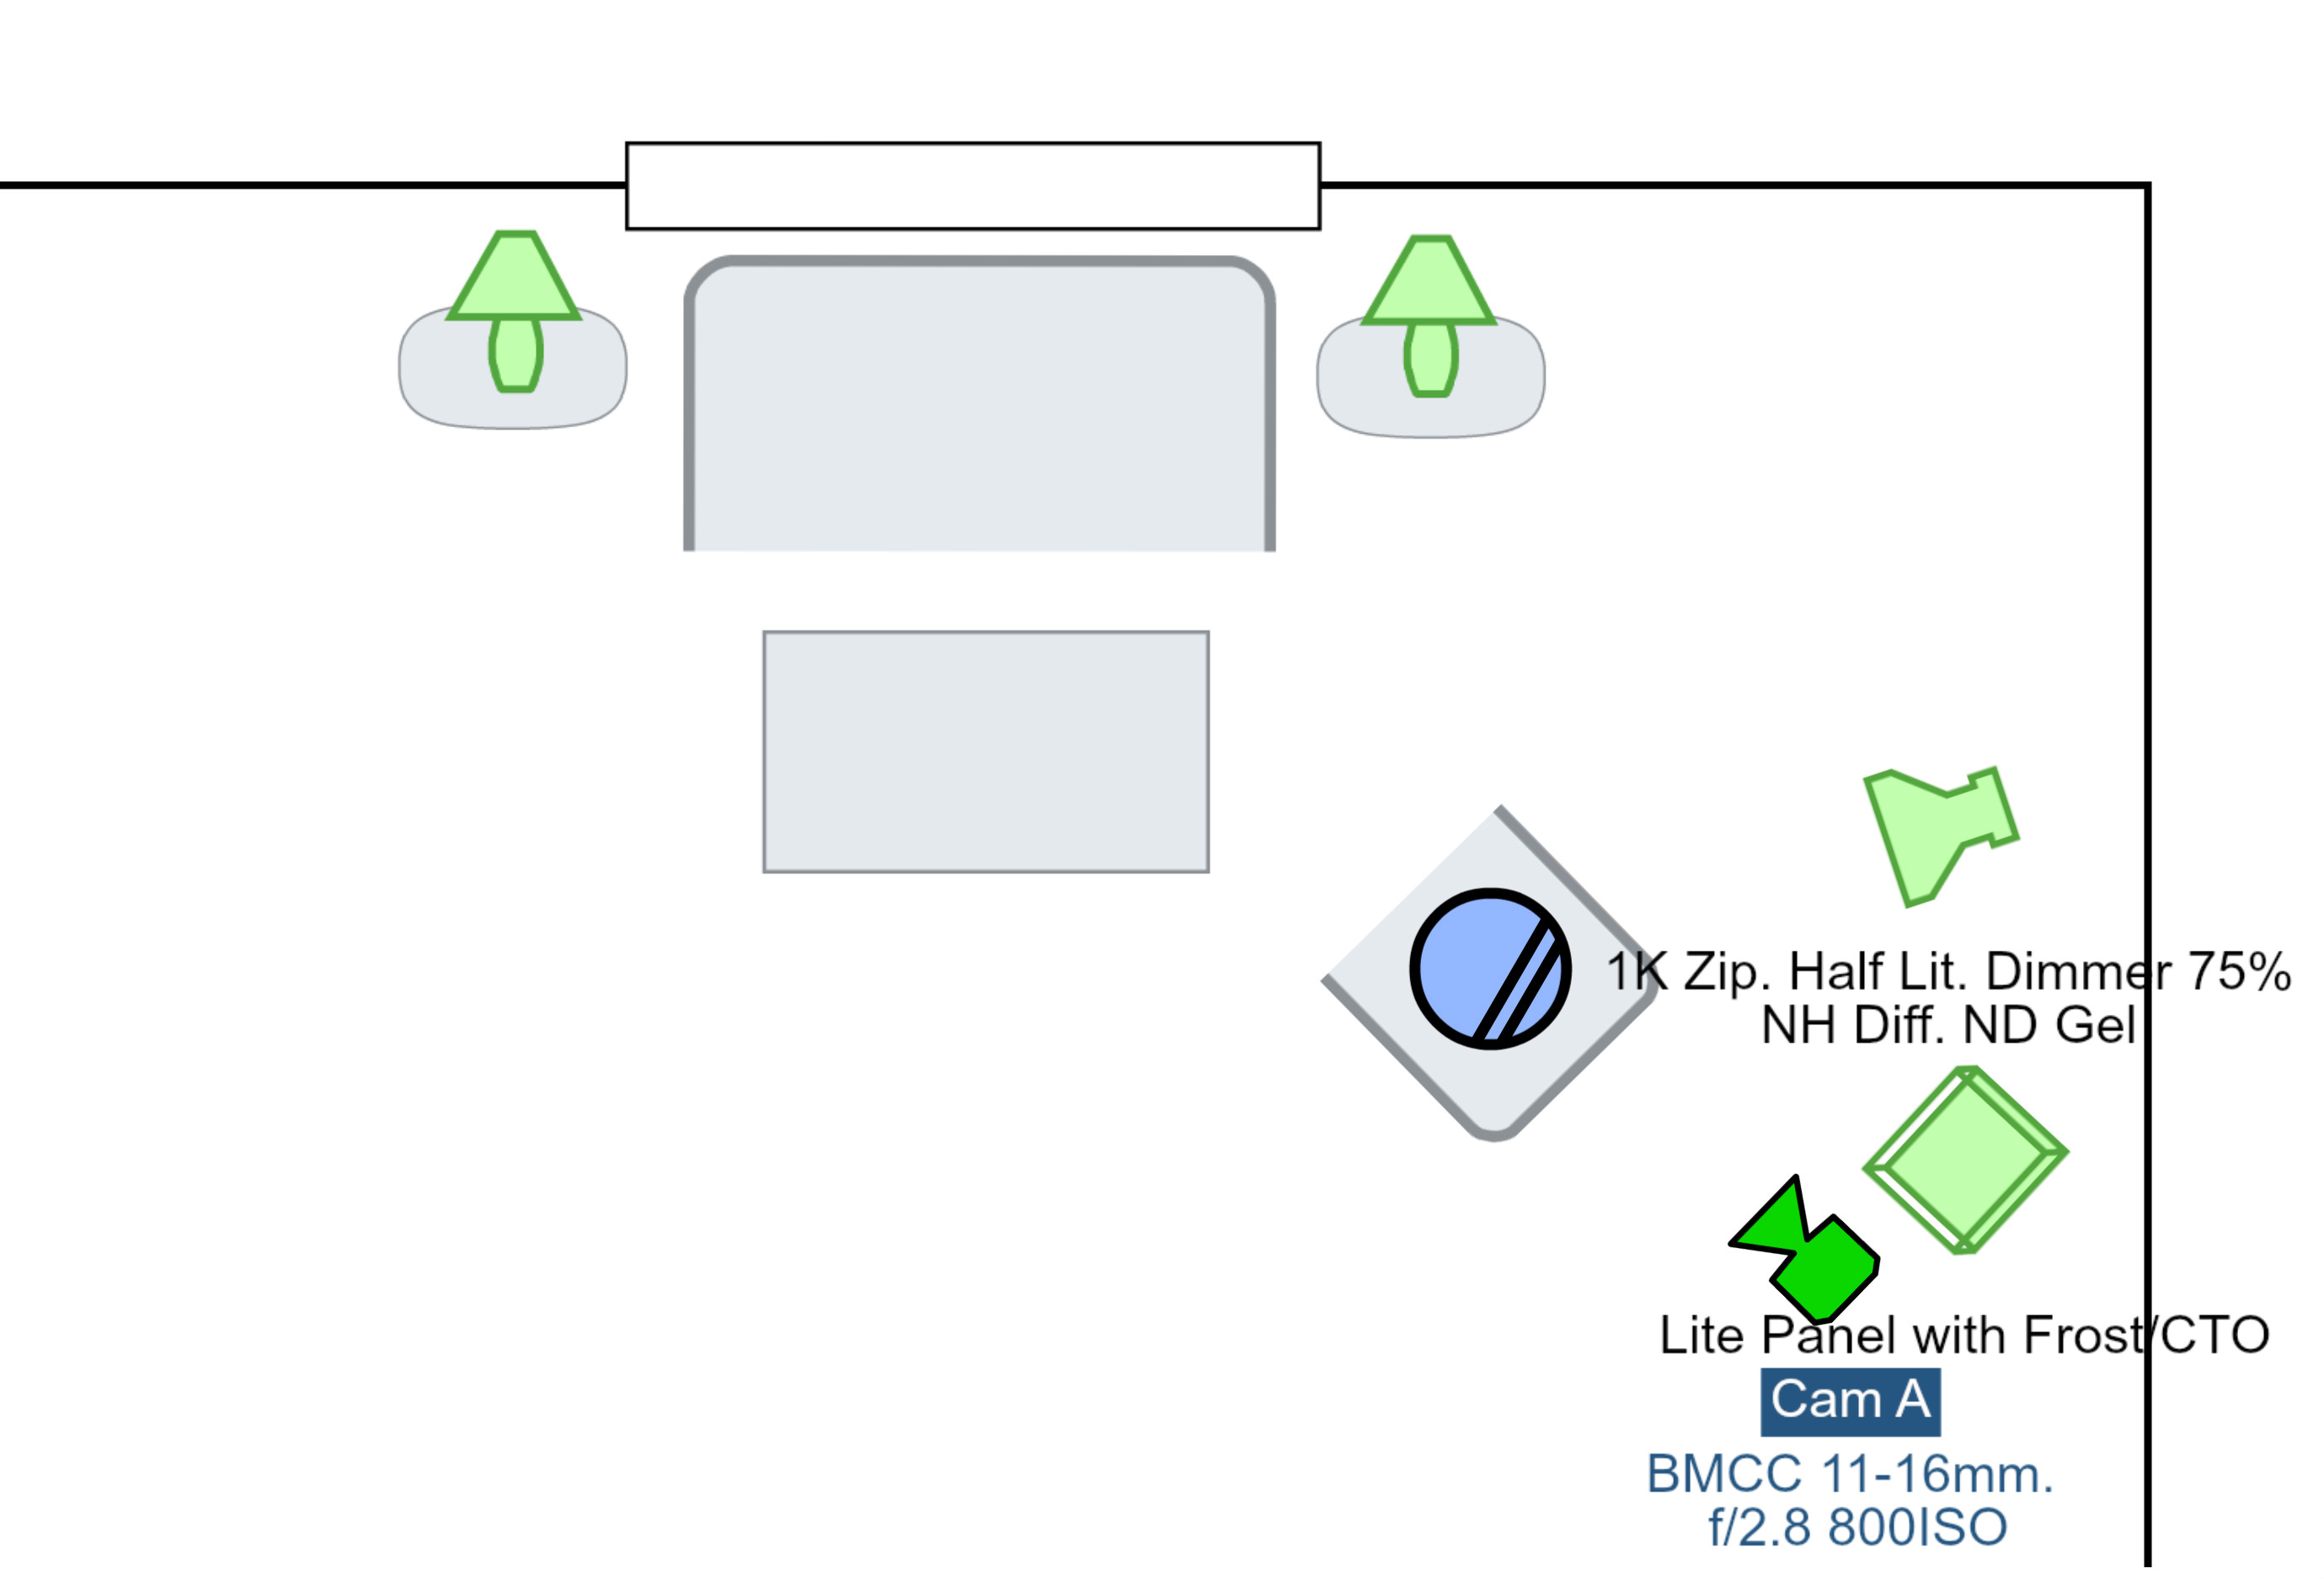
I set up three scenes that closely replicate shooting situations for me professionally. Here they are: an Interview Scene, an Interior Day-Light Scene, and an Interior Night Scene. These are common situations I tend to find myself in whether it be on a professional gig or a personal project. So this was a practical test for myself. I am including floor-plans detailing the shooting situation for each scene as well as a separate filter test video for each scene.
THE INTERVIEW SCENE
In this scene I wanted to see how each filter manipulated skin tone and skin detail. This is a very specific test for a situation I find myself often: trying to make someone look great in an interview setting. If diffusion mixed with soft light helps someone look their best… I'm in. This is the only scene where I reset the black and white levels for each filter. For example, if the Pro Mist 1 caused the blacks to become dark gray… I brought that dark gray back to black. I did the same for the highlights in this set-up as well. A bit of oops on the focus on a couple of the filter shots… I promise you that is operator error on my part and not caused by the filter.
THE INTERIOR DAY SCENE
Here, I wanted to test how each filter reacted to the window. How much would the light bloom? How much light would spread across the whole image and influence the blacks in this scene? Take note, I did not reset the black levels in these shots because I wanted to really see how much each filter changes them. One of the bigger take-away's from this scene for me was how the specular highlight on the wine glass changed depending on the filter in use.
THE NIGHT SCENE
This is easily my favorite of the three diffusion test scene. Here, I wanted to see how the color, the practicals, and how the skin tone/detail changed from one filter to the next. Again, the blacks have not been reset in this scene. One of the only changes I made was to mute the greenish light coming from the energy efficient light bulbs found in the practicals. Having those bulbs in meant it was difficult to dial in a matching color temperature with my key light.
THE COMPARISON VIDEO
To make comparison easy I have placed the unfiltered Night Scene on the left, in the video above, and the filter tests on the right. Hopefully, you can see how much each filter changes, or does not change, the image. For me, I like being able to see what each filter is doing. It helps me make clear decisions.
THE FLOOR PLANS
These are in the same order as the videos shown above, and I hope theses over-heads give you a clear idea about the light used for each set-up. I give this because I think filters and really nice light can go a long way in crafting a specific look to your film.
THE TAKE-AWAY
First, there are different filters for different looks and for different needs. If I was in a situation of only making those in front of the camera look as good as possible than the Warm Black Pro Mist might be one filter I grab regularly. However, if I needed my highlights to bloom, to give a feeling to the shot or story, than I might grab the Pro Mist or Double Fog.
My goal for this test was to find a filter that took the digital edge off the BMCC, do a fairly good job of retaining some fine detail, and give me an edge over my competition. I found the Warm Black Pro Mist and the Black Pro Mist very pleasing. I found the Double Fog to be less than ideal for interviews, but could be useful when crafting a “look.” I might use the Double Fog for a night street scene, and maybe it could do a great job in that situation.
One thing is for sure… all of these filters have taken the digital edge off the Blackmagic Cinema Camera's 2.5K footage. The light grades, 1/4 or even 1/8, might be a great option that takes the digital edge off the BMCC's footage while remaining subtle to an audience. If anything, this test is barely a scratch on the surface when it comes to filters. Tiffen, Formatt, and Schneider all make great filters for several different looks. So when crafting a “look” it is important to do your tests. That is the only way you will get exactly want you want.
Find Me/Follow Me
Twitter: @hallettbrian
Vimeo: vimeo.com/hallettbrian

Filmtools
Filmmakers go-to destination for pre-production, production & post production equipment!
Shop Now