Digital beauty treatments and cosmetic fixes in post-production often involve isolating skin with tracking and mattes for color correction and matching, skin smoothing, and blemish removal. Even skin matching across shots isn’t always easy, but there’s some help along the way in basic and advanced tutorials on the wide variety of tools available.
Update: fxguidetv episode #202 features the digital beauty, aging and de-aging work of LolaVFX. It’s about advanced film work, but a good introduction.
A bit later, the related website Fxphd made their class available to the general public, The Dark Art of Digital Beauty Work (for $69.00). This advanced 5-hour course looks at production-proven approaches for creating seamless digital beauty, with the files to follow the recordings. The class leverages Nuke, and while After Effects still doesn’t have many of the same features, the class might still be useful especially if there’s a trial version of Nuke available to you. One might easily imagine a wag telling the After Effects team to take the series as a big feature request. Here’s an excerpt:
The Secret Art of Cosmetic Fixes is a webinar from Moviola Learning. Here’s Moviola’s rundown of the webinar:
“Actors don’t always look their best on the day of the shoot. From signs of age and acne to signs of a sloppy visit to craft services between takes, one of Hollywood’s best kept secrets is just how much touch-up work takes place after the cameras stop rolling.
In this webinar we’ll take a look at the common techniques employed to create convincing and subtle cosmetic fixes in post. We’ll look at using planar tracking techniques with virtual skin grafts as well as effective color correction processing. We’ll round things out with a look at the near miraculous power of PFTrack to track a head in three dimensions and then apply a fix that remains consistent with the lighting throughout a shot.
- Working with client expectations.
- What does the client really mean by, “Just make it look natural.”?
- Evaluating a shot for the appropriate approach.
- How much dynamic range in the source footage?
- How much motion blur?
- Is there significant perspective shift?
- Planar tracking a face.
- Applying a skin graft.
- Evening skintone via color correction.
- Riding color correction in the RGB channels.
- Modeling a 3D mesh of an actor’s head.
- Tracking the mesh using PFTrack’s geometry tracking features.
- Creating a UV fix.
- Applying the fix.
- Adjusting for interactive lighting in the scene.”
Here’s the promo and a related discussion of PF Track and Nuke.
There are similar approaches for After Effects and Imagineer Systems Mocha, detailed in Webinar: Digital Makeup & Retouching with Mocha and Adobe After Effects, in Fantasy Elf Shot from Start to Finish using mocha Pro and After Effects, and in 2015, mocha and After Effects Puppet Tool. The last example captures secondary soft tissue motion with a set of multi-planar tracks, and uses the mesh warping capabilities of After Effect’s puppet tool to place complex animations onto a moving person.
The new Face Tracker in AE should make some of this easier. See intros by Evan Abrams and Chris Meyer on the Face Tracker, as well as Adobe AE CC 2015: Face Tracker and mocha AE: An Overview from Imagineer systems:
Perhaps some enterprising artists will post tutorials on using Mamoworld MaskTracker+ for this sort of retouching.
Mamoworld later added Beauty Retouch in NUKE with SplineWarp+ and Stabilized Views to support MochaImport+ for NUKE. And, after a software update, Imagineer addedOpen Splines and Beauty Work with mocha 4.1.
Awhile back, Andrew Kramer introduced techniques for After Effects in tutorial , where he showed how to remove facial blemishes, spots, discolorations and match grain to cleaned area of face.
How to touch up skin easily in After Effects by Mikey Borup was later added to Cinema Spice.
While not exactly cosmetic, Adding a Filmic Glow can help viewers overlook flaws. As often explained by Chris and Trish Meyer, and referrred to variously as “instant sex, ” ProMist, and Doris, it’s done in After Effects and Premiere with a blurred duplicate comped with a Transfer Mode (like Overlay) at varying opacities over the original.
You can dig deep on the topic with Alexis Van Hurkman in his book and in Even More On Memory Colors.
In a similar vein, Stu Maschwitz discussed “correct” skin tones in Save Our Skins, and targets changes in Cosmetics: Skin Retouching with Magic Bullet Colorista II and Mask Tracking and Color Grading in CC 2014. A summary can be found in Colorista II Skin Qualification Tutorial, from Covert Film.
In Premiere Pro CS6 Techniques: 53 Color SEVEN: Skin Tones, Andrew Devis does secondary color correction with 2 instances of the Fast Color Corrector. He first showed how to select a small section of your shot to evaluate with the vectorscope. He then goes on to show how to use a second instance of the Fast Color Corrector in conjunction with the vectorscope to for targeted adjustment of skin tones.
When the Median filter, and even Remove Grain in After Effects, is too heavy-handed, there are 3rd-party options to help smooth things over quicker and more subtly.
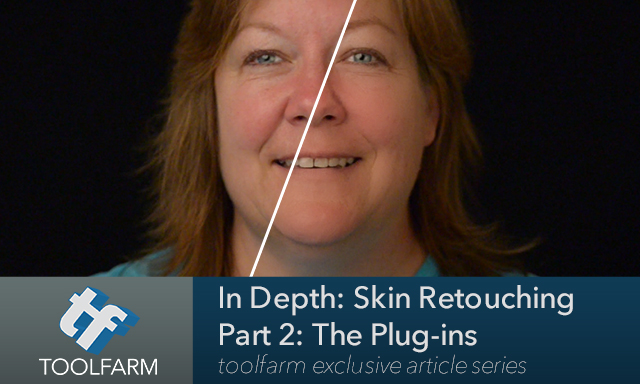 Perhaps it would have been easier to rehash or just copy and paste information on plug-ins from another article, even if this article existed in a raw state for quite awhile. If turnabout really was fair play, we could mine recent and admittedly ambitious 3-part coverage of the topic from plug-in reseller Toolfarm. Instead of rehashing here, you can visit their series–there might be something new about plug-ins. In Depth: Skin Retouching and Digital Makeup, Part 1 looks at a few tools that can isolate skin tones using articulated mattes and keys, color correcting skin tone, and methods of smoothing skin without 3rd-party plug-ins.
In Depth: Skin Retouching Part 2: The Plug-ins covers Digital Anarchy Beauty Box, GenArts Sapphire S_Beauty, FXHOME HitFilm, Imagenomic Portraiture, Dashwood Smooth Skin, and Red Giant Cosmo and Colorista. The plan for Part 3 includes CoreMelt SliceX Powered by mocha – FCPX, CrumplePop SkinTone for FCPX, Sheffield Softworks Makeup Artist, PHYX Keyer SkinTools and Skin Light, Boris Continuum Complete Smooth Tone, and NewBlueFX Skin Touch Up. Later, Part 3 with more of the same was added, as well as a Part 4 on DaVinci Resolve.
There are a ton of beauty-skin cleanup plug-ins for video from 3rd-party vendors (later noted by Toolfarm) but additional resources from the world of Photoshop might be useful for some. Aging but still a good launching pad is 70 Beauty-Retouching Photoshop Tutorials by Dirk Metzmacher on Smashing.
Retouching isn’t really new with Photoshop and digital cinemtograpghy; check out Beauty Retouching from the Early 1900s: A Portrait of Actress Joan Crawford That’s ‘Photoshopped’ at PetaPixel.
For inspiration, check out Project Omote, which combines real-time face tracking and projection mapping to create digital makeup. It’s a collaboration between Japanese media artist Nobumichi Asai, makeup artist Hiroto Kuwahara and french digital image engineer Paul Lacroix.
Earlier there was 4K movie / Beauty retouch from Foton inc. which made the rounds on photo blogs, and like the work of LolaVFX (Captain America example; Benjamin Button below), seems to have been made in Nuke and/or After Effects (translates automatically with Google Chrome), rather than some new software. Here’s examples from Omote and from Foton. Note also the in-depth technical coverage of Lola’s de-aging VFX in Ant-Man in Ant-Man: Marvel’s heist film at fxguide.
Lola’s VFX supervisor Edson Williams also does face replacement; for more see Twice The Social Network at Fxguide and an AEP roundup Face replacement in After Effects.

Filmtools
Filmmakers go-to destination for pre-production, production & post production equipment!
Shop Now