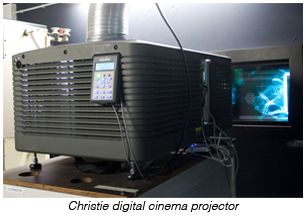
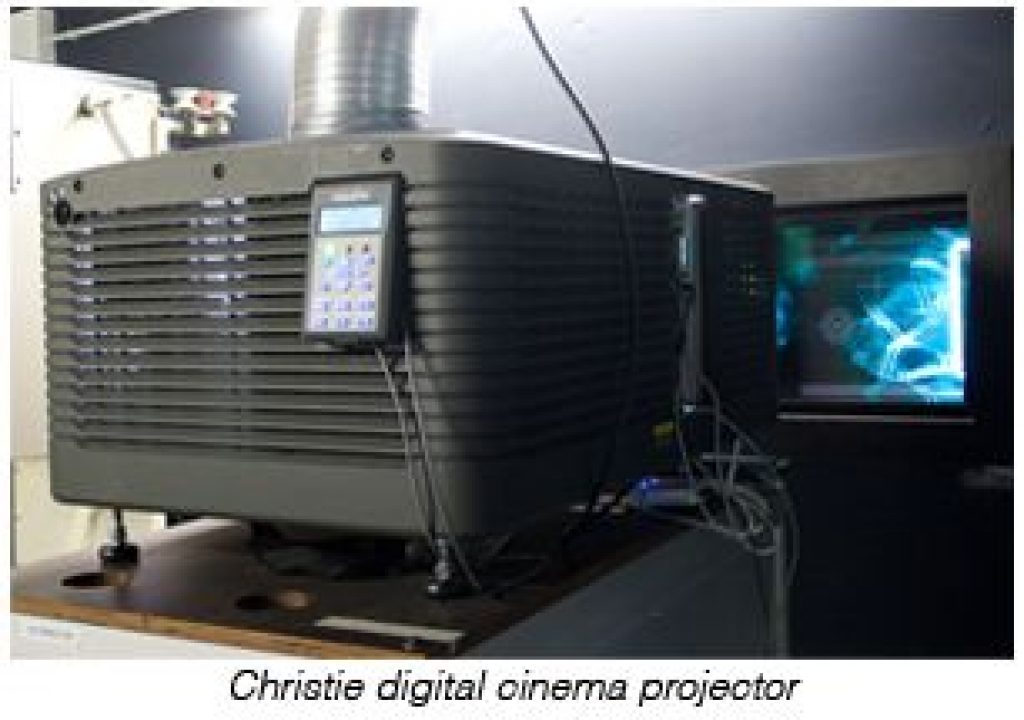
You used to hear a whir, the sound of sprockets pulling film from a 15 pound reel at a relentless 90 feet per minute. Then the thpt of a splice going through the gate, then the plunk of the mechanical damper revealing the projector’s diegetic light. Now, you hear only exhaust fans and air conditioning.

DCPs are business as usual for the movie studios. For the indy filmmaker, however, there is a problem: DCPs cost relatively big bucks; they are made by highly trained and skilled professionals who use serious tools. The cost of rendering your own Quicktime file: essentially free. The cost of a 100 minute DCP: at least $3K or so. Plus, you’ll probably deliver the movie on a relatively expensive hard drive as opposed to a nearly free Blu-ray or DVD-R.
What should you do if you need to convert your movie (your baby, the fruit of Herculean effort, the quintessential expression of your raison d’être) to a DCP?
some DCP production houses:
Fotokem
Simple DCP
ROUSH Media
Color A Go-Go
Cinematiq
Athena Studios
My advice: hire the pros. DCPs aren’t necessarily made very well by algorithms; as in all other aspects of filmmaking, experienced professionals are the crucial difference between likely success and a high chance of embarrassing failure. A good post production house can expertly finesse the DCP’s picture and sound so that your movie, all else being equal, will look like a studio picture. In the overall scheme of things, their rate is a bargain, especially for a feature film.
Maybe you can’t (or won’t) get the money together to make a DCP, have a weakness for adventure or have (perhaps imprudent) faith in your technical aptitude.

Undeterred, I googled a lot more, read the specs, downloaded applications, experimented, enlisted the help of some generous people and made my own DCP. It worked perfectly for me. Here’s how I did it.
You’re going to need time. And probably some coffee.
I converted a 1920 x 1080, 23.976fps, ProRes 422 HQ movie to a DCP that is compliant with DCI, Academy of Motion Picture Arts and Sciences, SMPTE and ISDCF standards. I used:
- Final Cut Pro 7
- Soundtrack Pro
- After Effects
- j2k plug-in for After Effects
- OpenDCP
- easyDCP Player
- Dolby Pink Noise audio reference
but the principles probably apply to other software.
The essential workflow is to
- convert your movie to 24 fps (that’s 24.0, not 23.976)
- convert your picture to the proper 2K or 4K, X′Y′Z′ color space, 2.6 gamma, 5900K .mxf file
- convert your sound to the proper 5.1 surround, 24 Bit, 48 kHz, Linear PCM .mxf file
- specify the necessary metadata
- package these into the standard DCP files
I illustrate my process in the eleven steps below. I made a 2K package. To make a 4K DCP, use the specified 4K values and change the labels and file names specified to reference 4K.
1. Prepare folders on your edit drive for each of the project’s elements
/DCP Sources/JPEG2000
/DCP Sources/WAV
/Deliverables/DCP
/Project Files/After Effects
/Project Files/Final Cut Pro
/Project Files/Soundtrack Pro
I use Post Haste for this purpose to standardize my project settings and organization.
2. Output the full resolution picture file
In Final Cut Pro 7.0, export the movie sequence at full resolution to the project’s DCP Sources folder. For example, if the movie is in ProRes 422 HQ, output the movie as [movie name]_ProRes_422_HQ.mov.
3. Mix the sound to 5.1 surround and output the six channels to separate .wav files
If your movie’s sound has been edited and/or mixed for stereo, you’ll have to re-edit the sound and/or re-mix it to use at least these three channels. While you’re at it, go ahead and mix it for all six channels of 5.1 surround sound. Do that now. I’ll wait.
| Welcome back. In the Final Cut Pro project, duplicate the movie sequence; call it [movie name]_to_Soundtrack_Pro . Send the [movie name]_to_Soundtrack_Pro sequence to a Soundtrack Pro Multitrack Project. Save the Soundtrack Pro project to the project’s Soundtrack Pro project folder. | |
| In Soundtrack Pro, make sure that all of the audio made it across and is in sync. Be sure to set the submixes to use Surround 1-6. | |
| If you haven’t already arranged the audio channels in surround audio space, use Soundtrack Pro’s 5.1 Surround panner to do so. |
I
Add the Dolby pink noise reference file to the project. Play the pink noise file and set the master fader to about -20 db.
Play the sound and confirm that it tops out at about -5 db for normal sounds. Anything above that is going to hurt the audience’s ears if played for too long.
4. Export the surround audio channels
In Soundtrack Pro, select File.Export…
Navigate to the project’s DCP Sources/AIFF folder
Save As: [movie name]_Audio
Exported Items: Master Mix
File Type: AIFF File
Create multiple mono files
Bit Depth: 24 Bit
Sample Rate: 48 kHz
5. Use the j2k plug-in in After Effects to make a 24fps JPEG 2000 image sequence
DCP aspect ratios are a little different from video aspect ratios.
For example, when you reformat your 1920×1080 HD picture to a 2K DCP, you have to decide whether to add a pillarbox matte to the sides of your picture or blow it up and crop it slightly on the top and/or bottom.
If you haven’t already, install the plug-in.
Make a new After Effects project:
[movie name]_2K_JPEG2K
Load the full resolution HD movie (for example: [movie name]_ProRes_422_HQ.mov) into After Effects. Make a comp from the footage. Name the comp [movie name]_2K_JPEG2K.
Select File.Project Settings:
Depth: 16 bit
Working Space: DCDM X′Y′Z′ (Gamma 2.6) 5900K (by Adobe)
Compensate for Scene-referred Profiles: checked
(displays the scene-referred profile [Rec. 709 for video] instead of the display-referred profile [DCDM X′Y′Z′ for cinema] when viewing in After Effects)
Composition Settings:
Uncheck the Lock Aspect Ratio checkbox.
Use the appropriate width and height for your movie’s size and aspect ratio:
|
size |
aspect ratio |
width x height |
| 2K | 1:1.85 (Flat) | 1998 x 1080 |
| 2K | 1:2.39 (Scope) | 2048 x 858 |
| 2K | 1:1.90 (Full) | 2048 x 1080 |
| 4K | 1:1.85 (Flat) | 3996 x 2160 |
| 4K | 1:2.39 (Scope) | 4096 x 1716 |
| 4K | 1:1.90 (Full) | 4096 x 2160 |
After the Width and Height are set, check the Lock Aspect Ratio checkbox.
Leave the frame rate at 23.976 fps.
If you elect to scale the movie to fit the digital cinema width, do so in the comp using Transform.Scale. Use the scale setting appropriate for your movie’s size and aspect ratio.
For 1920 x 1080 footage:
|
size |
aspect ratio |
width x height |
| 2K | 1:1.85 (Flat) | 104.25% |
| 2K | 1:2.39 (Scope) | 106.7% |
| 2K | 1:1.90 (Full) | 106.7% |
| 4K | 1:1.85 (Flat) | 104.25% |
| 4K | 1:2.39 (Scope) | 213.5% |
| 4K | 1:1.90 (Full) | 213.5% |
Consider moving the picture down so that the cropping is all on the bottom (“common top framing” in aspect ratio conversion parlance) so that you preserve the headroom of your picture. For my movie, I actually moved the picture up a bit to preserve the bottom of my composition.
Add the comp to the render queue: File.Export.Add to Render Queue.
Render Settings:
Color Depth: 16 bit
Frame Rate: 24
Output Module:
Format: JPEG 2000 Sequence
Depth: Trillions of Colors
Format Options: Digital Cinema
Check the Advanced checkbox and make sure that the quality slider is all the way to best. DCP standards specify:
| 2K | 125 Mb/s |
| 4K | 250 Mb/s |
However, anything up to 250 Mb/s should be acceptable. Brendan Bolles at fnord software recommends 238 Mb/s for 2K.
Output To:
the project’s DCP Sources/JPEG2000 folder.
Use the Command-I keys to input the image sequence. Rename the image sequence [movie name]_2K_JPEG2K_seq.
Right click the image sequence and select Interpret Footage.Main… Set Assume this frame rate to 24fps.
Yes: the 2K picture is going to look washed out and off-color. Your monitor can’t show XYZ color space correctly.
This is a good example of the advantage professionals have over the amateur DCP maker: they should be able to finesse the picture in XYZ color space, watching their work on a properly calibrated DCP projector. Without that ability, you are left to trust the algorithms in j2k and After Effects, have faith, and maybe correct things in a very long, iterative process. Fortunately for me, my movie’s picture was very even; this DIY process worked very well for me.
Make a new comp from this image sequence:
Composition Settings:
Name: [movie name]_2K_JPEG2K_seq
Frame Rate: 24fps.
Add the comp to the render queue: File.Export.Add to Render Queue.
Render out a Quicktime ProRes 422 proxy version of the 2K movie called [movie name]_2K_JPEG2K_ProRes_422_proxy_XYZ_picture.mov:
Render Settings:
Color Depth: 16 bit
Frame Rate: 24
Output Module:
Format: Quicktime
Format Options– Video Codec: Apple ProRes 422 proxy
Depth: Trillions of Colors
Output To:
the project’s DCP Sources folder.
Check the ProRes movie to make sure that it is the correct speed and length (you set Interpret Footage properly when you input the image sequence in After Effects, right?).
6. Adjust the speed of the audio tracks to sync with the picture
In the Final Cut Pro project, create a new sequence; call it [movie name]_2K_JPEG2K_ProRes_422_proxy_XYZ.
Import the 2K QT picture (DCP Sources/[movie name]_2K_JPEG2K_ProRes_422_proxy_XYZ_picture.mov) into the project and add it to the sequence. Let Final Cut Pro change the sequence settings to match this 2K picture.
Import the six audio files from the project’s DCP Sources/AIFF folder into the project. Place them in the 2K sequence. Adjust the speed of the sound tracks to match the picture. Change Speed: 99.9% should do it. Make sure that the sound is the same length as the 2K picture. If not, adjust the speed of the sound to match.
7. Export the AIFF sound files as WAV files
In Final Cut Pro, export each of the six audio tracks, one at a time:
Option-click the Track Visibility control next to the audio track you want to export; this disables output of the other five audio tracks.
Choose File.Export.Using QuickTime Conversion:
File.Export…
Navigate to the project’s DCP Sources/WAV folder
Save As: [movie name]_Audio_[track name]
the track name is the same as the AIFF file’s name: C, L, LFE, Ls, R or Rs
Format: Wave
Options.Sound Settings-
Format: Linear PCM
Channels: Mono
Rate: 48 kHz
Quality: Best
Sample Size: 24 Bit
Repeat the procedure for each of the six tracks.
8. Make the MXF sound and picture files
In OpenDCP, in the MXF tab make the video MXF:
Type: JPEG2000
Label (this specifies the DCP standard): SMPTE
Frame Rate: 24
Don’t change the Picture Parameters
Picture Input Directory: the project’s DCP Sources/JPEG2000 folder
Output Files: [project’s DCP Sources folder]/[movie name]_2K_Picture
Click the Create MXF button.
Change the Type and make the audio MXF:
Type: WAV
Label (this specifies the DCP standard): SMPTE
Frame Rate: 24
Sound Input Type: Mono
Sound Output Parameters: 5.1
Input Directory: in the project’s DCP Sources/WAV folder, select the sound file for each channel
Output Files: [project’s DCP Sources folder]/[movie name]_Audio
Click the Create MXF button.
9. Make the DCP package
In OpenDCP’s DCP tab:
Composition Parameters–
Title: use the Title Generator
The second Type Modifier is the frame rate. The Package Type OV (Original Version) means that the package contains the entire movie.
Annotation: [12 character movie short name]_CPL
Issuer: [your company name]
Rating: [rating]
Kind: [kind]
Reel–
Annotation: [12 character movie short name]_REEL
Picture: [project’s DCP Sources folder]/[movie name]_2K_Picture
Sound: [project’s DCP Sources folder]/[movie name]_2K_Audio
Options–
MXF File Behavior: Move, Overwrite Existing
Click Create DCP: create the DCP in the project’s Deliverables/DCP folder, which includes:
- Packing List
- Asset Map
- Composition Play List
- audio .mxf
- video .mxf
- Volume Index
10. Copy the files to a delivery medium
The theater will most likely ingest your DCP from your delivery media to the hard drives on their server. Your DCP will be listed as an asset on their server’s user interface; it can then be programmed to run in a screening.
The ISDCF, one of the standards bodies for digital cinema, defines a rather strict specification: USB 2 external drives formatted in Linux as EXT2 or EXT3, with a Master Boot Record (MBR) partition table as the only partition, with a inode size of 128, in read-only mode. The drive must have only the DCP files on it (with only one ASSETMAP.xml).
Knut Erik Evensen, who does DCP mastering in Norway, recommends these best practices to deliver a Digital Cinema Package, in preferential order:
It is a good idea to send a backup of any media that you send. I ask the projectionist at film festivals what a suitable backup is; some have suggested a Blu-ray or Quicktime file, others simply wanted a duplicate of the DCP on a second drive.
11. Test the DCP package
DCP packages are designed for projection in digital cinema theaters. You can use apps such as easyDCP Player to play your DCP, but any emulator has some chance of misleading you. To make matters worse, some theaters have varying degrees of compliance to DCP standards or use outdated standards. Like any computer, a theater’s DCP server is equipped to work with specific media (certain kinds of hard drives, for example).
If you absolutely, positively want your DCP to work, you should take it for a test drive in the theater where you plan to show it. Can’t afford an extra trip to Cannes? Contact the theater and ask them intimate details about their projection system. Find out the brand and model of their DCP server and projector, then look up the hardware’s technical details.
In any case, find out the:
- acceptable size (2K, 4K)
- acceptable media (hard drive, USB flash drive, BD-R, DVD-R)
- external drive format (EXT2, EXT3,NTFS, HFS+, FAT32, ex-FAT, etc.)
- external drive connection (USB 3, Firewire 800, eSATA, etc.)
- color space (it should be X′Y′Z′ with 2.6 gamma)
- projector color temperature (it should be 5900K)
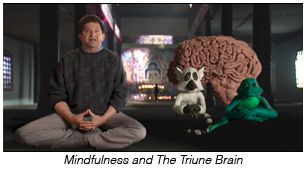
The premiere festival screening of Mindfulness and The Triune Brain was at UCLA’s James Bridges Theater. I contacted them: they are the proud owners of a Dolby DSS200 DCP server, a Dolby CP750 cinema sound processor and a Barco projector. After googling a good source of DCP server manuals and reading up on this gear, I confirmed with the projectionist that their server would accept NTFS formatted USB 2 or USB 3 hard drives and flash drives (my film is only 2:40; its DCP is 1 GB). So far, the five film festivals I’ve delivered to all accepted those same formats; some also accepted DVD-R (UDF) disks. Your mileage may vary.
Begin your test by examining your DCP in easyDCP Player:
Make sure that the sound and picture sync (are the same length). Use Hash Check, Audio Viewer and the other viewers in the View menu to check on the package. Use the color menu at the bottom of the viewer window to view the movie in a Rec. 709 color space emulation.
Then find a local theater with the same set-up as your screening venue and project your movie there.
Screening my DCP, Tim counseled me to adjust the sound (which I had inadvertently set to a noncompliant level). Fortunately, my film is very short: I was able to dash home, adjust the DCP and bounce back before Timʼs very limited availability was up.
If you are in the San Francisco Bay Area, I recommend that you rent 32Tenʼs screening room: www.32ten.com
Everyone has freedom of the press— as long as you own a press
Did you ever strike your own 35mm film print in your garage? I didn’t think so. Amazingly, you now have the potential to make a professional theatrical print of your own movie and distribute it to theaters in the same way that, say, 20th Century Fox does. If you have the resources, by all means hire the pros to make your DCP. But, if all you have is scrappy independence, a computer editing setup, lots of time for trial and error, access to a DCP theater and perhaps flexible standards, you can roll your own using my recipe.
Meanwhile, you’ll sometimes find me at Quentin Tarantino’s New Beverly Cinema, watching 35mm film prints from his collection. Perhaps, one day, the projection room door will be ajar and I can hear it’s mighty, industrial revolution curio, the film projector, whirring into action before the show.
Don Starnes directs and photographs movies and videos of all kinds and is based in Los Angeles and the San Francisco Bay Area. He finds that equipment manuals and standards recommendations are as interesting anthropologically as they are technically.
Also by Don Starnes:
The difference between a movie and a video is that a movie is created in the filmmakers’ minds and a video is created on a monitor.
It’s the Producer’s Invitational Pancake Breakfast. Just as the producers are cutting into short stacks with their plastic forks, all of the doors are locked…
Feature film: first day. The first-time director is 45 minutes late. Finally, he shows up: harried, stubbly, preoccupied and exhausted…
A sign taped to the door says “Quiet– filming.” This only makes you more nervous.
Hint: it isn’t by reading this.
Just in time for NAB, the 9250-XL is everything that a producer could want in a camera. The revolution has begun…
Skitch a ride up its steep learning curve using my template and tutorial.


